Azure, GCP, Nutanix, and OpenStack/KVM
- 3 Minutes to read
- Print
- DarkLight
- PDF
Azure, GCP, Nutanix, and OpenStack/KVM
- 3 Minutes to read
- Print
- DarkLight
- PDF
Article Summary
Share feedback
Thanks for sharing your feedback!
CTERA recommends making a backup of the 6.x edge filer before starting the migration.
After upgrading to a 7.x edge filer, you cannot downgrade it to a 6.x edge filer. CTERA recommends keeping the 6.x edge filer in reserve, in case the migration fails for any reason.
Note
Before migrating an edge filer to a 7.x CTERA Edge Filer, connect the 7.x edge filer to the same CTERA Portal as the 6.x edge filer.
Make sure both the CPU and memory settings for the 7.x edge filer are the same as for the 6.x edge filer.
Upgrade Procedure
To replace a 6.x edge filer with a 7.x edge filer:
Make a copy of the 6.x edge filer cloudsync.db and save it to a public share, so it is accessible.
Login to the 6.x edge filer.
In the CONFIGURATION tab, select Cloud Services > Status in the navigation pane, and then sign in to the portal.
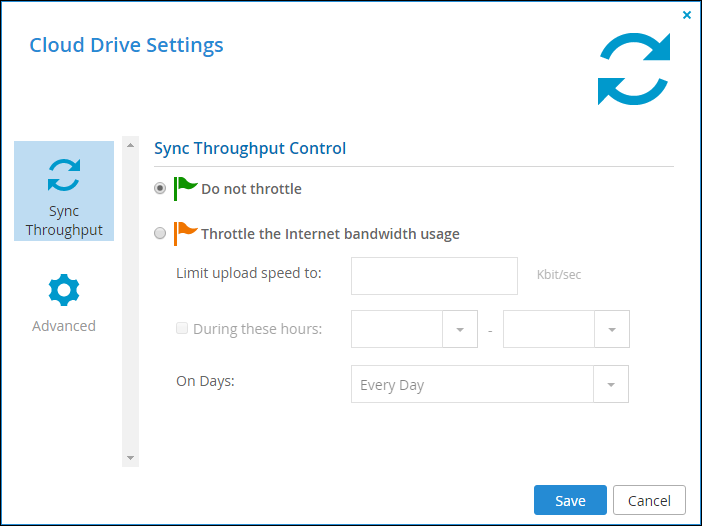
In the CONFIGURATION tab, select Cloud Drive > Cloud Drive in the navigation pane, and then click Suspend.
If the edge filer is configured as a Sync Gateway (and not a Caching Gateway):
- Click Settings.
The Cloud Drive Settings window is displayed.
- Select the Advanced option and change the Operation Mode to Caching Gateway.
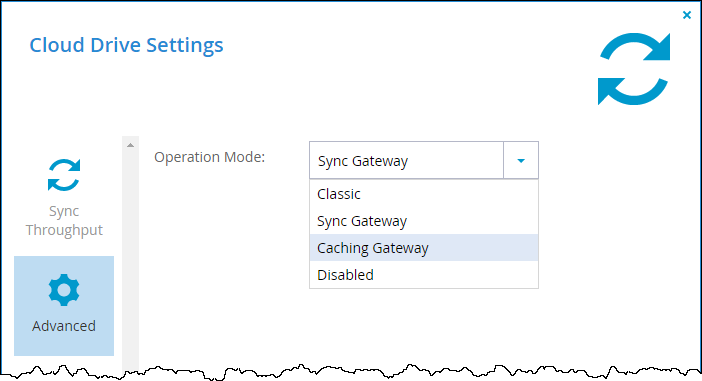
- Click Save.
- Click Settings.
Make sure both the 6.x and 7.x edge filers are connected to the same portal.
- Check that the edge filer is connected to the portal in the both the 6.x and 7.x edge filers, under Cloud Services > Status.
Wait for the 7.x edge filer to be fully synced with the portal. View the sync status in the Cloud Drive > Cloud Drive in the edge filer to determine when the syncing has completed.
The time for the 7.x edge filer to be fully synced with the portal is dependent on how much data needs syncing.Validate that the 7.x edge filer has been synced correctly, by looking at the number of folders and files on both the 6.x and 7.x edge filers.
Prevent user access to the 6.x edge filer.
In the 6.x edge filer, in the CONFIGURATION tab, select Cloud Drive > Cloud Drive in the navigation pane, and then click Suspend.
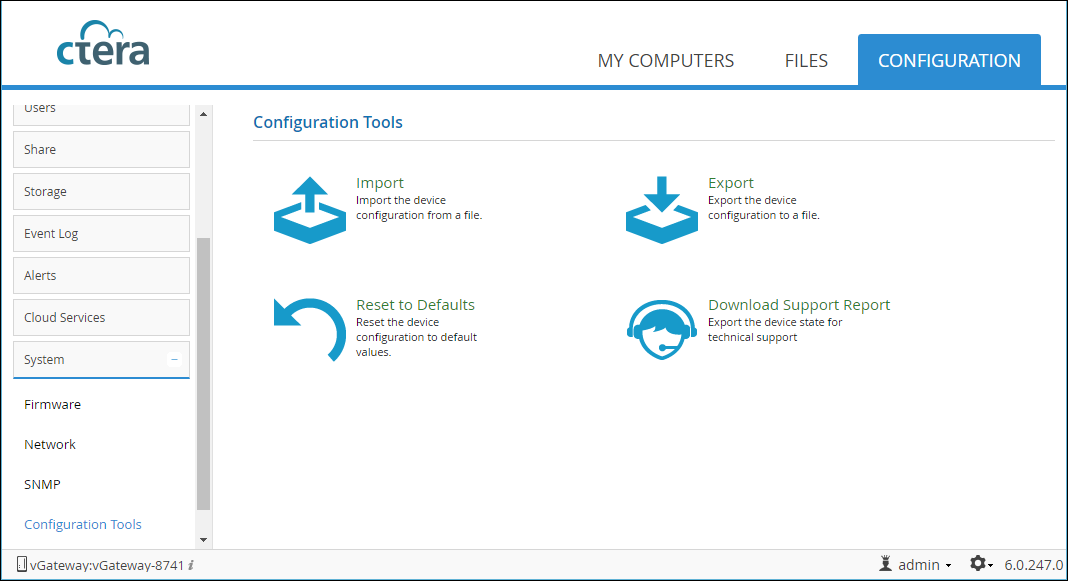
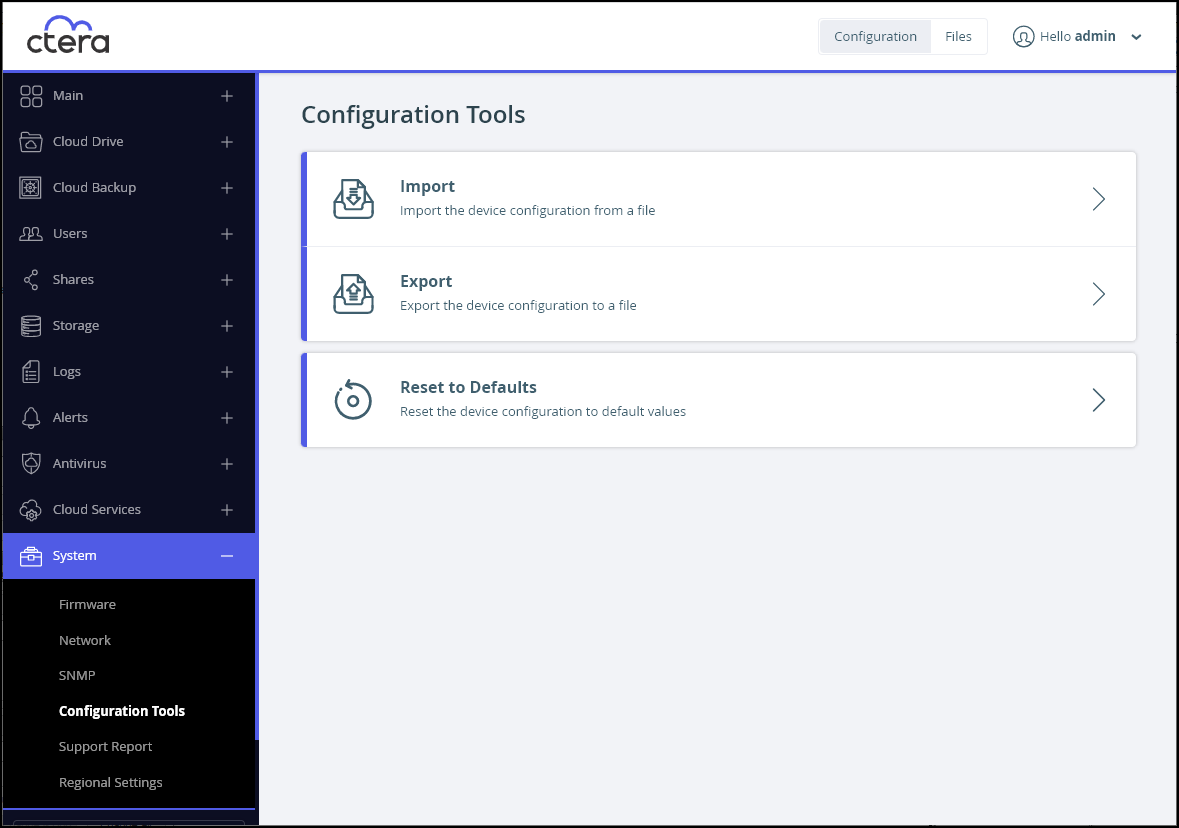
In the CONFIGURATION tab, select System > Configuration Tools in the navigation pane, and then click Export to save the edge filer configuration to an XML file.
In the CONFIGURATION tab, select Cloud Services > Status in the navigation pane, and then sign out from the portal.
Disconnect the 6.0.x edge filer.
NoteDo not delete the content of the 6.0.x edge filer but keep it for around 30 days so that it can be brought back on line as a failback or temporary backup.
In the 7.x edge filer, in the Configuration view, select System > Configuration Tools in the navigation pane, and then click Import, to import the XML file you exported.
 Note
NoteFields that are no longer valid in the XML are removed and the import procedure reports warnings for these fields, which can be ignored.
Refresh the user interface.
In the Configuration view, select Cloud Drive > Cloud Drive in the navigation pane.
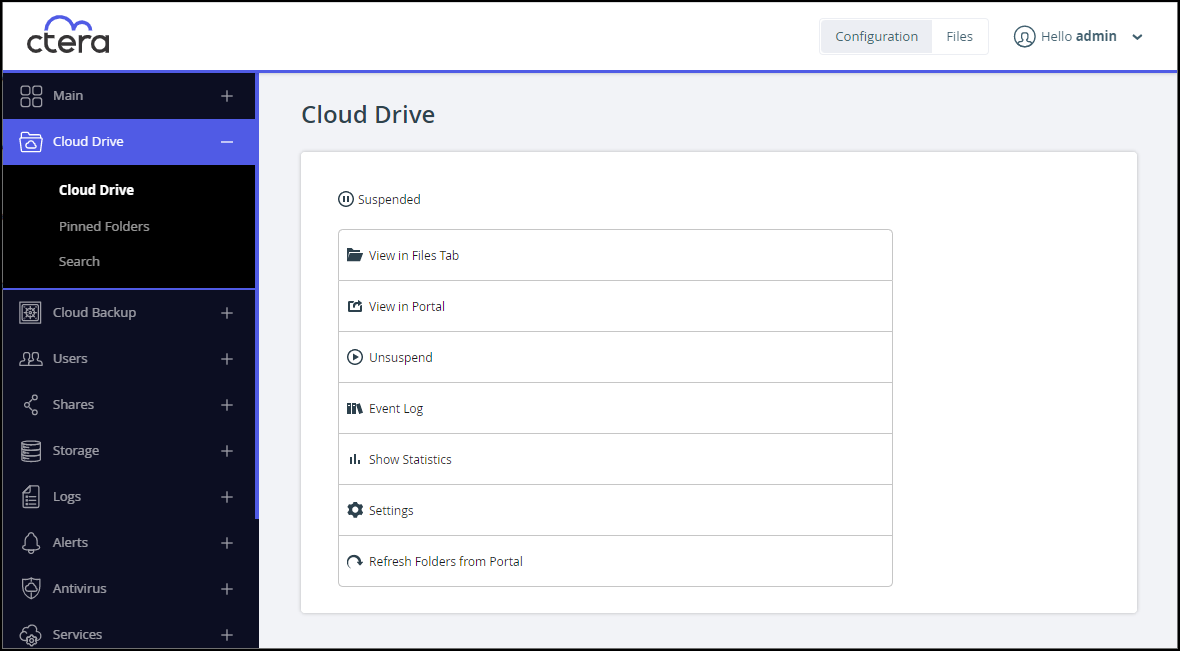
Click Unsuspend.


The database on the 7.x edge filer is built and files are synced from the portal.
Direct all the users to the 7.x edge filer. Users can now access and work on the 7.x edge filer.
If, for whatever reason, the migration did not complete successfully, you can try using the copy of cloudsync.db saved to a public share. If this does not work, revert back to the 6.x edge filer and contact CTERA support.
Was this article helpful?