Users logging on to a PC running a CTERA Agent, with CAC, Common Access Card, are automatically and transparently authenticated to the CTERA Portal. Single sign-on (SSO) to the CTERA Portal must be defined in Microsoft Active Directory, using the Kerberos protocol. When validating the CTERA Portal certificate, certificate revocation checking is performed using CAPI/OSB revocation checks.
To connect to a CTERA Portal:
- Click the CTERA Agent icon,
 , in the menu bar.
The Welcome to CTERA Agent window is displayed.
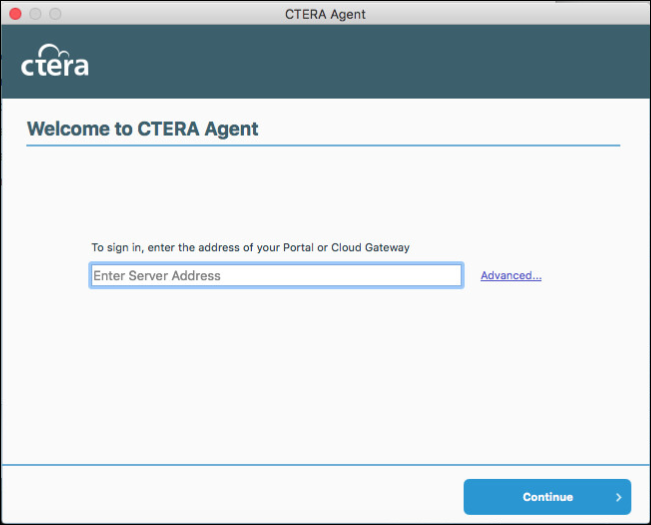
- Enter the portal DNS name or IP address.
Alternatively, if you want to configure CTERA Agent to connect to the CTERA Portal via a proxy click Advanced. - Click Continue.
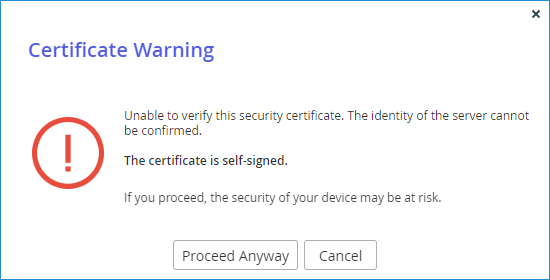
If the CTERA Portal sends an unknown or untrusted CA certificate, a warning is displayed when connecting the agent to the portal, offering the option to proceed anyway.
When SSO is not implemented to access the CTERA Portal, the window to specify the username and password is displayed.
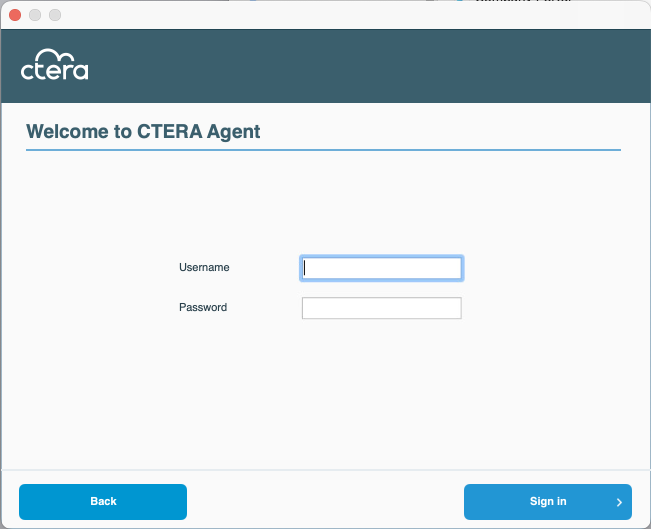
- In the Username and Password fields, enter your user name and password for accessing the portal, and click Sign in.
The CTERA Agent signs you in to the portal. The CTERA Agent icon changes to  .
.
The CTERA Agent window is displayed.
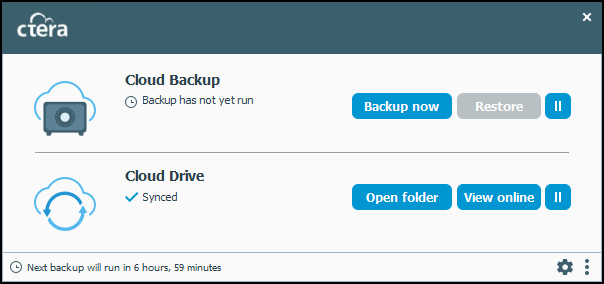
If the CTERA Agent is not licensed for backup, and only CTERA Drive Share is available, the following CTERA Agent window is displayed.

Setting Up Connection Via a Web Proxy
CTERA Agent supports HTTPS proxies that support the CONNECT method. If you want CTERA Agent to connect to the CTERA Portal via a proxy, you can configure the proxy before you sign into CTERA Agent.
The following proxy authentication schemes are supported:
- Basic
- NTLM
- NTLMv2
Using a proxy auto-config (PAC) file is not supported.
To set up a connection to the CTERA Portal via a web proxy:
-
In the Welcome to CTERA Agent window, click Advanced.
-
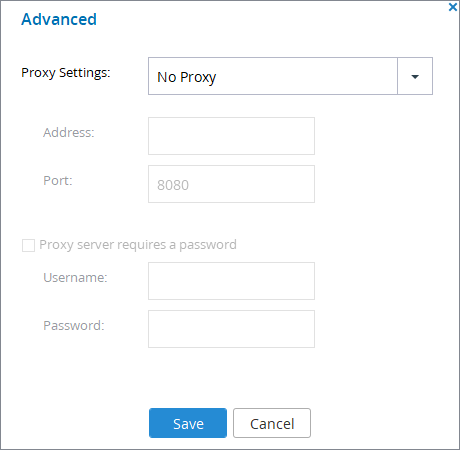
Select an option from the Proxy Settings drop-down list.
No Proxy – A proxy server is not used.
Use HTTP Proxy – CTERA Agent uses the proxy you configure to connect to the CTERA Portal server:- Address – The address of the proxy server.
- Port – The proxy server port number.
Auto – CTERA Agent attempts to automatically determine your proxy settings.
-
Check Proxy server requires a password if the proxy server requires authentication via a username and password:
- Username – The username for authenticating to the proxy server.
- Password – The password.
-
Click Save.
The proxy settings set in the Advanced window are saved as the default proxy settings. If you connect not using these proxy settings and then use the proxy settings again, these default settings are displayed.