If you want to change the portal look and feel you can do the following:
- Change the color scheme for an individual team portal.
- Customize the portal skin by changing objects in the default skin. Customizing a skin should only be performed with CTERA support. After a skin has been customized you can upload it to the portal and set it as the default skin.
Managing the Portal Colors
You can define the portal colors for both the administration and end user views for a specific team or reseller portal in the view for that portal. You can change the color scheme for both the portal administration view and end user view.
You cannot define the portal colors for a team portal in the team portal administration.
To define the portal color scheme:
-
For a specific team portal, in the view for that team portal, select Settings > Palette Generator in the navigation pane.
The Palette Generator page is displayed.
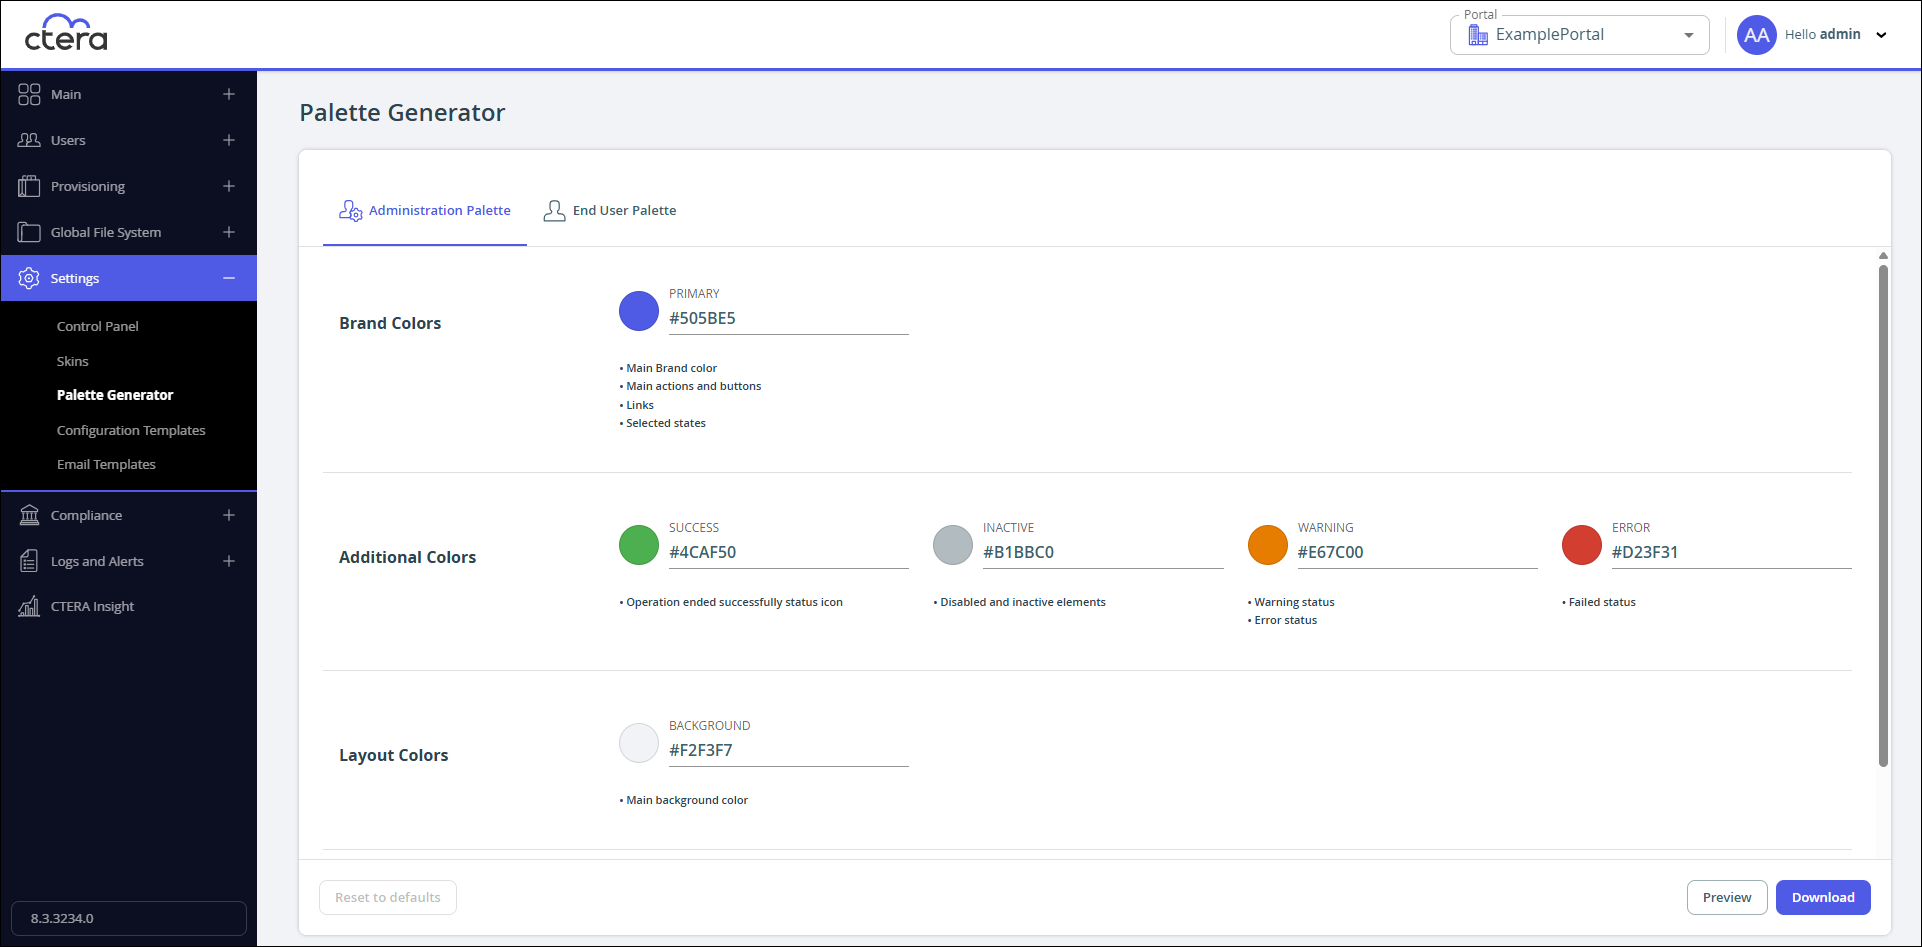
The color scheme is separated into the following areas under both the Administration Palette and End User Palette views:- Brand Colors, which determine the color for the main menu items in the navigation menu, as well as action icons and buttons.
- Additional Colors, which determine message colors.
- Layout Colors, which determine the general page layout colors.
- Text Colors, which determine the text colors.
In addition, the Grid Colors option, which determines table colors, is displayed in the End User Palette view.
Clicking an item in one of these areas displays the current color in an editable format and to what the item applies to.
-
Choose the view to change: Administration Palette or End User Palette.
-
Click the item to change the color and enter the HTML color code you want for that item.
-
Click Preview to preview the new color scheme.
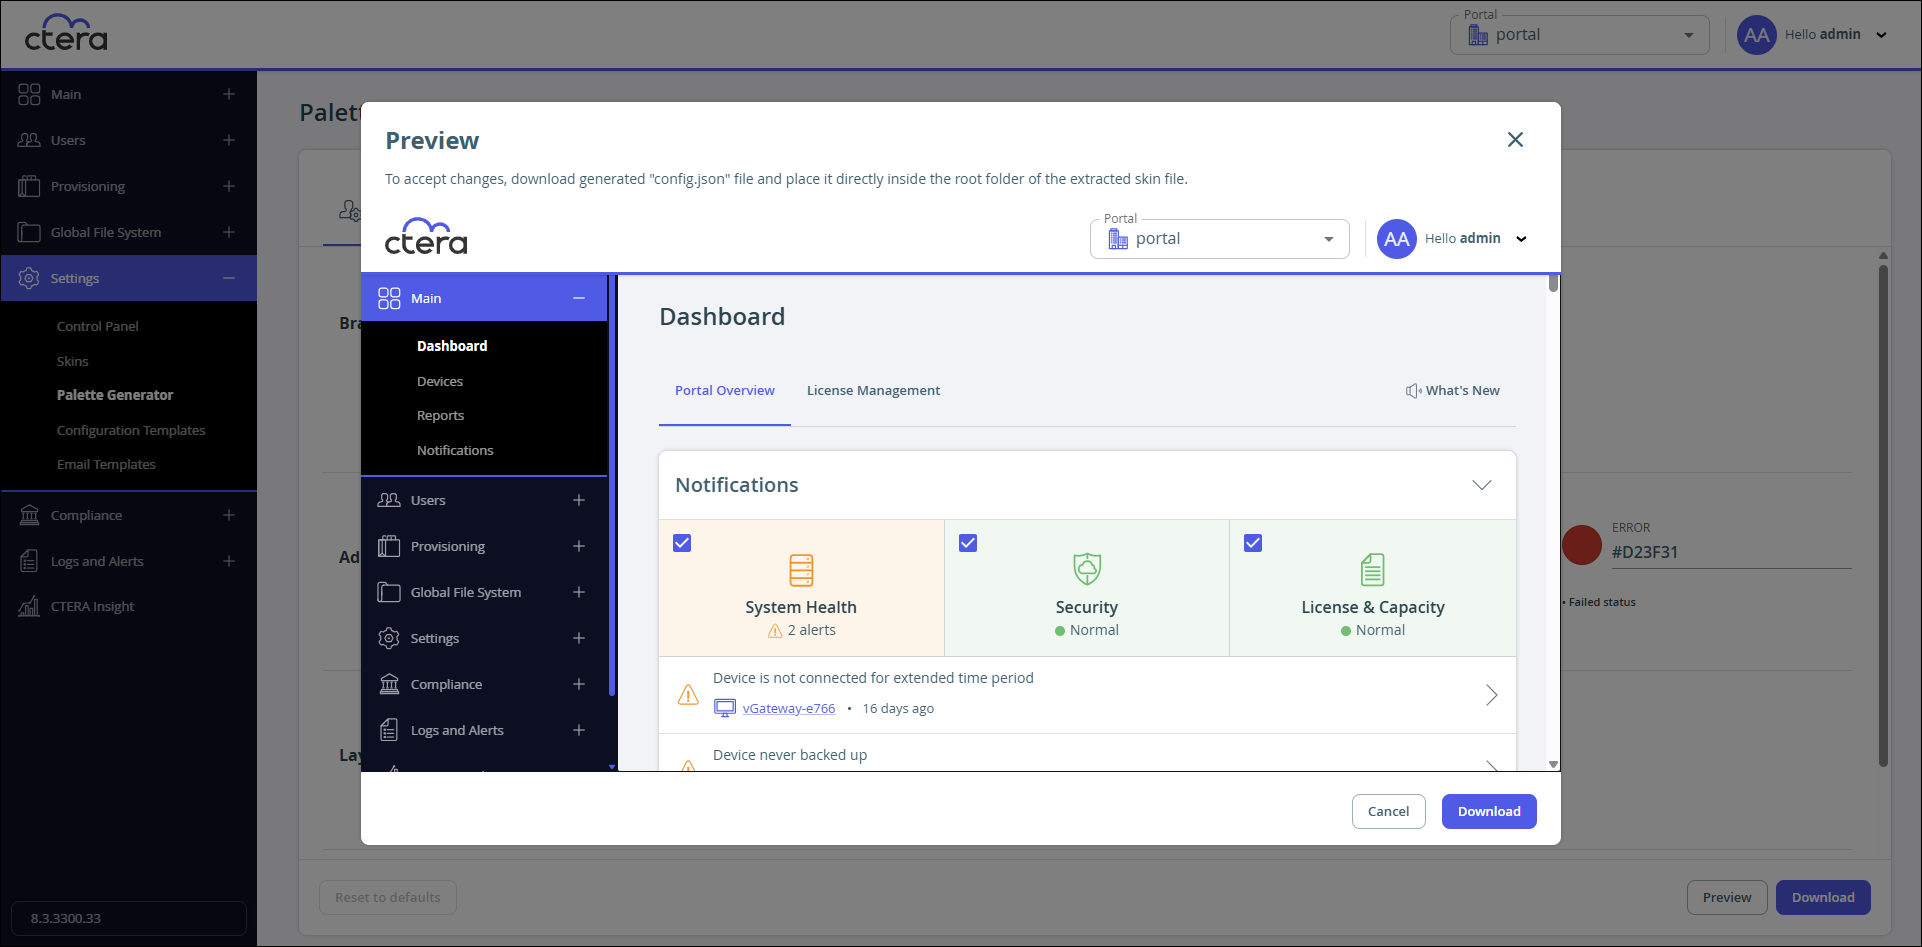
Click Cancel in the preview and then if you do not like the changes, click Reset to defaults in the Palette Generator page to undo all your changes. -
Once you are satisfied with the color scheme, click Download.
If you leave the **Palette Generator** page after making a color change, you will no longer be able to reset it to the default colors.
For the Administration Palette, a config.json file is downloaded.
For the End User Palette, a skins.css file is downloaded.
Use the file as part of the skin for your portal, as described in Managing a Portal Skin.
Managing a Portal Skin
You can upload a default skin for all the portals in the global administration view or for a specific team portal in the view for that portal.
You can get a basic skin from CTERA support. The skin file has an extension .skin.
To change a skin to include a new color scheme:
- Create the file with the desired color scheme as described in Managing the Portal Colors.
- Change the extension of the .skin file you want to use to .zip
- For the administration view, replace the config.json file in the zip with downloaded config.json file.
- For the end user view, replace the skins.css in the endUser/css folder in the zip with the downloaded skins.css file.
- To upload the updated skin file, first change the zip file's extension back to .skin.
- Upload the skin file to the portal and set it as the default.
You must not change the name of the skin file.
In coordination with CTERA support you can make other changes to the skin as described in CTERA Portal Customization Guidelines.
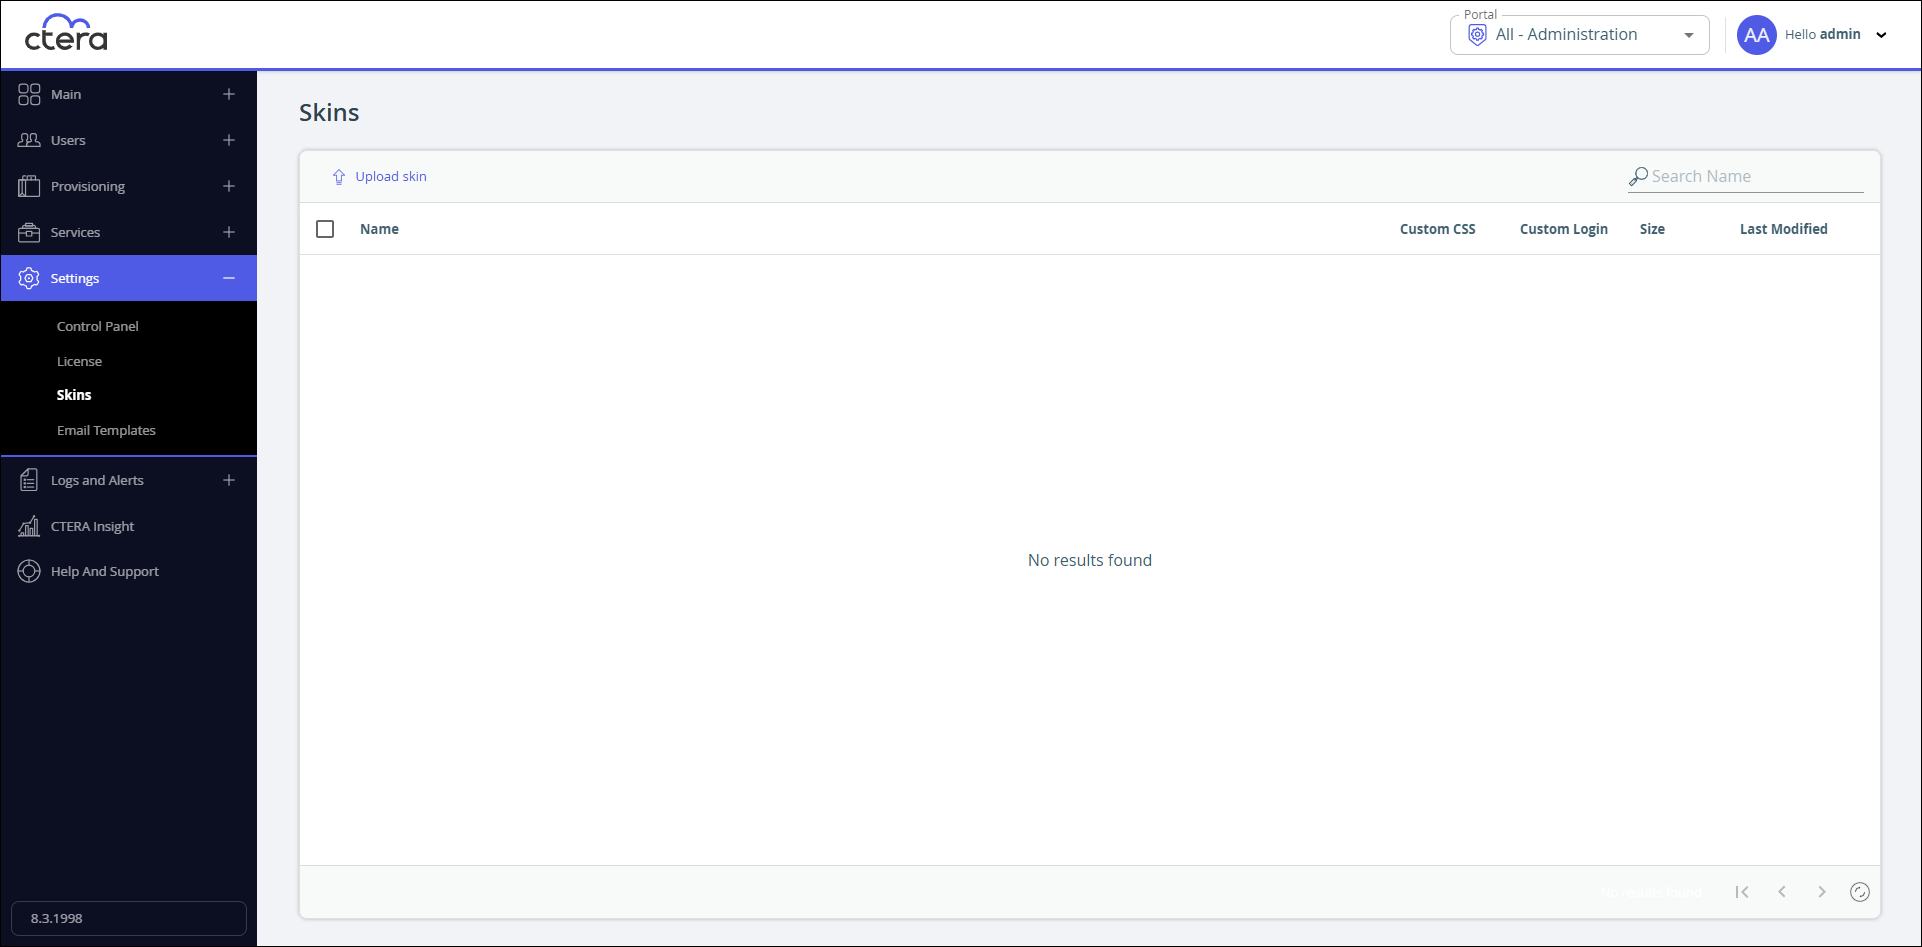
To upload a skin to the portal:
- For all portals, in the global administration view, or for a specific team portal, in the view for the team portal, select Settings > Skins in the navigation pane.
The Skins page is displayed. For example, in the global administration view:
- Click Upload skin and browse to the skin received from CTERA support.
- Select the file with the extension .skin and click Open.
The selected skin is uploaded.

You can also download a skin from the portal to make changes. CTERA recommends only doing this in coordination with CTERA support.
To make a skin the default skin:
- For all portals in the global administration view, or for a specific team portal, in the view for the team portal: Select Settings > Skins in the navigation pane.
The Skins page is displayed. - Select the row of the skin to use as the default and click Set as Default.
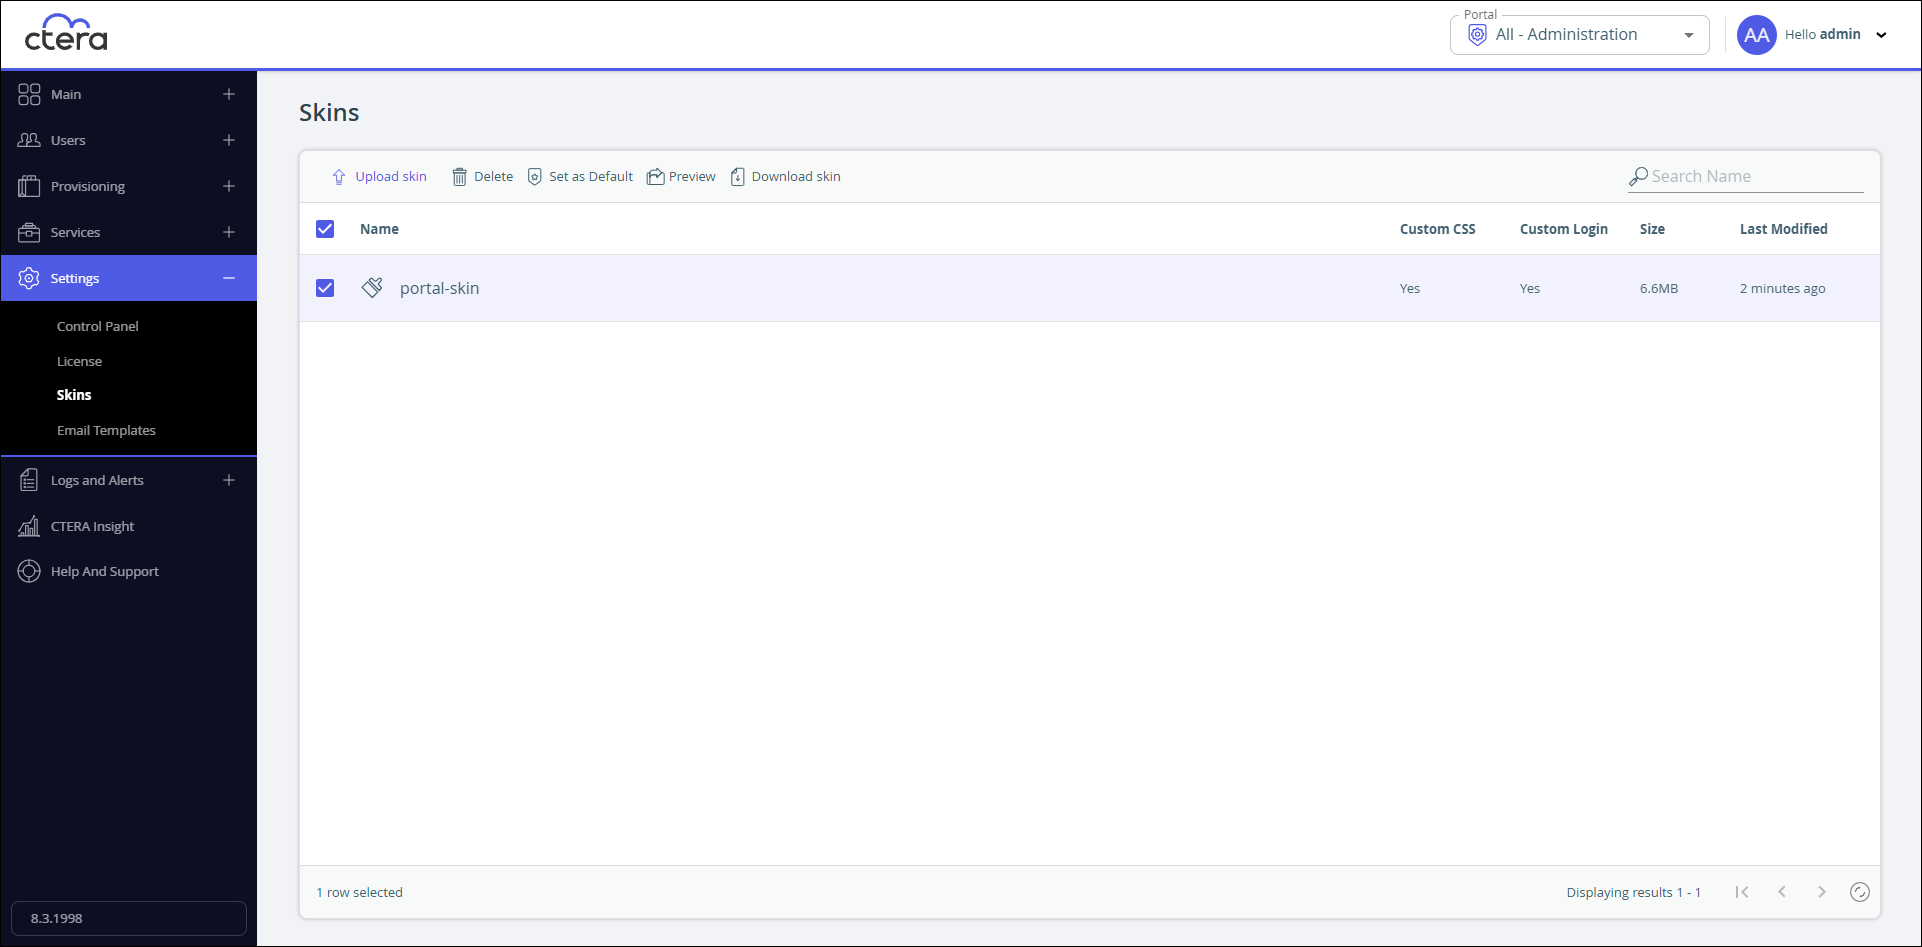
The selected skin becomes the default skin.Default Skinis displayed under the skin name and the icon changes to .
. - Refresh the portal page.
The default skin cannot be deleted.
To remove a skin from being the default:
- For all portals in the global administration view, or for a specific team portal, in the view for the team portal: Select Settings > Skins in the navigation pane.
The Skins page is displayed. - Select the row of the default skin and click Remove Default.
- Refresh the portal page.
To delete a skin that is not the default skin:
- For all portals, in the global administration view or for a specific team portal, in the view for the team portal, select Settings > Skins in the navigation pane.
The Skins page is displayed. - Select the row of the skin to delete and click Delete.
A confirmation window is displayed. - Click Delete to confirm.
The skin is deleted.