Initial CTERA Edge Filer Setup
- 7 Minutes to read
- Print
- DarkLight
- PDF
Initial CTERA Edge Filer Setup
- 7 Minutes to read
- Print
- DarkLight
- PDF
Article Summary
Share feedback
Thanks for sharing your feedback!
Before setting up the CTERA Edge Filer, you have to configure the CTERA Portal to which the CTERA Edge Filer will connect, as described in Configuring the CTERA Portal as a Precondition to Setting Up the CTERA Edge Filer. After configuring the CTERA Portal and installing the CTERA Edge Filer, you need to perform an initial CTERA Edge Filer setup. On first access to the CTERA Edge Filer, you set up a CTERA Edge Filer administrator and then a wizard guides you through connecting to a CTERA Portal and storage and user setup. You can skip any of the wizard steps and perform them later, as described in the CTERA Edge Filer Administrator Guide.
Note
If you are installing the CTERA Edge Filer to replace an existing version 6.0.x CTERA Edge Filer, contact CTERA support before performing the initial setup described below.
After this initial CTERA Edge Filer setup, the file server structure is synced from the CTERA Portal to the CTERA Edge Filer.
To access the CTERA Edge Filer and initial setup:
Open any web browser.
Enter the CTERA Edge Filer's IP address to navigate to the device.
When you connect to the web interface for the first time, your browser displays the Welcome to CTERA page.
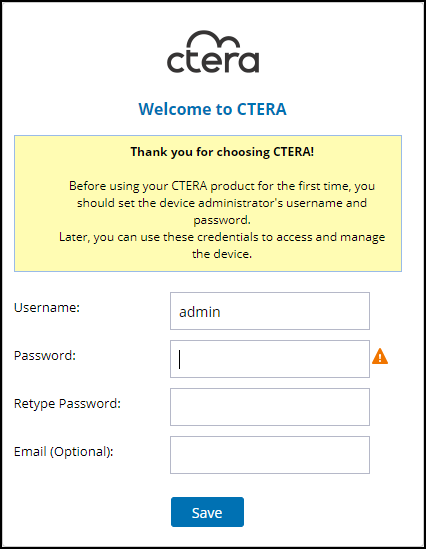
Choose a user name and password for the administrator. The password must be at least eight characters and must include at least a letter, digit and special character, such as ~, @, #, $ , %, ^, & , (.
NoteYou can keep the default user name,
admin. Other administrators are defined in the CTERA Edge Filer from Active Directory.Optionally, enter an email for receiving notifications regarding the CTERA Edge Filer.
Click Save.
If the CTERA Edge Filer does not have a data disk, the following message window is displayed.
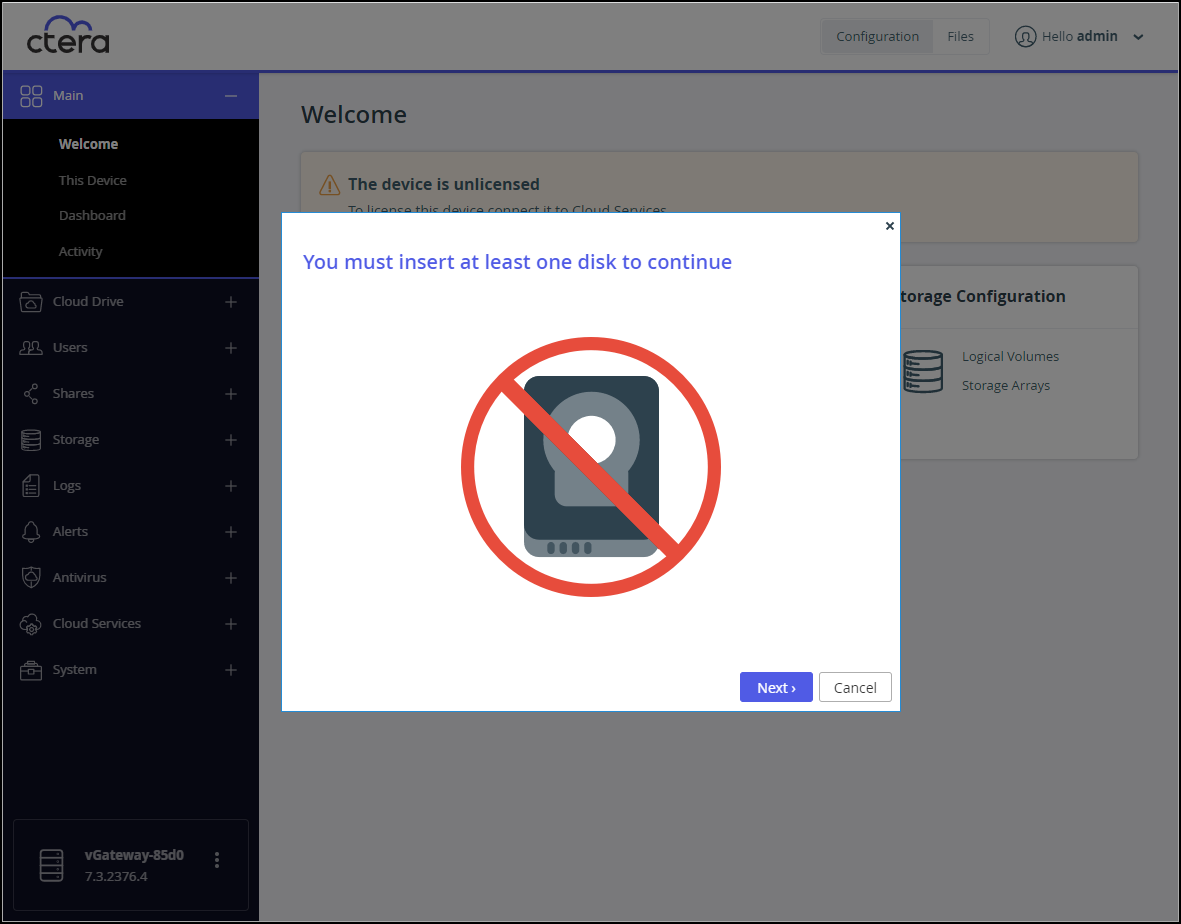
Add a disk to the CTERA Edge Filer virtual machine.
Otherwise, the Name this Edge Filer window is displayed.
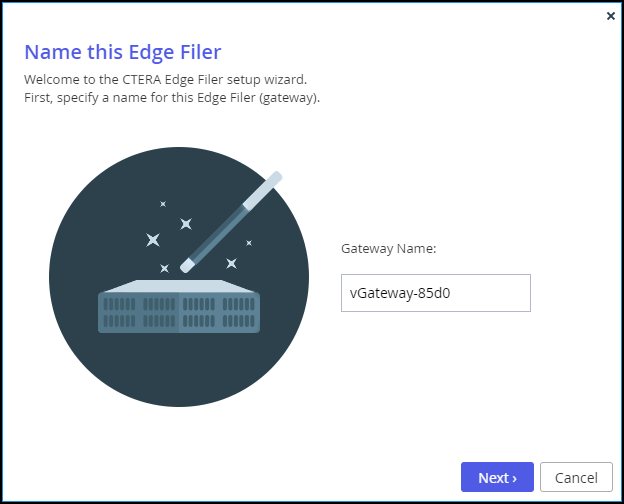
Either keep the CTERA Edge Filer default name or enter a new name to identify the CTERA Edge Filer and click Next.
The administration user interface is displayed to set up the CTERA Edge Filer, starting with the Account Details window.
 Note
NoteYou can also change the CTERA Edge Filer name after the initial setup, as described in Setting Up the CTERA Edge Filer.
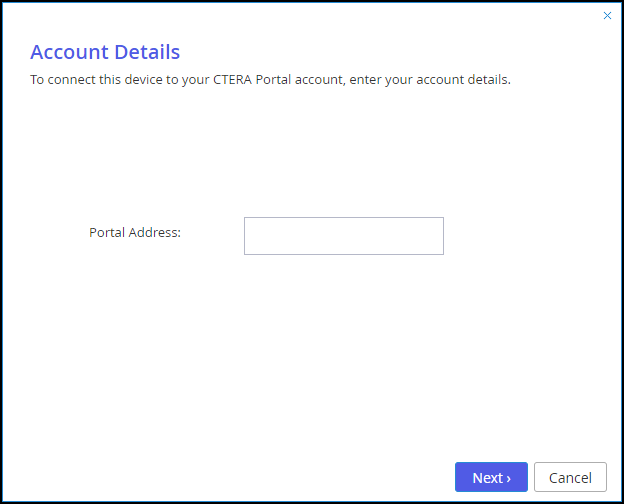
Enter the DNS name of the CTERA Portal to which you have an account and want to connect the CTERA Edge Filer to, in the Portal Address field and click Next.
NoteIf the CTERA Portal does not have a valid certificate installed, a warning is displayed to the end user when logging a device into the portal, offering the option to proceed anyway.
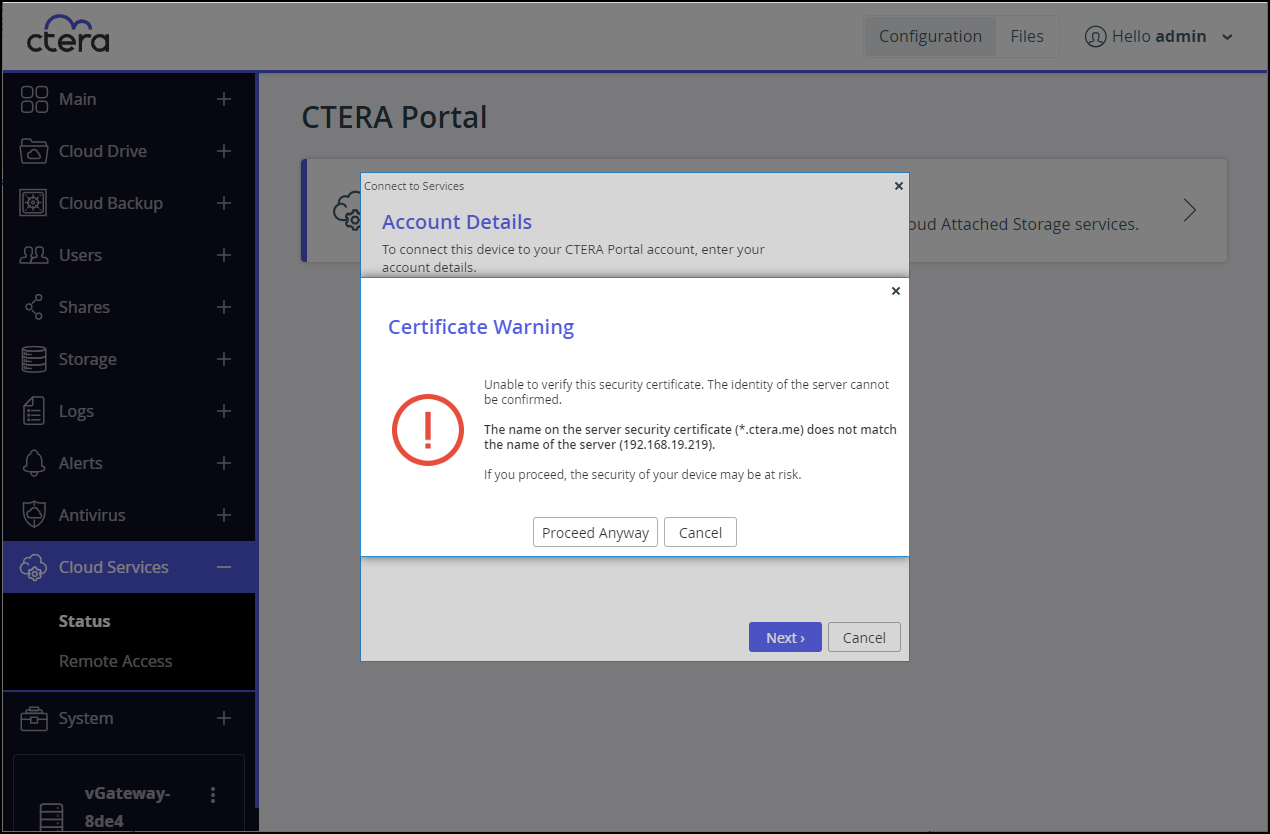
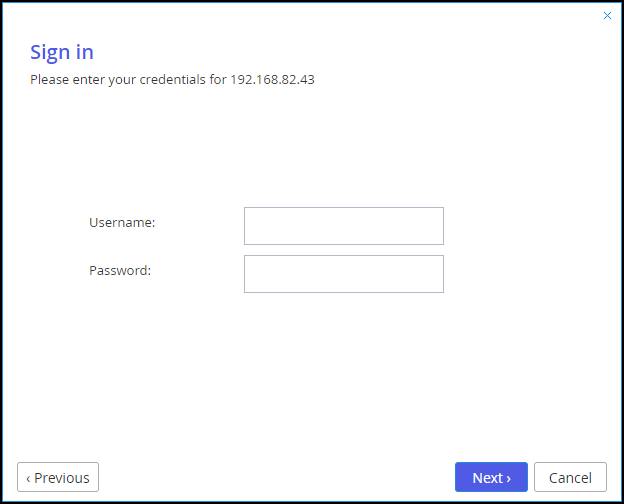
This warning dialog is presented every time a user connects a device to the portal, until a valid certificate is installed.The Sign in window is displayed.
 Note
NoteIf single sign-on has been set up to the portal, the following screen is displayed.
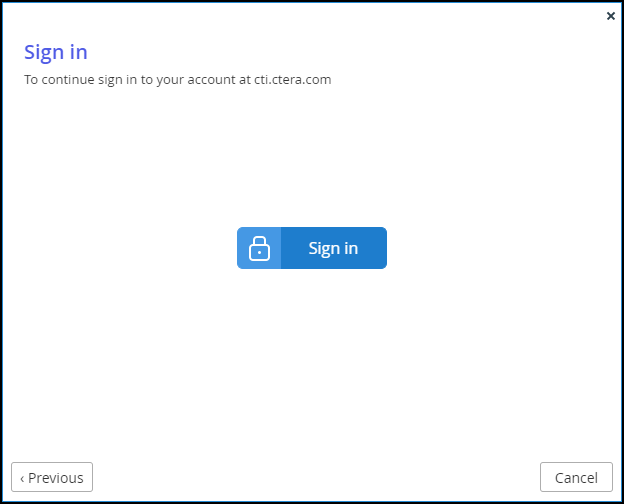
In this case, click Sign In and then Allow when prompted, and then the Select License screen is displayed. Go to step 9.Enter the CTERA Portal designated user username and password, set in Configuring the CTERA Portal as a Precondition to Setting Up the CTERA Edge Filer to access the CTERA Portal and click Next.
The Select License window is displayed with the available licenses.
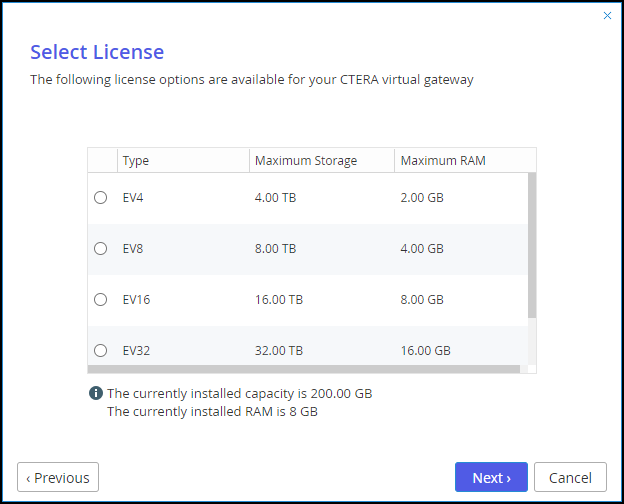
The available storage and RAM are displayed.Select the license for the gateway and click Next.
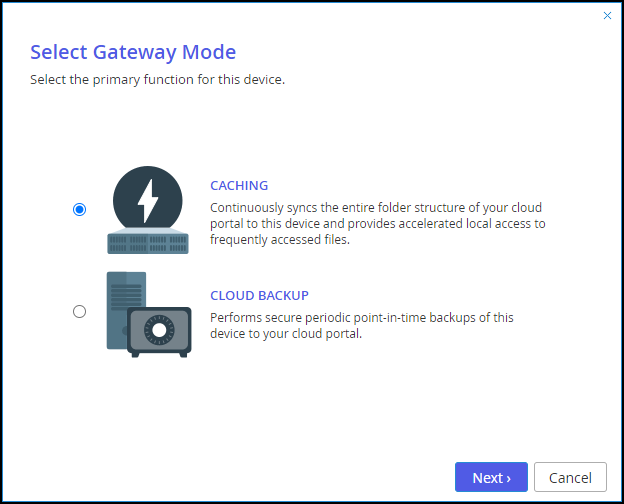
The Select Gateway Mode window is displayed.
 Note
NoteIf the gateway is not licensed for cloud backup, only the CACHING mode option is displayed.
Select the primary mode you want to configure for the CTERA Edge Filer. This can be changed later, as described in Changing the Edge Filer Mode Between CLOUD BACKUP and CACHING. The modes are:
CACHING – Provides users with LAN speed access to all the shared cloud folders on the CTERA Portal. Shared storage is on the CTERA Portal in the cloud with stubs saved on the CTERA Edge Filer. A stub is a file with a tiny footprint that contains the metadata about the file, such as the file name, size, and modification date. Only the folder and file metadata and not the actual file content is saved locally. Thus, the CTERA Edge Filer can have much less physical storage than is made available to users, who have access to both the local CTERA Edge Filer storage and the CTERA Portal storage. Systems with many file changes, where only some of the files are required locally, don’t over use bandwidth between the cloud and CTERA Edge Filer. Only the required files are passed across the wire. When a user accesses a file stub, the file is opened without delay, by streaming the file content from the cloud. After the download has completed, the file is unstubbed. Any changes to the file are synced back to the CTERA Portal. Folders that are always required can be pinned, in which case the files in the folders, and not the stubs, are stored on the CTERA Edge Filer.NoteIf you are replacing an existing file server, set the mode to CACHING.
CLOUD BACKUP – Provides secure periodic point-in-time backups of selected local folders on the CTERA Edge Filer that are not part of the cloud shared folder. Automated differential backup and restore functions include block-level deduplication, compression, and encryption technologies, ensuring secure and efficient synchronization between the CTERA Edge Filer and the cloud. Backups are encrypted using high-grade AES encryption and encoded to maximize bandwidth utilization. When CLOUD BACKUP is selected, CACHING defaults to disabled. This can be changed in the CTERA Edge Filer user interface.
NoteCloud backup requires a backup license from CTERA.
Cloud files cached with a CTERA Portal are backed up from the CTERA Portal. CLOUD BACKUP is used to back up local folders and files.Click Next.
The Easy Storage Setup window is displayed, showing the number of virtual disks.
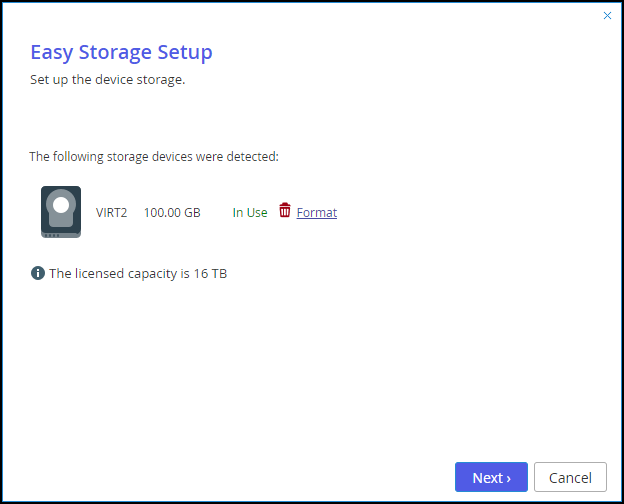
The maximum storage allowed for the selected CTERA Edge Filer license is also displayed.Click Next.
The Proposed Actions window is displayed with the recommended configuration.
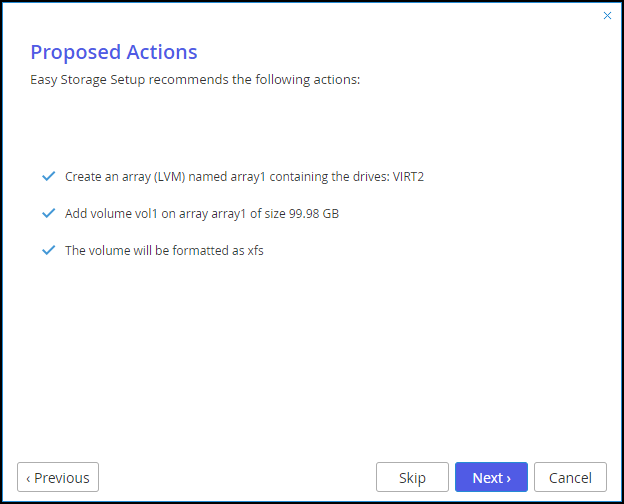
CTERA recommends accepting the proposed actions and clicking Next and not clicking Skip.Click Next (or Skip).
- If CACHING was selected, the Join an Active Directory Domain window is displayed.
- If CLOUD BACKUP was selected and the wizard is being run for the first time and the portal user does not have a backup folder defined in the CTERA Portal, for example a new user in the portal, the Backup Encryption window is displayed.
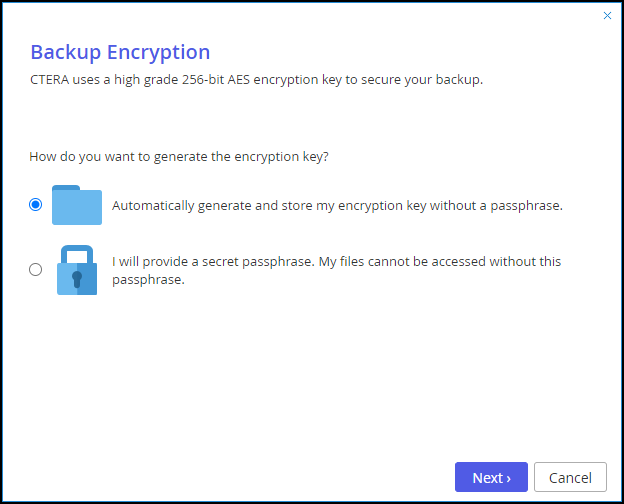
- Select the encryption you require. If you want to use a passphrase to protect the data, the Backup Passphrase window is displayed.
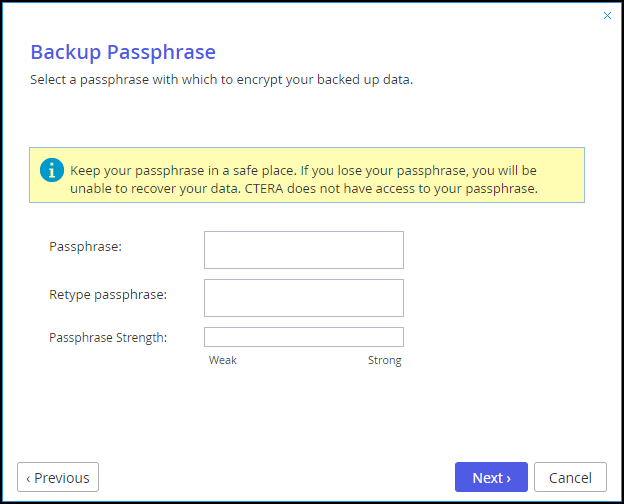
- Specify the passphrase and then confirm this passphrase by retyping it. The selected passphrase must contain at least one letter, one digit and one special character.
The encryption method employed is the Advanced Encryption Standard (AES-256 CBC ESSIV). Enabling volume encryption may reduce performance.NoteIt is important to keep the passphrase in a safe place, as there is no way of retrieving it if you lose it. If you reset the CTERA Edge Filer to its default settings, you cannot access the volume without this passphrase.
- Click Next.
- Select the encryption you require. If you want to use a passphrase to protect the data, the Backup Passphrase window is displayed.
The Join an Active Directory Domain window is displayed.

Specify the domain details so that the CTERA Edge Filer is populated with the users from your Active Directory domain and click Next or, if you want to set up Active Directory later, click Skip.
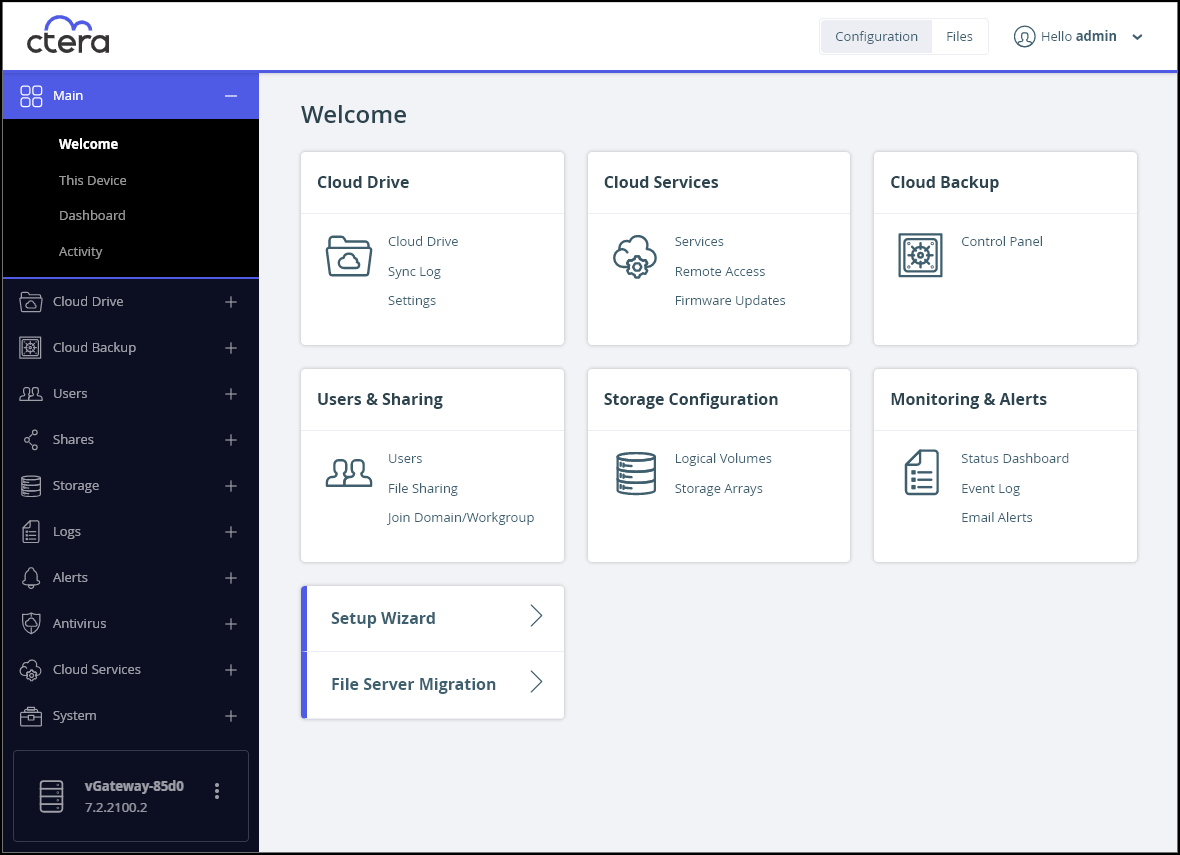
The Wizard Completed window is displayed.Click Finish.
The Configuration view's Main > Welcome page is displayed.
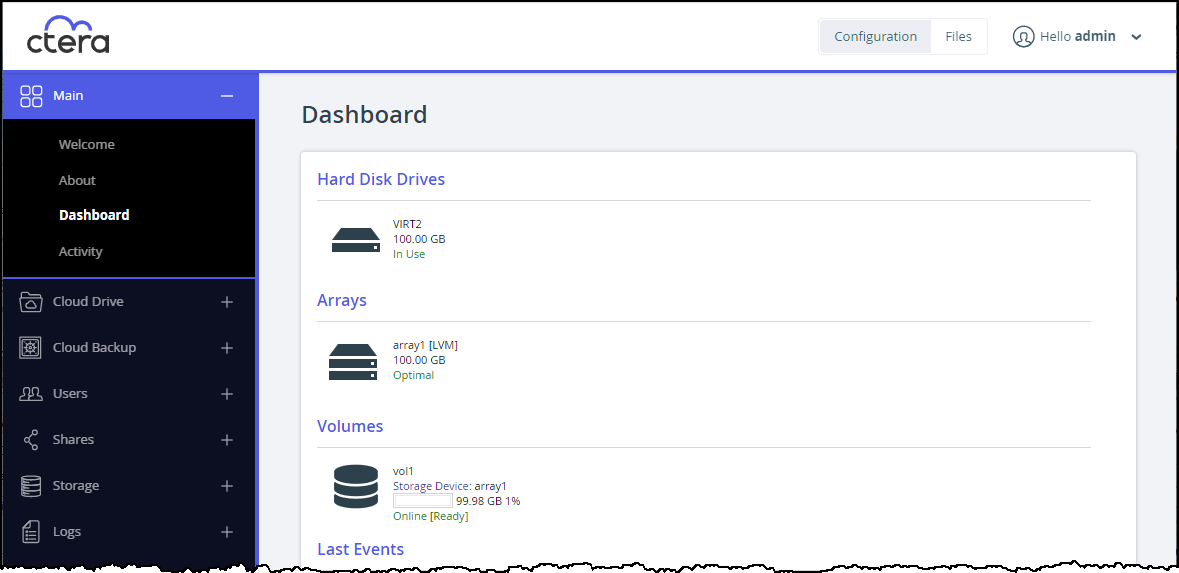
If you selected CLOUD BACKUP, you can enable caching at a later date.Select Main > Dashboard and verify that all the hard disk drives installed in the CTERA Edge Filer are available.
An LVM array, array1, which includes all the virtual disks and a single volume, vol1, are created.


Note
You can rerun the wizard by selecting Main > Welcome and click Setup Wizard.
You can migrate a file server to CTERA Edge Filer so that end users who are familiar with a given folder structure and share, while using the file server, continue to see the same folder structure and shares after migration to the CTERA Edge Filer. If you are replacing an existing file server with the CTERA Edge Filer, continue with Migrating a File Server.
When more than one DNS server is in use at the site, you can define the primary and secondary DNS servers, described in Managing Network Settings.
Was this article helpful?