A CTERA Portal in AWS is created as an instance in an existing Virtual Private Cloud (VPC).
Use the following workflow to install CTERA Portal.
- Creating a Portal Instance.
- Optionally, associate your CTERA Portal instance with an Elastic IP Address. See Optionally Obtaining an Elastic IP Address for the CTERA Portal Instance.
- Optionally, configure a default gateway.
- For the first server you install, follow the steps in Configuring the Primary Server.
- For any additional servers beside the primary server, install the server as described below and configure it as an additional server, as described in Installing and Configuring Additional CTERA Portal Servers.
- Make sure that you replicate the database, as described in Configuring the CTERA Portal Database for Backup.
- Backup the server as described in Backing Up the CTERA Portal Servers and Storage.
Creating a Portal Instance
To create the CTERA Portal in AWS:
-
From your Amazon Web Services account, sign in to the AWS Management Console.
-
Either,
- Select AWS Marketplace and then select Discover products and search for
ctera networks
The CTERA product offerings are displayed.
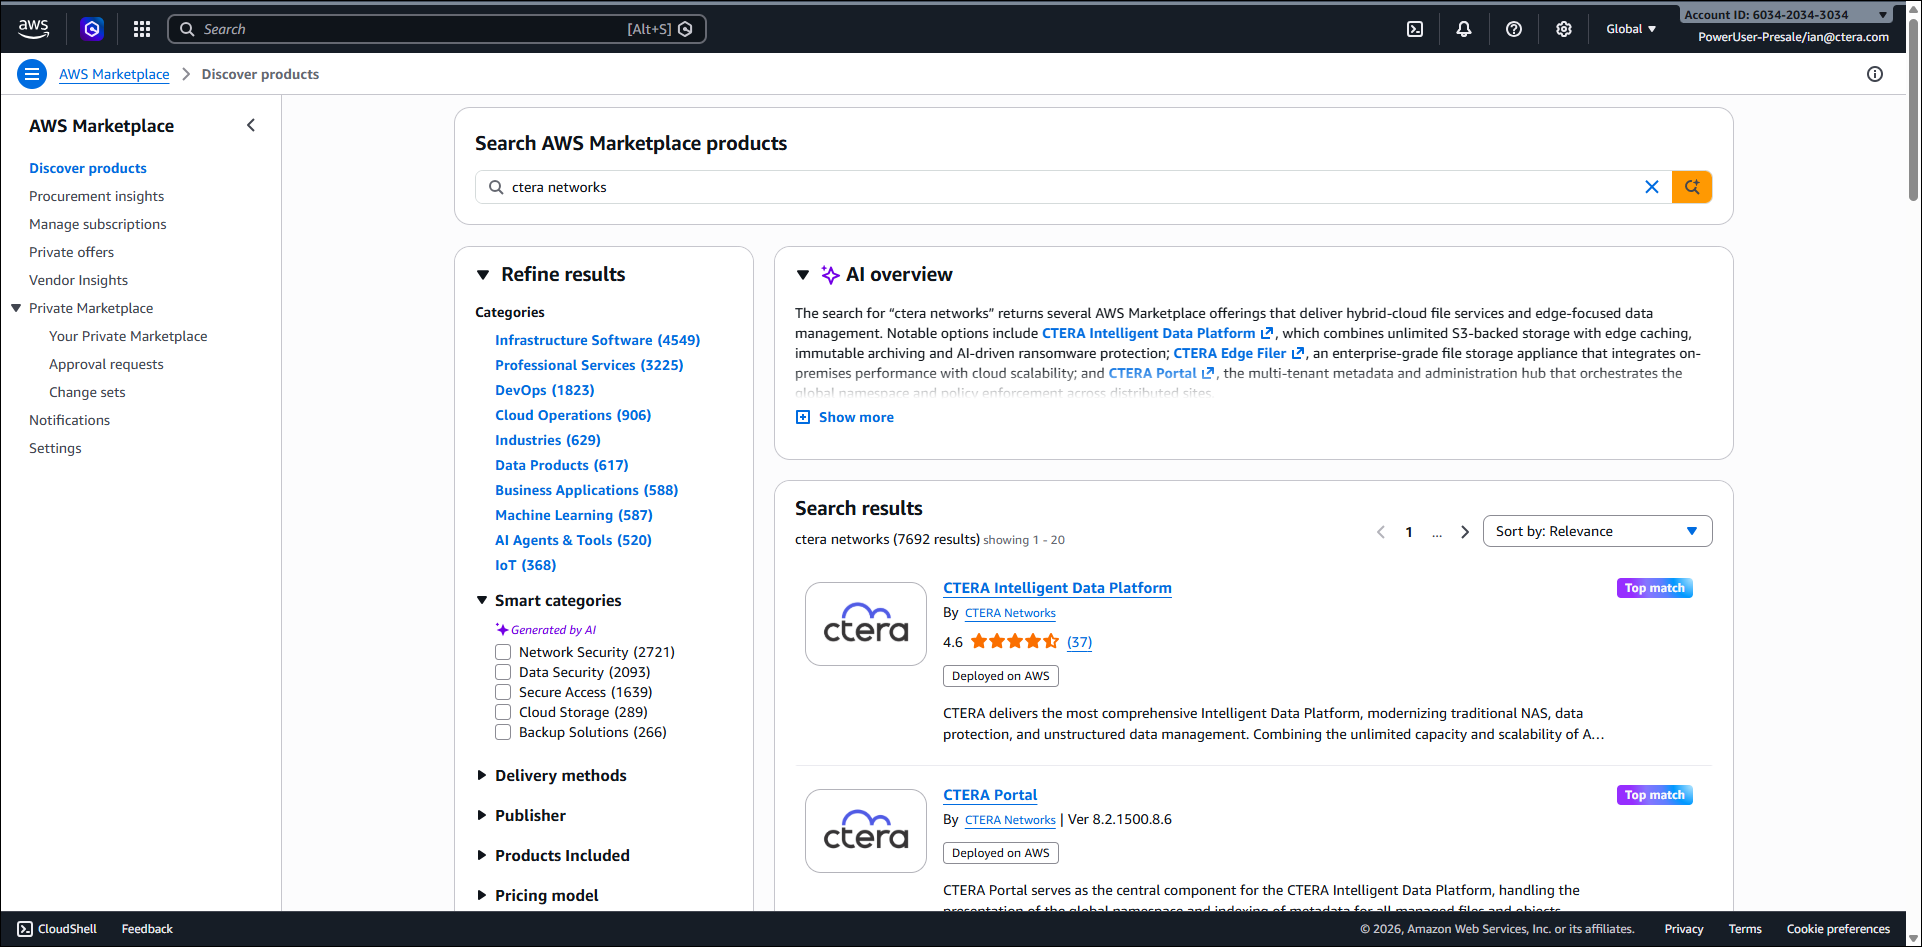
- Click CTERA Portal.
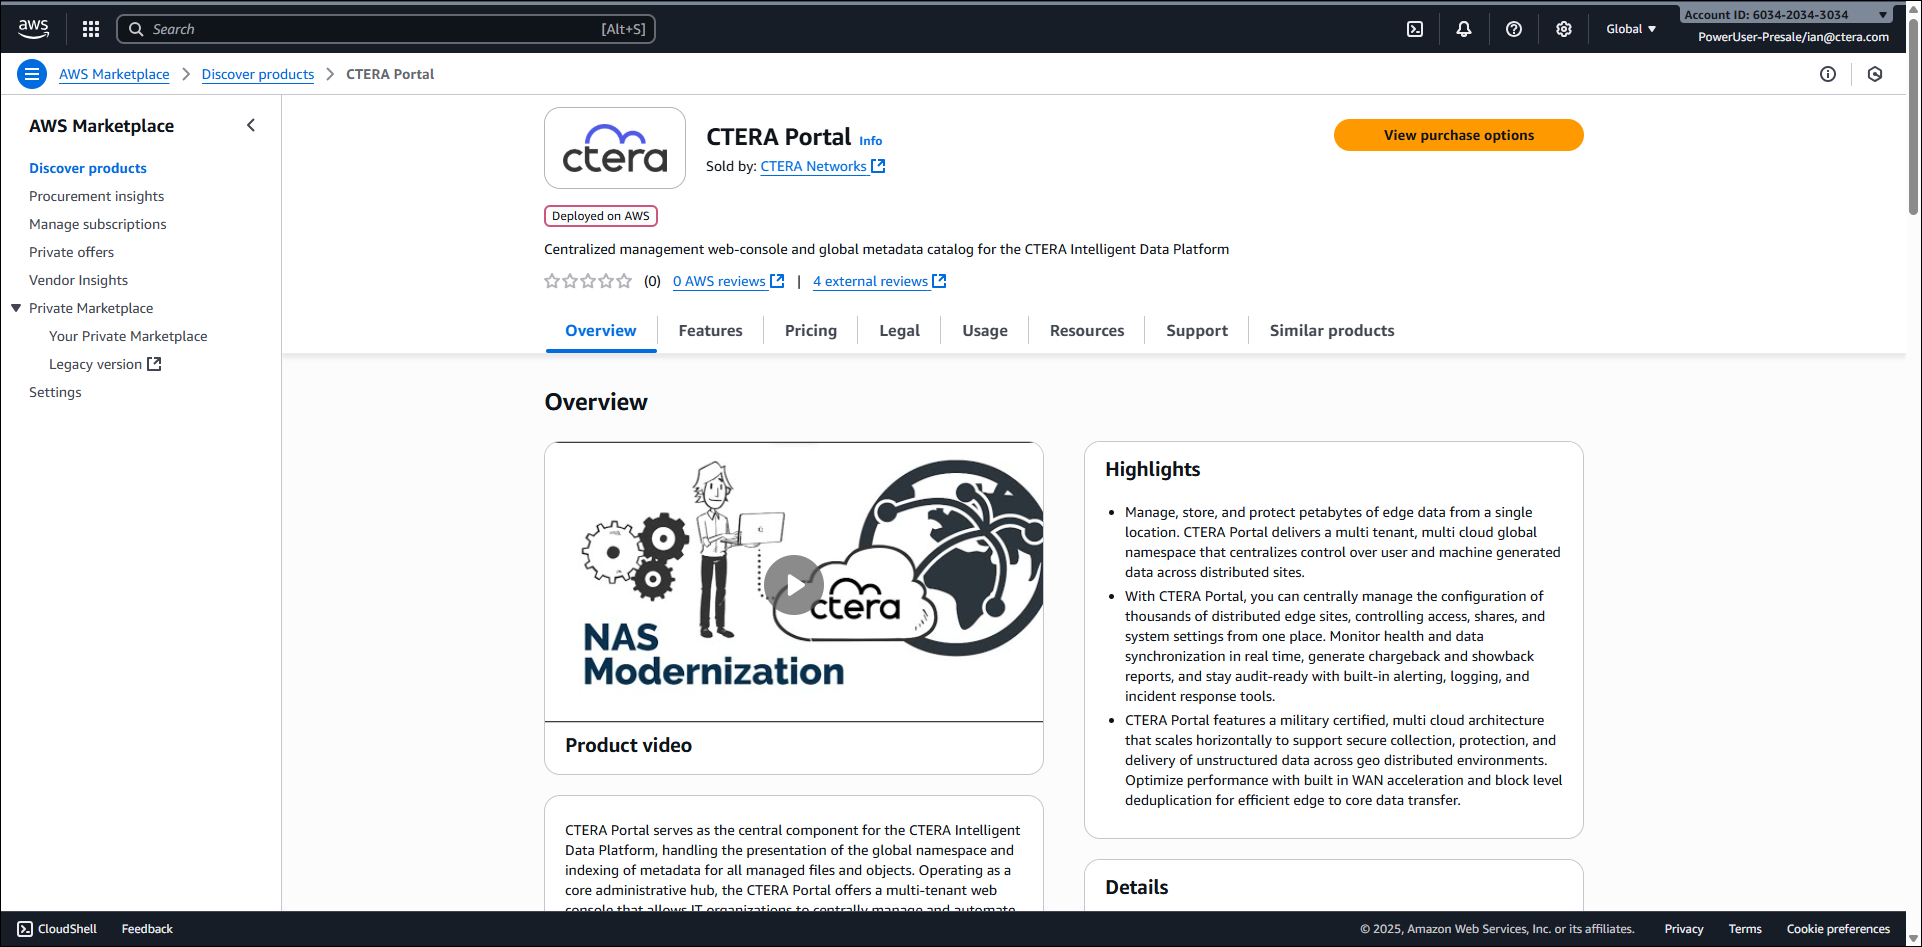
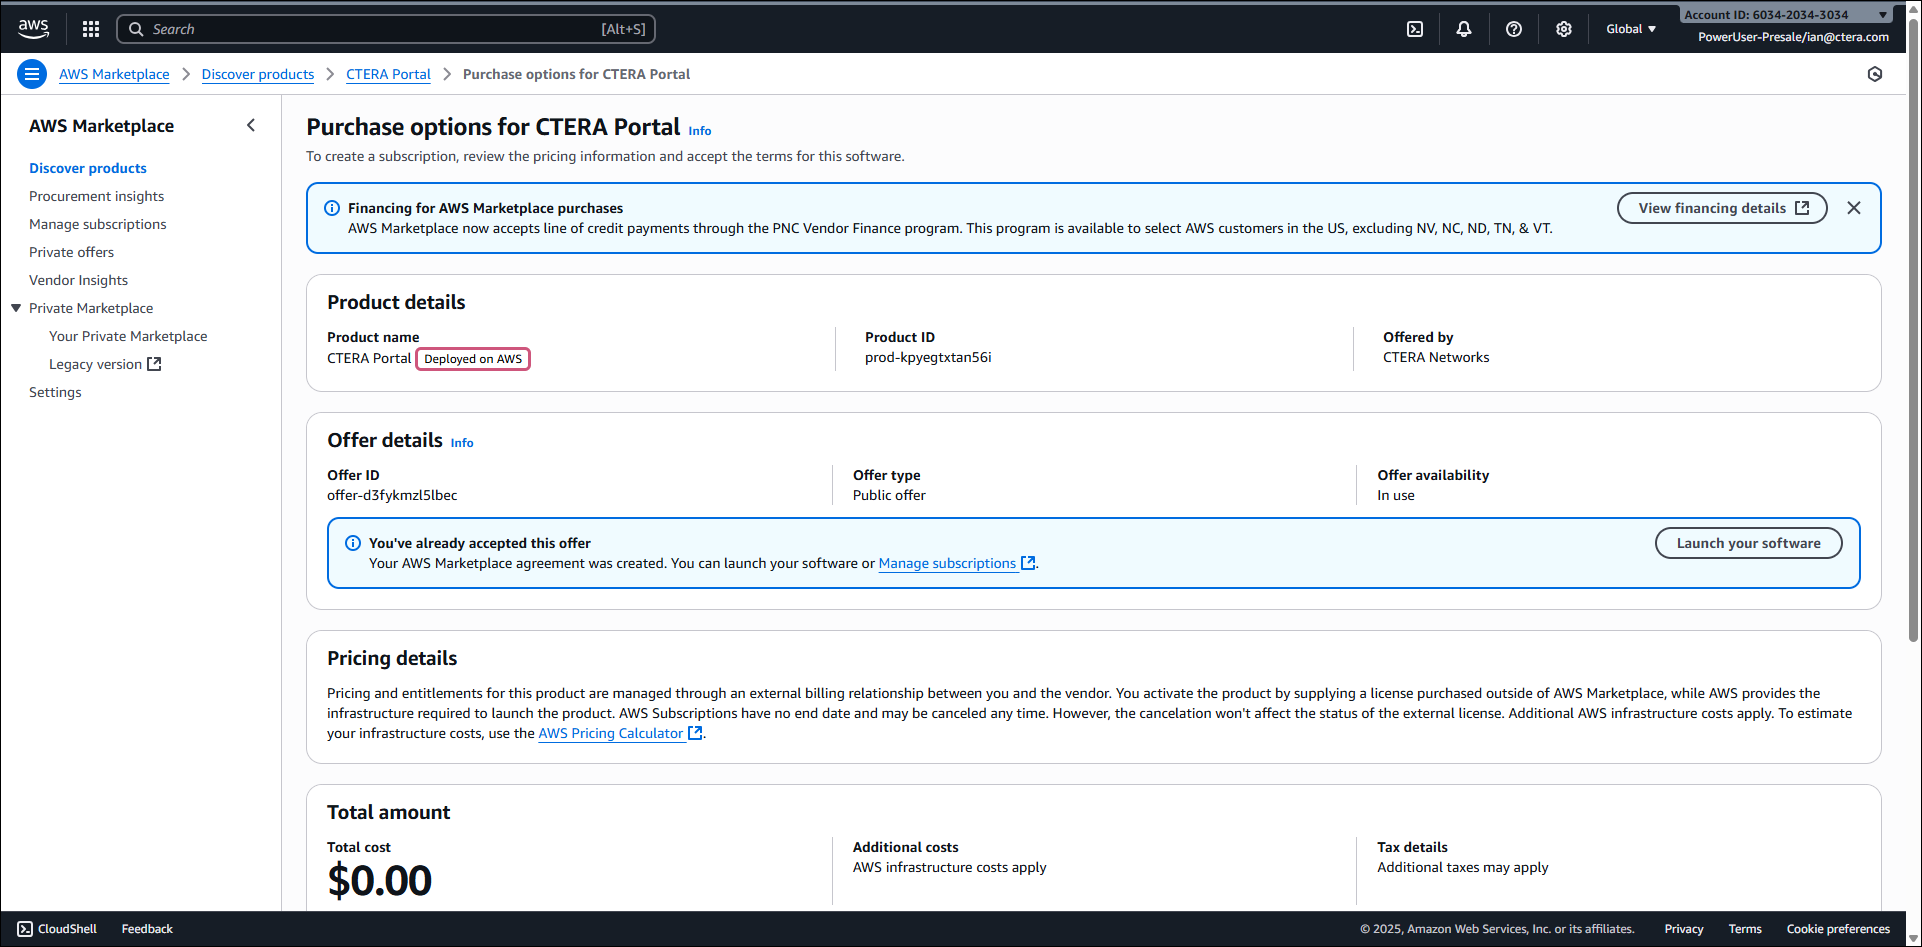
- Click View purchase options.
 Note
NoteCTERA recommends that you read the Terms and conditions before continuing.
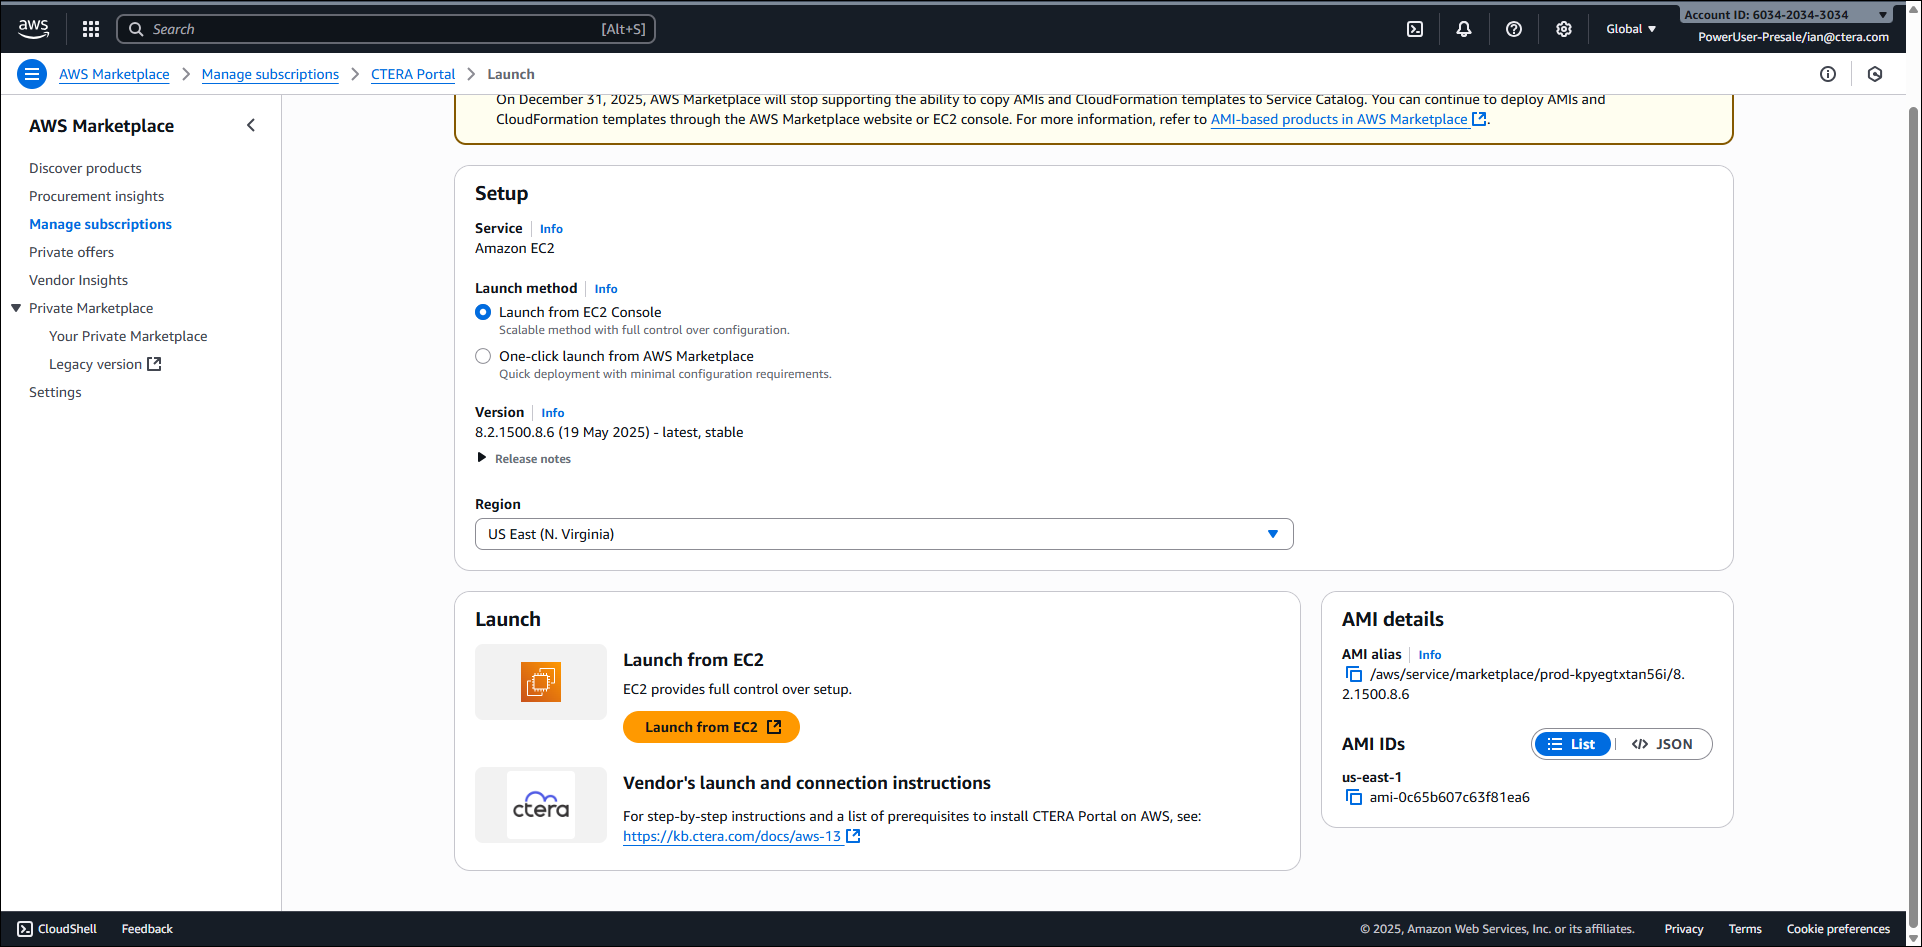
- If you have not yet subscribed to this offer, click Subscribe at the bottom of the page, otherwise, click Launch your software.
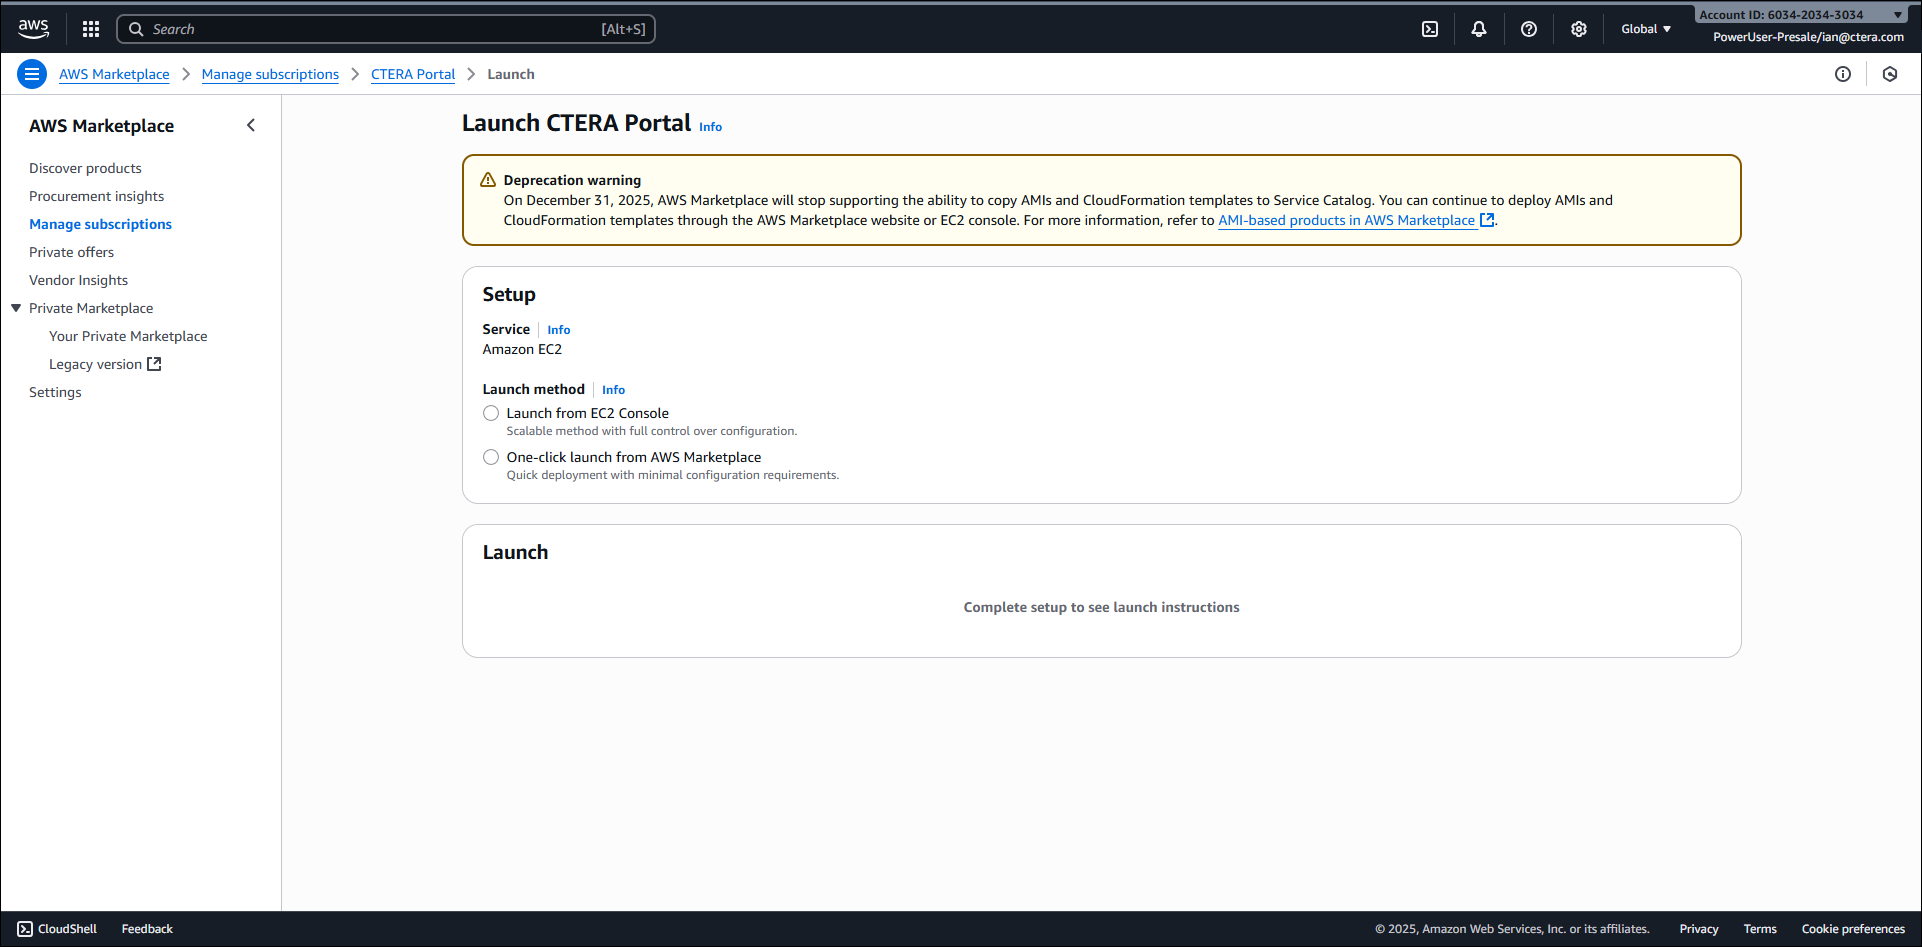
- Select the Launch from EC2 Console option.
 Note
NoteDo not use the One-click launch from AWS Marketplace option.
- Click Launch from EC2.
Or,
- Under the Compute service, select EC2.
- In the navigation pane, click Images > AMIs.
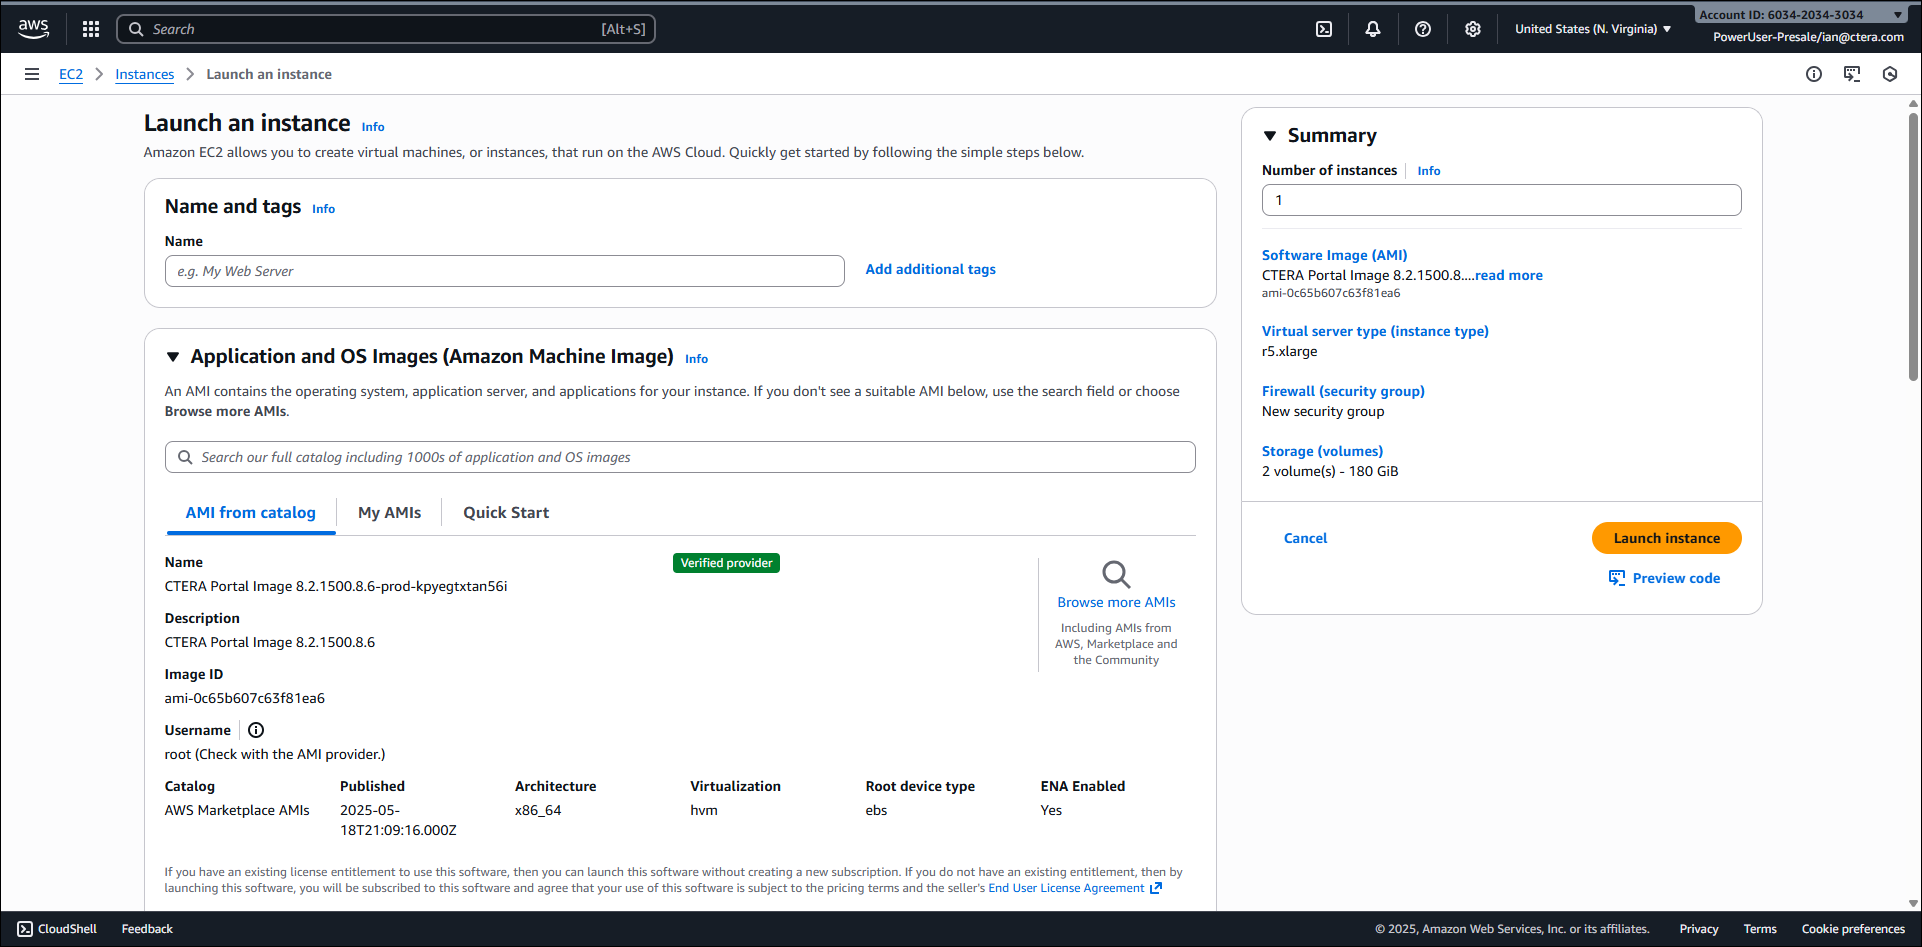
The Amazon Machine Images (AMIs) window is displayed. - Select the CTERA Portal image that CTERA shared with you and click Launch instance from AMI.
The Launch an instance page is displayed.
- Select AWS Marketplace and then select Discover products and search for
-
Under Name and tags, enter a name for the instance.
-
Optionally, click Add additional tags to add tags, clicking Add tags for each additional tag you want to add.
NoteIn multi-instance environments, it is recommended to include the name of the CTERA service running on this instance, for example, replication, preview, application.
-
Under Instance type, select the required instance type.
NoteOnly viable instance types are allowed. For information on CTERA's server sizing requirements, contact CTERA Support.
-
Under Key pair (login), do one of the following.
- If you created a key pair, and have the private key file that corresponds to the pair in a safe and accessible place, select the key pair from the drop-down list
- If you want to create a new key pair, do the following:
- Select Create new key pair.
- In the Key pair name field, enter a name for the key pair.
- Choose the
.pemPrivate key file format option. - Click Create key pair.
A private key in *.pem format is downloaded.
Be sure to save the private key file in a safe place. You will need to provide the name of your key pair when you launch the instance and the corresponding private key each time you connect to the instance.
This is also the key you will use to setup any additional portal servers.WarningYou must have a key pair for the instance. If you launch your instance without a key pair, you will not be able to connect to it.
-
Under Network settings, click Edit
- Select the VPC Network from the drop-down list.
- Select the Subnet from the drop-down list. The subnet can be a private subnet or a public subnet.
Note
You only need a public subnet if access to the CTERA Portal will not be within the VPC.
- Under Firewall (security groups) choose Create security group for a new security group or Select existing security group if you already have one defined.
For security reasons, it is recommend to create one security group for servers running CTERA's application service or preview service, and a different security group for servers running CTERA's main database.
If you chose Create security group, click Add security group rule to add the following from the Type drop-down:- DNS (UDP)
- HTTP
- Custom TCP and set Port range to 389, for Active Directory, if used.
- HTTPS
- Custom TCP and set Port range to 995
TCP port 22 for SSH remote connectivity and assistance by CTERA support personnel is added automatically when you select Create security group.
CTERA Portal instances communicate with each other over TCP port 5432. Allow TCP communication overport 5432 to the CTERA Portal database server. This communication port should be opened only between the CTERA servers.
CTERA recommends modifying the allowed source IP addresses for each inbound security rule added.
-
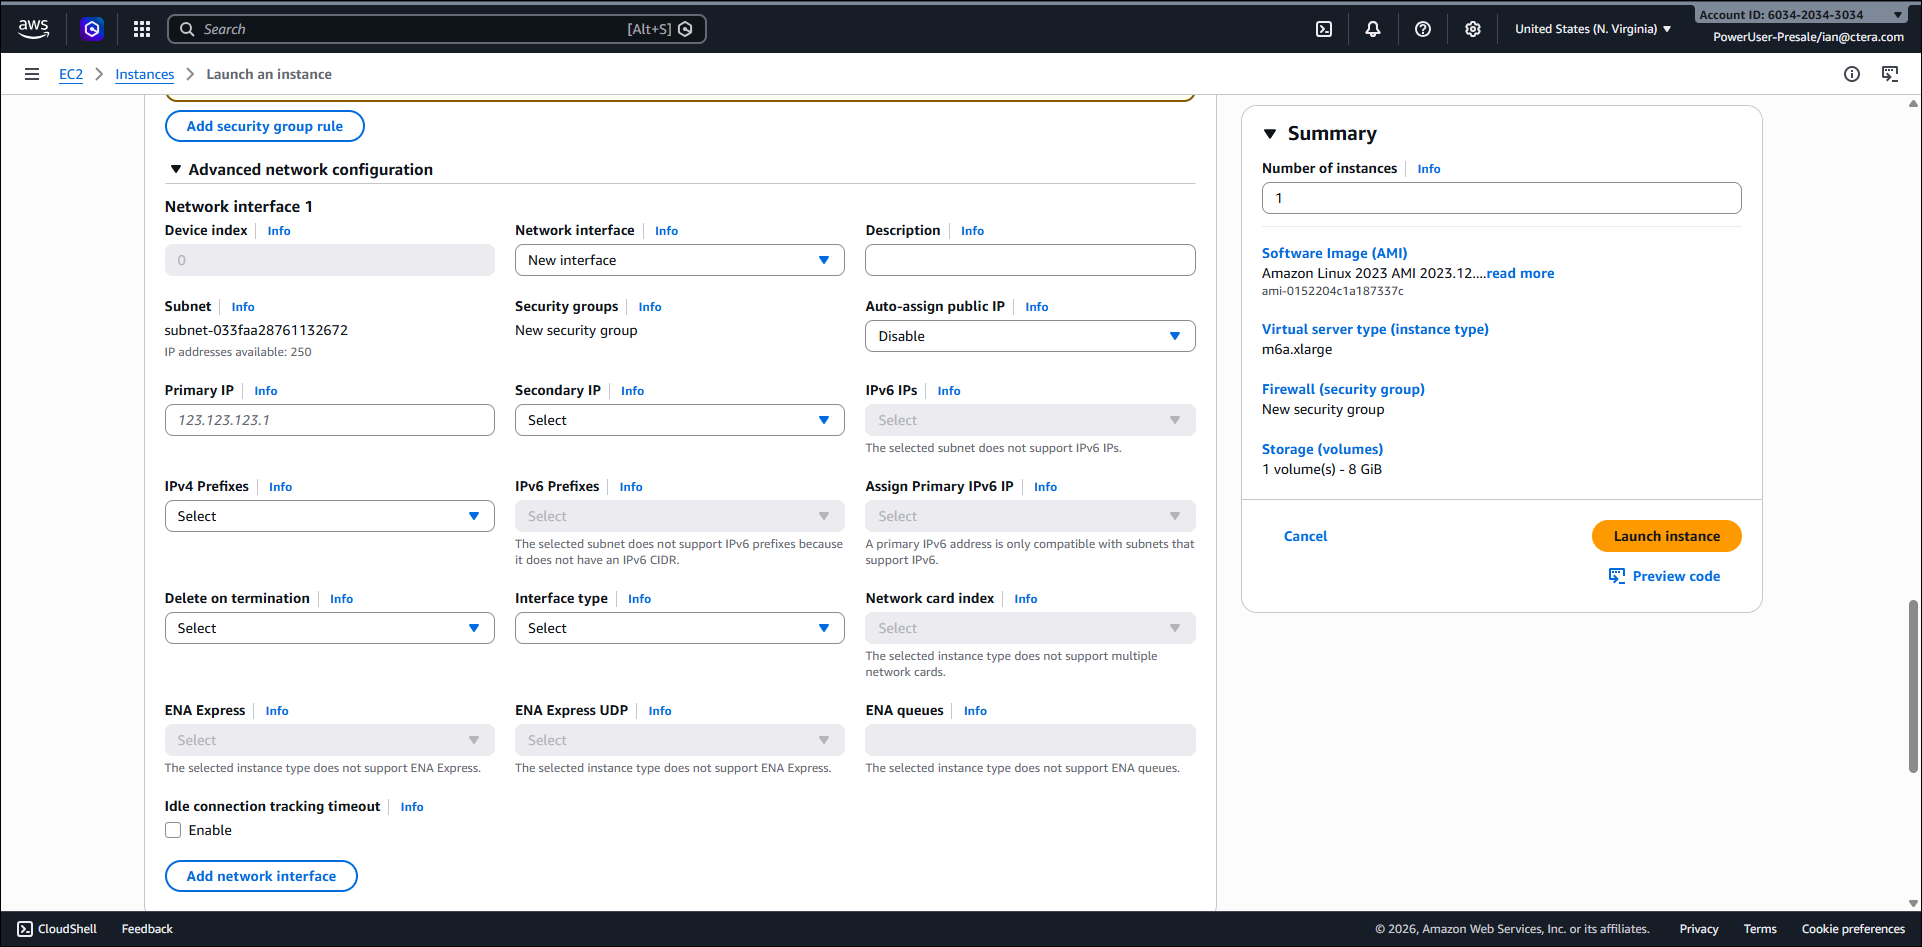
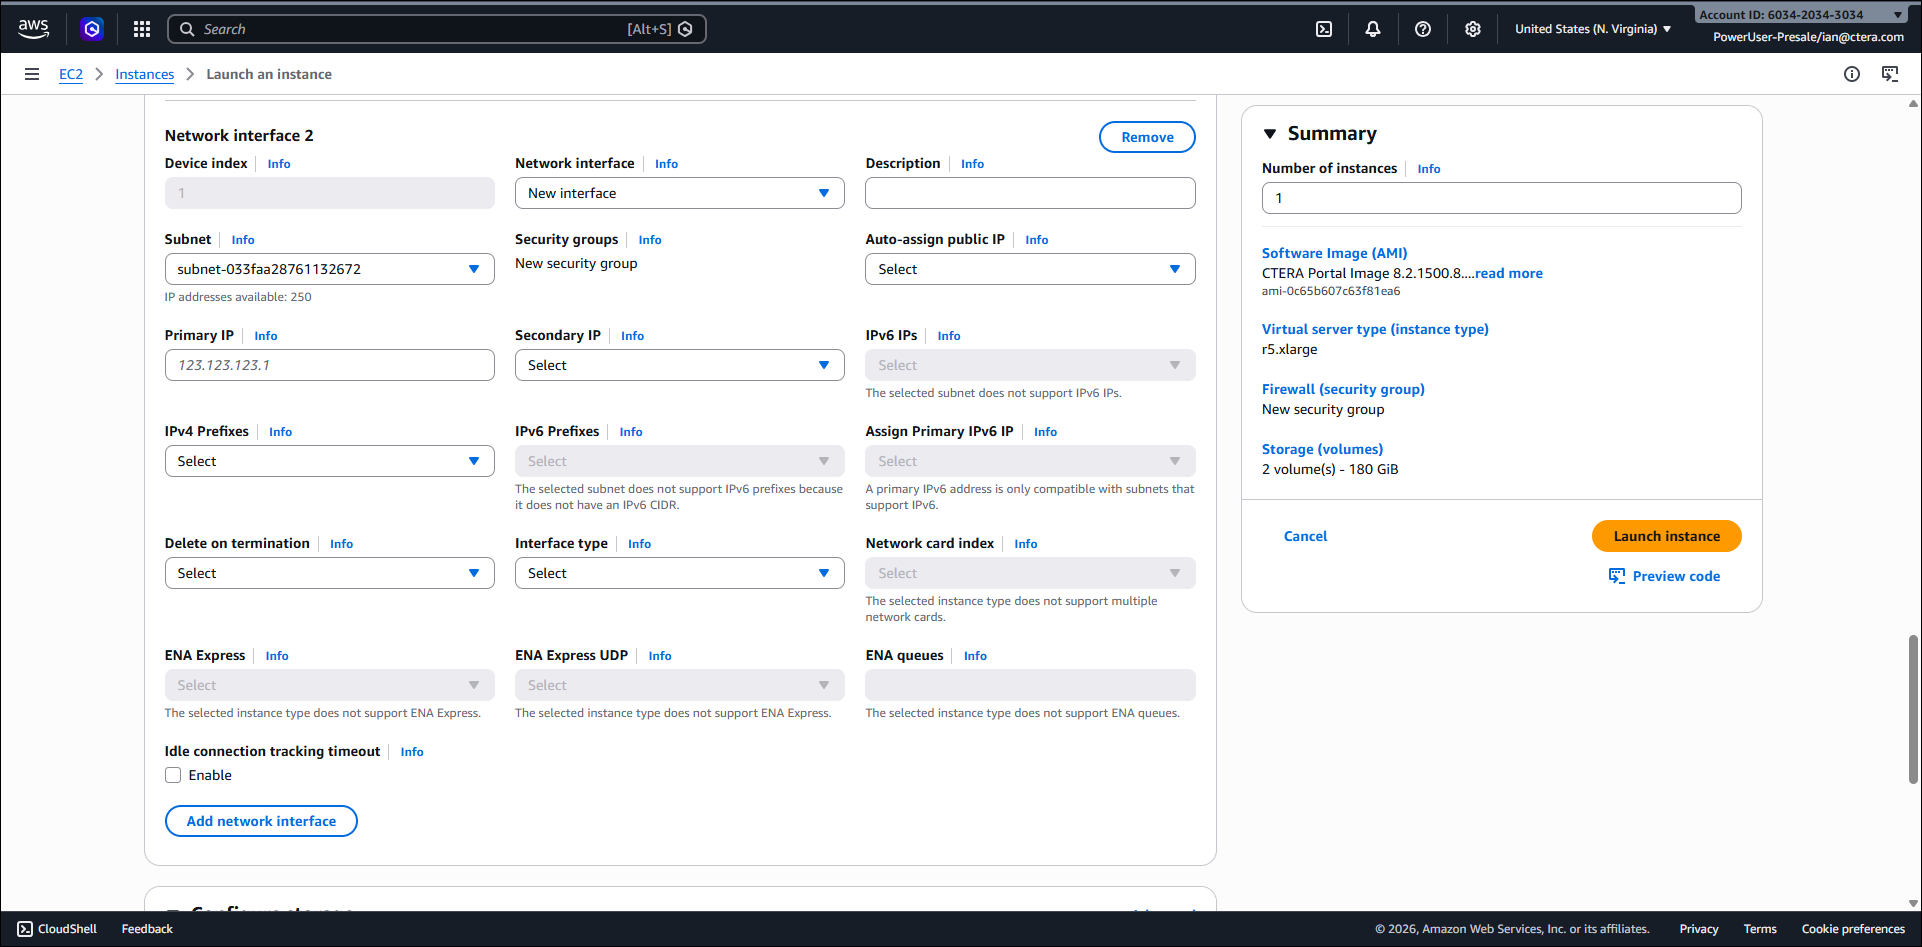
Click Advanced network configuration.
-
Click Add network interface.
-
In the Subnet field select a different subnet from the main network interface.
-
Add the relevant security groups.
-
Under Configure storage, click Advanced and then click Add new volume to add the volume:
Another row is displayed in the table.- In the Size (GiB) field, enter the size of the EBS volume.
The size of the volume depends on the server, as specified in Requirements. - In the Volume Type field, select the volume type. The volume type depends on the server, primary database server, secondary, replication server, preview server, application server, with or without the messaging server, as specified in Requirements. Where SSD is specified, choose General purpose SSD (gp3), otherwise choose Magnetic (standard) from the drop-down list.
- Record the Device name, such as
/dev/sdbfor the volume.
- In the Size (GiB) field, enter the size of the EBS volume.
-
Under Advanced details, select the IAM instance profile created in Setting CTERA Portal Resource Access in IAM.
-
In the Summary section specify the Number of instances you want to create using the specification.
NoteFor example, the primary, database, server and secondary, replication, server must both have the same configuration and therefore when defining the configuration for the primary, database, server CTERA recommends changiung the Number of instances to
2so that the secondary, replication, server is created at the same time as the primary, database, server with the same configuration. -
Review the summary and click Launch instance.
The virtual machine starts up and on the first start up a script is run to create a data pool from the data disk and then to load portal dockers on to this data pool. Loading the dockers can take a few minutes. -
After the instance is successfully launched, click the instance id link in the Success box.
The Instances page is displayed, showing the status of the instance. -
Wait until the Status check has finished and then click the Instance ID.
Information about the instance is displayed. -
Note the IP address displayed in either the Public IPv4 address field, when public access was required and a subnet accessible publicly was specified, or in the Private IPv4 addresses field, when the access is within the VPC.
NoteIf the script to create the data pool does not successfully run, it will start on every boot until it completes. The script has a timeout which means it will exit if the data pool is not created within the timeout after boot time. If the data pool is not created, dockers required by the portal are not loaded to the data pool.
To make sure that the script completed successfully, before continuing, run
docker imagesto check that the docker images are available, including zookeeper, which is the last docker to load to the data pool.If all the dockers do not load you need to run the script
/usr/bin/ctera_firstboot.shAlso, refer to Troubleshooting the Installation if the script does not complete successfully.
-
For the primary database server and the secondary, replication database, server, continue with Create the Archive Storage.
-
Start CTERA Portal services, by running the following command:
portal-manage.sh startNoteDo not start the portal until both the sdconv and envoy dockers have been loaded to the data pool. You can check that these dockers have loaded in
/var/log/ctera_firstboot.logor by runningdocker images -
Upgrade the portal server image and software to the latest version, as described in Upgrading the Portal Image and Software.
Create the Archive Storage
you need to create an archive pool on the primary database server and when PostgreSQL streaming replication is required, also on the secondary, replication database, server. See Using PostgreSQL Streaming Replication for details about PostgreSQL streaming replication.
To create the archive pool:
- Log in to the AWS Management Console and in the EC2 service click Instances > Instances in the navigation pane.
- Note the Instance ID of the server you want to add a new volume to.
- Click Elastic Block Store > Volumes in the navigation pane.
- Click Create volume.
- In the Volume Type field, select Magnetic (standard) from the drop-down list for the volume type.
- In the Size (GiB) field enter the size of the volume.
The size of the volume for the archive pool should be around 2% of the expected global file system size and at least 200GB. - In the Availability Zone field enter the availability zone specified for the server instance that you want to attach the volume to.
- Leave the other fields with their default values and click Create volume.
- In the Volumes page selet the new volume and click Actions > Attach volume.
- In the Instance field select the instance you created in Creating a Portal instance and noted at the beginning of this procedure.
- In the Device name field select a device name for the volume, such as
/dev/svdc - Click Attach volume.
- Click Instances > Instances in the navigation pane and selct the instance.
- Click Connect.
- Select the Session Manager tab and click Connect.
- Change to the root user by running the following command:
sudo -i - Run the following command to create the archive pool:
portal-storage-util.sh create_db_archive_pool Volume_ID
Where Volume_ID is the Volume ID of the volume you attached to the server instance, to use for the archive pool.
Troubleshooting the Installation
You can check on the progress of the docker loads in one of the following ways to ensure that all the dockers are loaded: The last docker to load is called zookeeper:
- In
/var/log/ctera_firstboot.log - By running
docker imagesto check that the docker images are available. - By checking if
/var/lib/ctera_firstboot_completedis present with the date and time when the installation was performed.
If all the dockers do not load you need to run the script /usr/bin/ctera_firstboot.sh