Managing Network Shares
- 10 Minutes to read
- Print
- DarkLight
- PDF
Managing Network Shares
- 10 Minutes to read
- Print
- DarkLight
- PDF
Article Summary
Share feedback
Thanks for sharing your feedback!
The Shares page allows you to manage all network shares on the CTERA Edge Filer, both for content that is synced with a CTERA Portal and content that is only available locally.
To define a network share:
In the Configuration view, select Shares > Shares in the navigation pane.
The Shares page is displayed.
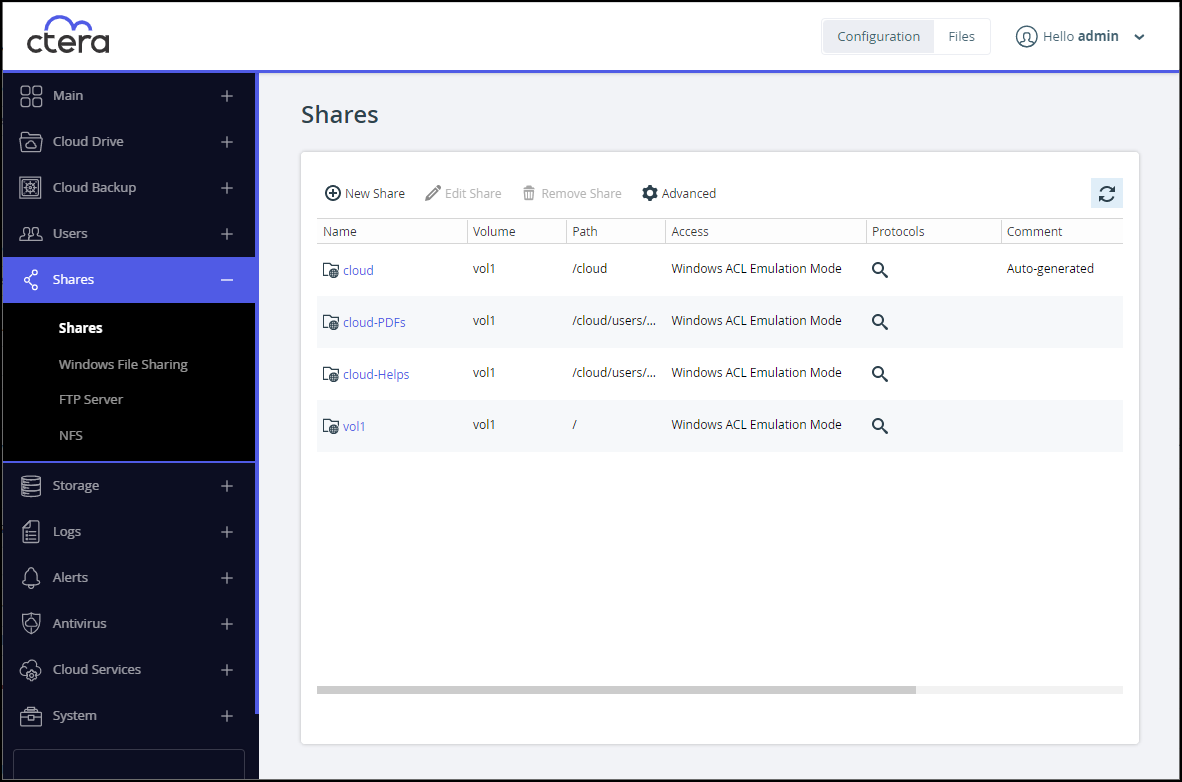
Click New Share.
The Select a Folder to Share window opens, displaying the volumes and folders on the CTERA Edge Filer.
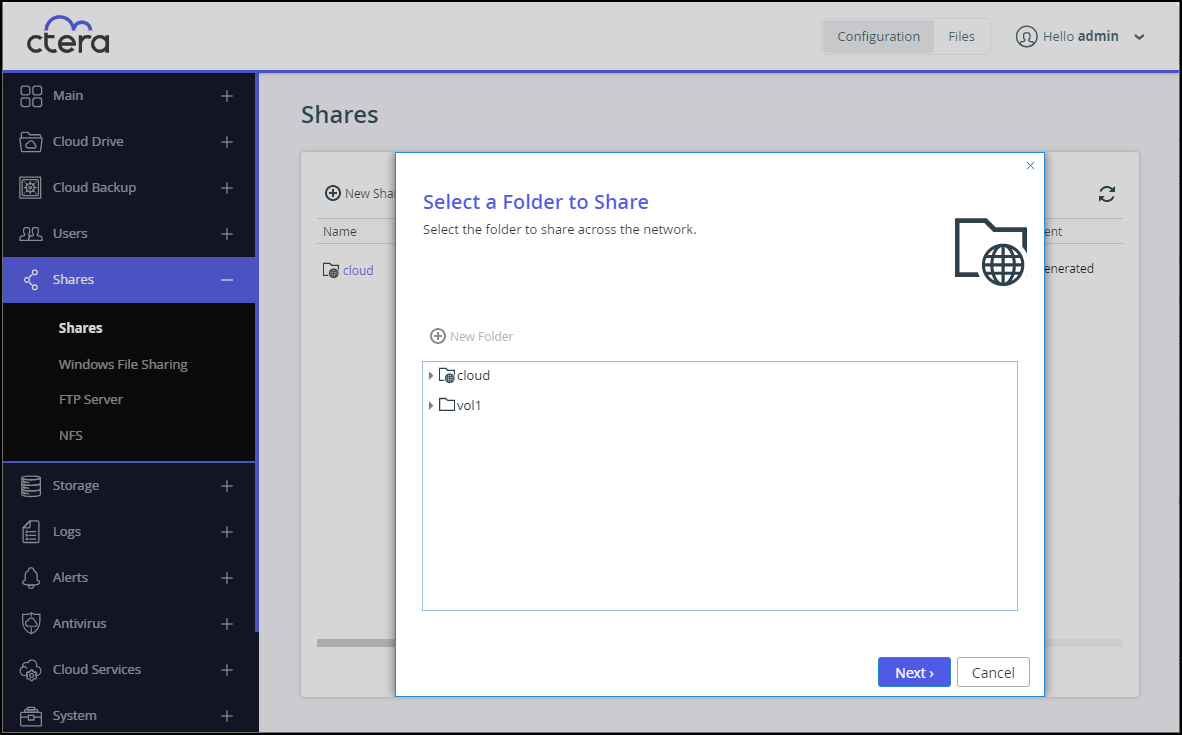
Select the volume, folder, or subfolder on which you want to define the share.
Subfolders, nested shares, are not available for Cloud Backup.- To create a new subfolder to select as a nested share, select the parent folder, click New Folder, and then assign the subfolder a name.
- You can define nested shares based on subfolders within the own cloud drive, which are available to users based on the permissions defined when creating the share. If the share has NT ACL settings, these settings are applied to the nested share and to every share below this share. For example, if the administrator has a personal cloud drive named MyGateway, to which he migrated a full old Windows File Server with the following structure:
If, before the Windows File Server migration,/Cloud /WIN-File-Server /Share1 /Share2 /My Files /Shared with me\\Win-File-Server\Share1and\\Win-File-Server\Share2shares were exposed in the old file server, users logged in to MyGateway can access the content of the shares:\\MyGateway\Share1 and \\MyGateway\Share2after they are defined:Share1 = \\MyGateway\Cloud\WIN-File-Server\Share1 Share2 = \\MyGateway\Cloud\WIN-File-Server\Share2
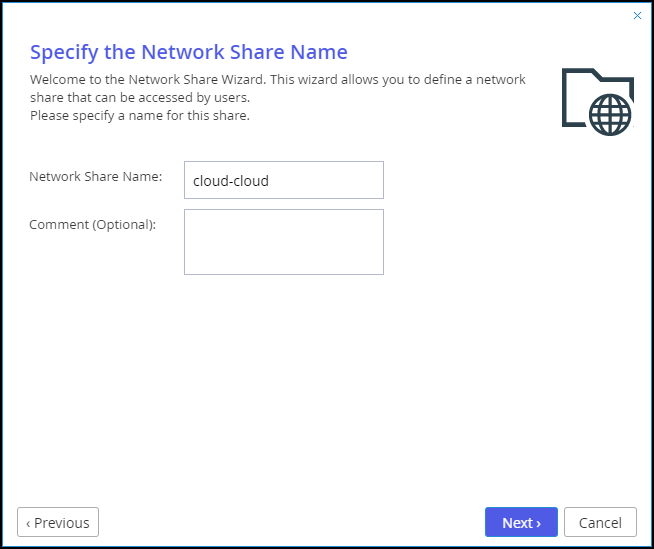
Click Next and then assign the network share a name.
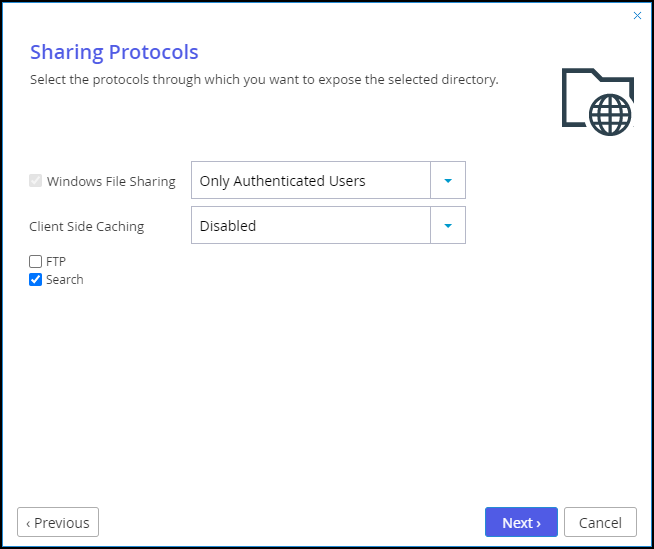
Click Next and choose through which sharing protocols to expose this share.
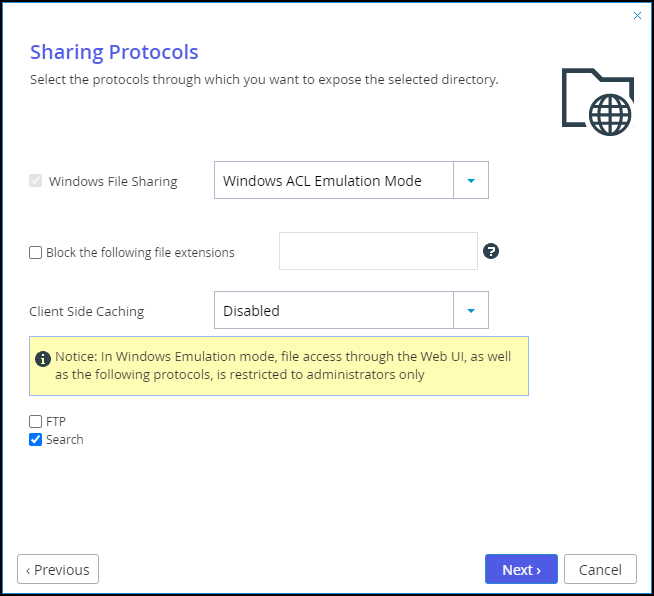
Windows File Sharing is checked by default and cannot be deselected. From the drop-down, select one of these access levels for the share:- Windows ACL Emulation Mode – The share will be a Windows ACL emulation mode share.
Users access the shared files and folders through standard Windows client computers; for example, using Windows File Explorer through the SMB access provided by the CTERA Edge Filer.
Windows ACL Emulation Mode also allows you to block users from writing specific file types into the CTERA Edge Filer share or gaining control of the content located on it.
To copy the files with their ACLs to the CTERA Edge Filer, see Copying Files From an External File Server to the CTERA Edge Filer. - Only Authenticated Users – Users will be required to authenticate using their CTERA Edge Filer user name and password, in order to access the network share.
For more information, see Configuring Windows File Sharing.
Block the following file extensions – Prevent the creation of files with the listed extensions, with each extension separated by a comma (,).
Client Side Caching – Server files are designated for off-line work so that a copy of the files is cached on the client computer and can be accessed when the client is off line in exactly the same way as if they were stored on the Windows file server.- Automatic caching for documents – A copy of the files is cached automatically.
- Disabled – The client computer cannot cache files locally and the updated copy must be retrieved from the file server.
- Manual caching for documents – Users must cache files manually.
- Windows ACL Emulation Mode – The share will be a Windows ACL emulation mode share.
Specify how you want to share the files.
FTP – Users will be able to access and download files on this share from the FTP site. To configure the FTP server, go to Shares > FTP Server.
Search – Users will be able to search for files in this share.Click Next.
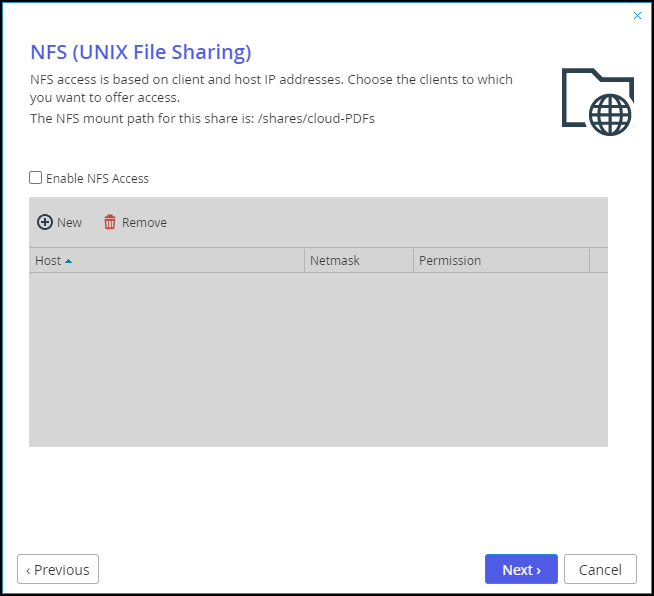
The NFS (UNIX File Sharing) window is displayed.
 Note
NoteThe NFS mount path for the share, when NFS access is enabled, is displayed.
Check the Enable NFS Access option to enable NFS clients to access the share. Both NFS versions 3 and 4 protocols are supported, depending on the protocol used by the client.
Either, click New to configure each client to which you want to grant access. A row is displayed in the table:- Enter the client's IP address and netmask in the appropriate fields.
- Select the permitted level of access to the network share via NFS. Options are None, PreviewOnly, Read Only, or Read/Write. Preview Only permission prevents downloading, copying, or printing the file and content cannot be synchronized for offline access.
Or,
Click Remove and then select the client's IP address to remove the client from the list.NoteThe NFS mount path for the network share is specified at the top of the window.
Click Next and set which users can access this network share.
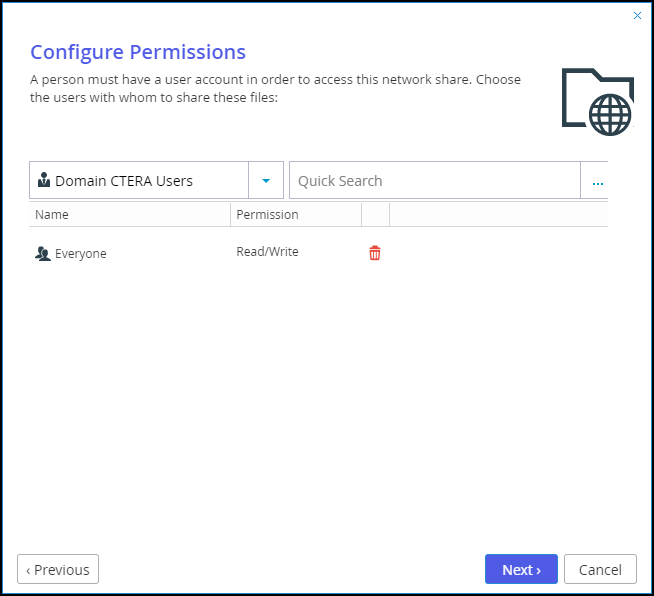
- In the Local Users drop-down list, select one of the following:
Local Users – Search the users defined locally on the CTERA Edge Filer.
Domain domain Users – Search the users belonging to the domain called domain.
Local Groups – Search the user groups defined locally on the CTERA Edge Filer.
Domain domain Groups – Search the user groups belonging to the domain called domain. - In the Quick Search field, type a string that is displayed anywhere within the name of the user or user group you want to add, or click
...to list the users.
A list of users or user groups matching the search string is displayed. - Select the user or user group in the table.
The user or user group is added to the list of users and user groups who should have access to the network share. - For each user and user group, click in the Permission field, and then select the access level from the drop-down list.
- In the Local Users drop-down list, select one of the following:
Click Next and then Finish to complete the wizard.


Blocking File Types from Network Shares
CTERA Edge Filer administrators can block users from writing specific file types into the CTERA Edge Filer share or gaining control of the content located on it. The file types that are blocked are set per network share.
When file types are blocked, share users cannot create files or write to files with a blocked extension or rename a file to a forbidden extension. However, if you block extensions for a pre-existing share that already contains files with the forbidden extension, the pre-existing files are not deleted.
To block files:
- In the Configuration view, select Shares > Shares in the navigation pane.
- Click New Share to create a new share with blocked file type, or Edit Share to block file types on an existing share.
- Proceed through the procedure to define a network share. In the Sharing Protocols window:
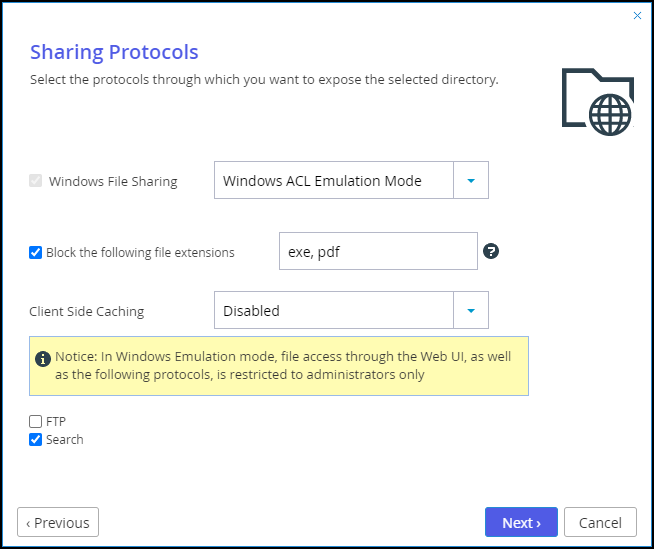
- Define the access level for Windows File Sharing as Windows ACL Emulation Mode. Users will be able to access the share using the SMB protocol and configure permissions for files and folders in the same way they would on a Windows file server.
- Select the Block the following file extensions check box, and then define the file extensions for the types of files you want to block.
You can block multiple file extensions, as shown in the image below. List only the letters of each file extension, using a comma to separate between them. For example, to block EXE files, list theexefile extension; to block PDF files, list thepdffile extension. To block both EXE and PDF files, list them asexe,pdf. Blocked extensions are not case sensitive.
Wildcards (for example,*.exe) are not supported.
- Click Next and continue with the wizard to create the new share or edit the existing share.

Copying Files From an External File Server to the CTERA Edge Filer
Note
To copy a whole file server (such as a Windows or NetApp file server) by migrating it to the CTERA Edge Filer requires in-depth planning and should be done in conjunction with CTERA support.
To copy individual shares from a file server, use the following procedure.
To migrate shares to the CTERA Edge Filer:
In the Configuration view's Main > Welcome page, click File Server Migration.
The File Server Migration page is displayed.Click + to create a new job.
The Create Job wizard is displayed showing the Task Type step.
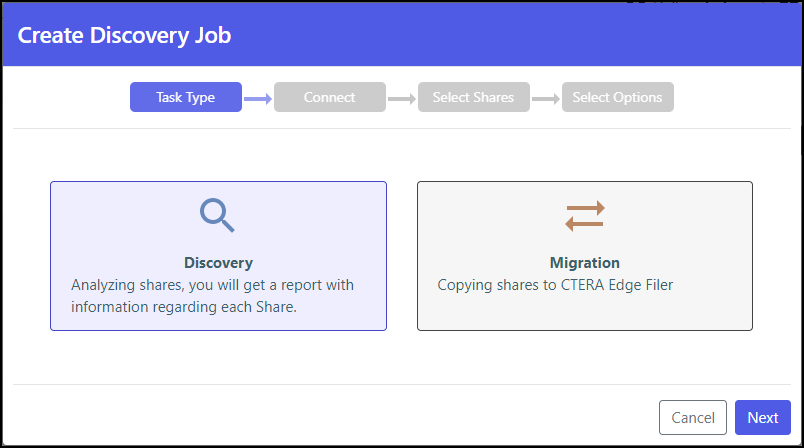
The default job is a discovery job.Click the Migration job to change the job to migrate a file server.
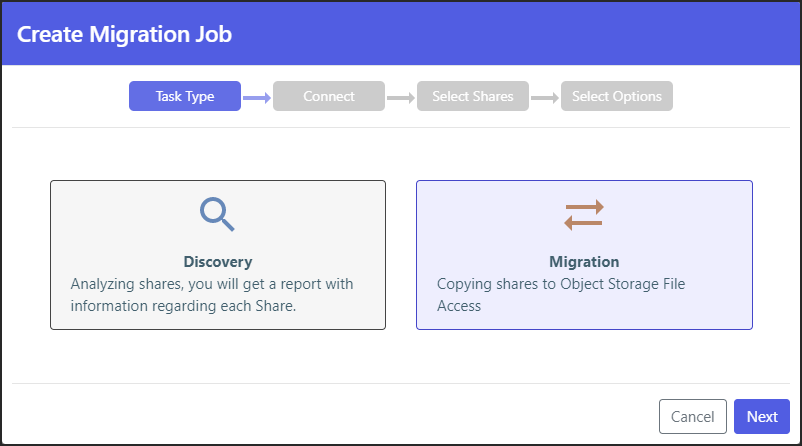
Click Next.
The Connect step is displayed.
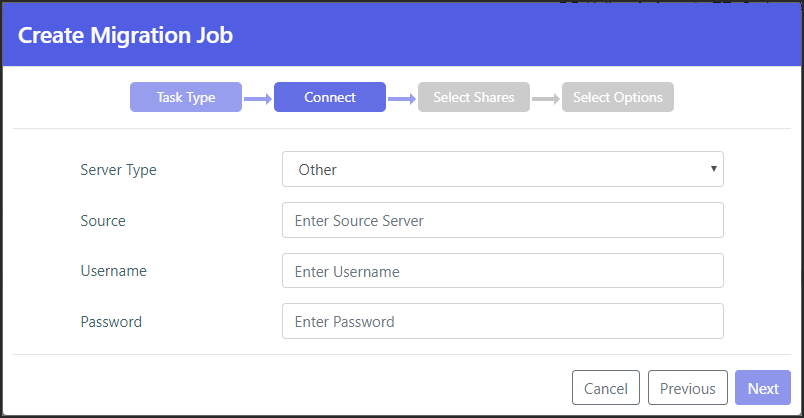
Select the server type to connect to from the drop-down box. You can connect to a Windows Server, NetApp ONTAP, Isilon OneFS, Panzura Freedom Filer, NetAPP StorageGRID 9 (SMB), and NetAPP StorageGRID1 (SMB), or another file server by selecting the Other option.
Enter the IP address or DNS name for the source file server and an administrator user name and password to access the filer server.
NoteThe administrator used must have access to the files to migrate.
Click Next.
The Select Shares step is displayed.
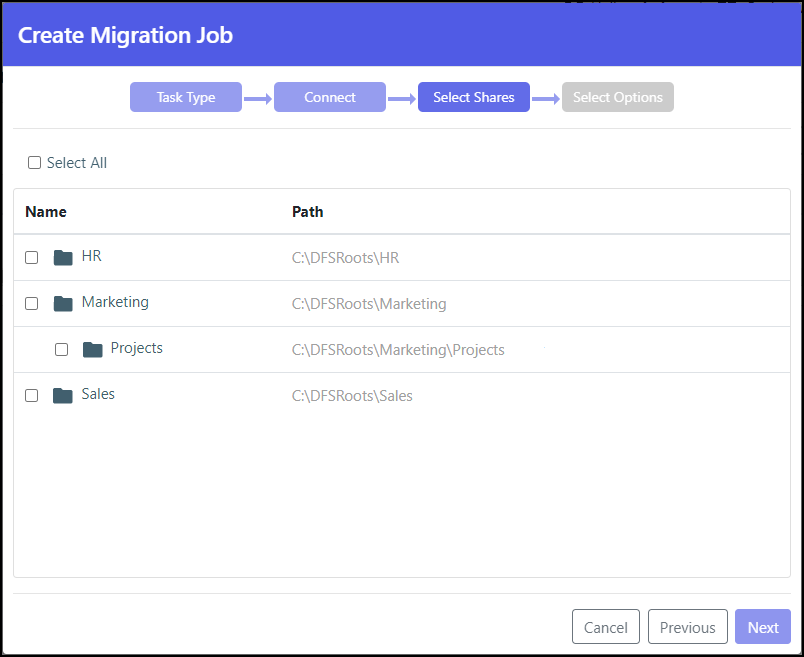
Select the shares to migrate and click Next.
The Select Options step is displayed.
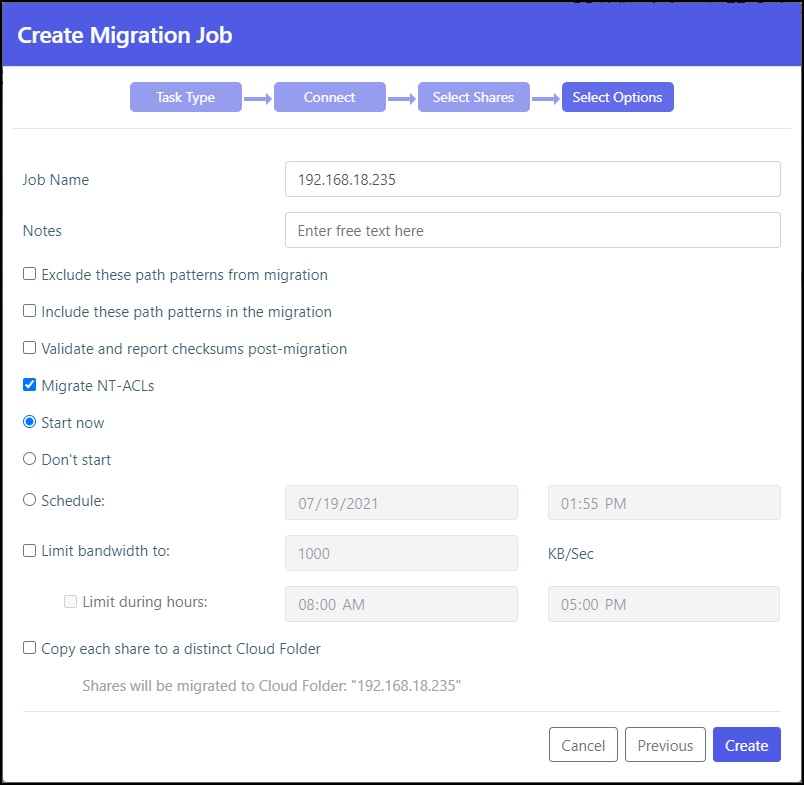
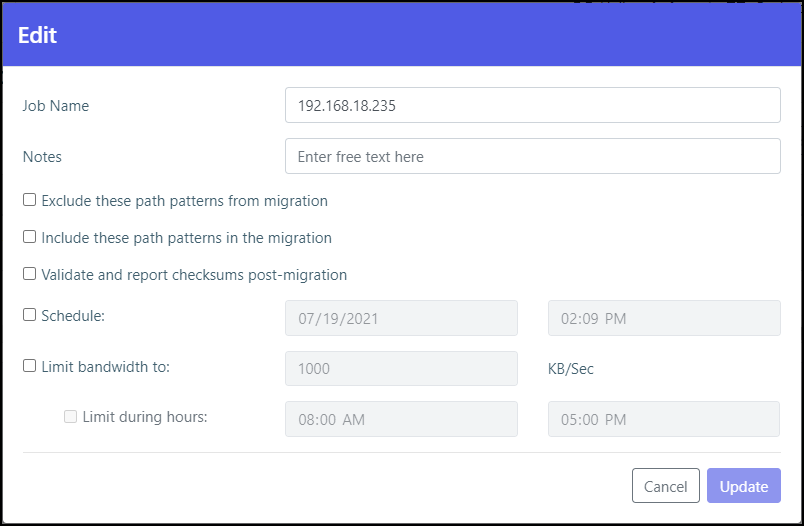
Optionally, provide a different name for the job and any specific notes about the job.
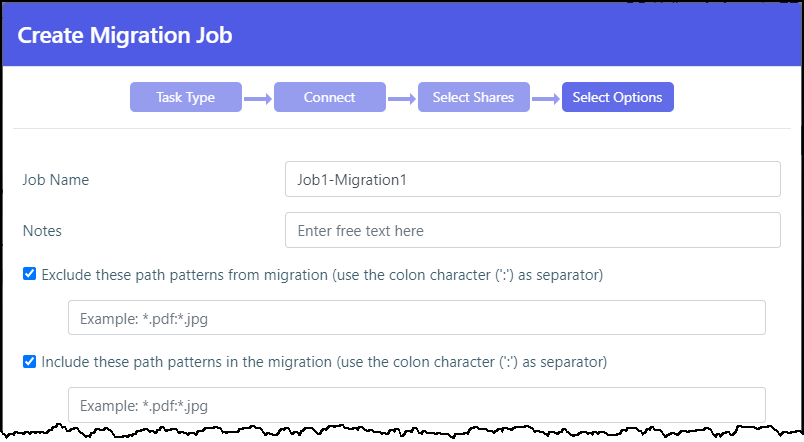
You can specify patterns that you do not want to migrate, or that you do want to migrate, separating each pattern with a colon (:). You can include the asterisk (*) as a wildcard in the pattern. To specify the pattern, check the relevant box.
- Exclude these path patterns from the migration (use the colon character (’:’) as a separator)
- Include these path patterns in the migration (use the colon character (’:’) as a separator)
To migrate specific folders in a share, instead of all the folders in the share:- Include the folders by specifying each folder path.
You can specify to include an MD5 hash checksum for every file being migrated to verify the migration was successful when the hash is compared with the checksum of the file in the source file server.
You can select to migrate the data from the file server with the ACLs.
You can specify when to start the migration, either immediately or at a scheduled date and time.
You can throttle the bandwidth used for the migration with the time range to apply this throttling so as not to adversely impact ongoing work.
Check Copy each share to a distinct Cloud Folder if you want to specify that each share is migrated to a distinct cloud folder.
The cloud folder where the cloud folders are migrated is displayed under the Copy each share to a distinct Cloud Folder checkbox.
When Copy each share to a distinct Cloud Folder is checked:- Jobs that were created in a previous version will continue to migrate into the cloud folder root directory.
- New jobs will create a redundant directory with the name of the source share into the cloud folder root directory, and migrate into it instead.
When Copy each share to a distinct Cloud Folder is not checked:
- Depending on the source exposing the data, either the full path in the original server is recreated and no files are migrated into the cloud folder root, or the share name is used under the cloud folder root as was the case in previous versions.
Click Create.
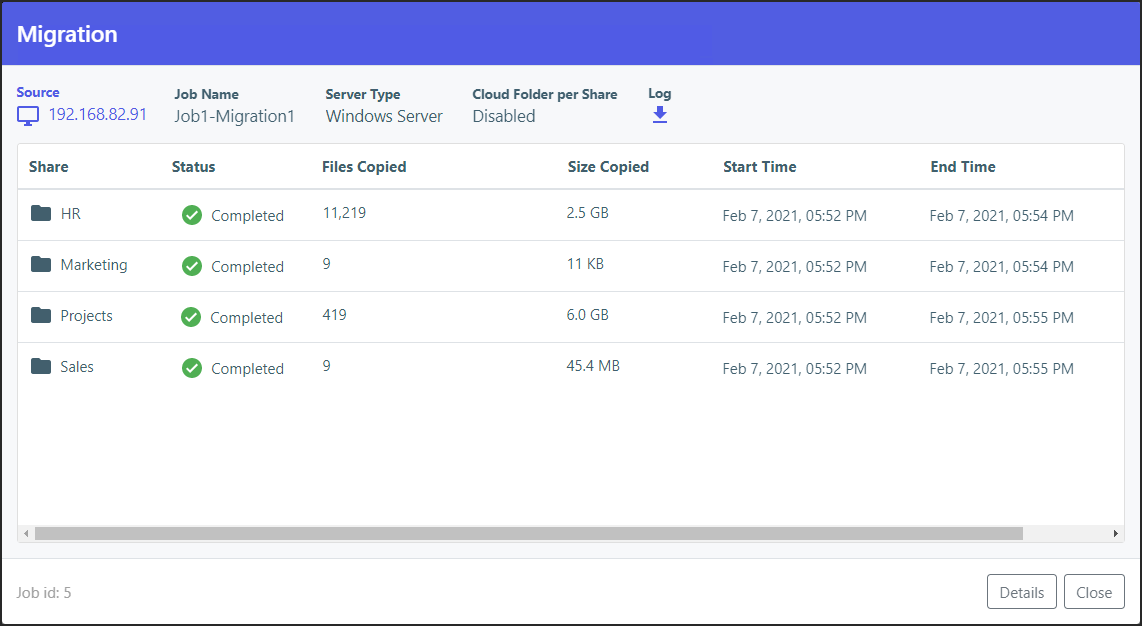
During the migration, the progress bar shows the percentage completed and what is currently being processed.
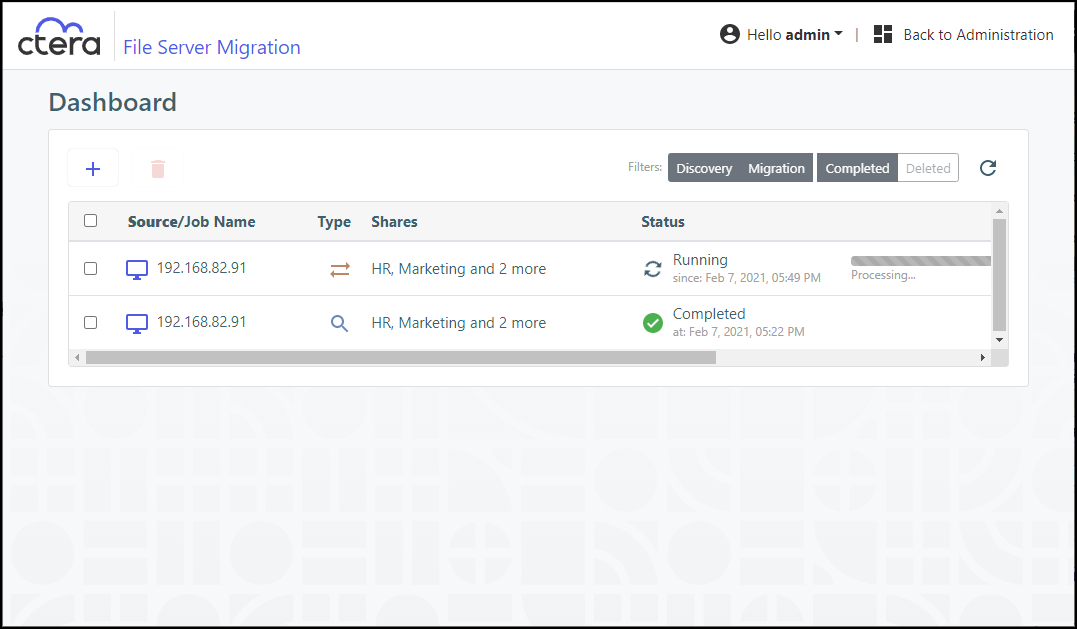
After migrating all the shares, the job completes and an email alert is sent with the job summary.
If needed, scroll to the end of the job for buttons to access the migration report and shares details.
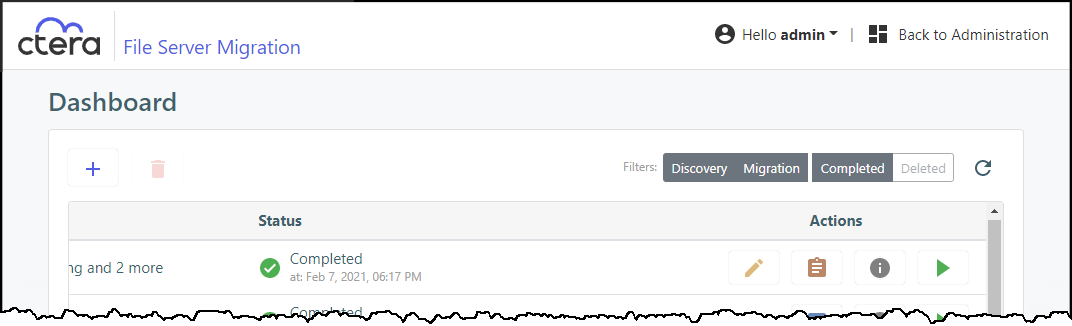
Click
 to edit the migration job name, notes, include and exclude paths, migration checksum schedule and throttling.
Click
 to display the migration report.
- Optionally, click
 to download the migration log file to a .log text file.
- Optionally, click
Click
 to display the list of every time this job was run with the results of each run, including the start and end times for the job, the number of files migrated and the total size of the migration, access to the report and the ability to download the log, which provides information about the migration and any errors that occurred during the migration.
Optionally, in the dashboard you can select a job and click
 to delete it.
After deleting a job, you can display all the jobs including the deleted jobs by clicking the Deleted filter in the dashboard.
You can restore deleted jobs by selecting the deleted jobs to restore and clicking .
.


 to edit the migration job name, notes, include and exclude paths, migration checksum schedule and throttling.
 to display the migration report.
 to download the migration log file to a .log text file.
 to display the list of every time this job was run with the results of each run, including the start and end times for the job, the number of files migrated and the total size of the migration, access to the report and the ability to download the log, which provides information about the migration and any errors that occurred during the migration.
 to delete it.
 .
.The share structure from the source is recreated on the CTERA Edge Filer, including nested shares and their permissions. If there are any recoverable errors during the copy process, retry the migration for the failed shares.
Note
Only ACLs are migrated with the files. Extended attributes are not migrated. In the CTERA Edge Filer the shares are defined with Windows ACL Emulation Mode.
Modifying Shares
Select the share and click Edit Share. Proceed as for defining a new network share.
Removing Shares
Select the share, click Remove Share and then Yes to confirm. This removes the share from the volume or folder it was defined on.
Was this article helpful?