Managing User Groups
- 1 Minute to read
- Print
- DarkLight
- PDF
Managing User Groups
- 1 Minute to read
- Print
- DarkLight
- PDF
Article Summary
Share feedback
Thanks for sharing your feedback!
The CTERA Edge Filer includes built-in user groups: Administrators, Read Only Administrators, and Backup-Operators. You can create additional user groups to meet your organization's requirements. It is possible to add each user to more than one group.
Warning
The built-in user groups must not be deleted.
CTERA Edge Filer administrators can create local groups with nested Active Directory groups. Nesting Active Directory groups within local groups is useful when addressing frequent changes in branch user hierarchies. The Backup-Operators group initially has no members and is for users who require access to backup files and folders, even if they do not have the correct ACL permissions.
To add or edit a user group:
- In the Configuration view, select Users > Groups in the navigation pane.
The Groups page is displayed.
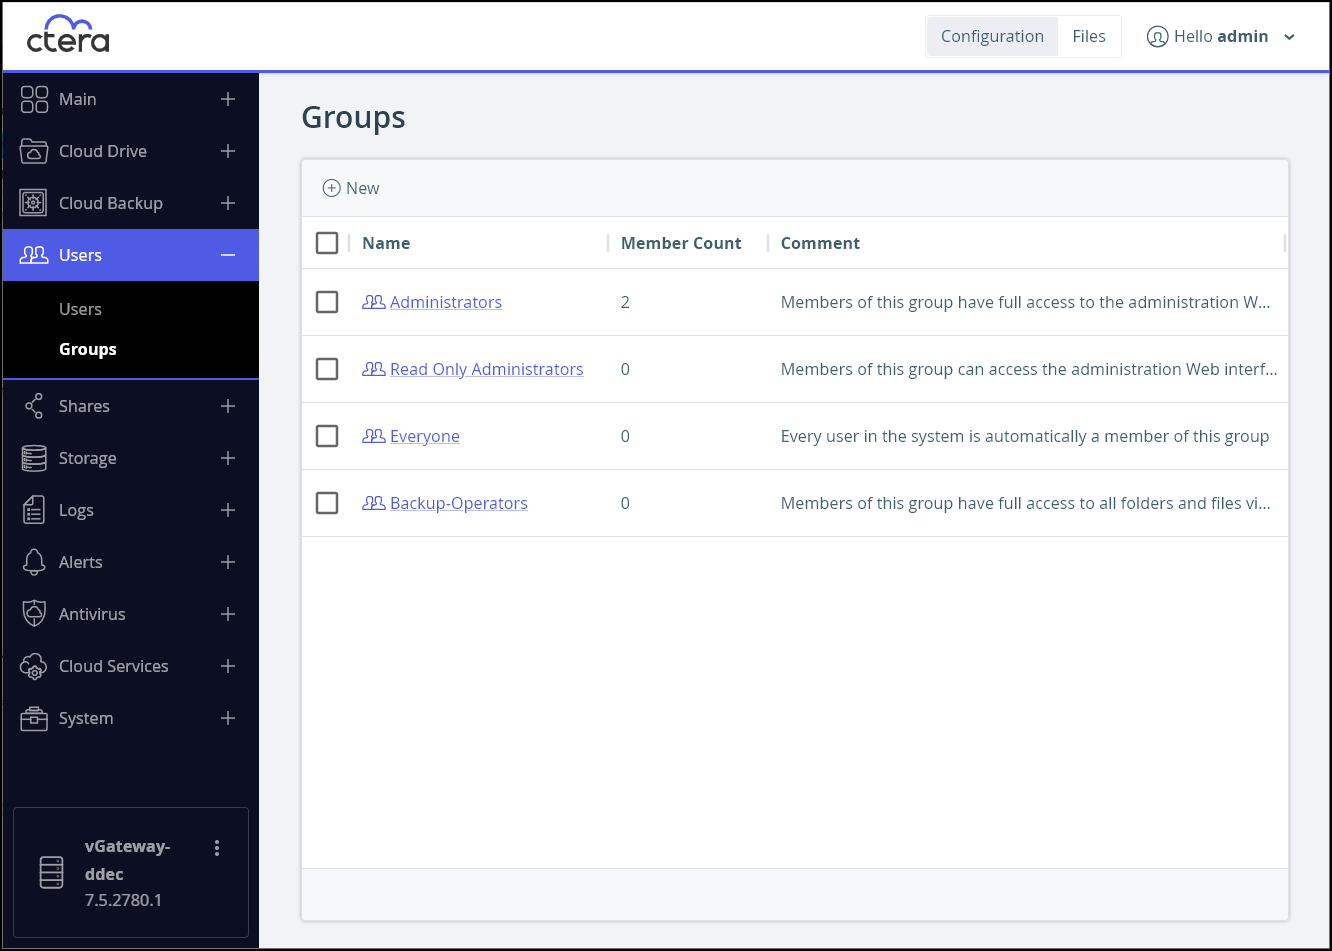
- To add a group, click New.
Or,
To edit a group, either click the group name or select the group row and click Edit.
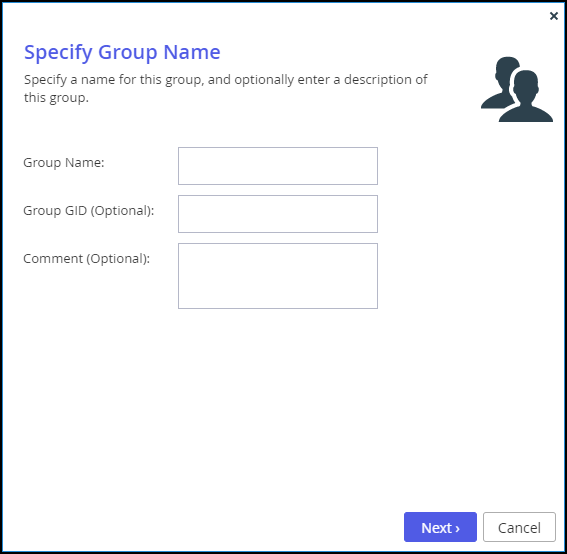
The Specify Group Name window is displayed. If you are editing an existing group, the window is displayed with the group details.
 Note
NoteYou cannot edit the Group Name of the built-in groups, such as Administrators and Read Only Administrators.
- Specify the group name and optionally, other details.
The following reserved names cannot be used:
Administrator, Backup Operators, Domain Admins, Domain Computers, Domain Controllers, Domain Guests, Domain Users, Guest, Guests, Network, Self, Service, UsersNoteUpgrading from a version that has one of these names as a group name causes a warning to be written to the log.
- Click Next and select the group members, either from Local Users, or from Domain domainName Users, or from Domain domainName Groups.
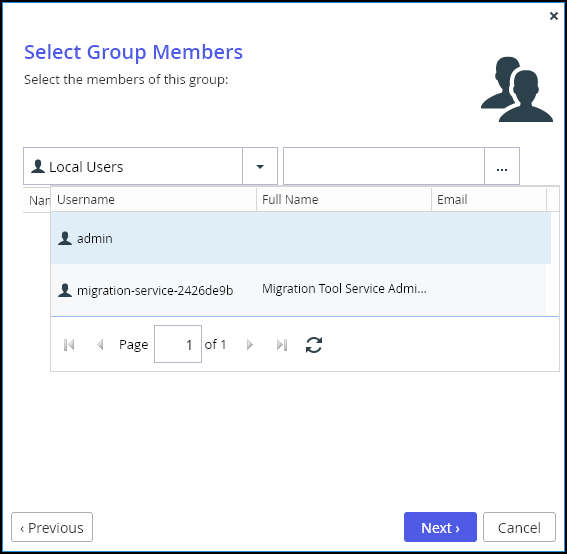
- Select the group whose member you want to include.
- Either start to enter a user name is the Quick Search text box or, click and select the user from the list.
- When you are done adding users, click Next and then Finish.


Deleting User Groups
To delete a user group, select the group row, click Delete, and then click Yes to confirm.
Notes
Deleting a user group does not delete the group members.
Built-in groups, such as Administrators and Read Only Administrators, cannot be deleted.
If the deleted user group had been granted access rights to network shares, the group members will no longer have access rights to those network shares. To assign individual users access rights to network shares, see Managing Local Shares.
Was this article helpful?