Setting Up the CTERA Edge Filer
- 5 Minutes to read
- Print
- DarkLight
- PDF
Setting Up the CTERA Edge Filer
- 5 Minutes to read
- Print
- DarkLight
- PDF
Article Summary
Share feedback
Thanks for sharing your feedback!
Setting the CTERA Edge Filer time and language, or enabling remote access from a CTERA Portal is performed from within the CTERA Edge Filer user interface.
Setting up the CTERA Edge Filer storage and users is described in Storage Setup and Adding and Editing Users, if this was not done during the initial CTERA Edge Filer set up. Configuring the CTERA Edge Filer for caching is described in Setting Up the CTERA Edge Filer For Caching.
Viewing CTERA Edge Filer Details
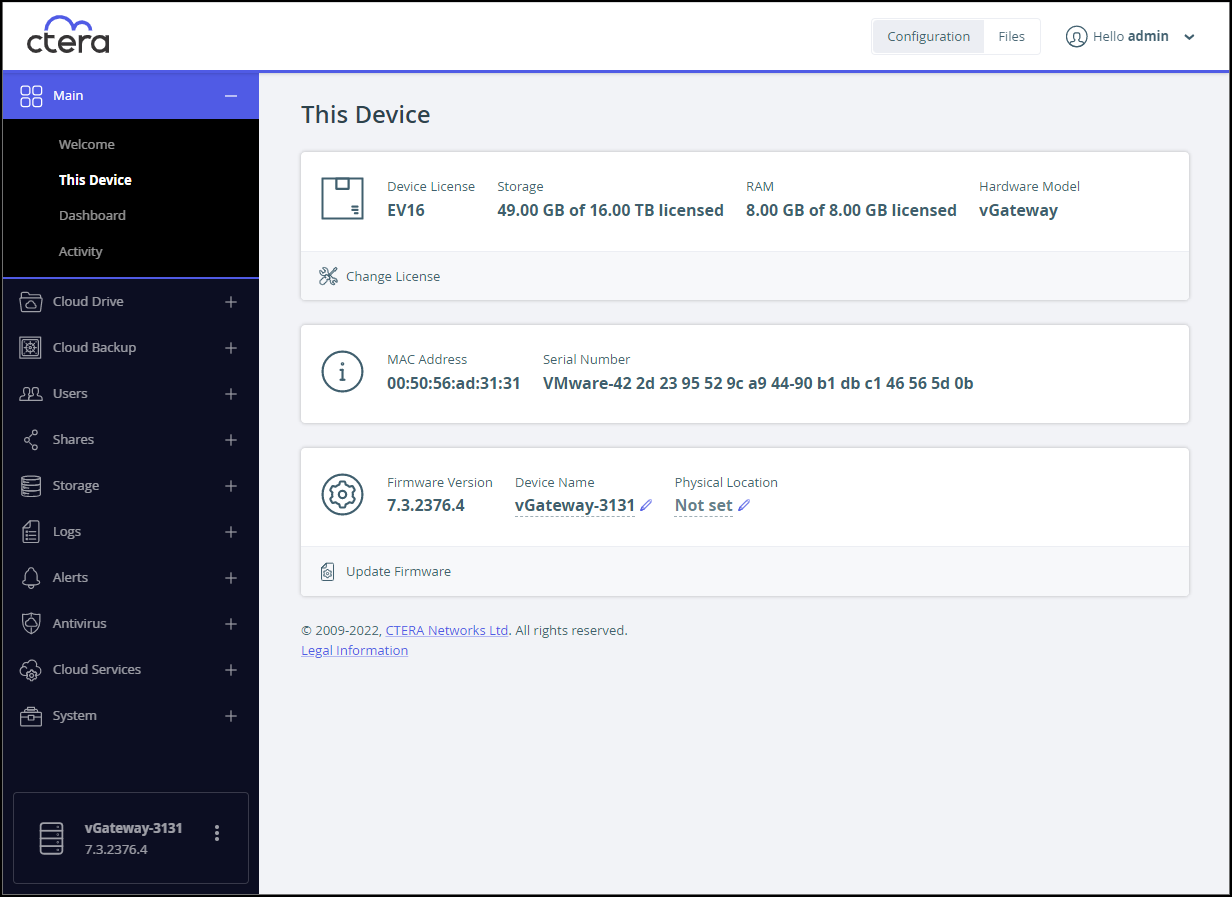
You can view general information about the CTERA Edge Filer, such as the storage used, license details, and the firmware version.
- In the Configuration view, select Main > This Device in the navigation pane.
The This Device page opens, displaying the product information.

Note
The Change License option under Device License is not displayed for a CTERA HC100 Edge Filer, which has an EV4 license.
Clicking Update Firmware opens the Firmware page, described in Updating the Edge Filer Version.
Setting a Name and Location to Identify the Edge Filer
The CTERA Edge Filer name is used as a unique identifier of this CTERA Edge Filer on the network. The name must be different than any other CTERA Edge Filer or PC on the network. The location field enables you to document the CTERA Edge Filer’s physical location, and is optional.
To configure the CTERA Edge Filer name and location:
- In the Configuration view, select Main > This Device in the navigation pane.
The This Device page opens, displaying the product information.
- To configure the CTERA Edge Filer's name:
- Next to the Device Name field, click the edit icon.
- Enter the name to represent the CTERA Edge Filer in the network neighborhood.
- Click the tick icon.
- Configure the CTERA Edge Filer's physical location.
- Next to the Physical Location field, click the edit icon.
- Enter the CTERA Edge Filer's location.
For example: “Delaware Branch Office”. - Click the tick icon.
Setting the CTERA Edge Filer Time and Date: Configuring NTP
You can configure the CTERA Edge Filer to obtain the time and date from an NTP server, or you configure the time and date manually.
To configure the CTERA Edge Filer time and date:
- In the Configuration view, select System > Regional Settings in the navigation pane.
The Regional Settings page opens, displaying the currently configured date, time, time zone, and language for the CTERA Edge Filer.

- Click Change date and time settings.
The Select Your Time Zone window is displayed.
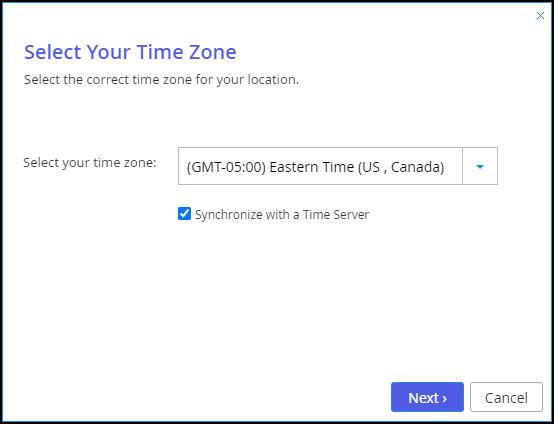
- Select the time zone.
- To synchronize the CTERA Edge Filer with an NTP server, select the Synchronize with a Time Server option.
If you want to manually configure the date and time, clear the Synchronize with a Time Server check box. - Click Next.
- If you chose to synchronize the CTERA Edge Filer with an NTP server, the Time Server Settings window is displayed with a list of time servers with which the CTERA Edge Filer will synchronize time and date settings.
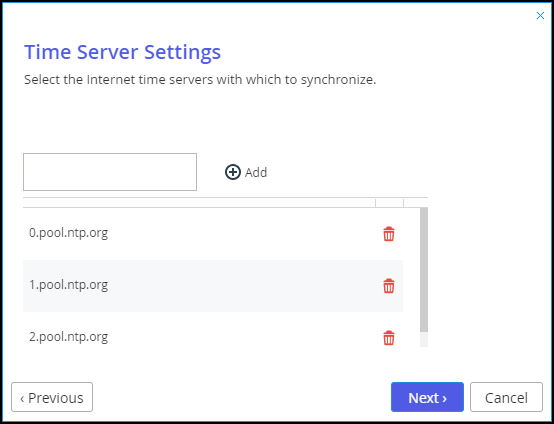
To add a time server to the list, enter the server's URL in the provided field, and then click Add.
To remove a time server from the list, click for the server to remove.
 - If you chose to manually configure time and date settings on the CTERA Edge Filer, the Adjust Date & Time window is displayed.
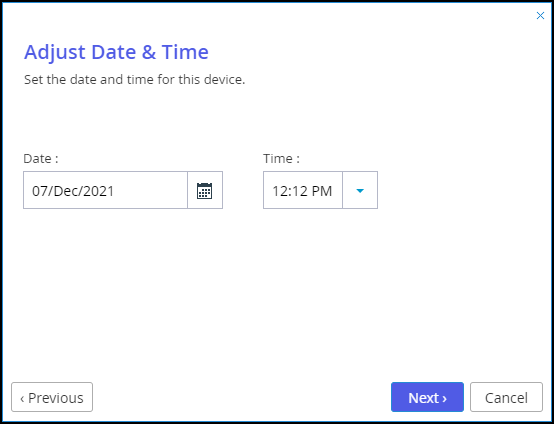
Do the following:- In the Date field, type the current date, or click to select the date from a calendar.
- In the Time drop-down list, select the current time.
- If you chose to synchronize the CTERA Edge Filer with an NTP server, the Time Server Settings window is displayed with a list of time servers with which the CTERA Edge Filer will synchronize time and date settings.
- Click Next and then Finish.


 for the server to remove.
Configuring the User Interface Language
You can configure the language to be displayed in the CTERA Edge Filer's user interface.
To configure the user interface language:
- In the Configuration view, select System > Regional Settings in the navigation pane.
The Regional Settings page opens, displaying the currently configured date, time, time zone, and language for the CTERA Edge Filer.

- Click Change Language.
The Change Language window is displayed. - Select the desired language from the drop-down list.
- Click Save.

Configuring Proxy Settings
The CTERA Edge Filer can be configured to connect to a CTERA Portal via a proxy server. HTTPS proxies that support the CONNECT method may be used.
To configure proxy settings:
In the Configuration view, select System > Network in the navigation pane.
The Network page is displayed.
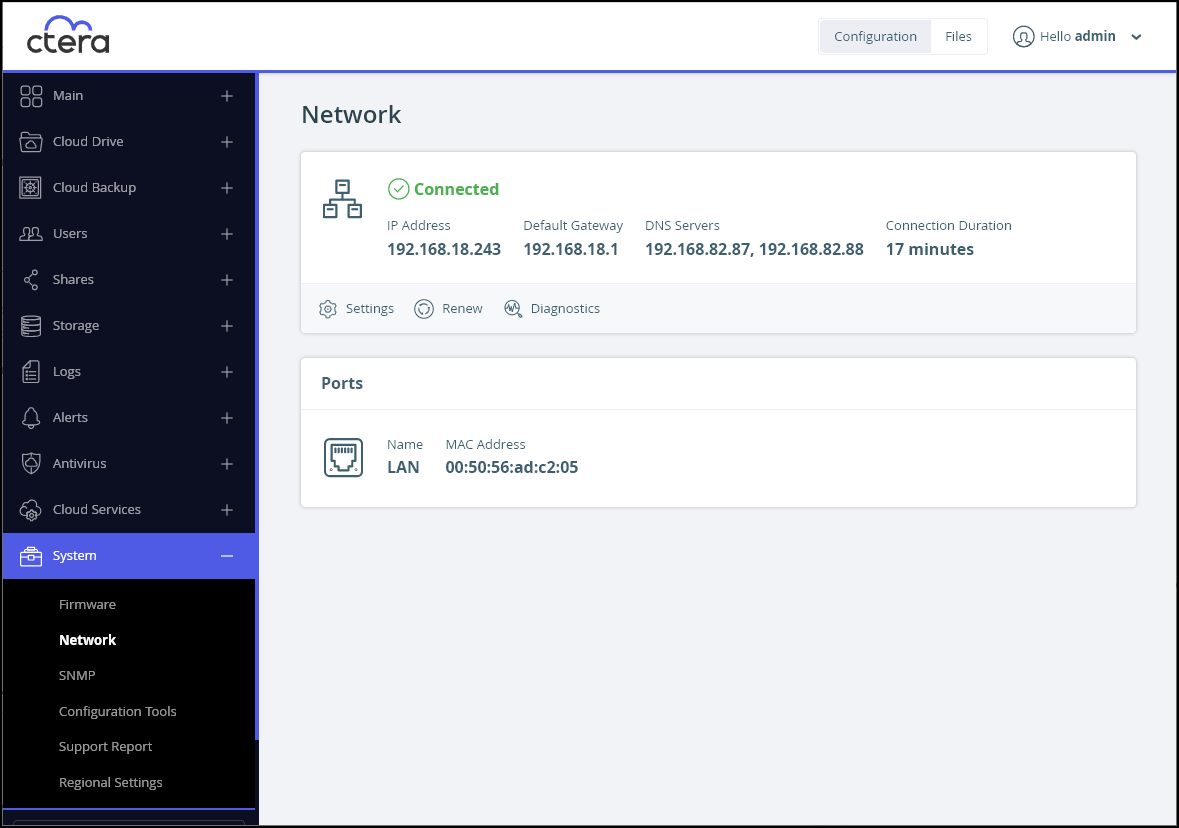
Click Settings.
The Network Configuration window is displayed.
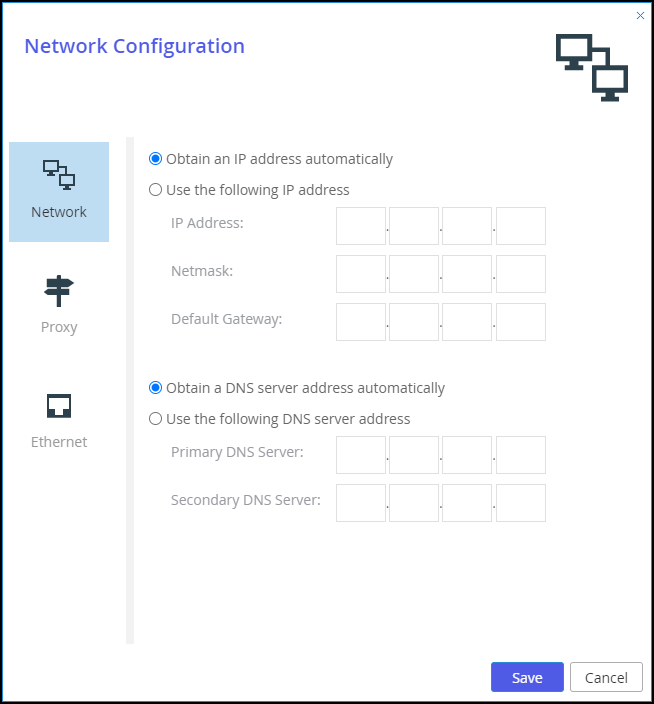
Select the Proxy option.
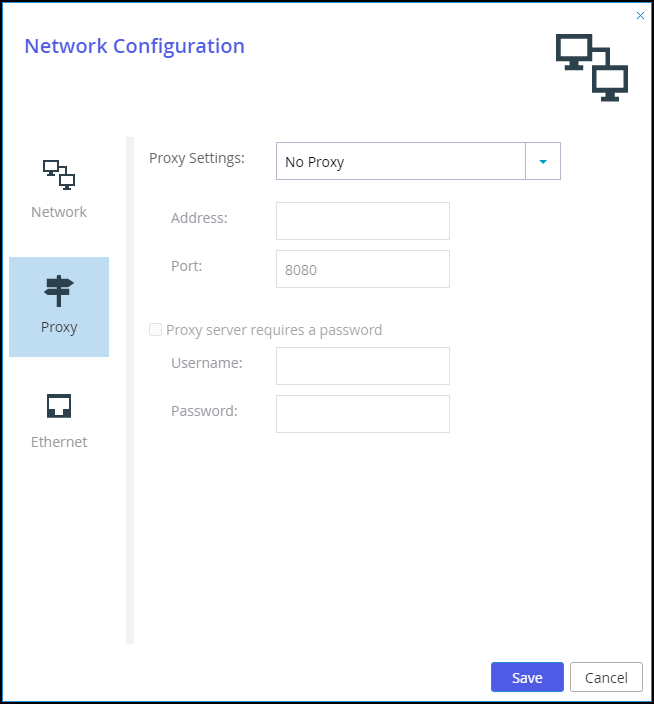
Specify the proxy settings.
Proxy Settings – Select Use HTTP Proxy and configure the appropriate settings:- Address – The address of the proxy server.
- Port – The proxy server port number.
Proxy server requires a password – Check to specify that the proxy server requires authentication via a username and password.
Username – The username for authenticating to the proxy server.
Password – The password for authenticating to the proxy server.Click Save.


Enabling Remote Access to the CTERA Edge Filer
When the CTERA Edge Filer is connected to a CTERA Portal, you can access the CTERA Edge Filer over the Internet by enabling Remote Access. Remote Access is a cloud service and when it is enabled, the CTERA Edge Filer is assigned a unique DNS name. You can then use this DNS name to access the CTERA Edge Filer anywhere, over the Internet.
You can always access the CTERA Edge Filer from within the local network, regardless of the Remote Access setting.
Note
You do not need to open any ports on the firewall in order to access the CTERA Edge Filer using the DNS name from a remote location.
To enable and disable remote access:
- Make sure that the CTERA Edge Filer is connected to a CTERA Portal. For details, see Connecting to a CTERA Portal.
- In the Configuration view, select Cloud Services > Remote Access in the navigation pane.
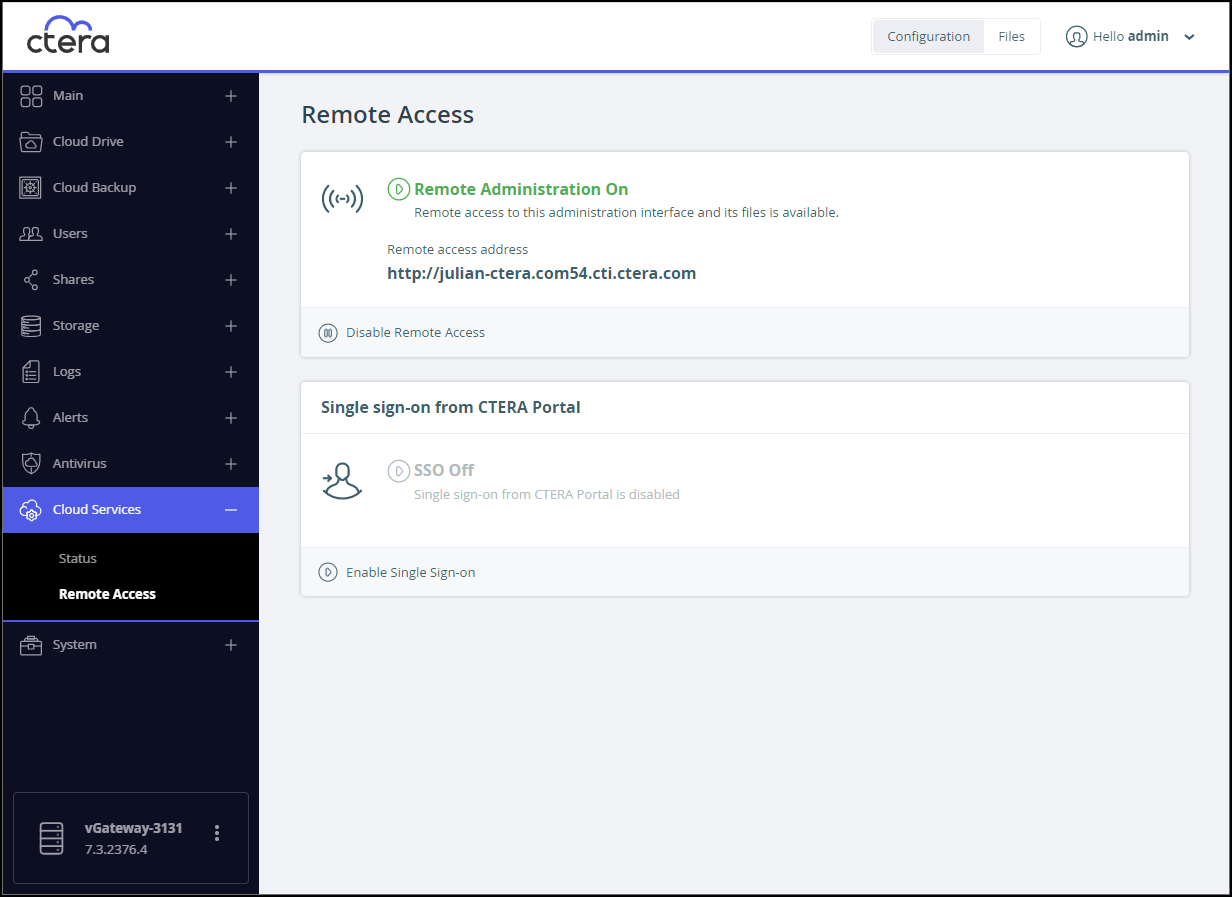
The Remote Access page is displayed.

- Click Disable Remote Access to disable remote access, or Enable Remote Access to enable remote access.

When enabled, a link to the administration interface is displayed. Use this URL link for remote access to the CTERA Edge Filer.
Allowing Single Sign-on from CTERA Portal
The CTERA Edge Filer user interface can be accessed by a logged in user from within the CTERA Portal user interface, without the user entering CTERA Edge Filer credentials. The user signed in to the CTERA Portal must be the same user as the CTERA Edge Filer user.
Note
If single sign-on using CAC, Common Access Card, has been enabled for the CTERA Portal, the CTERA Edge Filer must connect to the CTERA Portal using an activation code instead of the user and password credentials. For details, contact CTERA support.
To enable single sign-on to the CTERA Edge Filer:
- In the Configuration view, select Cloud Services > Remote Access in the navigation pane.
The Remote Access page is displayed.
- Make sure Enable Remote Access is set.
- Click Enable Single Sign-on to enable SSO from the CTERA Portal, or Disable Single Sign-on to disable SSO from the CTERA Portal.

Was this article helpful?