Setting Up the CTERA Portal with AWS Snowball
- 8 Minutes to read
- Print
- DarkLight
- PDF
Setting Up the CTERA Portal with AWS Snowball
- 8 Minutes to read
- Print
- DarkLight
- PDF
Article Summary
Share feedback
Thanks for sharing your feedback!
Note
To use AWS Snowball you must have CTERA Edge Filer 7.0.1783.22 or higher.
The AWS Snowball service is part of the AWS Snow Family and uses physical storage devices, Snowball Edge devices, to transfer large amounts of data between your on-premise storage and Amazon S3 storage in the cloud at faster-than-Internet speeds. By working with AWS Snowball, you can save time and money when ingesting large quantities of data from an edge filer to an AWS S3 storage node managed by a CTERA Portal. You install one or more AWS Snowball Edge devices on the same network as the CTERA Edge Filer so that the data is first moved from the CTERA Edge Filer to the Snowball Edge device and from there to the AWS account where it is managed by Amazon to move it to the appropriate AWS S3 storage bucket.
Note
Snowball is intended for transferring large amounts of data. If you want to ingest less than tens of terabytes of data, Snowball might not be your most economical choice.
An AWS Snowball Edge device can handle around 80TB of data. If you are transferring more than the maximum storage for a Snowball Edge device, you need multiple Snowball Edge devices. Each Snowball Edge device must be associated with a different AWS S3 bucket. Therefore, for each Snowball Edge device required, a separate Amazon S3 storage node is required, with each storage node associated with a different AWS S3 bucket.
After all the data has been written to the Snowball Edge devices it is transferred to Amazon, using an AWS courier and Amazon is responsible for populating the S3 buckets with the data. When the data is stored on multiple Snowball Edge devices, all the devices must be shipped at the same time.
You associate each Amazon S3 storage node defined in the CTERA Portal with an AWS Snowball Edge device.
To set up Snowball Edge devices:
- Refer to AWS documentation.
CTERA requires that each Snowball Edge device must be connected to a single AWS S3 bucket. You need to know for each server the respective bucket when you set up the CTERA Portal. Also, the Snowball Edge devices must be on the same network as the CTERA Edge Filer.
To set up Snowball usage in the CTERA Portal:
Calculate how many AWS Snowball Edge devices and Amazon S3 storage node are required. Divide the amount of storage to migrate to CTERA by the maximum usable storage possible on one AWS Snowball Edge device.
For example, if the existing file server holds 460TB of data you need 6 AWS Snowball Edge devices to handle the data and therefore 6 AWS storage buckets, with each storage bucket assigned an Amazon S3 storage node.NoteDeduplication and compression often reduce the final amount of storage required by the storage nodes at the end of the process.
Define the Amazon S3 storage node or nodes, one node for each AWS bucket.
In the global administration view, select Main > Storage Nodes in the navigation pane.
The STORAGE NODES page is displayed.
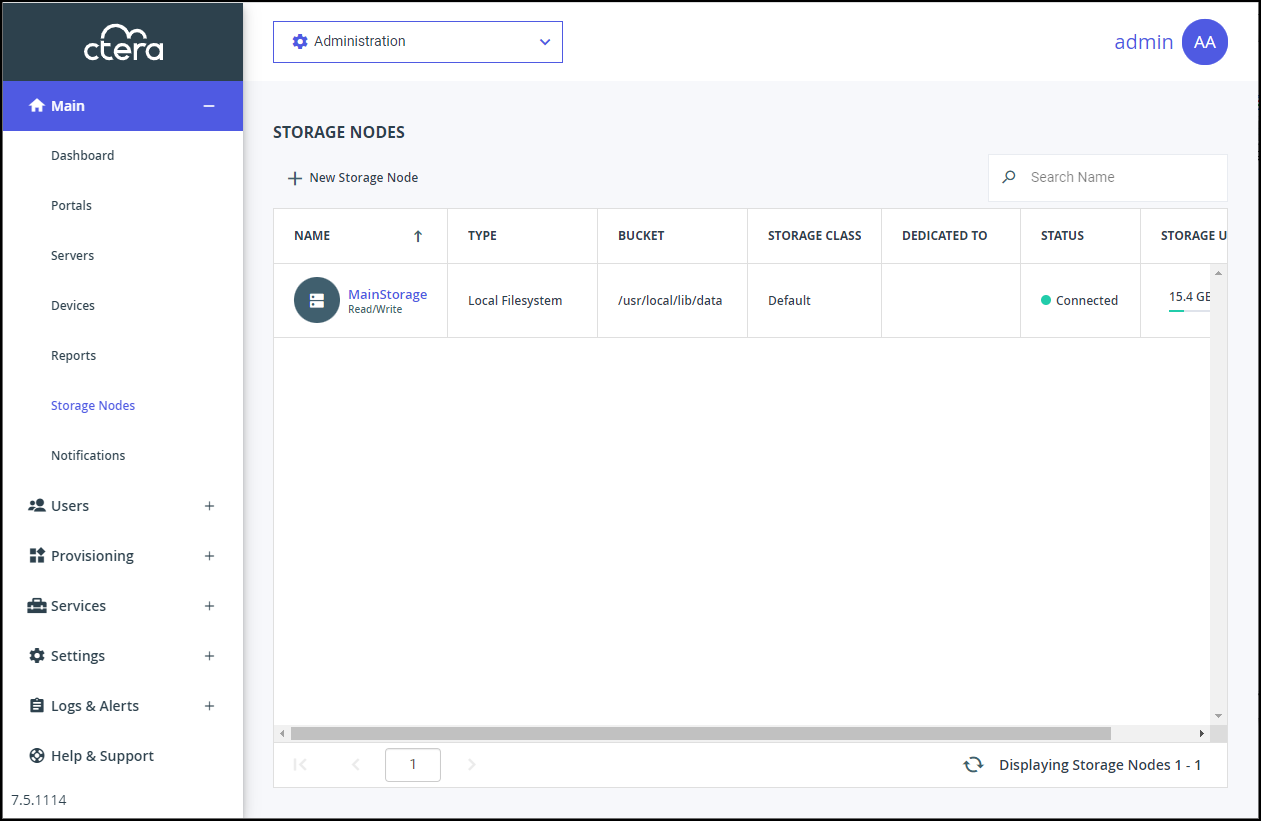
Click New Storage Node.
The New Storage Node window is displayed.Enter the generic details for the storage node.
Type – The type of storage node. Select Amazon S3 from the drop-down text box. As soon as you specify that the storage node is Amazon S3, an AWS Snowball option is added to the New Storage Node window.
Storage Node Name – A unique name to identify the storage node.
Dedicated to Portal – When using Snowball, you must dedicate the storage node to one virtual portal selected from the drop-down list.Complete the additional fields that are displayed.
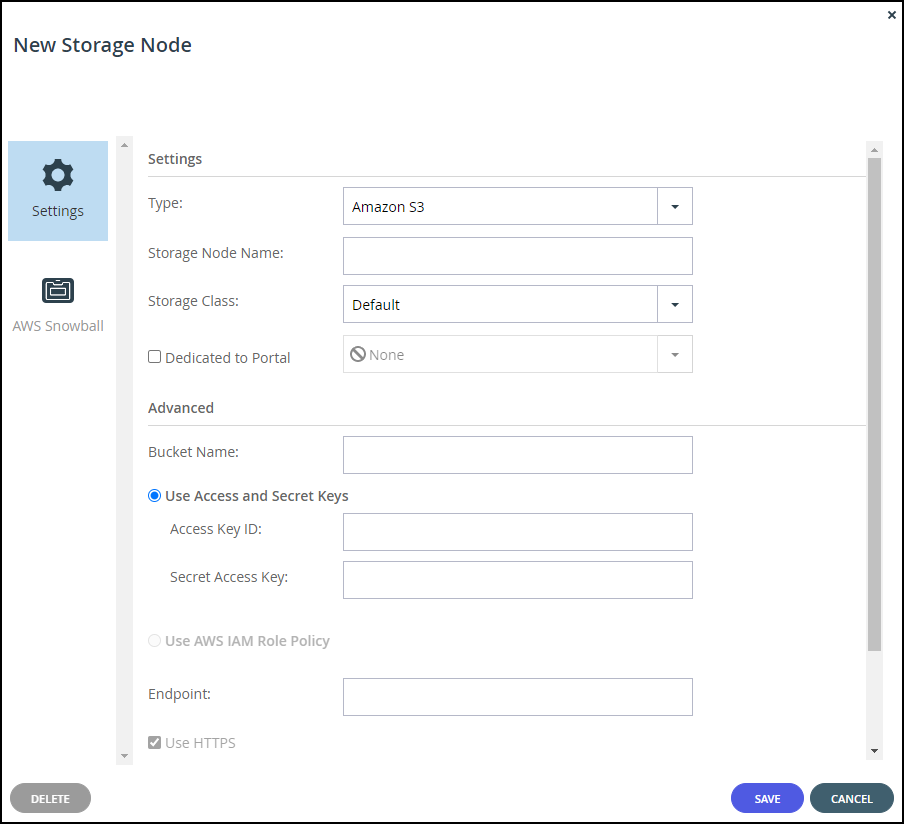
Bucket Name – The unique name of the Amazon S3 bucket that you want to add as a storage node.
Use Access and Secret Keys – Use Amazon S3 access credentials for the storage node. These are the credentials for the bucket in AWS S3, and not for the bucket on the Snowball Edge device.- Access Key ID – The AWS S3 access key ID.
- Secret Access Key – The AWS S3 secret access key.
Use AWS IAM Role Policy – When the portal is also running as an AWS EC2 instance, you can define an IAM policy and then assign this policy to an EC2 role which is then attached to the portal instance, via Instance Settings > Attach/Replace IAM Role in the AWS Management Console. If you set up this type of policy, you do not need to specify the Access and Secret keys to access the storage node. For an example IAM policy, see the Creating the IAM, Policy and Role for the Portal.
Endpoint – The private endpoint name of the S3 service. The port for the endpoint can be customized by adding the port after the URL, using a colon (:) separator. The default port is 80.
Use HTTPS – Use HTTPS to connect with the AWS S3 storage node.- Trust all certificates – Do not validate the certificate of the object storage. Normally this is unchecked.
Direct Mode – Data is uploaded and downloaded directly to and from the storage node and not via the portal. Direct mode must be defined for the storage node. CTERA recommends setting the deduplication method to fixed blocks and keeping the default 4MB fixed block size.
NoteOnce Direct Mode is set, the Use HTTPS option is also checked and cannot be unchecked.
Add Metadata Tags – For internal use. This must be unchecked.
Click AWS Snowball.
The AWS Snowball window is displayed.
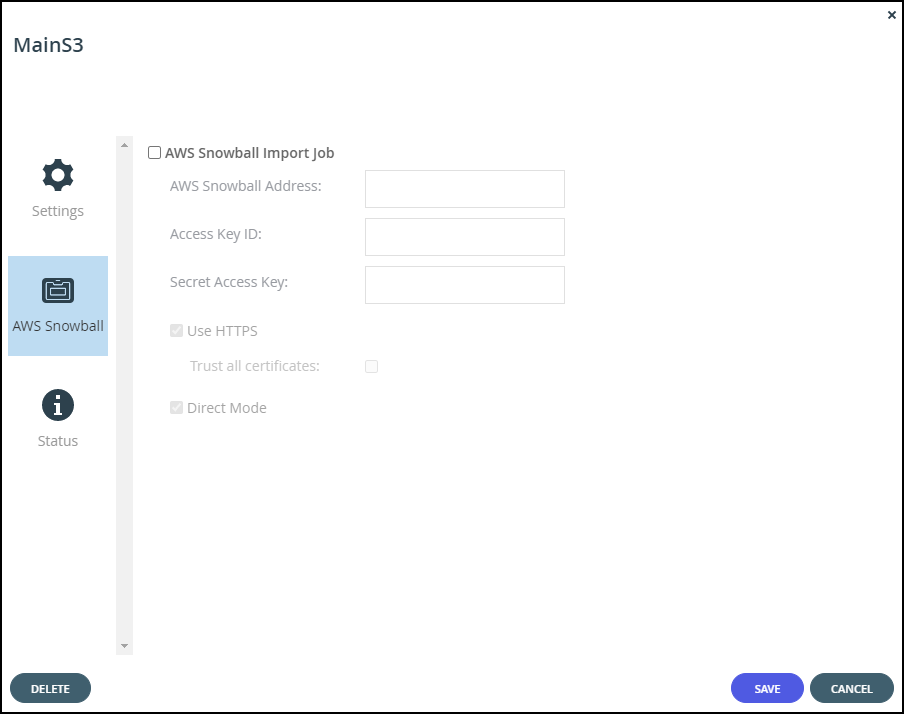
Check AWS Snowball Import Job and then specify the Snowball Edge device details:
AWS Snowball Address – The address of the Snowball Edge device, including the port, either 8443 when using HTTPS or 8080 when using HTTP.
Access Key ID – The AWS Snowball Edge device access key ID.
Secret Access Key – The AWS Snowball Edge device secret access key.
Use HTTPS – Use HTTPS to connect with the storage node. Only check this box if SSL is configured on the Snowball Edge device and you require high security. Typically, since the Snowball Edge device is on the local network this can be left unchecked.- Trust all certificates – Trust any security certificate installed on the Snowball Edge device. Since the Snowball Edge device certificate is typically untrusted, this should be checked.
Direct Mode – Data is uploaded directly to the Snowball Edge device. You cannot change this setting.
- Trust all certificates – Trust any security certificate installed on the Snowball Edge device. Since the Snowball Edge device certificate is typically untrusted, this should be checked.
Click SAVE.


When the edge filer is connected to the portal, you can optionally use CTERA Migrate to migrate the data from the existing file server to the edge filer, step 1 in the diagram, which then writes the data directly to the Snowball Edge devices, step 2 in the diagram. At the same time the edge filer writes the metadata to the CTERA Portal, step 2 in the diagram.
Note
While the data is being written to the Snowball Edge devices, it can be accessed from the edge filer but not from the portal or other edge filers which do not have access to the Snowball Edge device. If you want to access the data from the edge filer, you have to disable streaming of data until the data has been fully moved to the CTERA Portal, step 5 in the diagram, described in Managing Streaming to the CTERA Edge Filer.
After all the data has been written to the Snowball Edge devices it is transferred to Amazon, using an AWS courier, step 3 in the diagram. Amazon is responsible for populating the S3 buckets with the data, step 4 in the diagram. When the data is stored on multiple Snowball Edge devices, all the devices must be shipped at the same time.
Note
While the data is being transferred to Amazon and moved in to the S3 buckets, it cannot be accessed from any edge filer nor from the portal.
When the process is complete the job completion report is available from the AWS Management console. Verify that the job completed successfully, from the job report, or if there were errors, check these errors in the Download failure log. For details, refer to AWS documentation.
After Amazon completes the job of moving your data into the S3 buckets, you must uncheck AWS Snowball Import Job in each of the storage nodes.

Unchecking AWS Snowball Import Job causes the Amazon S3 storage nodes to be treated as standard storage nodes so that the data can be accessed from the portal and any edge filer, agent or mobile device connected to the portal.
Warning
If you keep AWS Snowball Import Job checked, files that have blocks on the storage node checked as Snowball will be inaccessible from the portal or from any CTERA Edge Filers, agents and mobile devices connected to the portal.
After the migration has completed, optionally define all the Amazon S3 storage nodes as read-only except for one which will remain a read/write node.
To optionally define storage nodes as read-only:
- In the global administration view, select Main > Storage Nodes in the navigation pane.
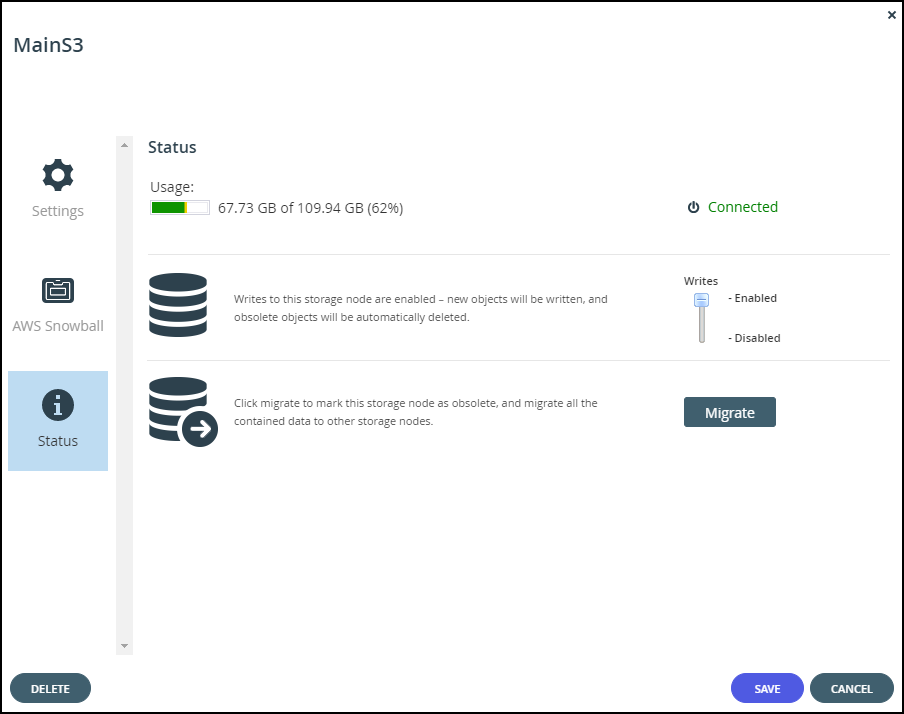
The STORAGE NODES page is displayed. - For each Amazon S3 storage node, except for one, click the Status option.
- Move the Writes slider to Disabled.

Managing Streaming to the CTERA Edge Filer
While the data is being written to the Snowball Edge devices, it can be accessed from the edge filer but not from the portal or other edge filers which do not have access to the Snowball Edge device. If you want to access the data from the edge filer, you have to manage streaming data.
To manage streaming data:
- Run the following CLI in the edge filer:
set /config/cloudsync/cloudExtender/minFileSizeForStreamingInMB 2147483646NoteSee Use the Gateway Command Line Interface (CLI) for details about running CLI commands in an edge filer.
After the data has been moved to the CTERA Portal, enable streaming from the CTERA Portal by running the following CLI in the edge filer: set /config/cloudsync/cloudExtender/minFileSizeForStreamingInMB 10
Was this article helpful?