To set up the Thumbnail service:
-
In the global administration view, select Main > Storage Nodes in the navigation pane and make sure that the storage nodes used support Direct Mode.
-
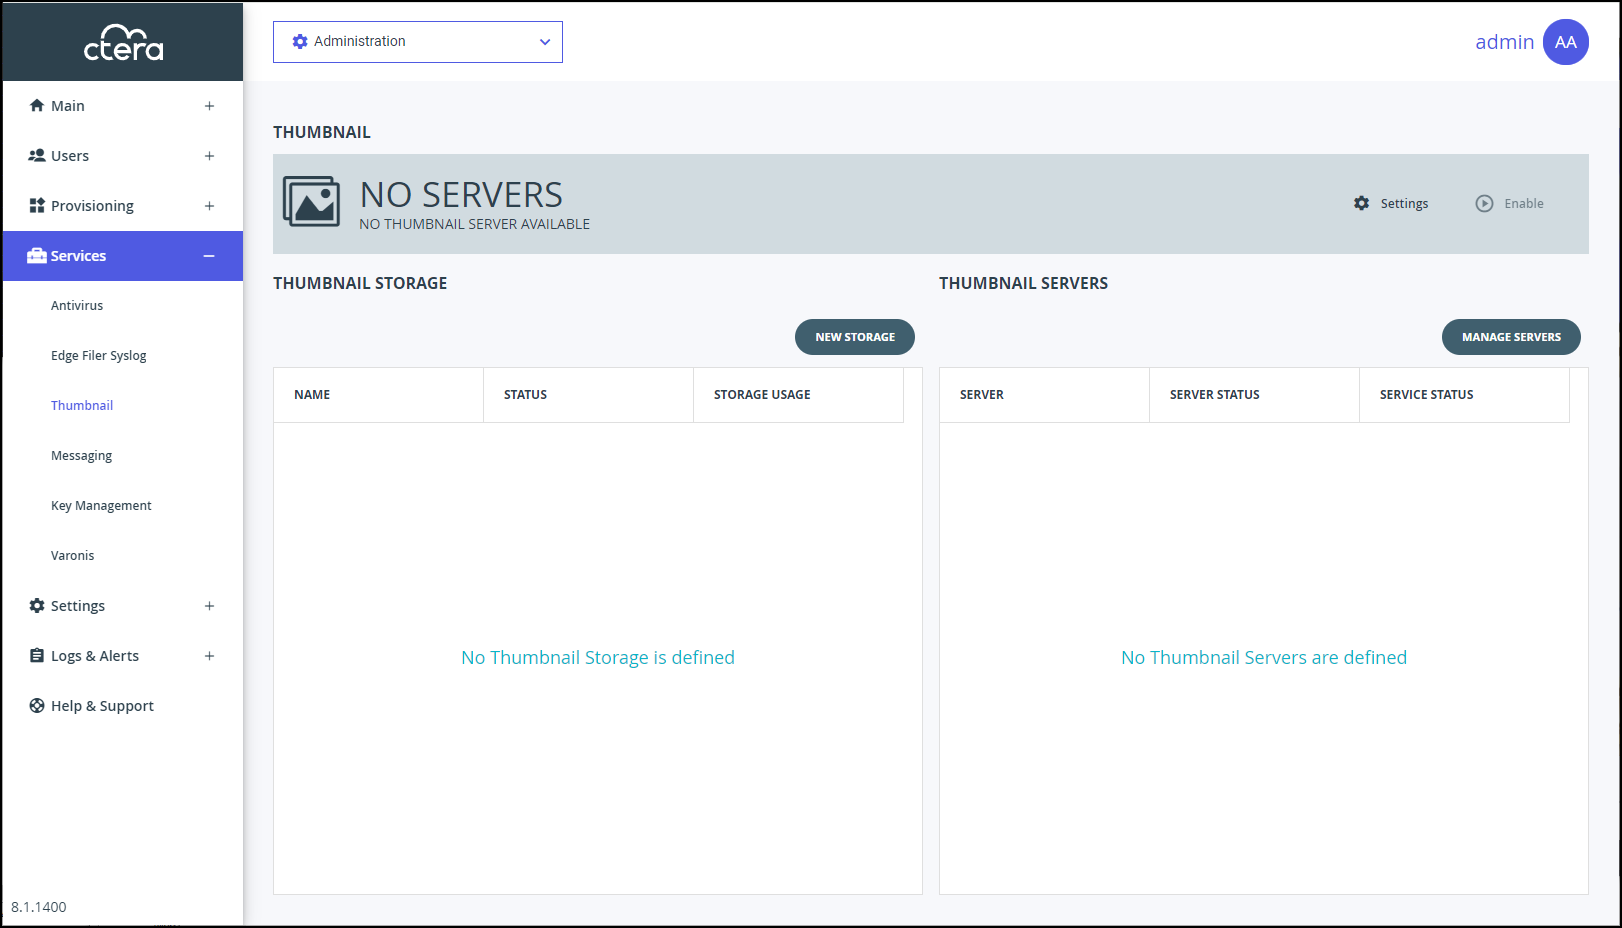
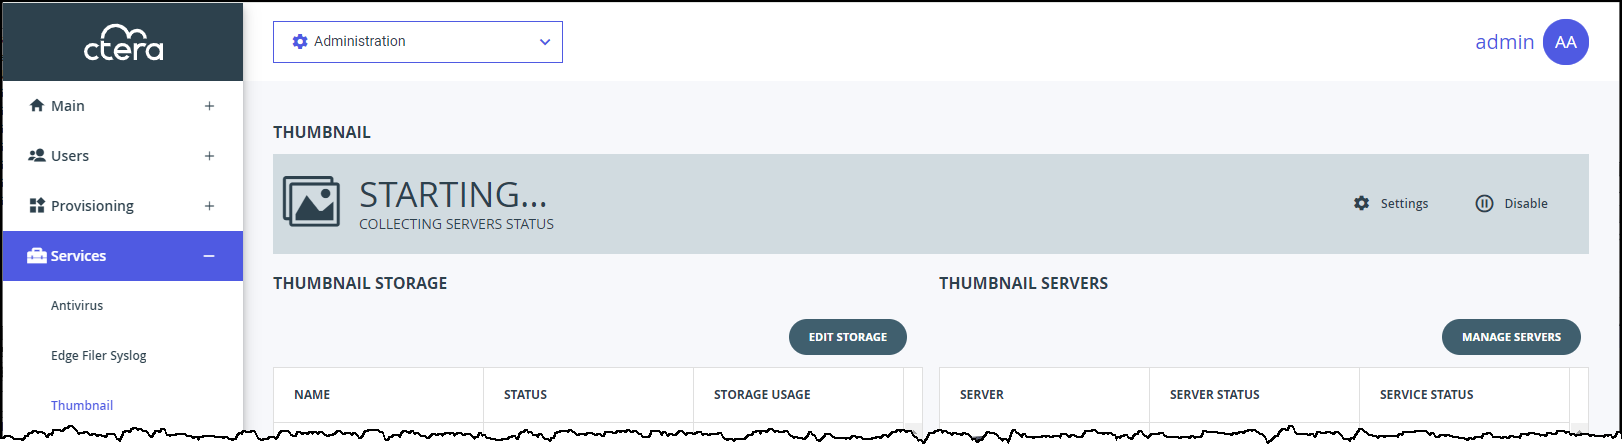
In the global administration view, select Services > Thumbnail in the navigation pane.
The THUMBNAIL page is displayed.
-
Click NEW STORAGE to define the storage for the thumbnails.
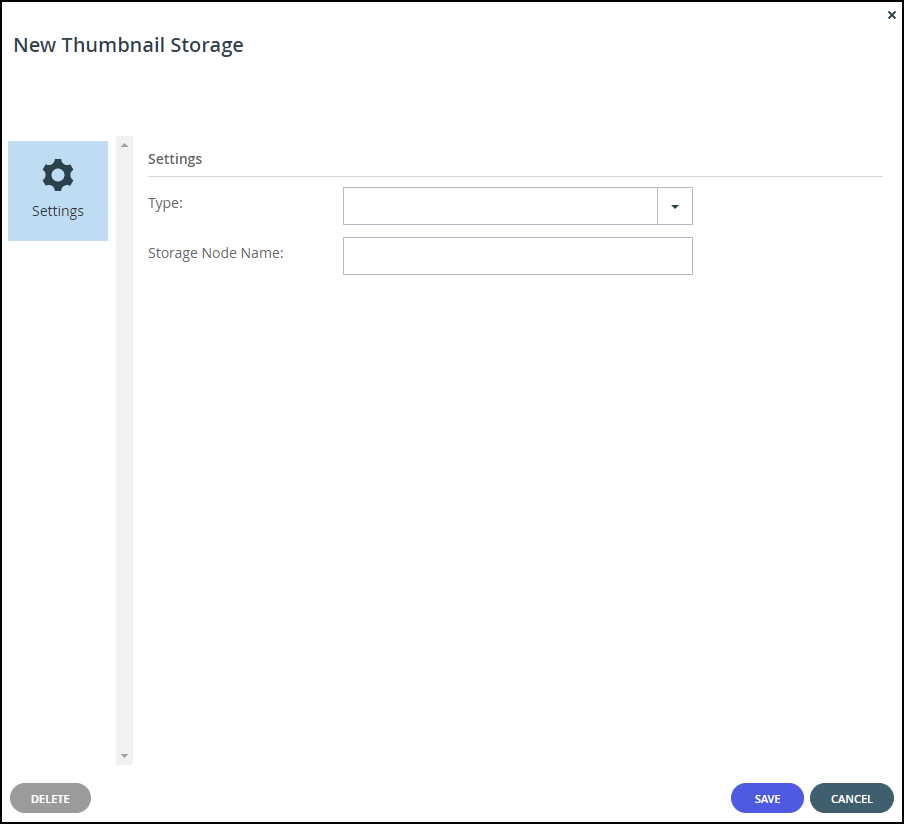
The New Thumbnail Storage window is displayed.
-
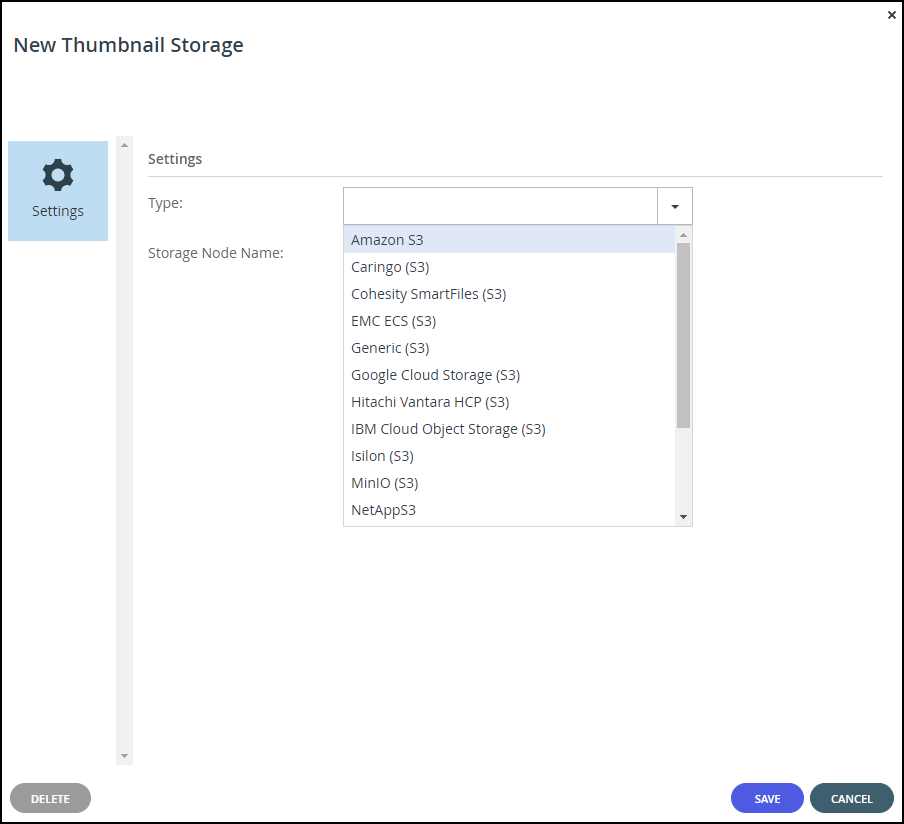
Enter the generic details for the storage node.
Type – The type of storage node you are adding. When you select the type, more fields are displayed so that you can add the specific details for the storage node.
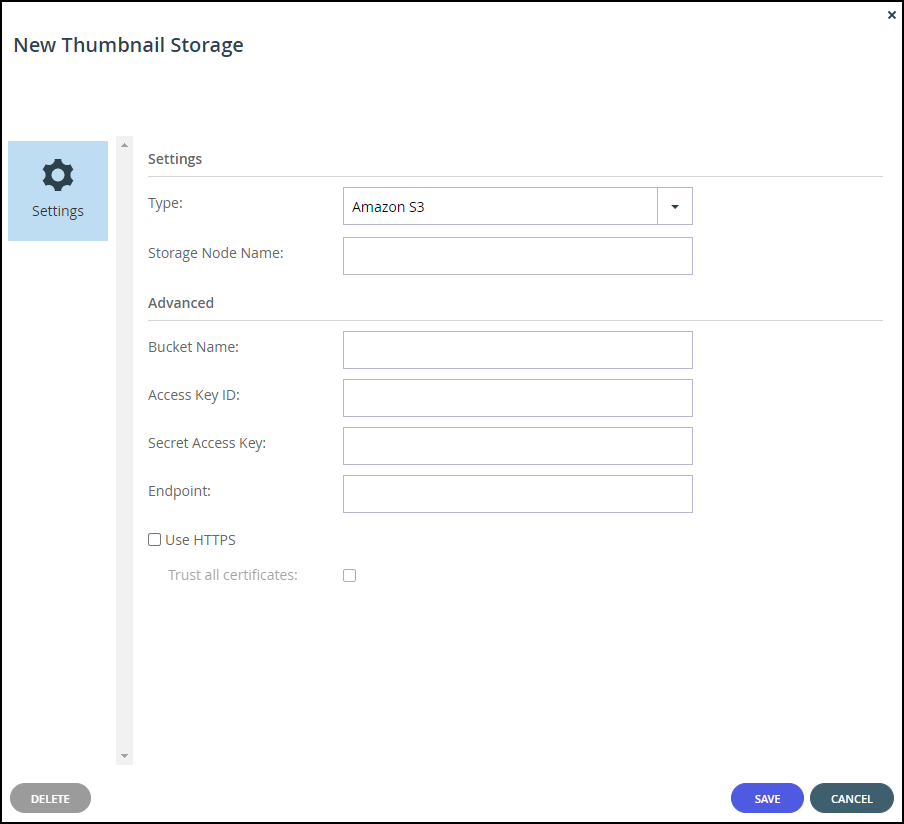
Storage Node Name – A unique name to identify the storage node.
Bucket Name – A unique name for the bucket.
Use Access and Secret Keys – Access credentials for the storage node.- Access Key ID – The S3 access key ID.
- Secret Access Key – The S3 secret access key.
Endpoint – The private endpoint name of the S3 service. The port for the endpoint can be customized by adding the port after the URL, using a colon (:) separator. The default port is 80.
Use HTTPS – Use HTTPS to connect with the storage node.- Trust all certificates – Do not validate the certificate of the object storage. Normally this is unchecked.
-
Click SAVE.
-
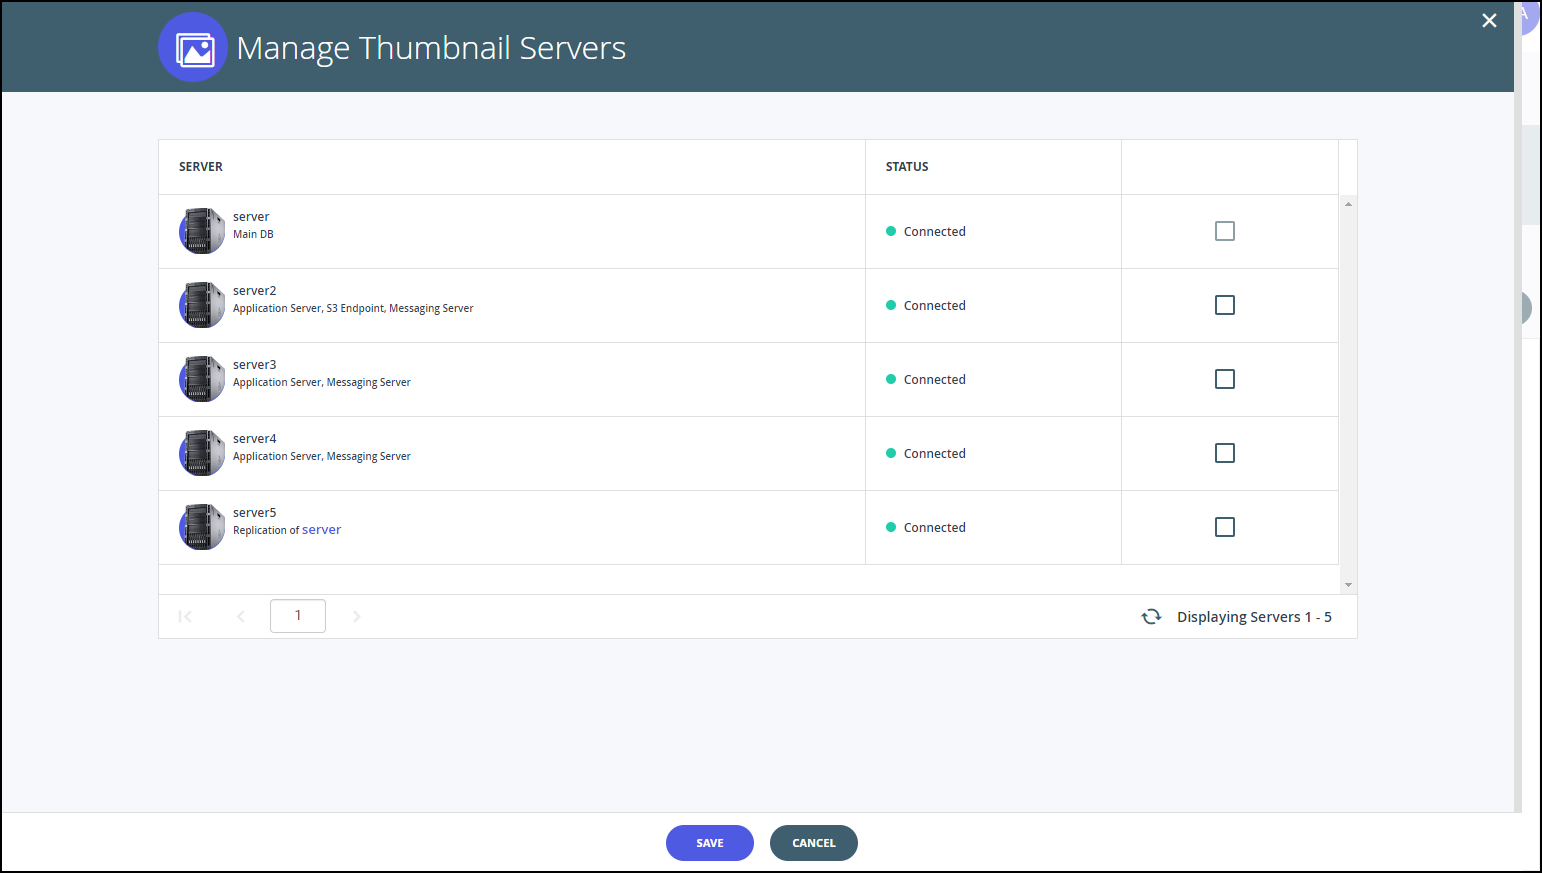
Click MANAGE SERVERS.
The Manage Thumbnail Servers window is displayed.
-
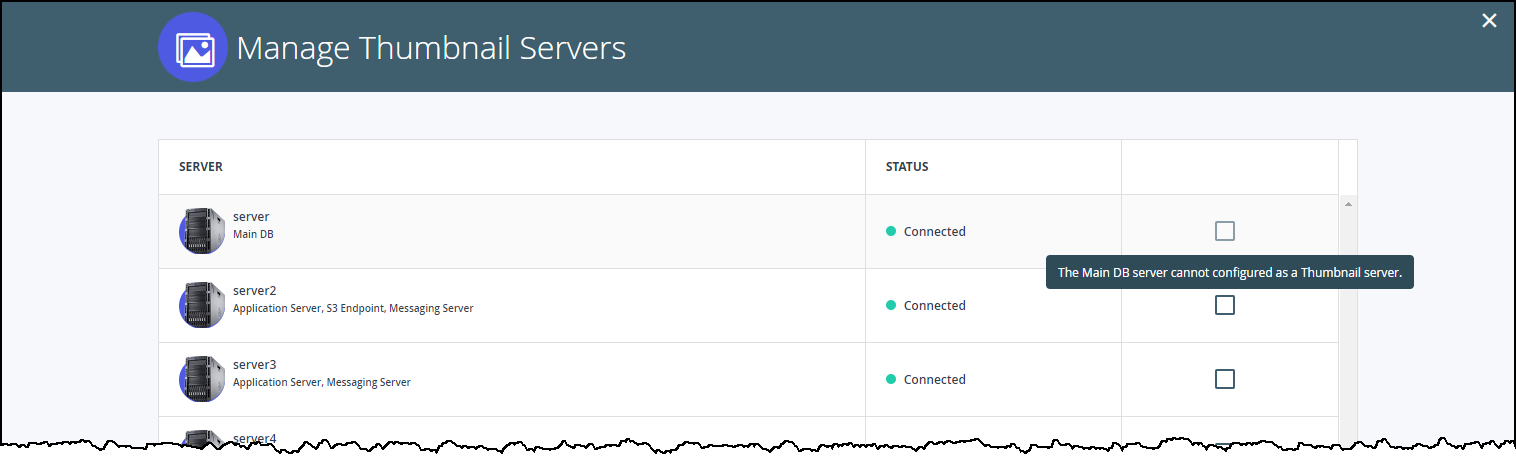
Select the servers to act as thumbnail servers.
NoteYou cannot select the Main DB server nor a preview server.
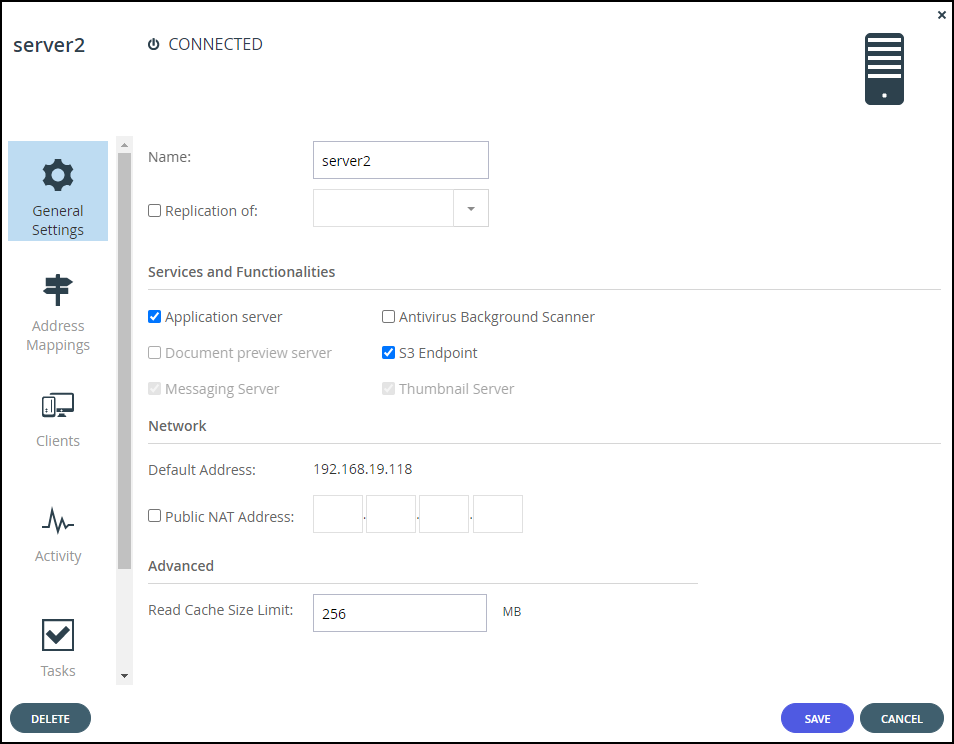
The server is defined as a Thumbnail server.
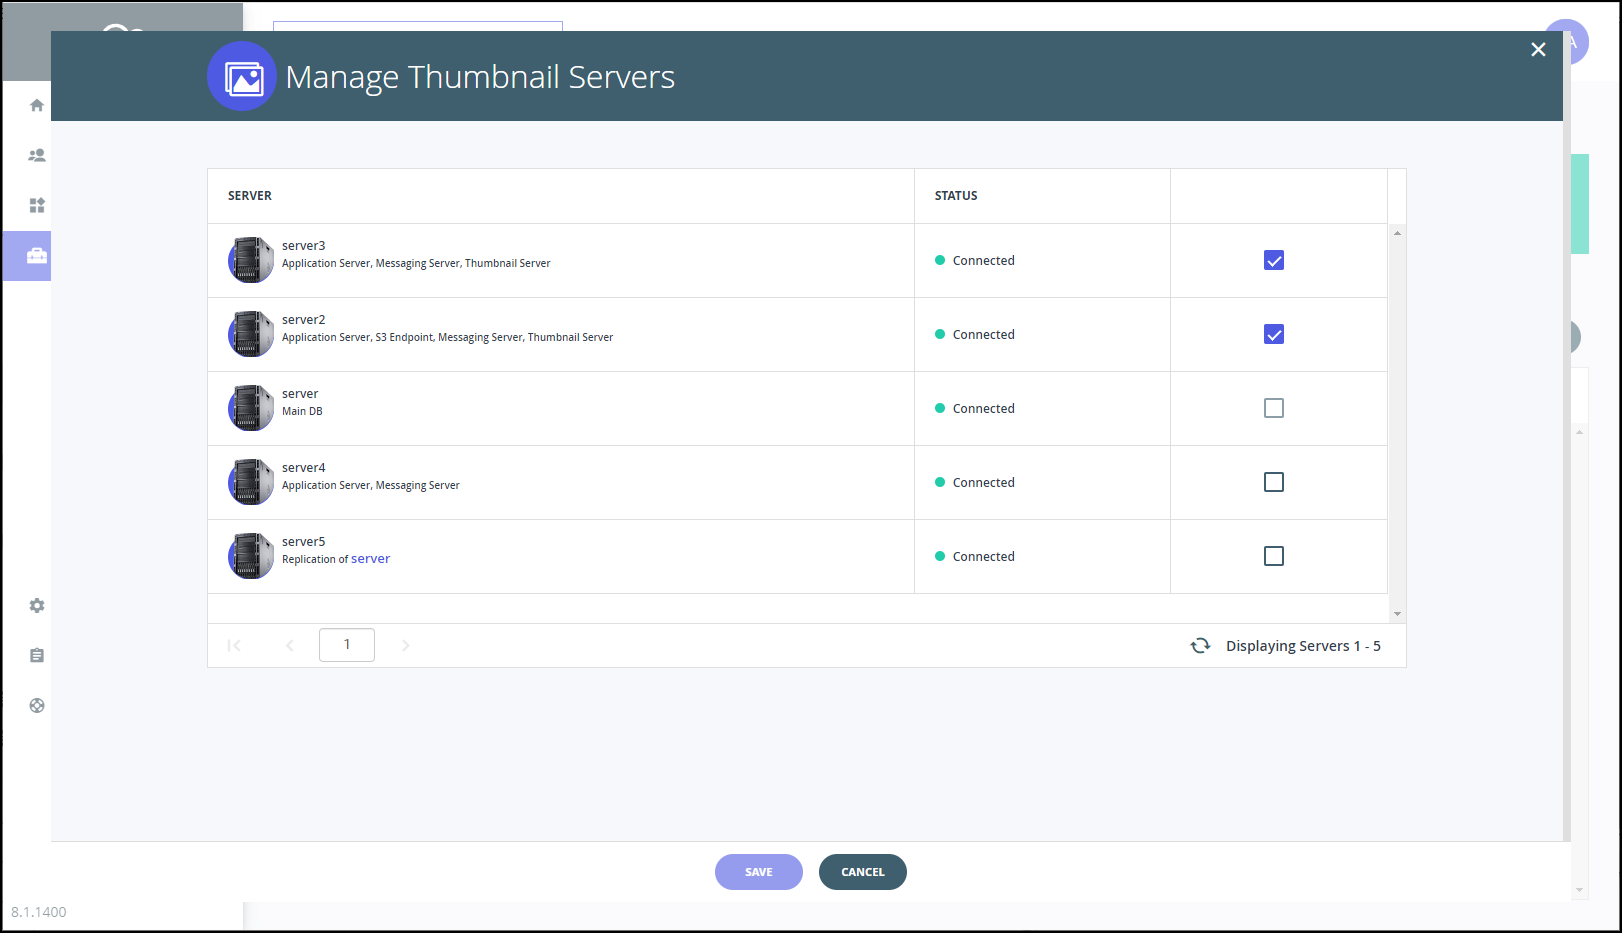
The Thumbnail Server option in the server definition is checked.
 Note
NoteThis option cannot be checked or unchecked in the server definition itself, only by checking or unchecking a server in the Manage Thumbnail Servers window.
-
Click SAVE.
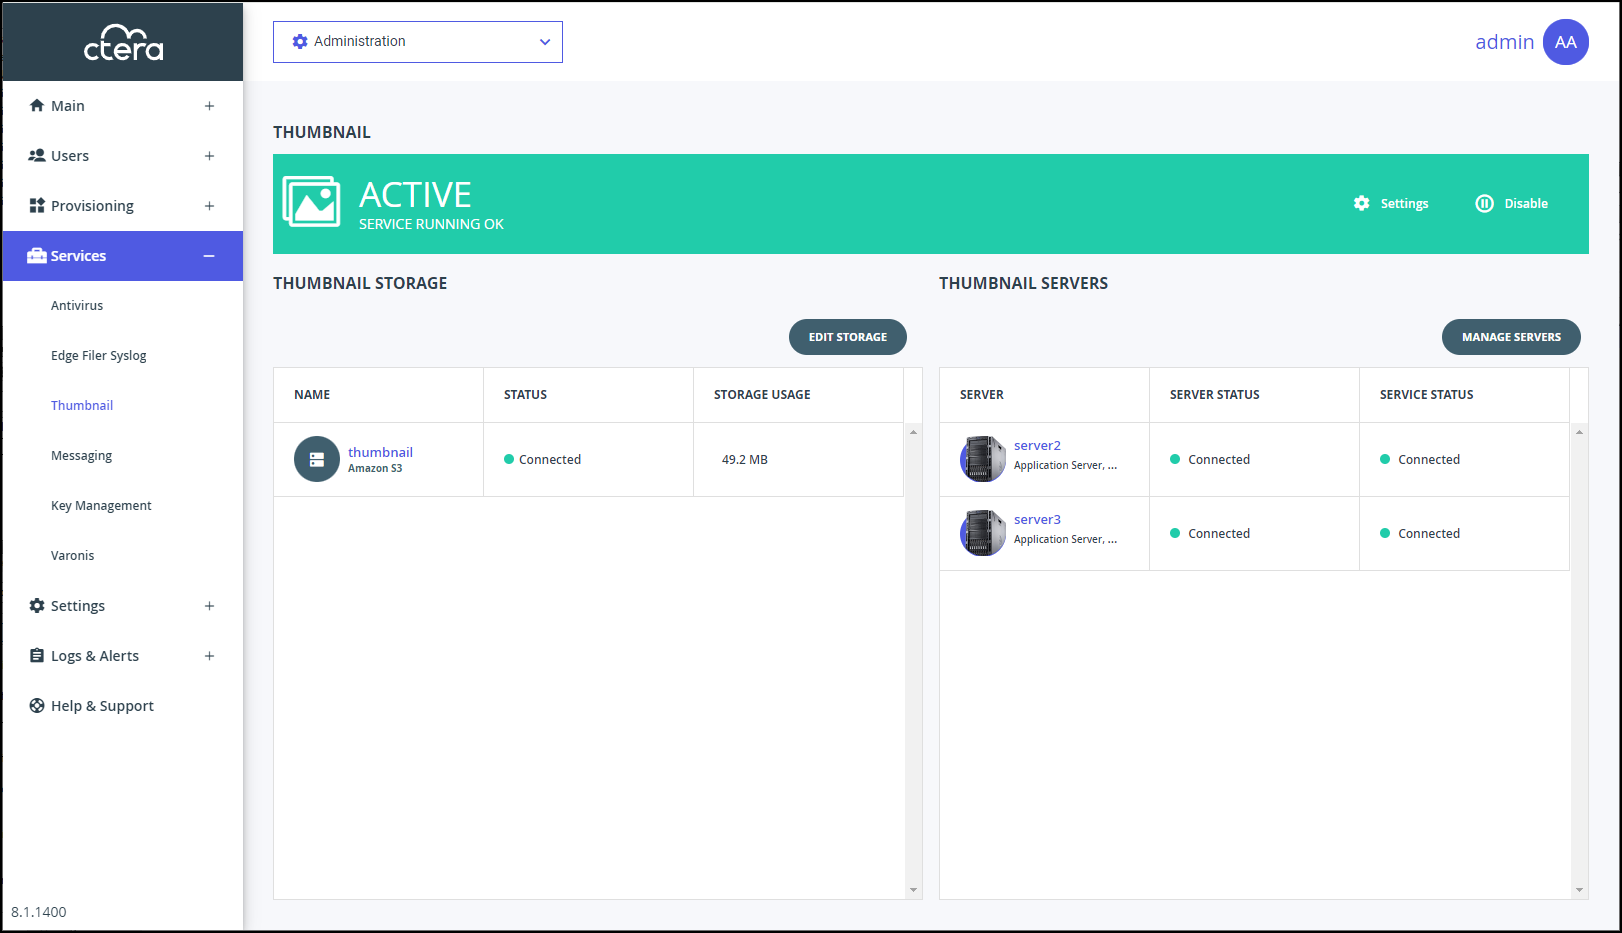
The THUMBNAIL page is redisplayed. -
Click Enable.
The service starts.
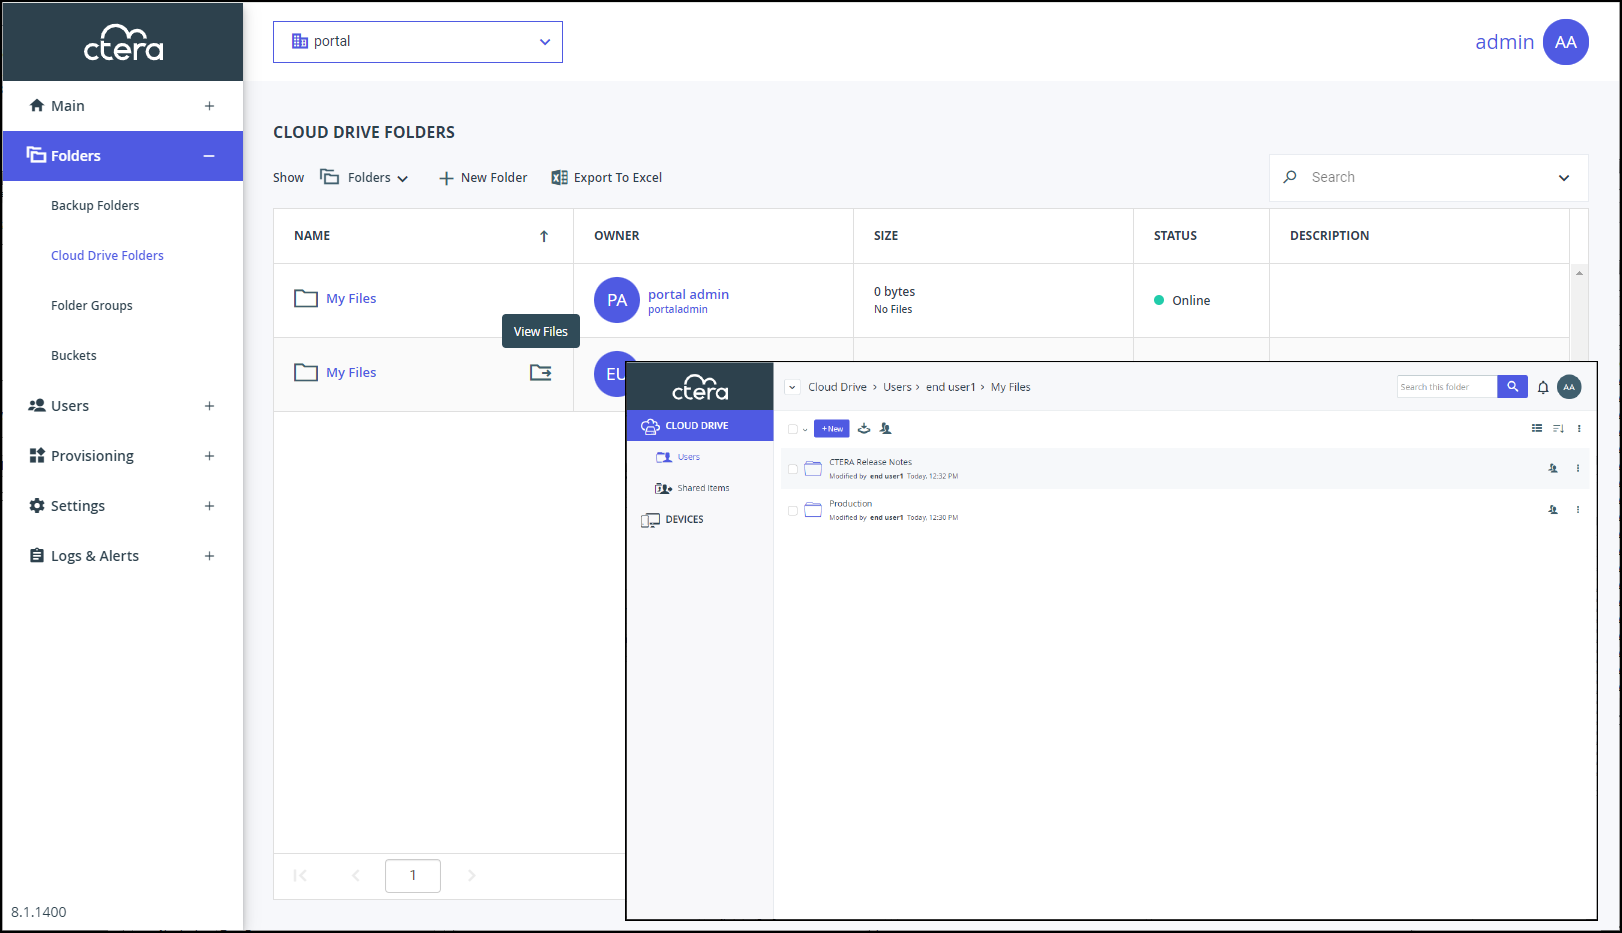
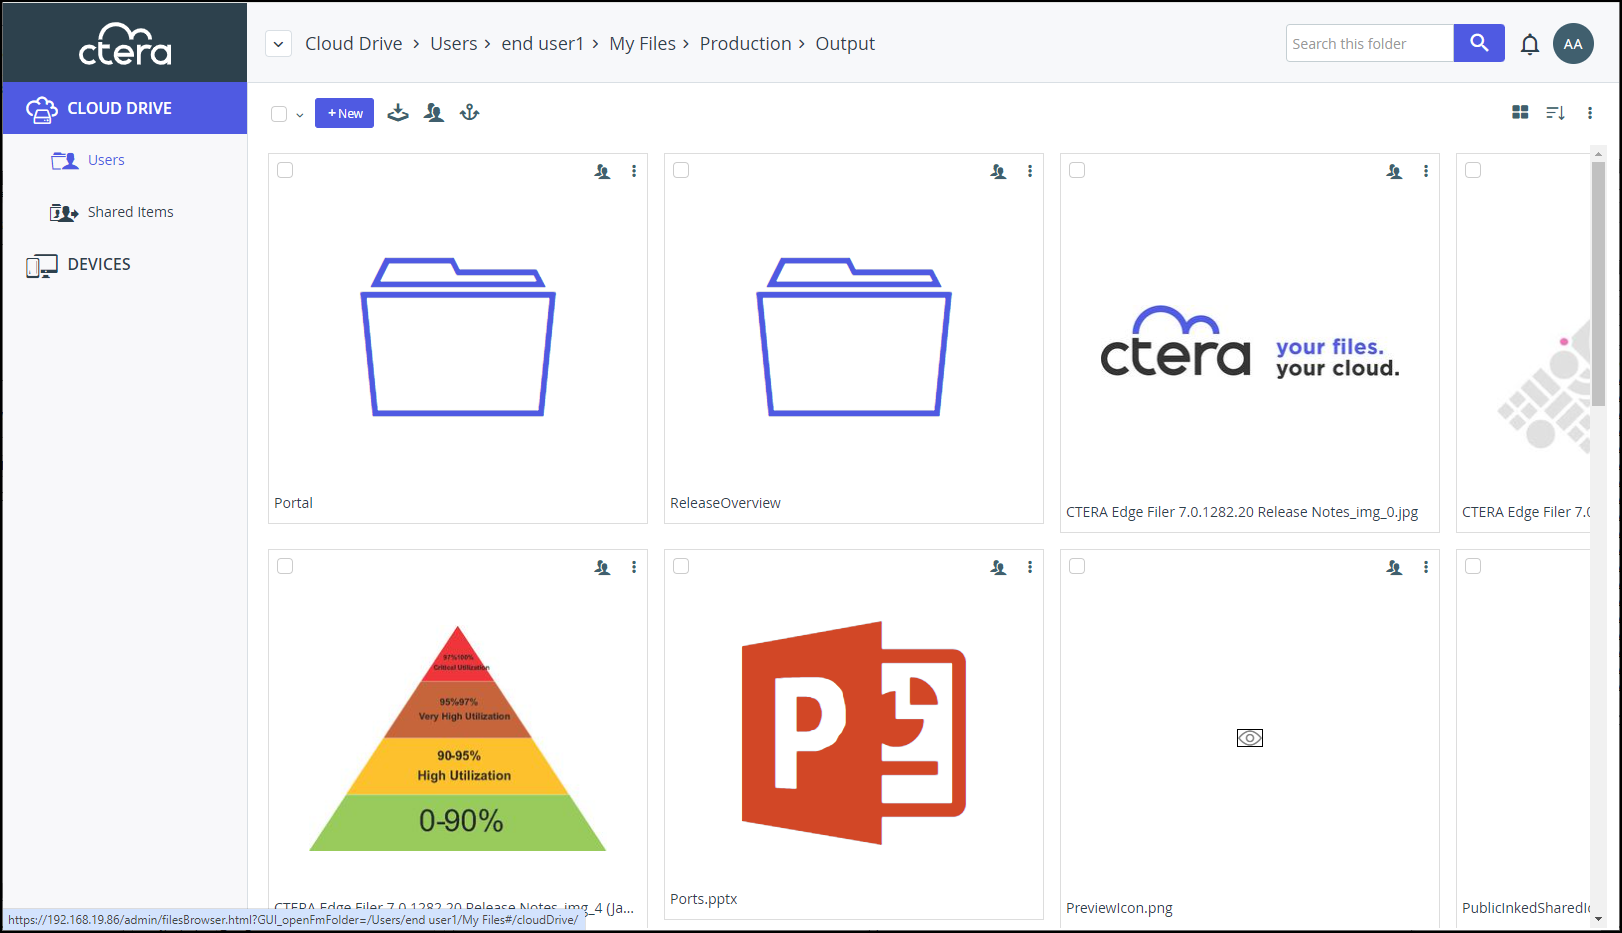
Once the service is active, thumbnails are displayed in the end user portal view for the following file types:JPEG/JPG, PNG, GIF, BMP, TIFF, WebP, SVG.
You can see the thumbnails by changing to the portal view and in the CLOUD DRIVE FOLDERS page, you can click  next to a folder to display the contents of that folder in a new tab.
Drill-down to a folder with graphics files that are supported by the Thumbnail service and display the files with the Details or Tiles view.
| Details View | Tiles View |
|---|---|
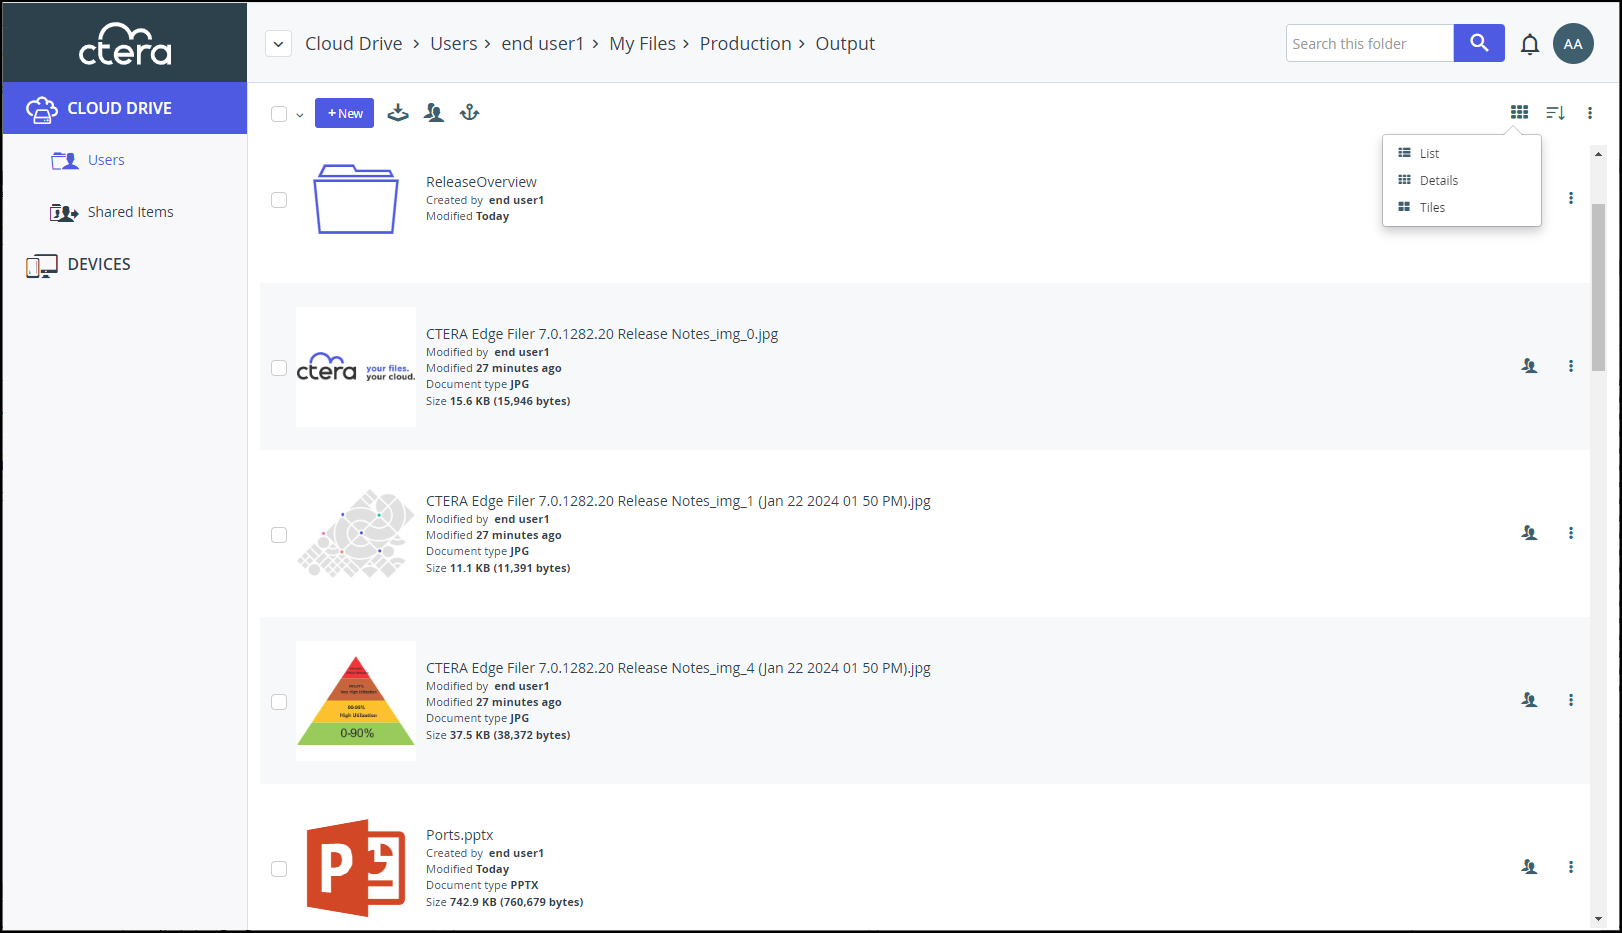 |
 |
Changing the Maximum File Size for Thumbnails
Thumbnails can be created for files that are not bigger than 50MB. The default maximum size is 20MB. You can change this size.
To change the maximum file size for thumbnails:
- In the global administration view, select Services > Thumbnail in the navigation pane.
The THUMBNAIL page is displayed.
- Click Settings > Configure Service in the status bar.
The Thumbnail Settings window is displayed.
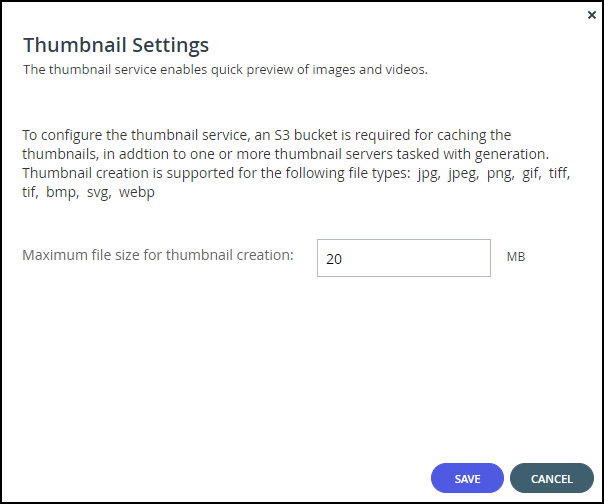
- Change the maximum size for thumbnails and click SAVE.