Using Active Directory for Single Sign-On
- 6 Minutes to read
- Print
- DarkLight
- PDF
Using Active Directory for Single Sign-On
- 6 Minutes to read
- Print
- DarkLight
- PDF
Article Summary
Share feedback
Thanks for sharing your feedback!
You can configure single sign-on for one team portal, for users defined in Microsoft Active Directory, using the Kerberos protocol. When single sign on is configured, CTERA Agents automatically and transparently authenticate to the team portal using their Active Directory credentials, upon first login to the PC on which they are installed.
Note
Only one virtual portal can be defined with single sign-on using Kerberos.
A service principal name (SPN) account on Active Directory uniquely identifies an instance of a service. Before the CTERA Portal can use Kerberos authentication, you must register the SPN on the account object that the CTERA Portal uses to log on and then create a keytab file.
To configure Active Directory for single sign-on with CTERA Portal:
- Get ctera-agent.adm from CTERA support.
Example ctera-agent.adm file:
CLASS MACHINE

CATEGORY !!CteraAgent
    KEYNAME "Software\Policies\CTERA\Agent"

    POLICY !!USESSO
        EXPLAIN !!USESSO_Explain
        VALUENAME "SSO"
        VALUEON NUMERIC 1
        VALUEOFF NUMERIC 0
        PART !!SSO_Server EDITTEXT REQUIRED
            VALUENAME "SSOServer"
        END PART
        PART !!SSO_Tip TEXT
        END PART
      END POLICY
END CATEGORY

[strings]
USESSO="Enable CTERA Agent automatic deployment"
USESSO_Explain="With this policy you can automatically deploy CTERA Agents.\n\n When this policy is disabled, or not configured, each CTERA agent must be manually connected to a CTERA portal or CTERA Cloud-Attached-Storage appliance.\n\n When this policy is enabled, the CTERA Agent installed on the computer automatically signs into the CTERA portal or appliance designated by the policy. When a user logs on to the machine for the first time, CTERA agent immediately signs into the designated server, using the credentials of that user."
SSO_Server="Sign into server"
SSO_Tip="Use the Fully-Qualified DNS name of a CTERA portal or a CTERA appliance. The target server must be a member of this Active Directory domain."
CteraAgent="CTERA Agent Settings"
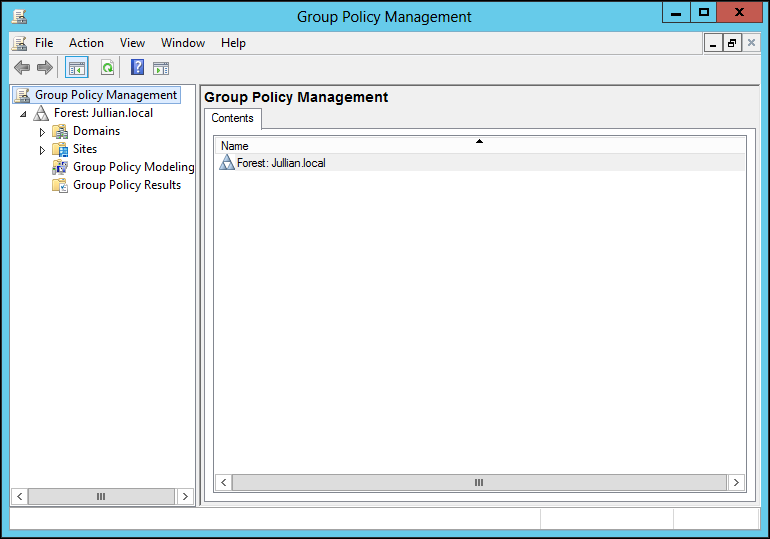
- In the Start menu on the server where Active Directory runs, select Administrative Tools > Group Policy Management.
The Group Policy Management console is displayed:
This console enables you to create domain-wide policies or policies for specific organizational units.- In the navigation pane, drill-down to the domain or organizational unit for which you want to create the policy, right-click it and select Create a new GPO in this domain and Link it here.
The New GPO window is displayed. - Enter a name for the policy and click OK.
- In the navigation pane, select the domain and in the right pane, select the Linked Group Policy Objects tab.
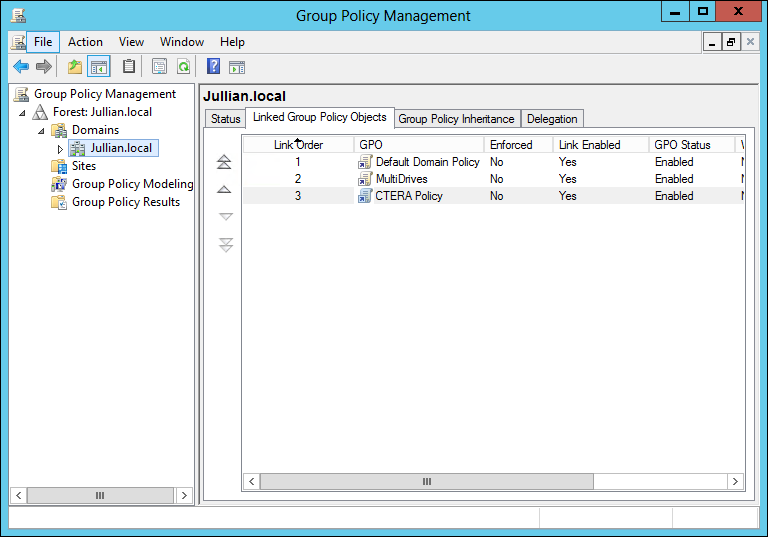
- Double-click the policy to display it.
If a Group Policy Management Console message is displayed, click OK.
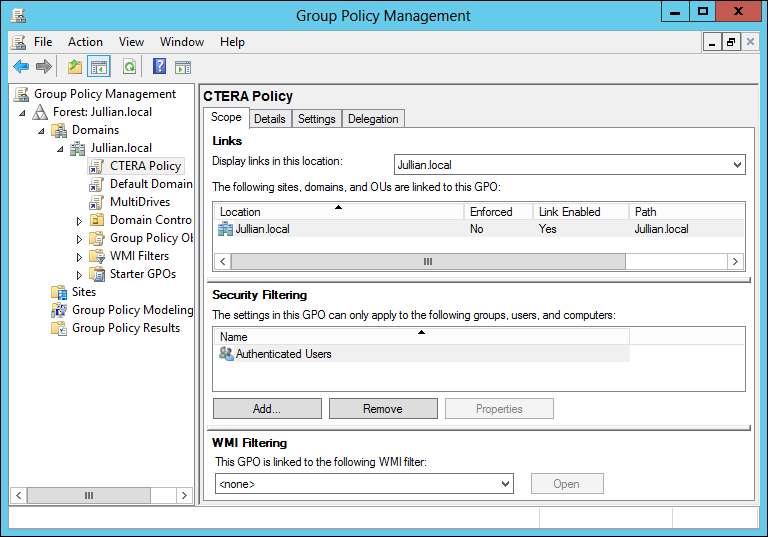
- Right-click the policy you created and select Enforced..
- Right-click the policy you created and select Edit.
The Group Policy Management Editor is displayed.

- In the navigation pane, expand Computer Configuration > Policies, right-click Administrative Templates and select Add/Remove Templates.
The Add/Remove Templates window is displayed. - Click Add and select the ctera-agent.adm file you received in step 1, above.
- Click Open.
- Click Close.
- In the navigation pane, expand Computer Configuration > Policies > Administrative Templates > Classic Administrative Templates and click the CTERA Agent Settings node.
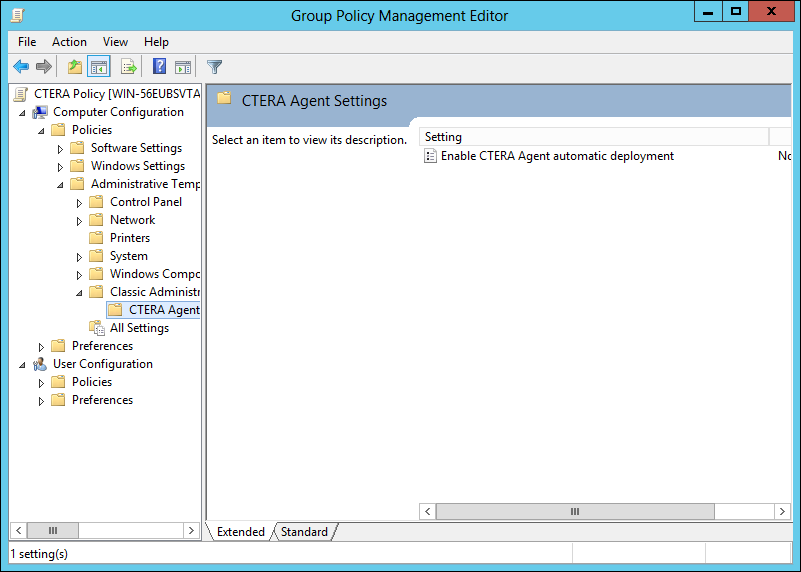
- Right-click Enable CTERA Agent automatic deployment and select Edit.
The Enable CTERA Agent automatic deployment window is displayed.
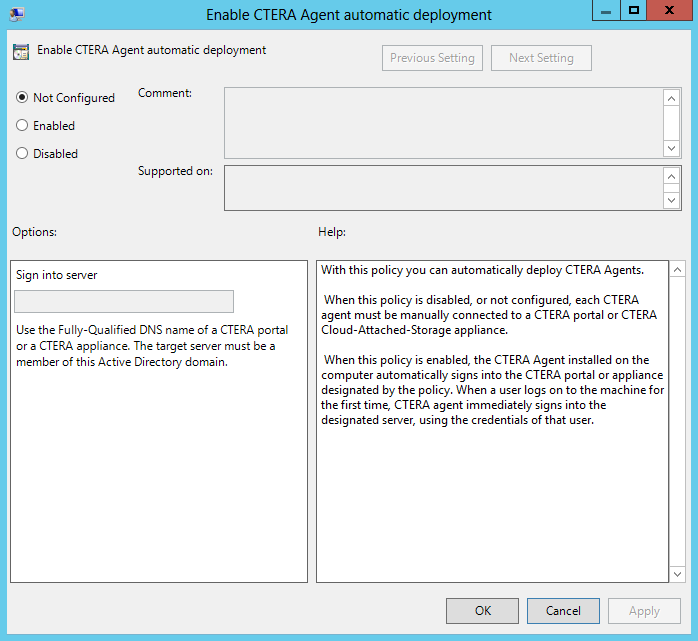
- Specify the following:
Enabled – Set the Enabled option.
Sign into server – Type the fully qualified DNS name of the CTERA Portal to which the CTERA Agent will connect. For example,myportal.ctera.com. - Click OK.
- In the navigation pane, drill-down to the domain or organizational unit for which you want to create the policy, right-click it and select Create a new GPO in this domain and Link it here.
- In the Start menu on the server where Active Directory runs, select Administrative Tools > Active Directory Users and Computers.
- Right-click on the name of the domain to which you want to add the user and click New > Organizational Unit.
The New Object - Organizational Unit window is displayed. - Enter a name for the unit and click OK.
- Right-click on the organizational unit and click New > User.
The New Object - User window is displayed.
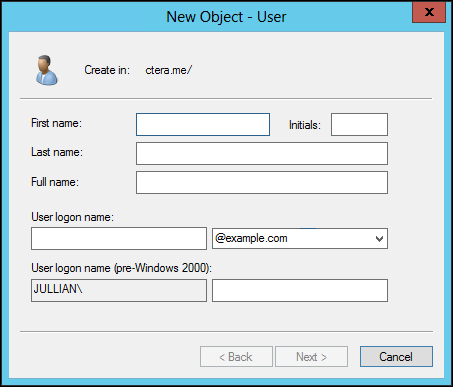
- Fill in the user details: In the User logon name area, in the first field enter a user account, such as
cteraportal, and in the second field select the domain. - Click Next.

- In the Password and Confirm password fields, enter a password for the user.
The password must be at least 8 characters in length and conform to at least 3 out of the following requirements:- It must contain at least one English uppercase character (A through Z)
- It must contain at least one English lowercase character (a through z)
- It must contain at least one Base 10 digit (0 through 9)
- It must contain at least one non-alphanumeric character (for example, !, $, #, %)
- Clear the User must change password at next logon check box.
- Check the User cannot change password and Password never expires check boxes.
- Click Next.
The summary for the new user is displayed. - Click Finish.
- Right-click on the name of the domain to which you want to add the user and click New > Organizational Unit.
- Map the service principal name to the user account that you created and generate a keytab file, by running the following command on the domain controller:
ktpass –princ SPN -out path_to_keytab -mapuser account_name@DOMAIN -mapOp set –pass account_password
Where:- SPN is the Kerberos service principal name.
For example:cttp/portal.example.com@example.com
The SPN syntax iscttp/portal_full_DNS_name@ACTIVE_DIRECTORY_REALMNoteThe Active Directory Kerberos realm must match the CTERA Portal's DNS suffix. The email pattern must include only uppercase letters.
- path_to_keytab is the path where you want to store the generated keytab file.
For example,c:\cteraportal.keytab.NoteThe keytab file name must include only uppercase letters.
- DOMAIN is the domain NetBIOS name.
For example,DOMAIN.LOCAL
The domain name must include only uppercase letters. - account_name is the service account name.
For example,cteraportal - account_password is the password associated with the service account.
For example, Password12E4.
For example:
ktpass -princ cttp/”SERVER FQDN”@”DOMAIN FQDN” -mapuser ctera_portal@”DOMAIN FQDN” -mapOp set -pass PASSWORD -out c:\temp\ctera_portal.keytab
- SPN is the Kerberos service principal name.
- Change network security under local group policy on Active Directory and the CTERA Agent workstation.


To configure Kerberos for single sign-on with CTERA Portal:
- Kerberos requires the clocks of the relevant hosts to be synchronized. Ensure that the CTERA Portal server's clock is synchronized with the Active Directory clock, preferably by synchronizing the CTERA Portal server's underlying clock, for example, via VMware Tools for a portal running on ESXi, with an NTP server.
- In order to authenticate with aes256-cts-hmac-sha1-96, make sure that the Active Directory domain controller policy supports this authentication. If this is not the case, change the ssouser configuration in the Active Directory server, so that the account supports AES 128 bit and AES 256 bit encryption.
- Generate a new keytab with AES256 encryption, copy it to the portal and then run
portal-keytab.shwith the new keytab on the portal andklist purgein the CTERA Agent workstation. - Verify the following in the libdefaults section of the krb5.conf:
default_tkt_enctypes = aes256-cts-hmac-sha1-96
default_tgs_enctypes = aes256-cts-hmac-sha1-96 - Connect the portal to Active Directory.
Note
Only one virtual portal can be defined with single sign-on using Kerberos. If the global administrator has set up SSO using Kerebos on another virtual portal, you cannot set SSO using Kerebos on this portal.
To configure SSO on the portal:
Note
Part of this procedure includes stopping the portal, which will result in some downtime.
- Enable the keytab file on the CTERA Portal:
- Log in to the CTERA Portal as root, using SSH.
- Run the following command to stop the portal:
portal-manage.sh stop - Copy the keytab file from the Active Directory server to
/usr/local/ctera/apache_tomcaton the CTERA Portal server. - Run the following command:
portal-keytab.sh keytabfilewhere keytabfile is the full name and path of the keytab file. - Run the following command to start the portal: portal-manage.sh start
- Add the Active Directory server to the CTERA Portal:
- Log in to the portal.
- Select Settings in the navigation pane.
The Control Panel page is displayed.
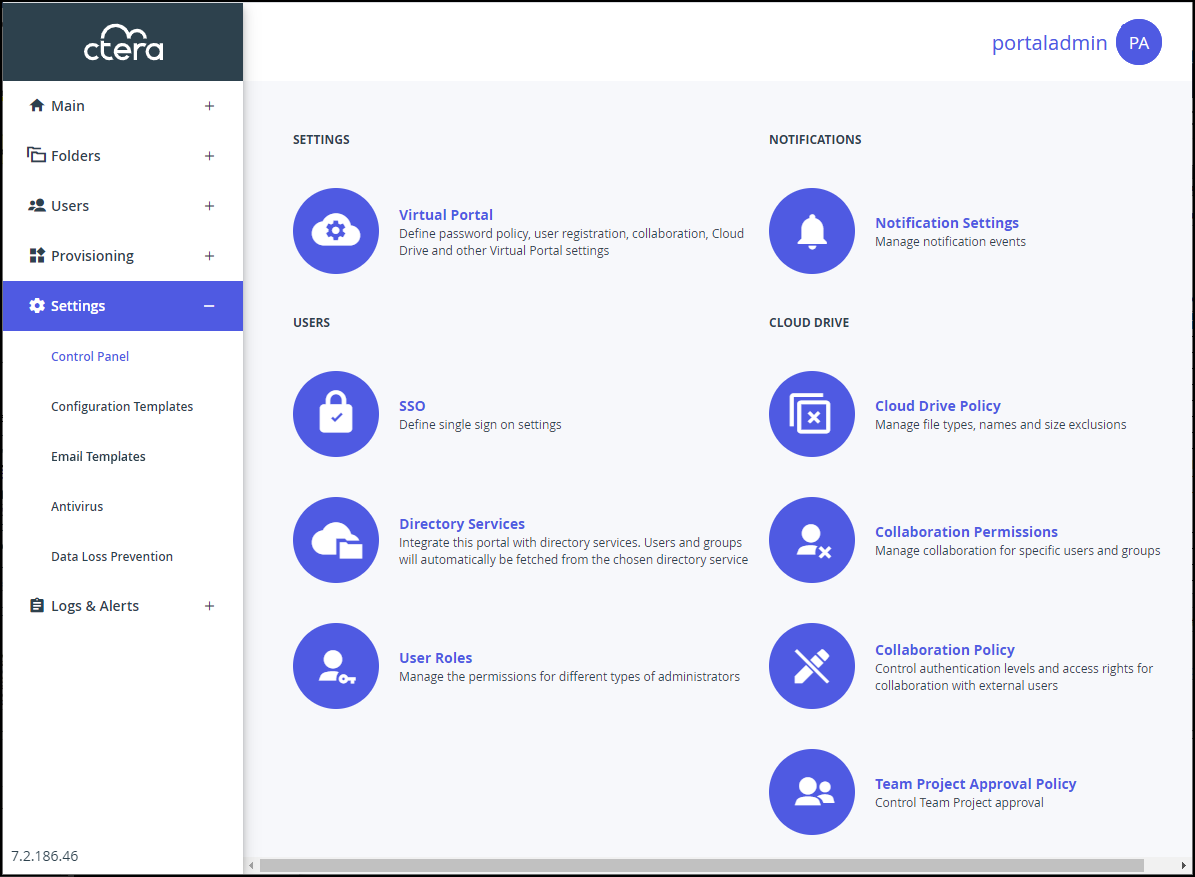
- Select Directory Settings, under USERS in the Control Panel page.
The Directory Services page is displayed. - Click Settings.
The Directory Services Settings window is displayed.
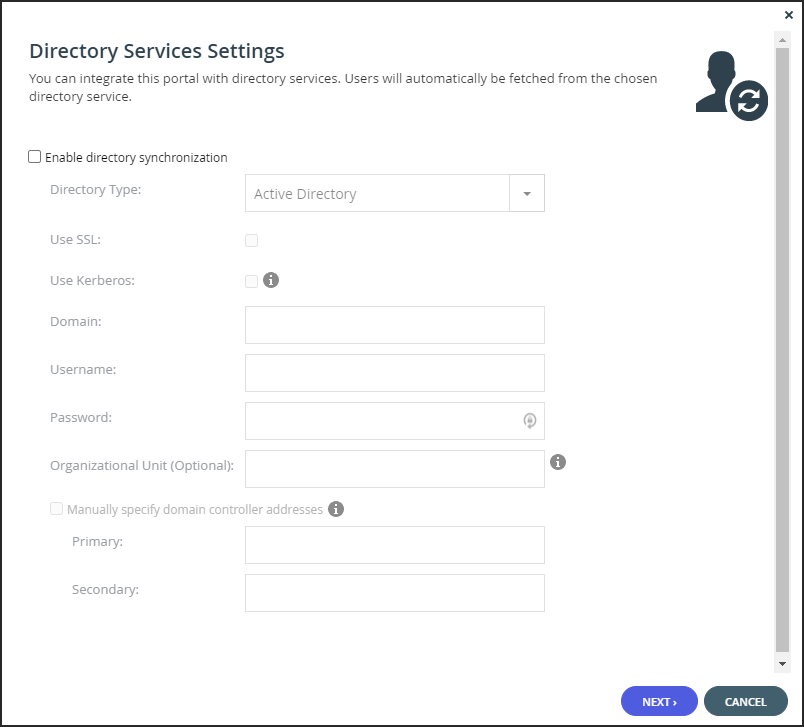
- Specify the following:
Check Enable directory synchronization.
In Directory Type, select Active Directory.
Check Use Kerberos.
In Domain, enter the Active Directory domain.
In Username, enter the username for the Active Directory URL.
In Password, enter the password for the Active Directory URL. - Click NEXT to the end of the wizard.
- Click FINISH.


SSO is now configured on the CTERA Portal.
Note
A single virtual portal can be configured to enable simultaneous SSO access via both Kerberos SSO and WebDAV SPNEGO, described in Enabling WebDAV Access Without Additional Authentication (Using SPNEGO) Using Kerberos and SPNEGO Together.
Was this article helpful?