After installing CTERA Cache Assist on the macOS computer, when the computer is connected to an edge filer that is configured for caching, stub files are identified in Finder by a stub icon,  . For example:
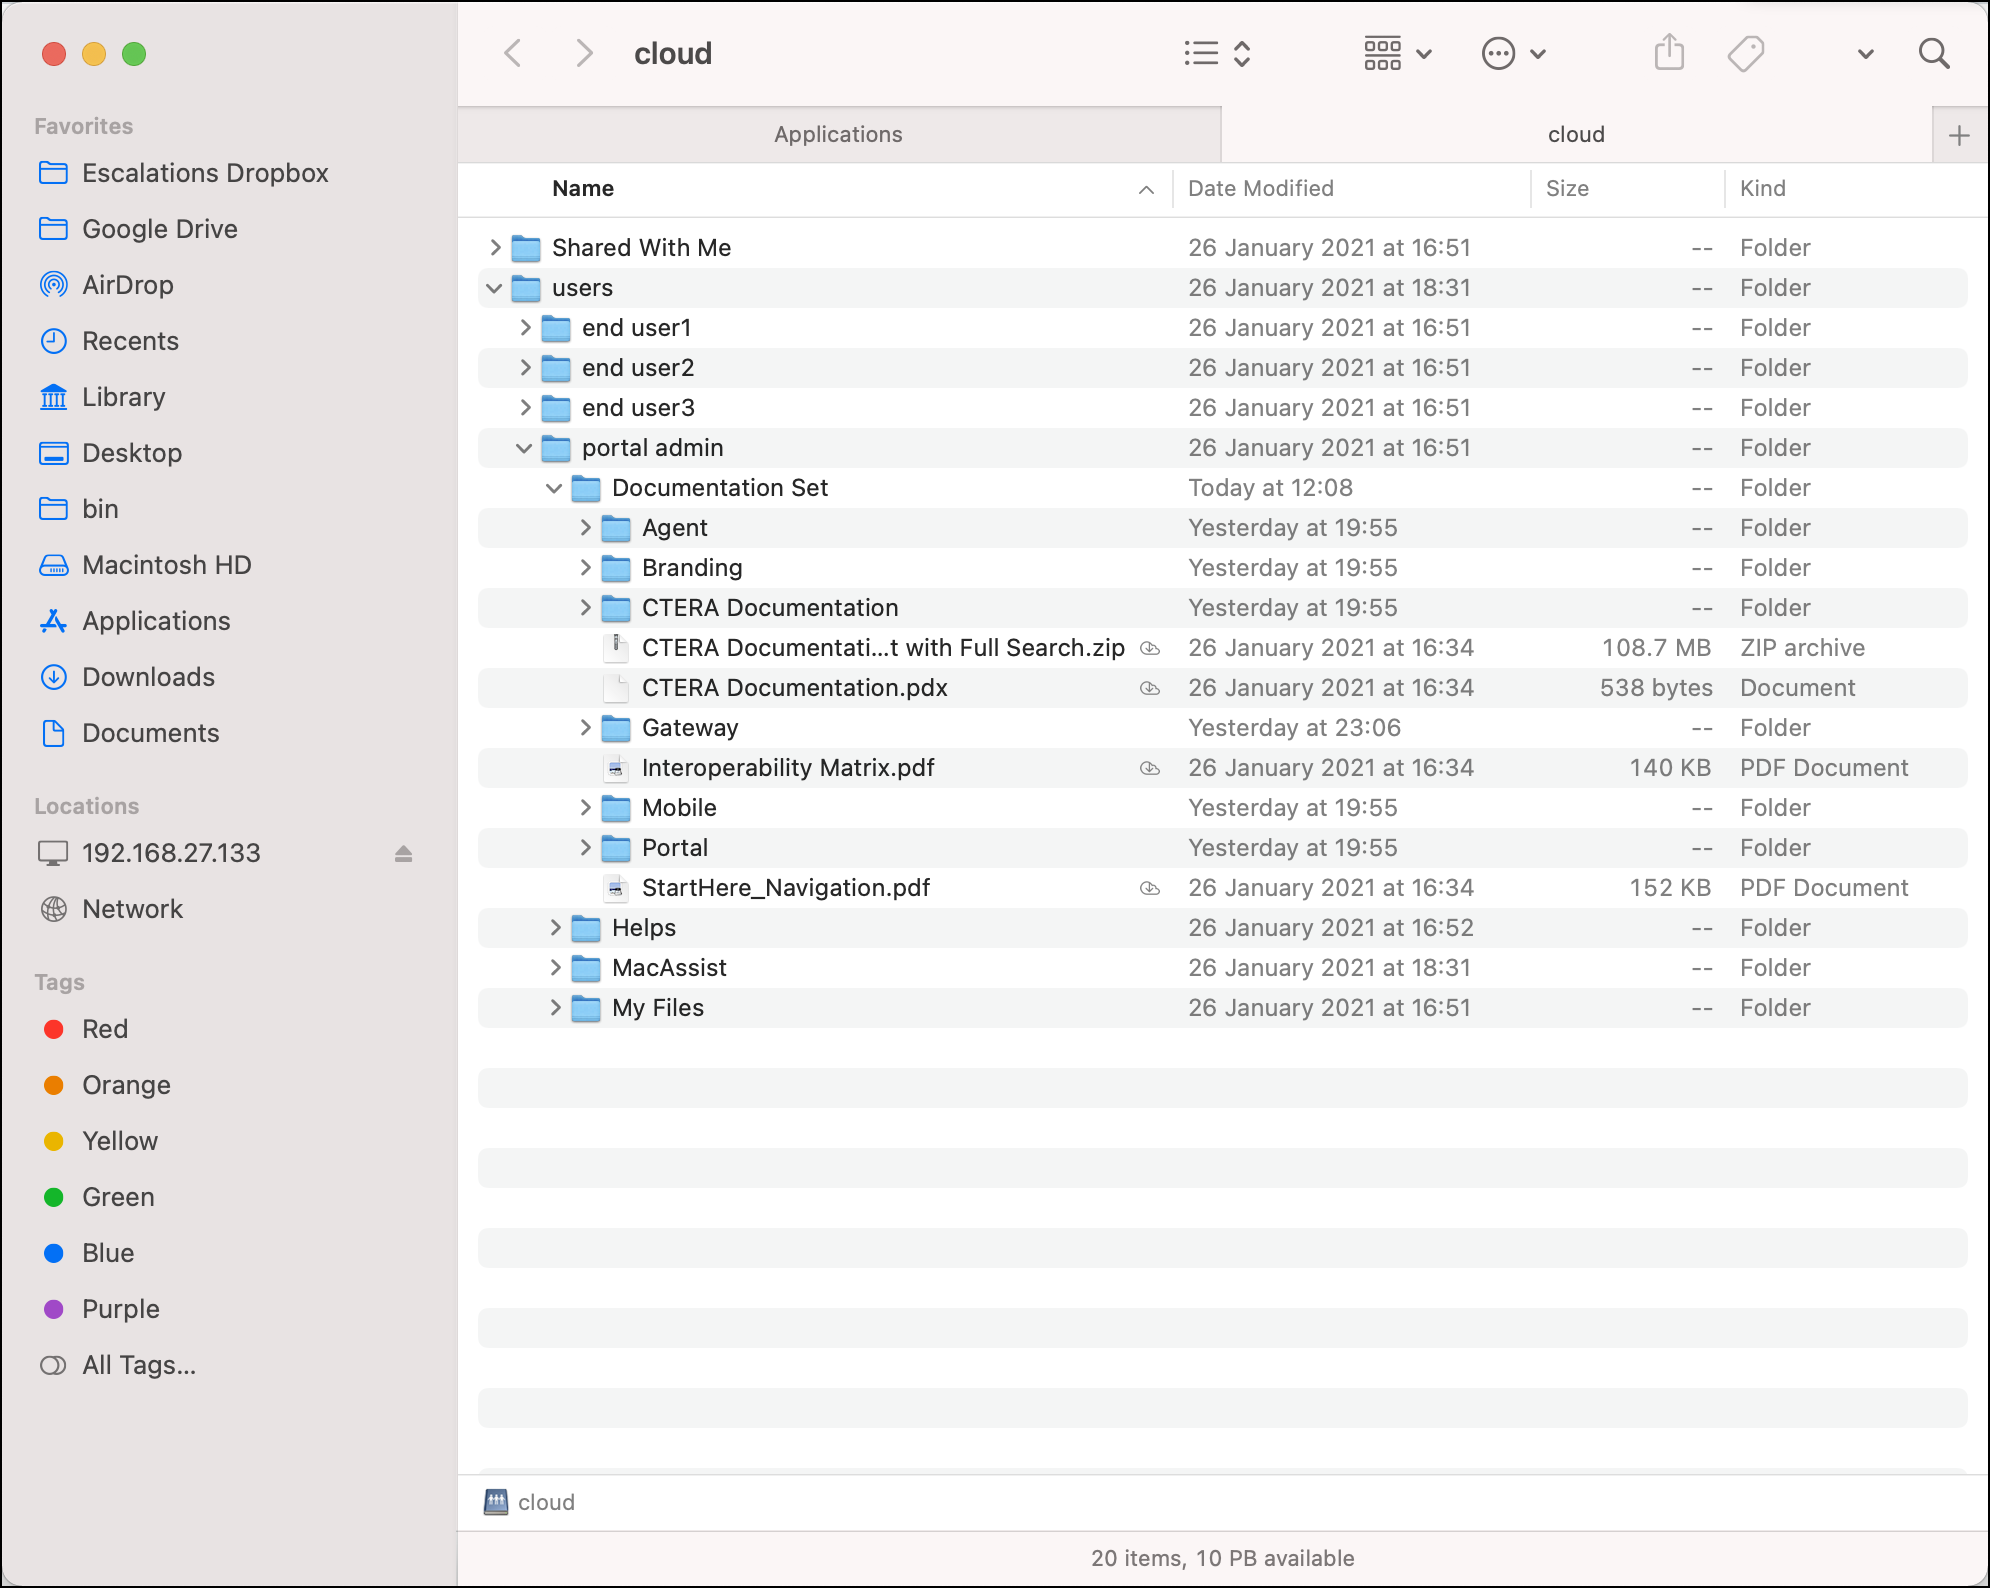
Finder reports that the total space and available free space for the mapped drive is a very high number to simulate the caching ability of infinite storage.
Downloading Stub Files and Folders On the macOS
When you click on a stub file it is automatically downloaded to the edge filer from the portal and the stub icon is removed from the file in Finder. All macOS computers that connect to the same edge filer will see the file without the stub icon, without having to refresh the screen.
If you want to download to your computer a file or a folder, with its subfolders, so it is ready for you to work on, you can right-click the item and choose the bring online option. The selected content is added to a queue and downloaded to your computer. You can also select multiple folders or files to download to your computer.
Clicking a file to open it immediately downloads this file, regardless of the files being queued to be downloaded.
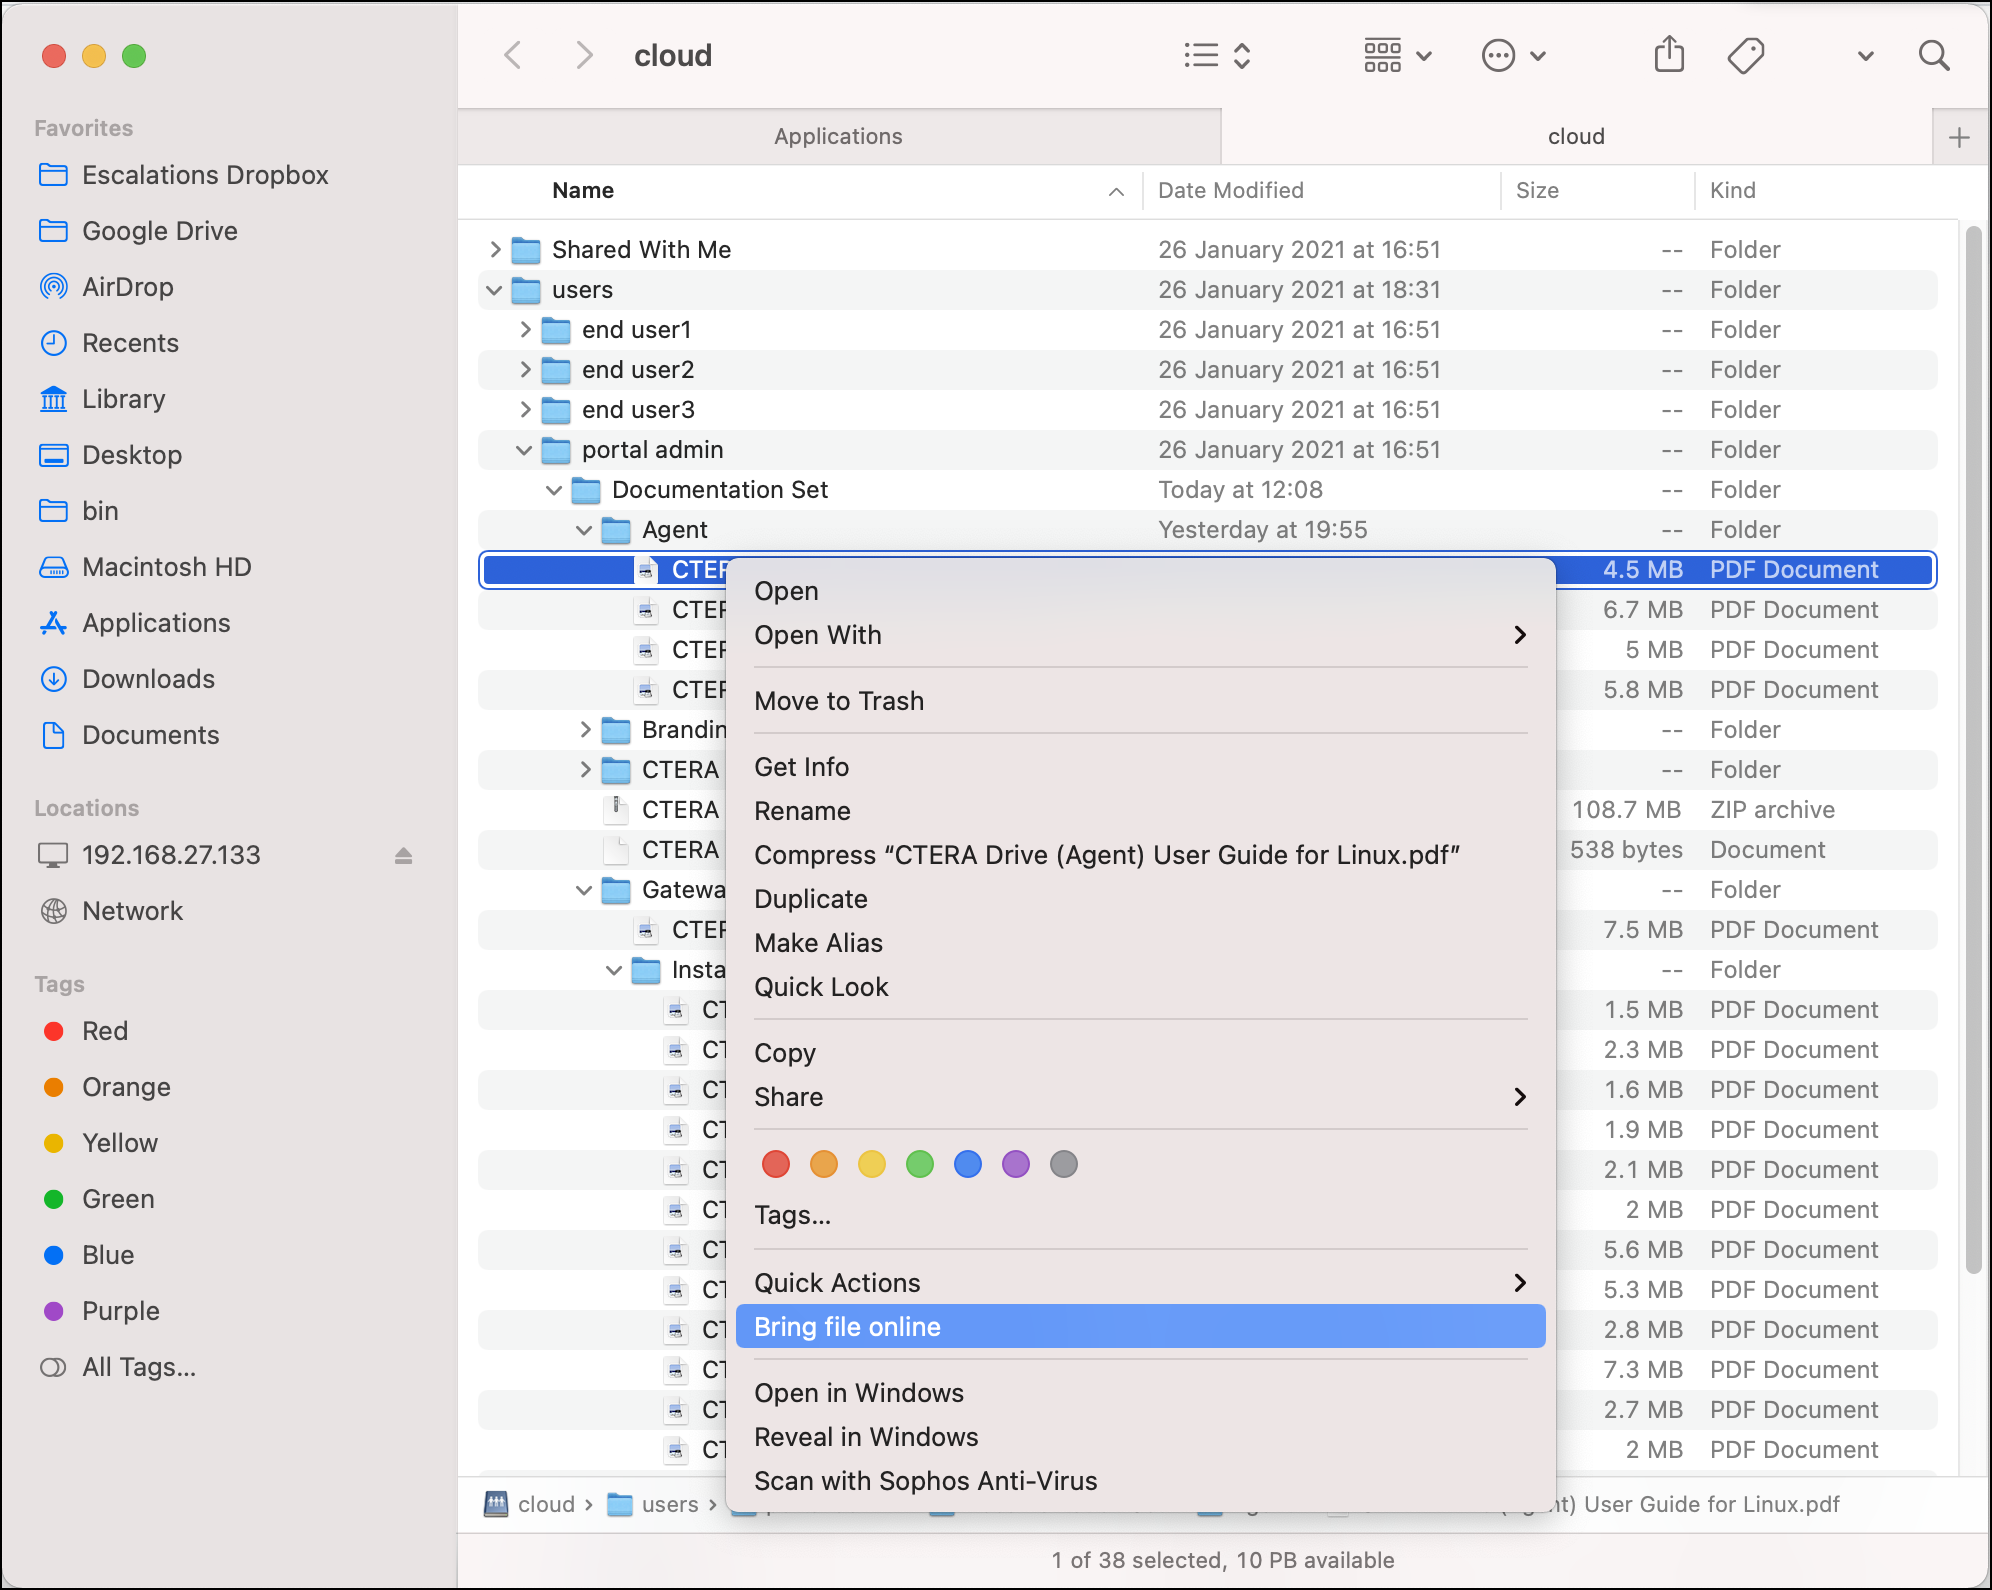
Downloading a File
To download a file, right-click a file and then click Bring file online to download the file on your computer.
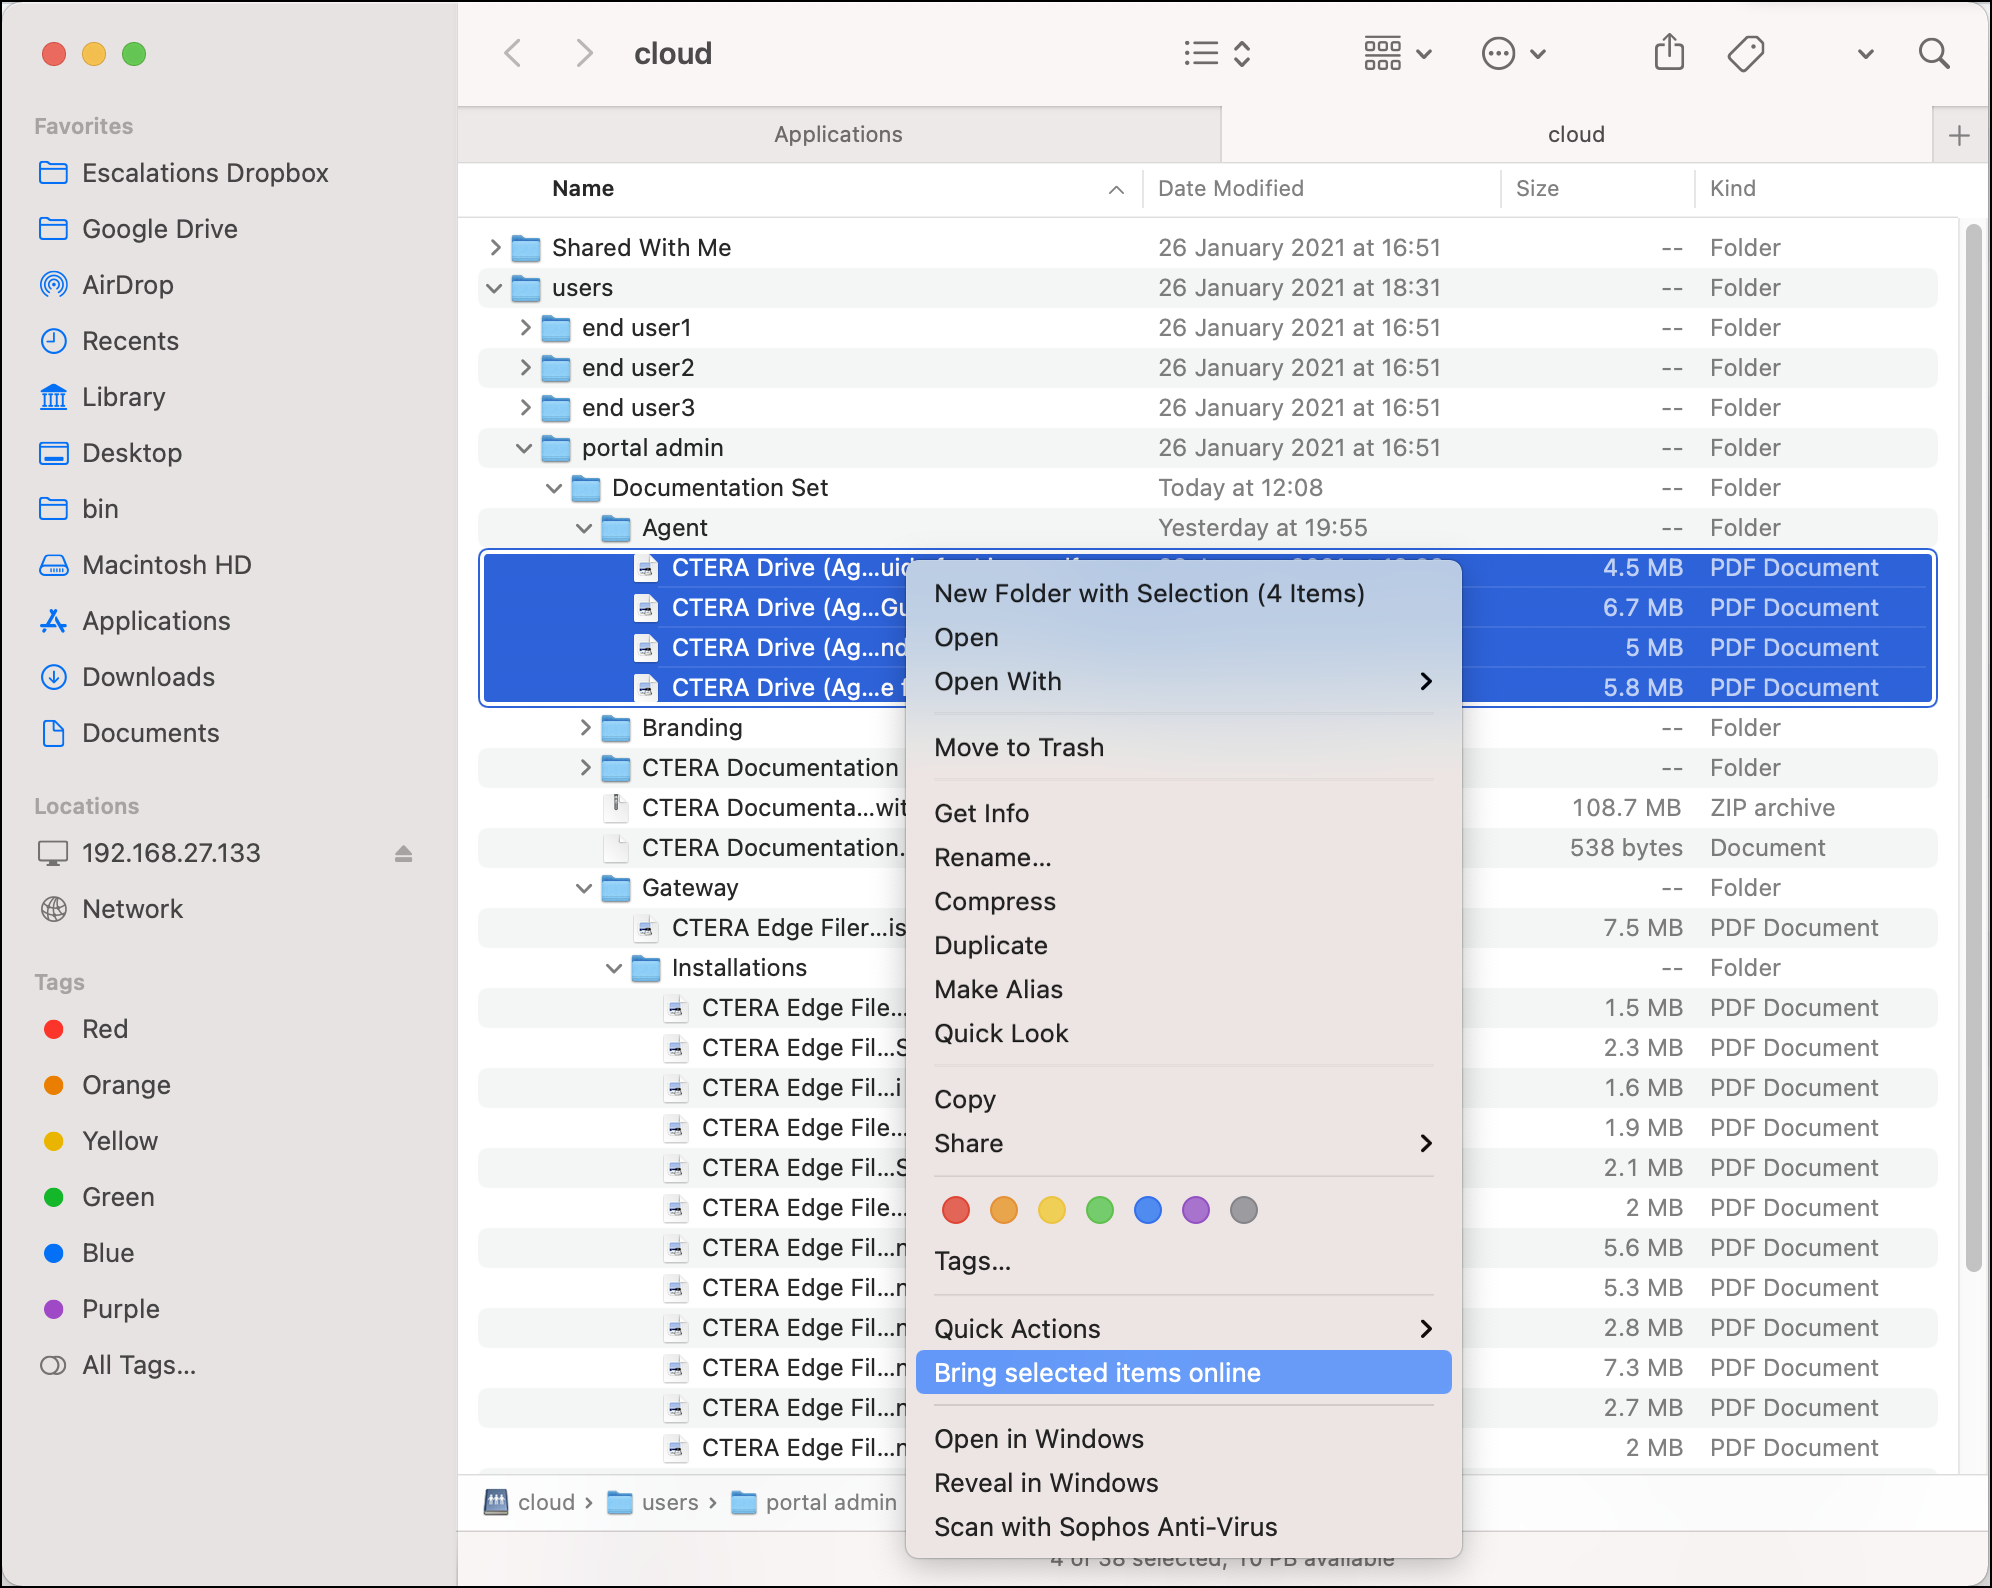
Downloading Multiple Files
To download more than one file, select multiple files to bring online and right-click. Click Bring selected items online to download all the selected files on your computer.
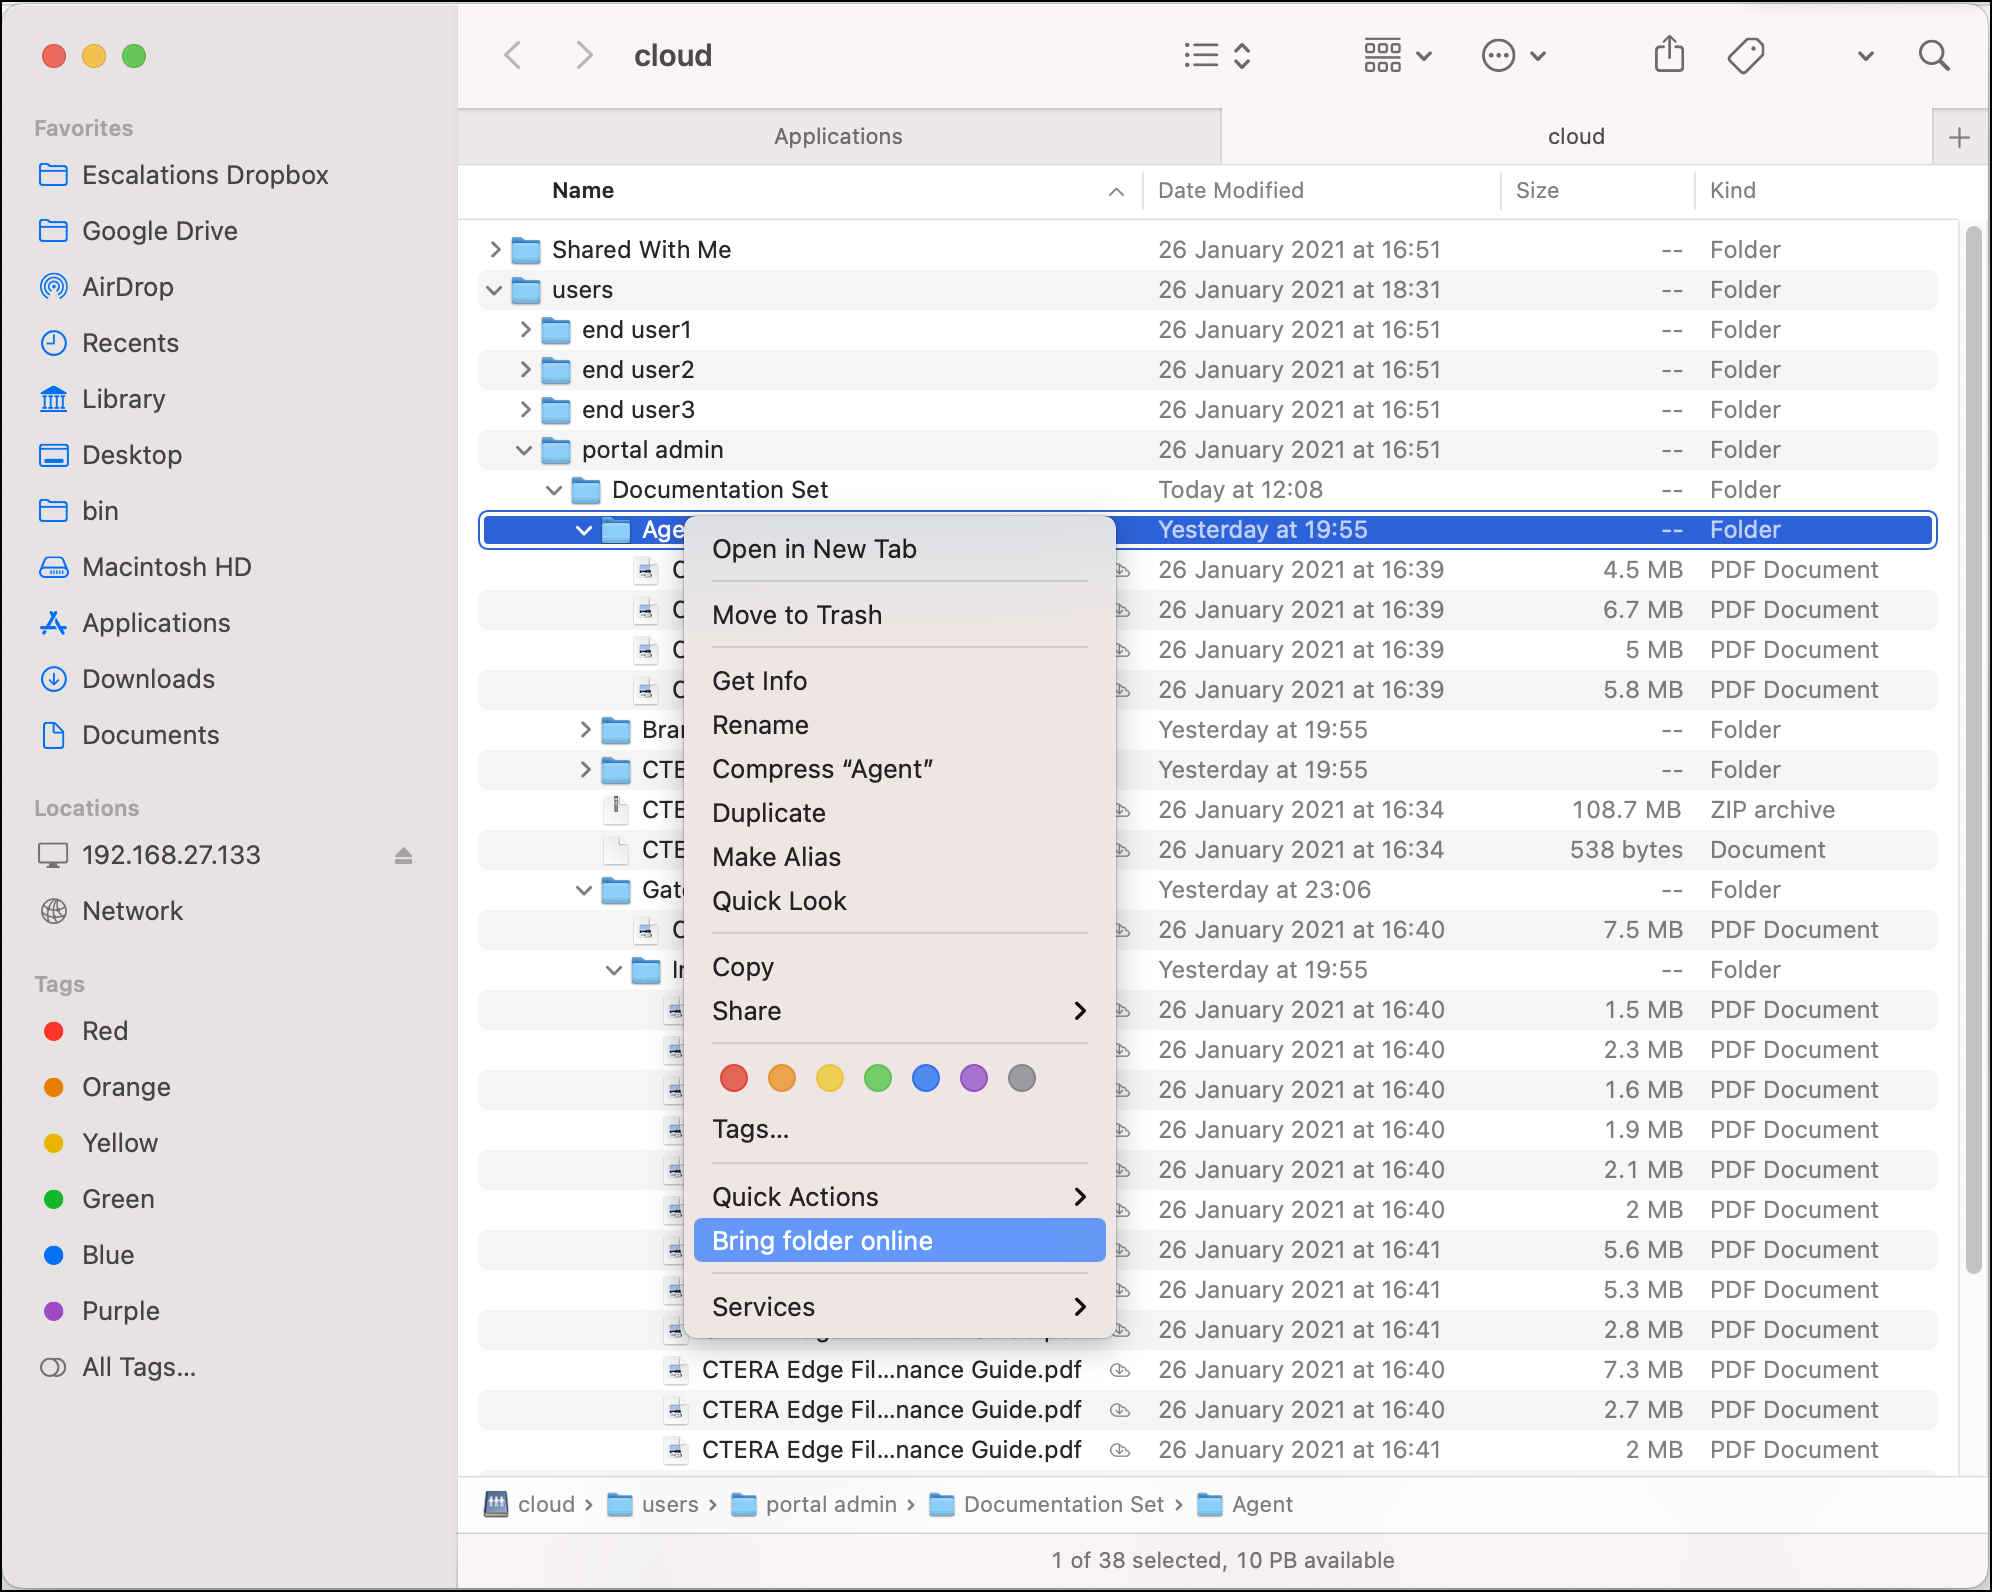
Downloading a Folder and Subfolders
To download a folder with its subfolders, right-click a folder and then click Bring folder online to download the folder and its subfolders on your computer.
Disabling Previews of Stub Files
In versions of CTERA MacAssist earlier than version 2.0, you had to disable Show View Options in Finder. This meant that no file could be previewed, whether it was a stub file or not. From CTERA MacAssist version 2.0, you can disable the previews only for stub files, allowing you to preview other files.
To disable previews only for stub files:
- In Finder, select Applications and then double-click CTERA Cache Assist from the list of the applications.
The CTERA Cache Assist window is displayed.
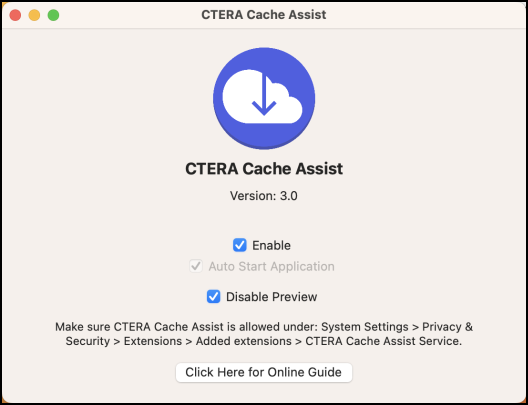
- Make sure Enable is checked.
- Check Disable Preview.
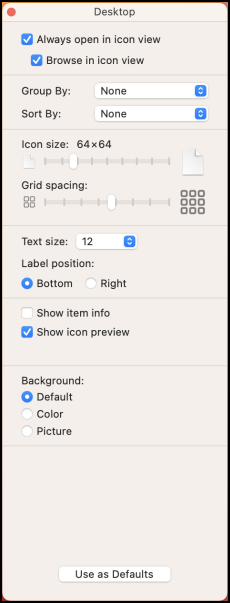
The following steps are only required if you disabled viewing previews to work with an earlier version of CTERA MacAssist.- In Finder select Desktop and then choose View > Show View Options from the menu bar.Note
If Desktop is not displayed, in Finder Settings > Sidebar check the Desktop option.
 Note
NoteThe display can be different, dependent on your version and starting point.
- Clear the Show icon preview option.
Depending on your Mac version, clearing Show icon preview also disables Calculate all sizes. - Click Use as Defaults and close the window.
- In Finder select Desktop and then choose View > Show View Options from the menu bar.
Controlling Whether CTERA Cache Assist is Enabled
If for any reason you need to control when CTERA Cache Assist is enabled or disabled, you can do this by changing the CAEnabled property in the plist file by running the following command to disable CTERA Cache Assist: defaults write D6PHDN9EA4.group.ctera.CacheAssist CAEnabled 0 and re-enable CTERA Cache Assist with the following command: defaults write D6PHDN9EA4.group.ctera.CacheAssist CAEnabled 1.
To see the current status, run the following command: defaults D6PHDN9EA4.group.ctera.CacheAssist CAEnabled. When CAEnabled is 1, CTERA Cache Assist is enabled. When it is 0, CTERA Cache Assist is disabled.