Adding and Editing Users
- 5 Minutes to read
- Print
- DarkLight
- PDF
Adding and Editing Users
- 5 Minutes to read
- Print
- DarkLight
- PDF
Article Summary
Share feedback
Thanks for sharing your feedback!
You can add users to the CTERA Edge Filer by connecting to Active Directory, or add local users.
- When connecting to Active Directory, you can add users from a domain or from an Active Directory tree or forest: Defining Users From an Active Directory Domain, Tree or Forest.
- When adding local users to the CTERA Edge Filer: Adding and Editing Local Users.
Note
The Active Directory domain controller must be read/write and not read-only.
Defining Users From an Active Directory Domain, Tree or Forest
When an Active Directory structure includes domains such that the CTERA Edge Filer is joined to one domain, which is set up to trust a second domain, you set up ID mapping for the second domain on the edge filer. The edge filer can list users and groups and permission them accordingly, and users can access the resources on the edge filer based on the permissions.
When the trust between domains is one way, for example, domain A is set up to trust domain B, but domain B is not set up to trust domain A, you can set up ID mapping for domain B on the edge filer connected to domain A and users and groups from domain B can access the edge filer. But, if you connect the edge filer to domain B, users and groups from domain A will not be able to access the edge filer.
Note
The ID mapping range 1 to 199999 is reserved and must not be manually overwritten.
To define users from an Active Directory domain:
- In the Configuration view, select Shares > Windows File Sharing in the navigation pane.
The Windows File Sharing page is displayed.
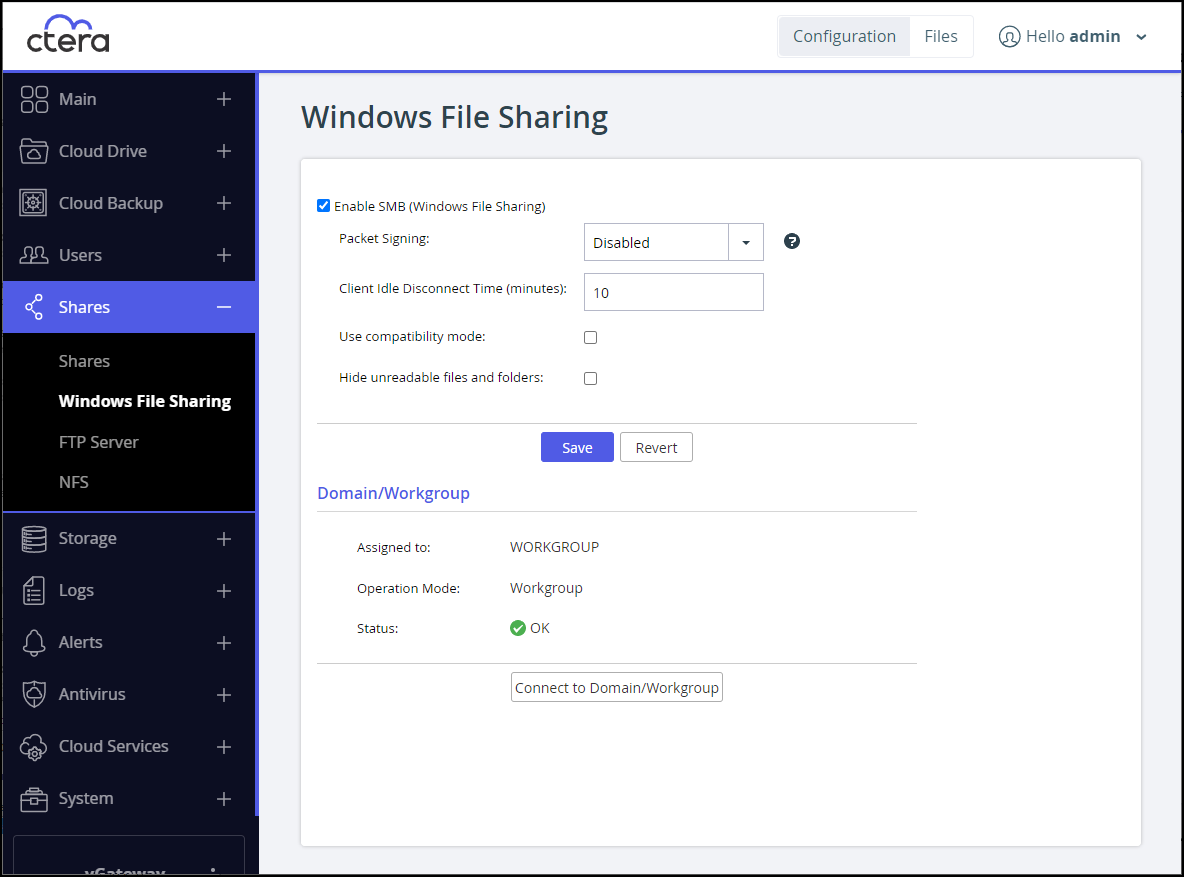
- Click Connect to Domain/Workgroup.
The Windows File Sharing Wizard opens, displaying the Connect to Domain/Workgroup window.
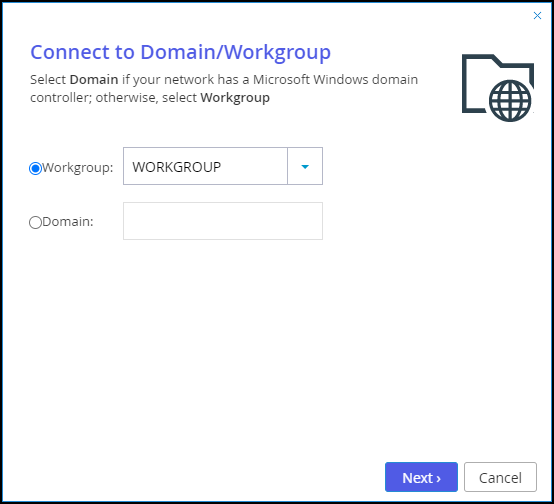
- Choose Domain and type the domain name.
- Click Next.
The Join a Windows domain window is displayed.
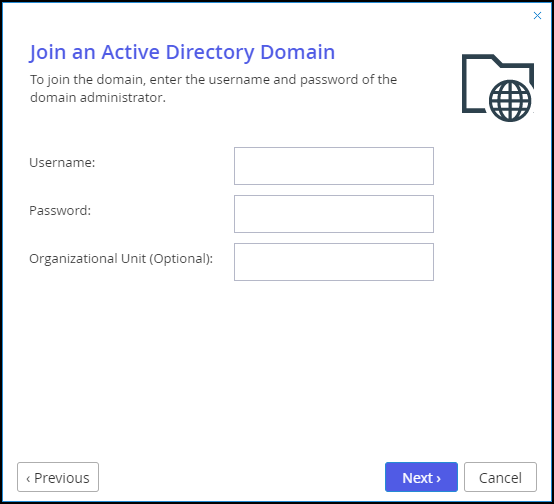
- In the Username and Password fields, type the domain administrator's username and password.
- Optionally, In the Organizational Unit field, type the name of the organizational unit within the Active Directory domain.
The format is a path and can contain the following:
CN=Fully qualified domain name, such as gatewayName.portalName.portalSuffix
L=Locality Name, for example London
ST=State or Province Name, for example London
O=Organization Name, for example CTERA Networks
OU=Organizational Unit Name, for example Sales
C=Country Name, for example GB
STREET=Street Address
DC=Domain Component, for example com
UID=Userid - Click Next and then Finish.


To define CTERA Edge Filer users from for an Active Directory tree or forest:
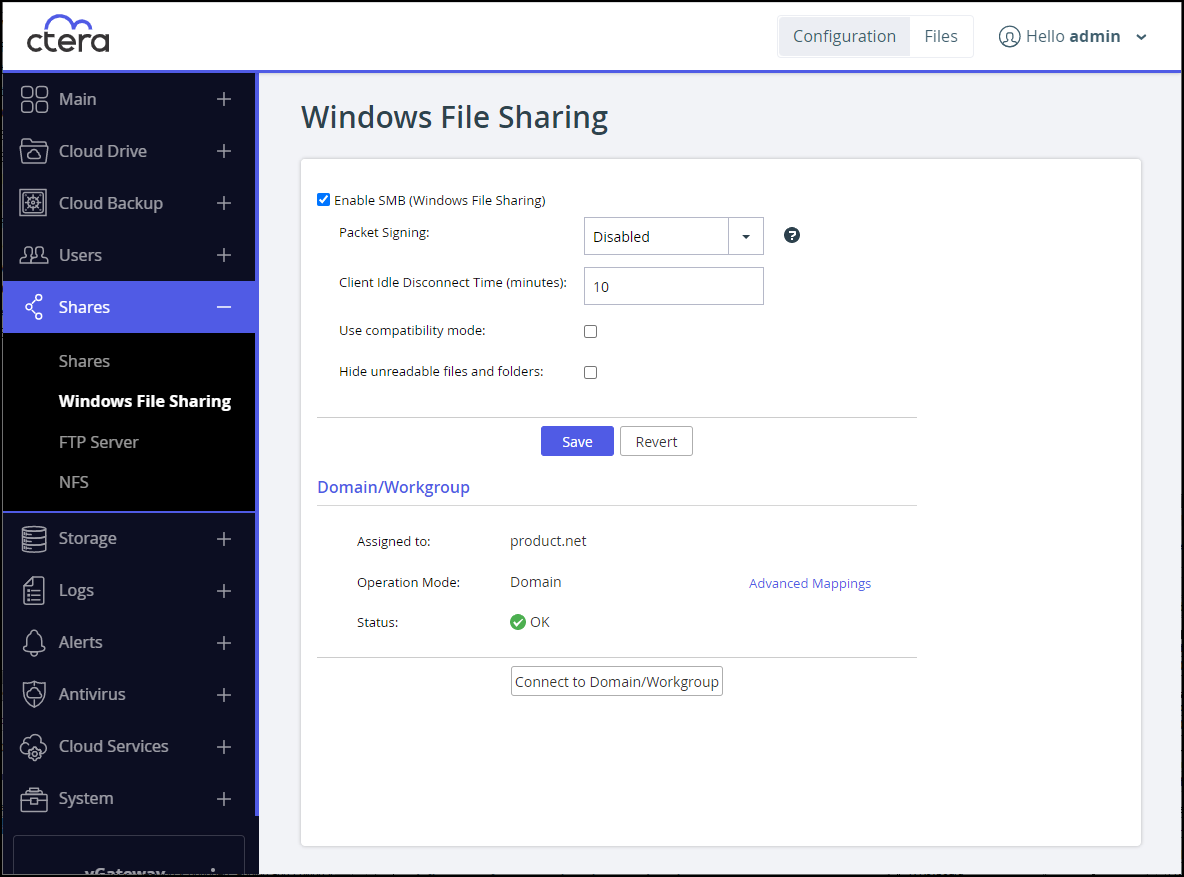
- After setting up the Active Directory domain, in the Windows File Sharing page, in the Domain/Workgroup area, click the Advanced Mappings link.
The UID/GID Mapping window is displayed.
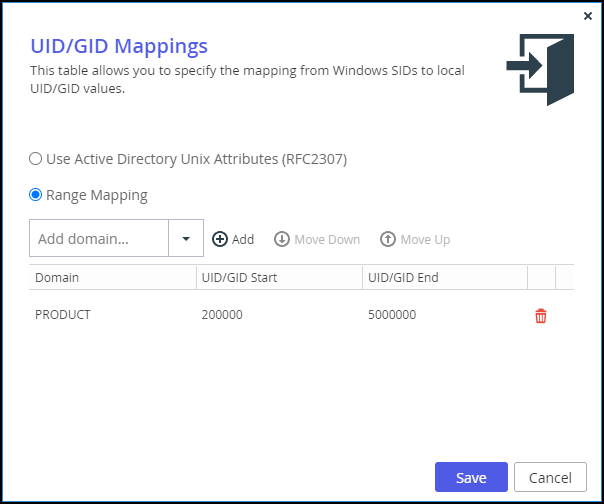
- For each domain in the tree/forest displayed in the list of domains, specify the UID/GID range allocated on CTERA for users and groups from Active Directory. The UID/GID range is defined by UID/GID Start value and UID/GID End value. this is set for each domain that is trusted in the Active Directory environment. The UID/GID range has a default minimum value of 200,000 in order to reserve a range for local accounts and system accounts to run on the system and should not be changed.Note
The ID mapping range 1 to 199999 is reserved and must not be manually overwritten.
- In the Add domain field, either type the desired domain's name, or select it from the drop-down list.
- Click Add.
The domain is displayed in the table. - Leave the UID/GID Start field with the default value.
- Click in the UID/GID End field and type the ending number in the range of CTERA Edge Filer user and group IDs (UID/GID) that should be assigned to users and user groups from this domain. The end number is calculated as follows:
The RID, Relative ID, value, added to the UID/GID Start number.
The SID is the identity of a user in Active Directory. SIDs are represented in the following way: S-1-5-21-1180699209-877415012-3182924384-4850000, where the last part of the SID is the RID value, 4850000 in this SID example.
For example, if the RID is 4850000 and UID/GID Start is 200000, UID/GID End is 4850000 + 200000 = 5050000.
- To re-order the domains, do any of the following:
- To move a domain up in the table, click on the desired domain, then click Move Up.
- To move a domain down in the table, click on the desired domain, then click Move Down.
The order in which domains appear in the table represents the order in which the domains will appear in drop-down lists throughout the CTERA Edge Filer user interface, for example, when managing access rights to projects.
- To remove a domain, in the domain row, click .
The domain is not displayed in the table. - Click Save.


Adding and Editing Local Users
You specify the local users who have access to the CTERA Edge Filer.
To add or edit a user:
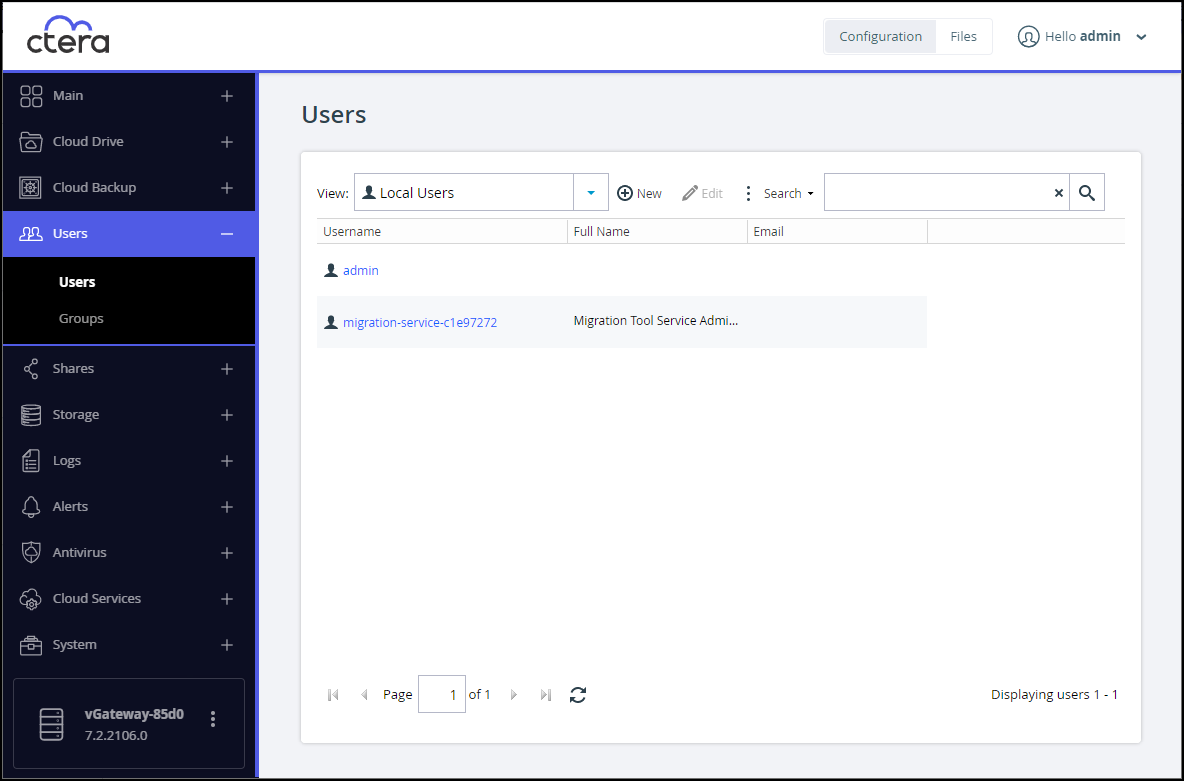
- In the Configuration view, select Users > Users in the navigation pane.
The Users page is displayed.
 Note
NoteA Migration Tool Service Admin Account administrator is automatically added:
migration-service-n, where n is a unique identifier. You must not delete this administrator. - To add a user, click New.
Or,
To edit a user, either click the user name or select the user row and click Edit.
The **Specify User Details **window is displayed. If you are editing an existing user, the window is displayed with the user details.
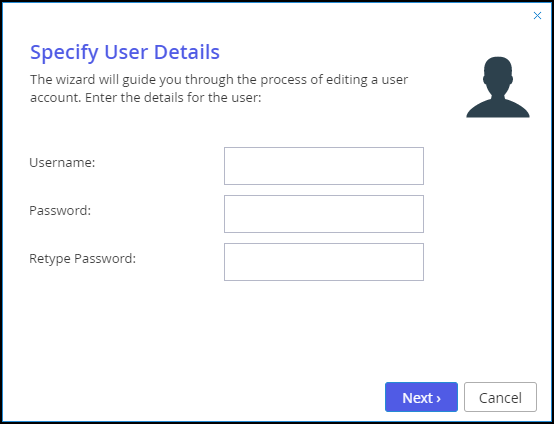
- Specify the user details.
Username – A name for the user.
Password – A password for the user. The password must be at least eight characters and must include at least a letter, digit and special character, such as ~, @, #, $ , %, ^, & , (. The password cannot contain the Username as part or all of the password.
Retype password – The same password you entered in the Password field. - Click Next and optionally specify additional account information:
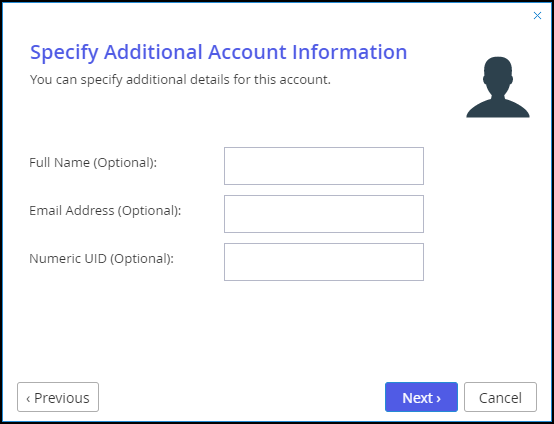
Full Name – The full name of the user.
Email Address – The email address of the user.
Numeric UID – A numeric user ID (UID) to assign the user. - Click Next and then Finish.
The new user is displayed on the Users page.


Was this article helpful?