Adding, Editing, and Deleting Virtual (Team or Reseller) Portals
- 3 Minutes to read
- Print
- DarkLight
- PDF
Adding, Editing, and Deleting Virtual (Team or Reseller) Portals
- 3 Minutes to read
- Print
- DarkLight
- PDF
Article summary
Did you find this summary helpful?
Thank you for your feedback
Adding and Editing Virtual Portals
To add or edit a virtual portal:
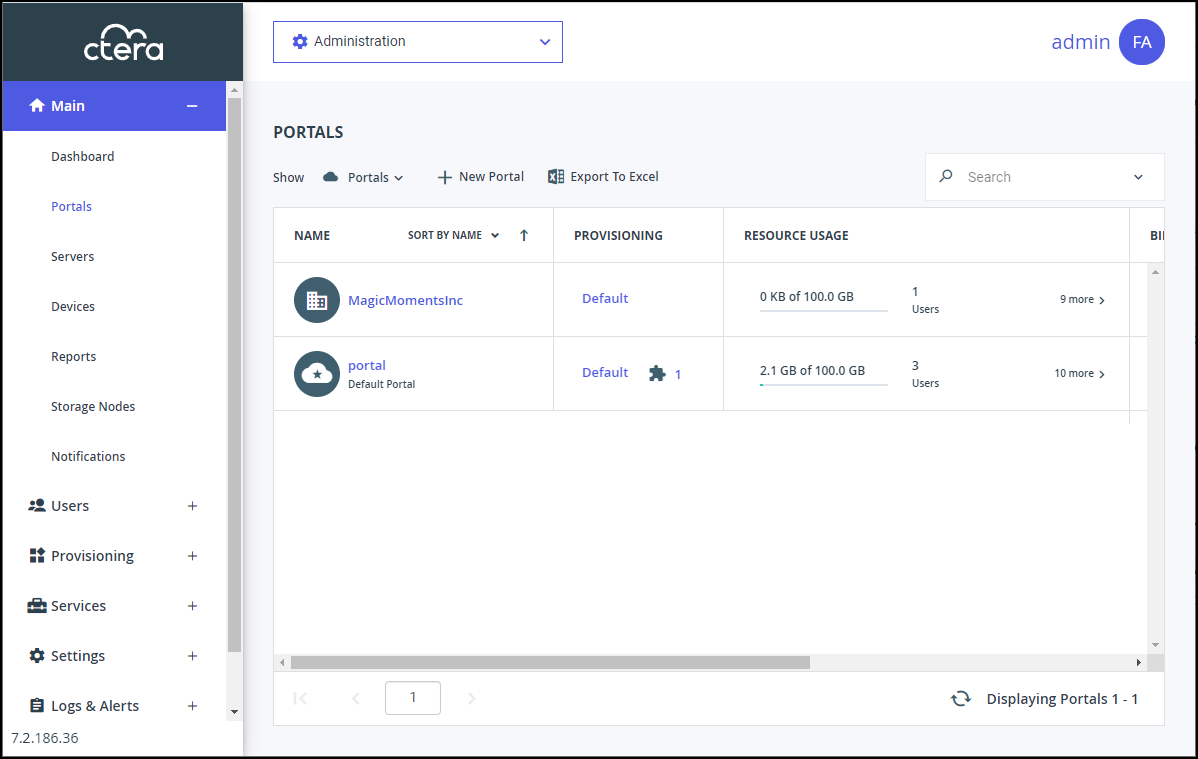
In the global administration view, select Main > Portals in the navigation pane.
The PORTALS page opens, displaying all the virtual portals.
Either,
- Add a new virtual portal, click New Portal.
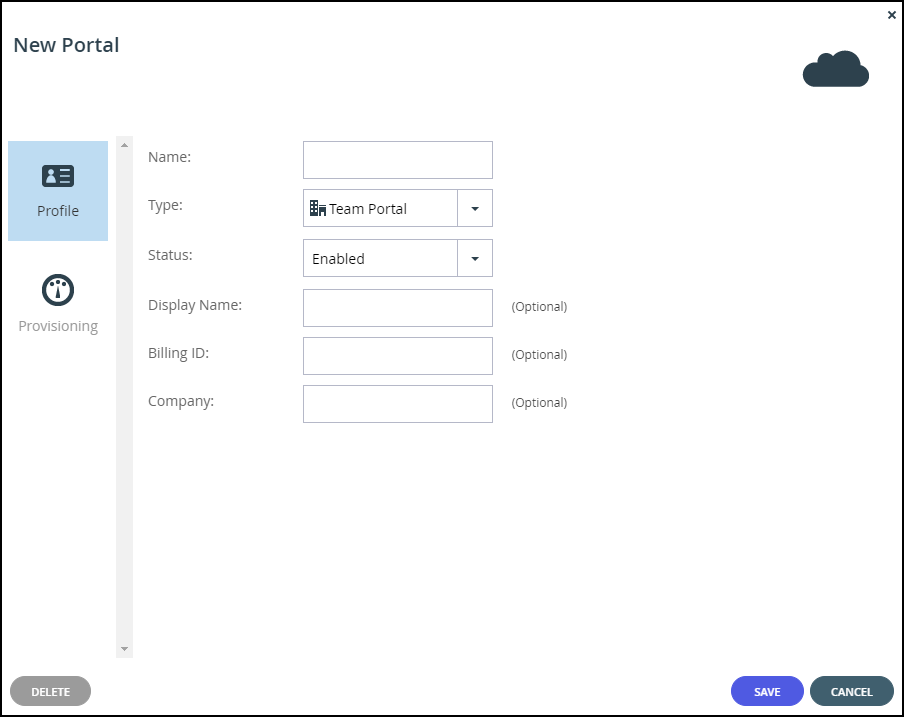
The New Portal window is displayed.
Or,
- Edit an existing portal, click the portal's name**.**
The portal window is displayed with the portal name as the window title.
- Add a new virtual portal, click New Portal.
Complete the fields.
Name – Type a unique name for the virtual portal.
Type – Select the virtual portal's type. This field is read-only, when editing an existing virtual portal.- Team Portal (default)
- Reseller Portal
Status – The status: either Enabled or Disabled. If you set the status to disabled:
- Users cannot log in to the portal, and devices cannot connect.
- Reports and email notifications are not sent from the portal.
- User self-registration is disabled.
Global administrators can still connect to disabled portals via the global administration view.
Display Name – Optional. The name displayed.
Billing ID – Optional. The virtual portal owner's billing ID. This enables integration of the portal with an external billing system.NoteThe Billing ID must be unique so that only this virtual portal is associated with it.
Company – Optional. The name of the company owning the portal.
Enable Resource Provisioning (Reseller portal only) – Deselect this box to allow a reseller unlimited quotas, subject only to the limits of the CTERA Portal license. If you deselect the box, the Provisioning option is removed.Assign a plan, as described in Assigning Global Plans to Virtual Portals.
Add global add-ons, as described in Assigning Add-ons to Virtual Portals.
Click SAVE.


Deleting and Undeleting Virtual Portals
Note
When a virtual portal is deleted, it is retained for the number of days specified in the Retain deleted portals for field in the global settings, where the retention period is defined. For details refer to the Configuring Global Settings.
All the portal content and configuration is retained during this time and any unique values associated with the portal cannot be used for another portal. At the end of the retention period, the portal content is permanently deleted and unique values that were associated with the portal can be used for another portal. During the retention period the portal can be restored, as described in the procedure To restore a deleted portal, below.
To delete a virtual portal:
- In the global administration view, select Main > Portals in the navigation pane.
The PORTALS page opens, displaying all the virtual portals.
- Select the row of the portal to delete and click Delete Portal.
A confirmation window is displayed. - Click DELETE.
The portal is deleted.
To restore a deleted portal:
Note
A deleted portal can be restored after it is deleted for the number of days specified in the Retain deleted portals for field in the global settings, where the retention period is defined. For details refer to the Configuring Global Settings.
- In the global administration view, select Main > Portals in the navigation pane.
The PORTALS page opens, displaying all the virtual portals. - Change the view to display the deleted portals by clicking Show Portals and selecting Deleted Portals.
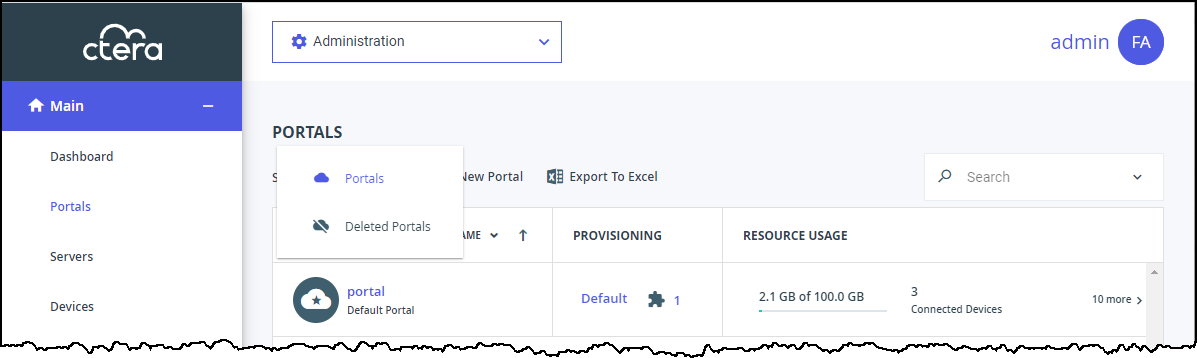
The view changes to display deleted portals.NoteDeleted portals in this list do not use any licenses or consume storage from storage quotas.
- Select the row of the portal to recover and click Undelete.

The portal and portal content is restored.NoteYou can export the list of deleted portals with information such as the storage used by the portal, when it was deleted and licenses for the portal, by clicking Export to Excel.
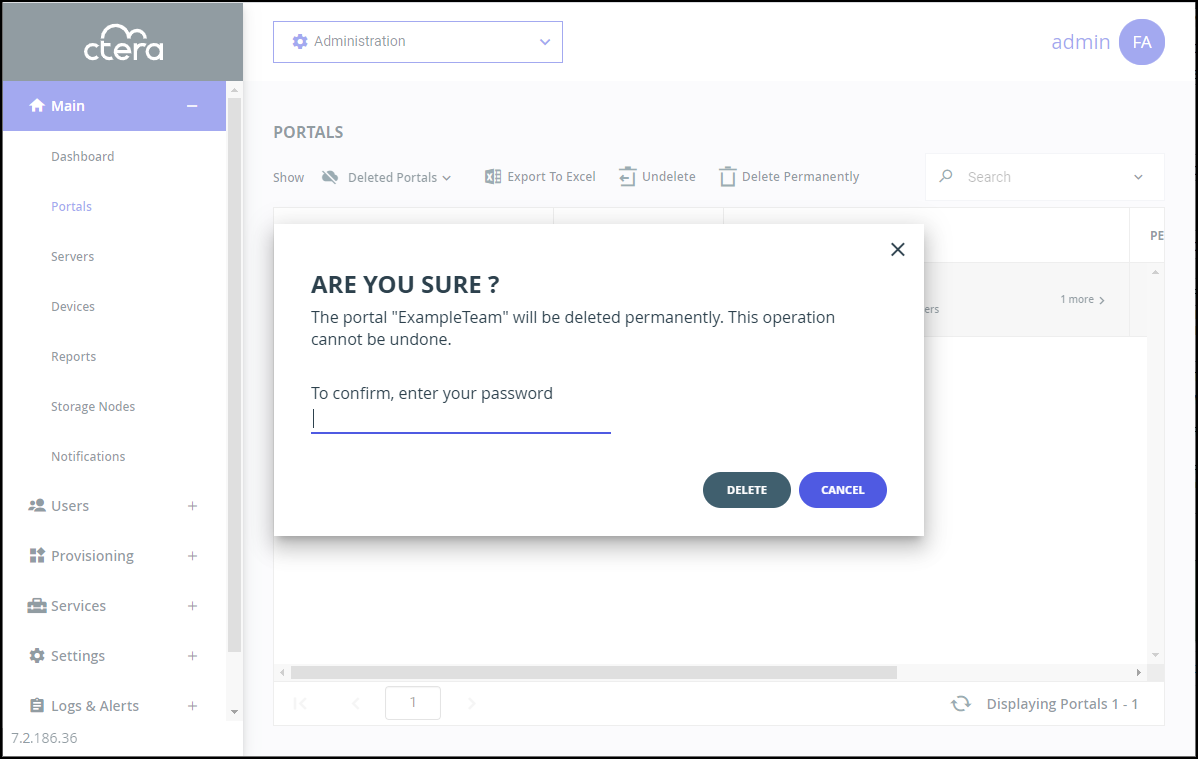
You can click Delete Permanently to immediately delete the portal and all the content. In this case, you are prompted to confirm that you want to permanently delete the portal by entering you administrator password.


The audit log includes an entry for a portal that is deleted, undeleted or permanently deleted.
Was this article helpful?