You can use a second CTERA Edge Filer is one of the following ways:
- With a second CTERA Edge Filer you can use the second edge filer as a fail-safe device if the primary edge filer fails. The failover to the second edge filer is achieved automatically using Microsoft DFS. Each edge filer must be connected to the Windows Server running Active Directory with DFS.
- Creating a new virtual CTERA Edge Filer and using Instant Disaster Recovery so that both the metadata and data are populated to the replacement CTERA Edge Filer, almost instantly, based on priority. When a user attempts to access content that hasn't yet been downloaded as a stub, as part of the metadata download, that content receives download priority and is populated in real-time, so it becomes available to users immediately. In the background the metadata from the CTERA Portal is downloaded so that the second edge filer is populated with the stub files of all the content.
Installing and setting up a new edge filer and setting it for fast disaster recovery is not a long procedure. The installation instructions are per version, for example for edge filer 7.9.x, see Installing and Upgrading a CTERA Edge Filer and Edge Filers 7.9.x: Enable Fast Disaster Recovery.
To Install and Configure DFS on the Windows Server
The Windows Server must be Windows Server 2016 or higher.
The procedures in this section can vary slightly, depending on the version of Windows Server.
To install DFS on the Windows Server:
- On the Windows Server open Server Manager and select Manage > Add Roles and Features.
- Click Server Selection, select the server and then click Server Roles.
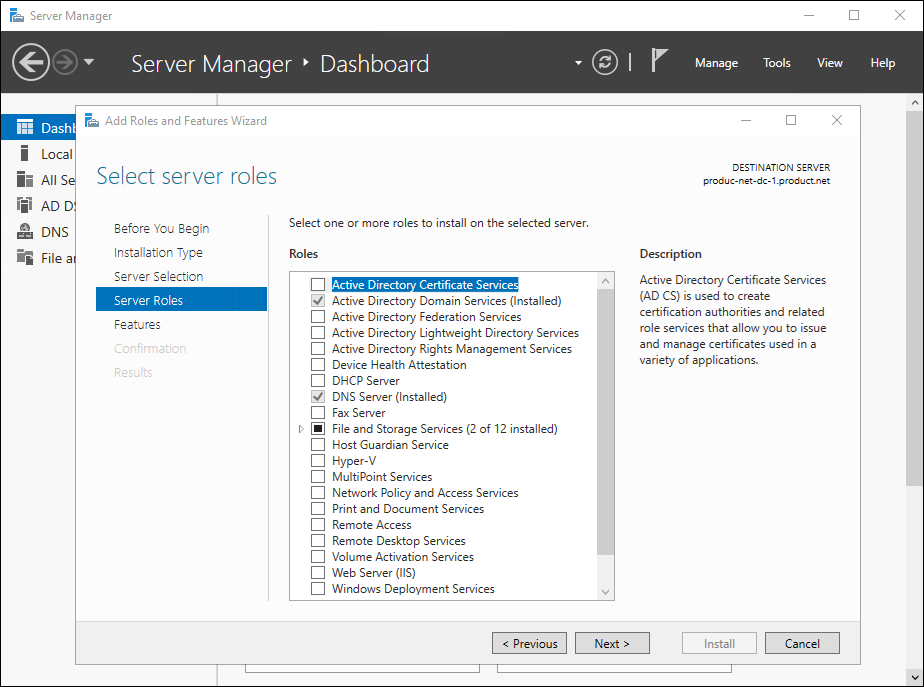
- Expand File and Storage Services (x of y installed) and then expand File and iSCSI Services (x of y installed).
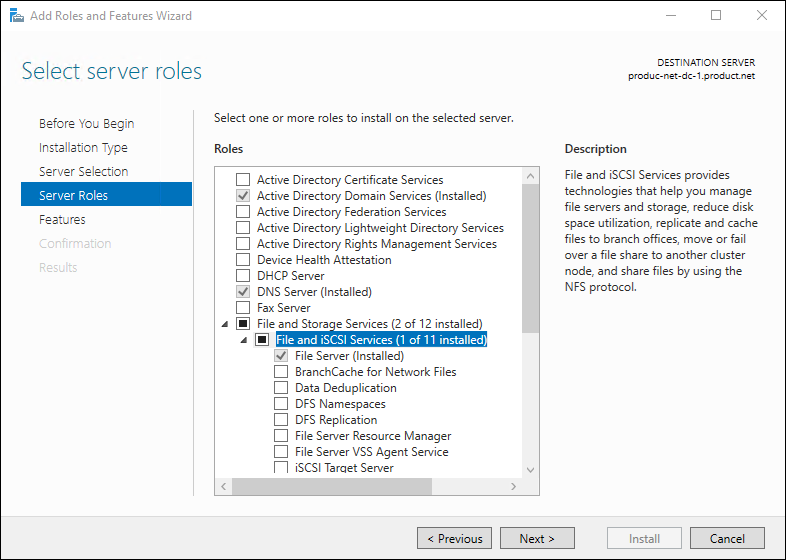
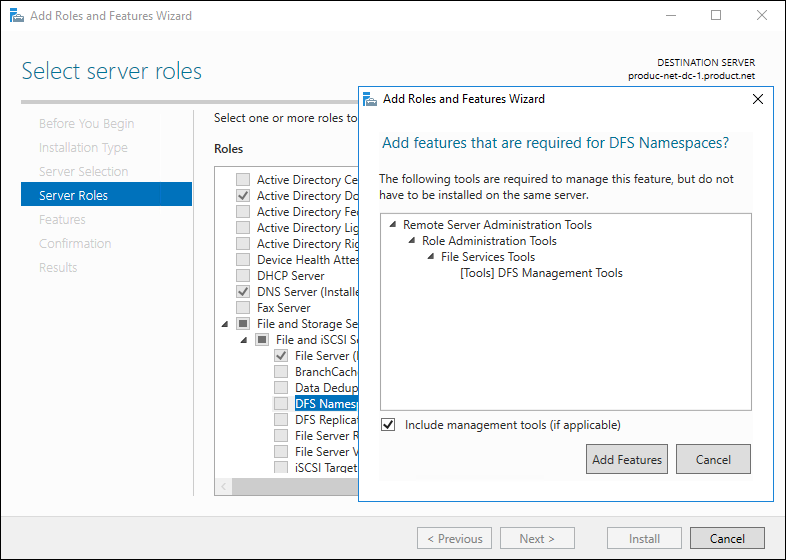
- Check DFS Namespaces and in the Add Roles and Features Wizard click Add Features.
- Check DFS Replication.Note
DFS Replication is not used, but must be installed.
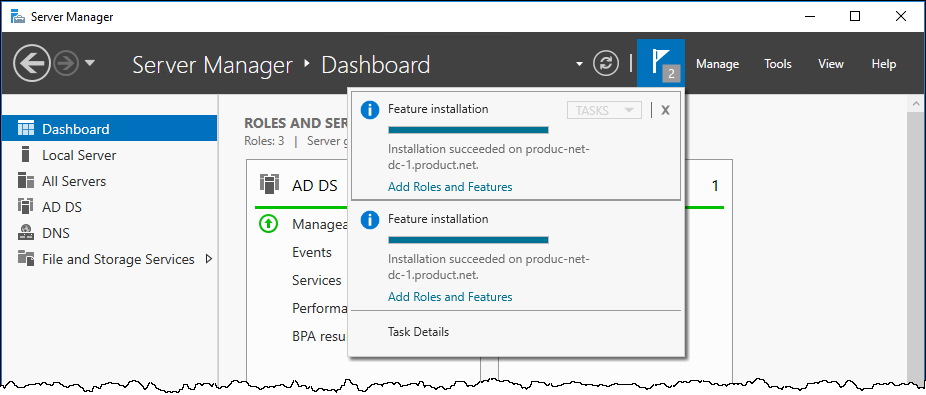
- Click Next until the end of the wizard and then click Install.
- Click Close.
The status of the installation can be viewed by clicking the flag at the top right of the Server Manager.
To configure DFS:
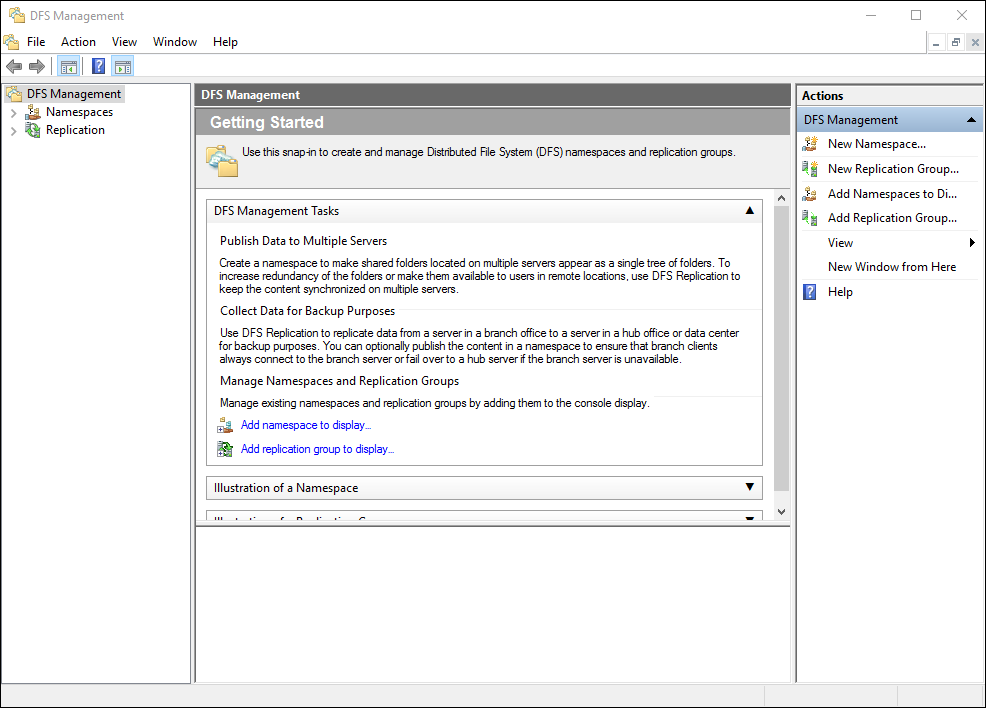
- In Server Manager select Tools > DFS Management.
- Expand Namespaces in the navigation pane and if there are no namespaces defined, create a new namespace.
- Right-click Namespaces in the navigation pane and select New Namespace.
- Follow the wizard to create the namespace.
The namespace is the container/folder where the shares will reside. For example, if the namespace is Data the DFS namespace path will be \domain\data.
- Right-click the namespace in the navigation pane, select Properties and then the Referrals tab and set Cache duration to the required value.
For demos and testing, the Cache duration value should be low. In production the value should be great enough for the edge filer to sync data with the portal when it comes back online. For example, if the primary edge filer goes down, DFS will failover to the backup edge filer. While down users will be changing files on the backup edge filer, which are not being synced to the down edge filer. When the primary edge filer comes back online, you need to allow a period of time for it to sync changed data back down to it.NoteMake sure that Ordering method is Lowest Cost and Clients fail back to preferred targets is checked.
- Click OK.
- Right-click the namespace in the navigation pane and select New Folder and define the folder which will be a share names that users will connect to.
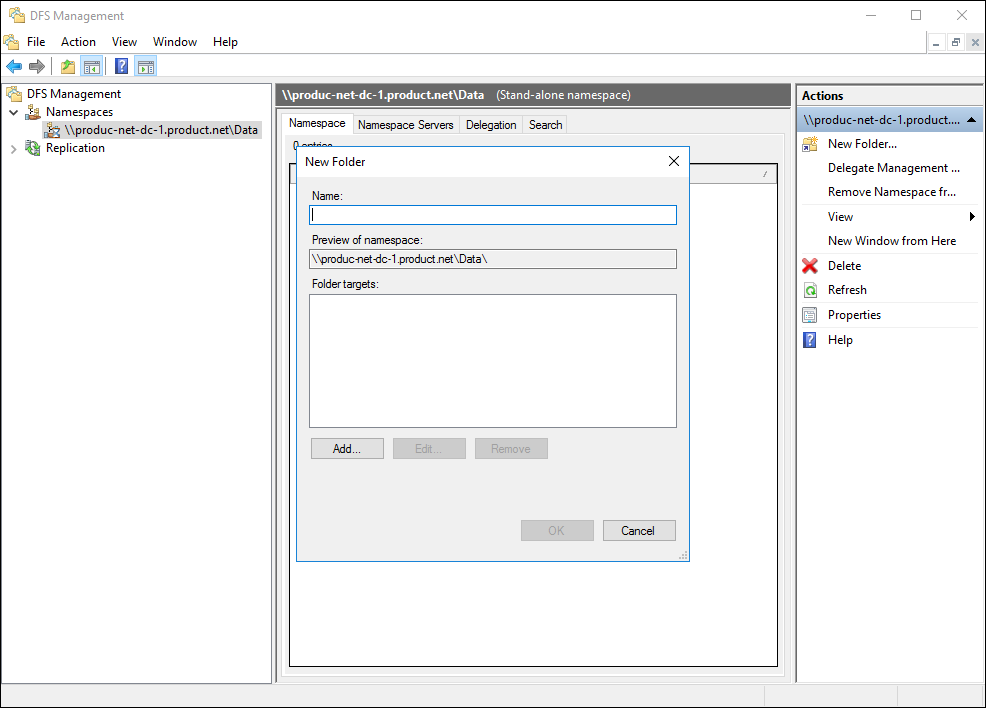
For example, for a folder NY the UNC path is \domain\data\NY. - Click Add to add Folder Targets that will be the UNC path of the edge filer shares you want to use.
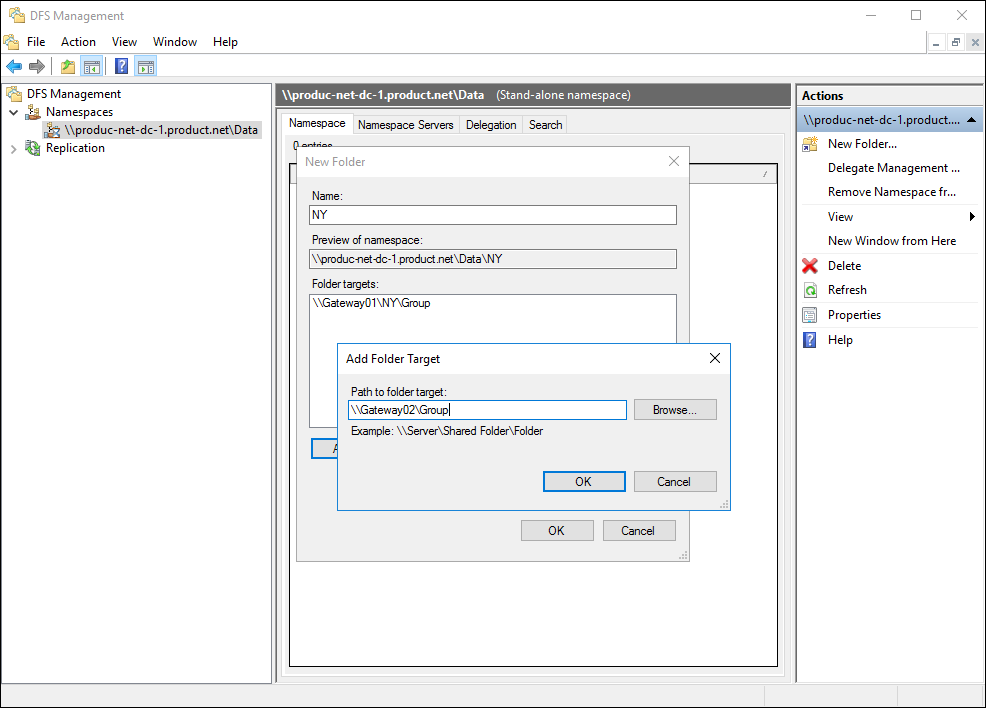
- Click OK to add the folder target and then OK to complete the folder addition.
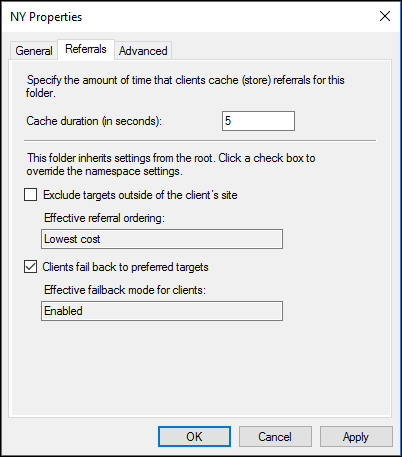
- Right-click the folder in the navigation pane, select Properties and then the Referrals tab and set Cache duration to the required value.
For demos and testing, the Cache duration value should be low. In production the value should be great enough for the edge filer to sync data with the portal when it comes back online.
 Note
NoteMake sure that Ordering method is Lowest Cost and Clients fail back to preferred targets is checked.
- Click OK.
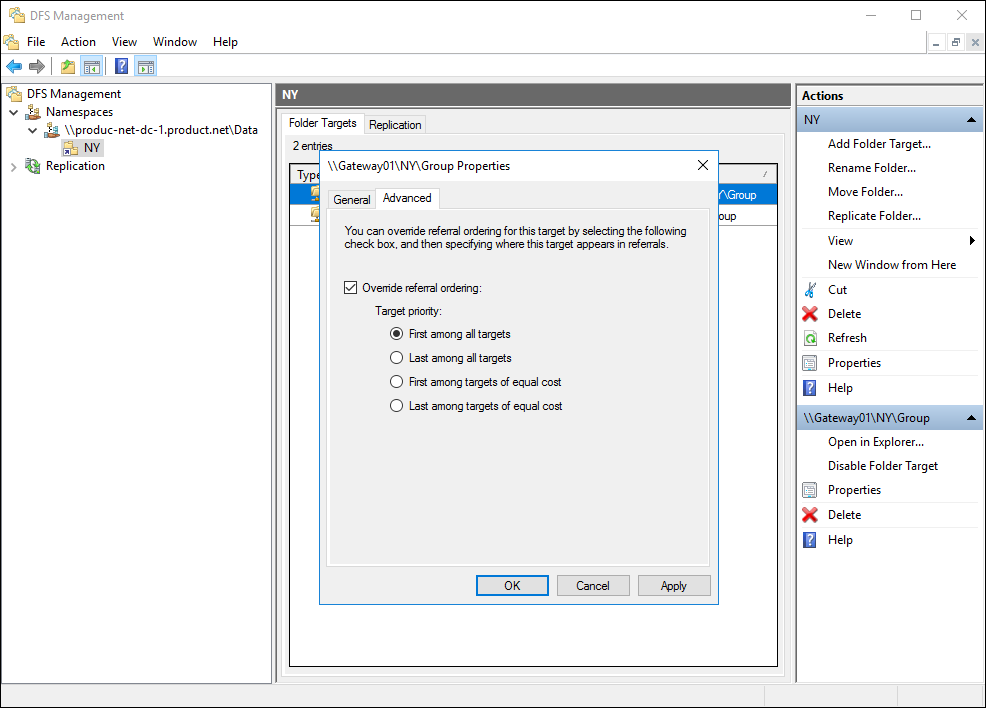
- Double-click the folder in the navigation pane to display it with the folder targets and right-click a folder target, select Properties and then the Advanced tab.
- Set the priority for which edge filer will be first and which will be last.
Testing Automatic Edge Filer Disaster Recovery
- Check which edge filer is recognized by DFS as the primary edge filer. On the primary edge filer, open several files so they are cached locally. On the other edge filer, these files are presented as stub files.
If the opposite situation occurs, that the stub files are presented on the primary edge filer, reconfigure the DFS Management properties for the folder targets. - In Windows Explorer, browse to the DFS namespace to verify that the primary edge filer is displayed.
- Log on to the primary edge filer as an administrator and navigate to Shares > Windows File Sharing. Uncheck Enable SMB and Save. This will cause the shares on the primary edge filer to be unavailable and DFS should automatically failover to the other edge filer. You should be able to tell this because instead of files, you will see stubs.
- Log on to the edge filer as an administrator.
- In the Configuration view, select Share > Windows File Sharing in the navigation pane.
The Windows File Sharing page is displayed. - Uncheck Enable SMB (Windows File Sharing) and click Save.
- Check the primary edge filer and the shares should now be unavailable.
DFS will automatically failover to the secondary edge filer which can be accessed using the same SMB path, for example, \domain.local\data\NY, and the files will be available as stubs. - Validate failback by re-enabling SMB on the primary edge filer in the edge filer user interface.
Within the cache duration specified, the path will automatically fail back to the primary edge filer, where the share will contain files and not stubs.