Configuring Global Settings
- 6 Minutes to read
- Print
- DarkLight
- PDF
Configuring Global Settings
- 6 Minutes to read
- Print
- DarkLight
- PDF
Article Summary
Share feedback
Thanks for sharing your feedback!
Global settings apply across all team and reseller portals:
- The DNS suffix that is appended to each virtual portal's name, in order to create the team and reseller portal's DNS name.
- The CTERA Portal time zone.
- Database replication lag time.
- Redirects from HTTP to HTTPS for administrators and end users.
- Session timeout when no activity.
- Document preview settings.
- Password policy for portal administrators.
- Settings for the CTERA Portal behind a proxy server.
- Consent page prior to login.
To configure global settings:
In the global administration view, select Settings in the navigation pane.
The Control Panel page is displayed.
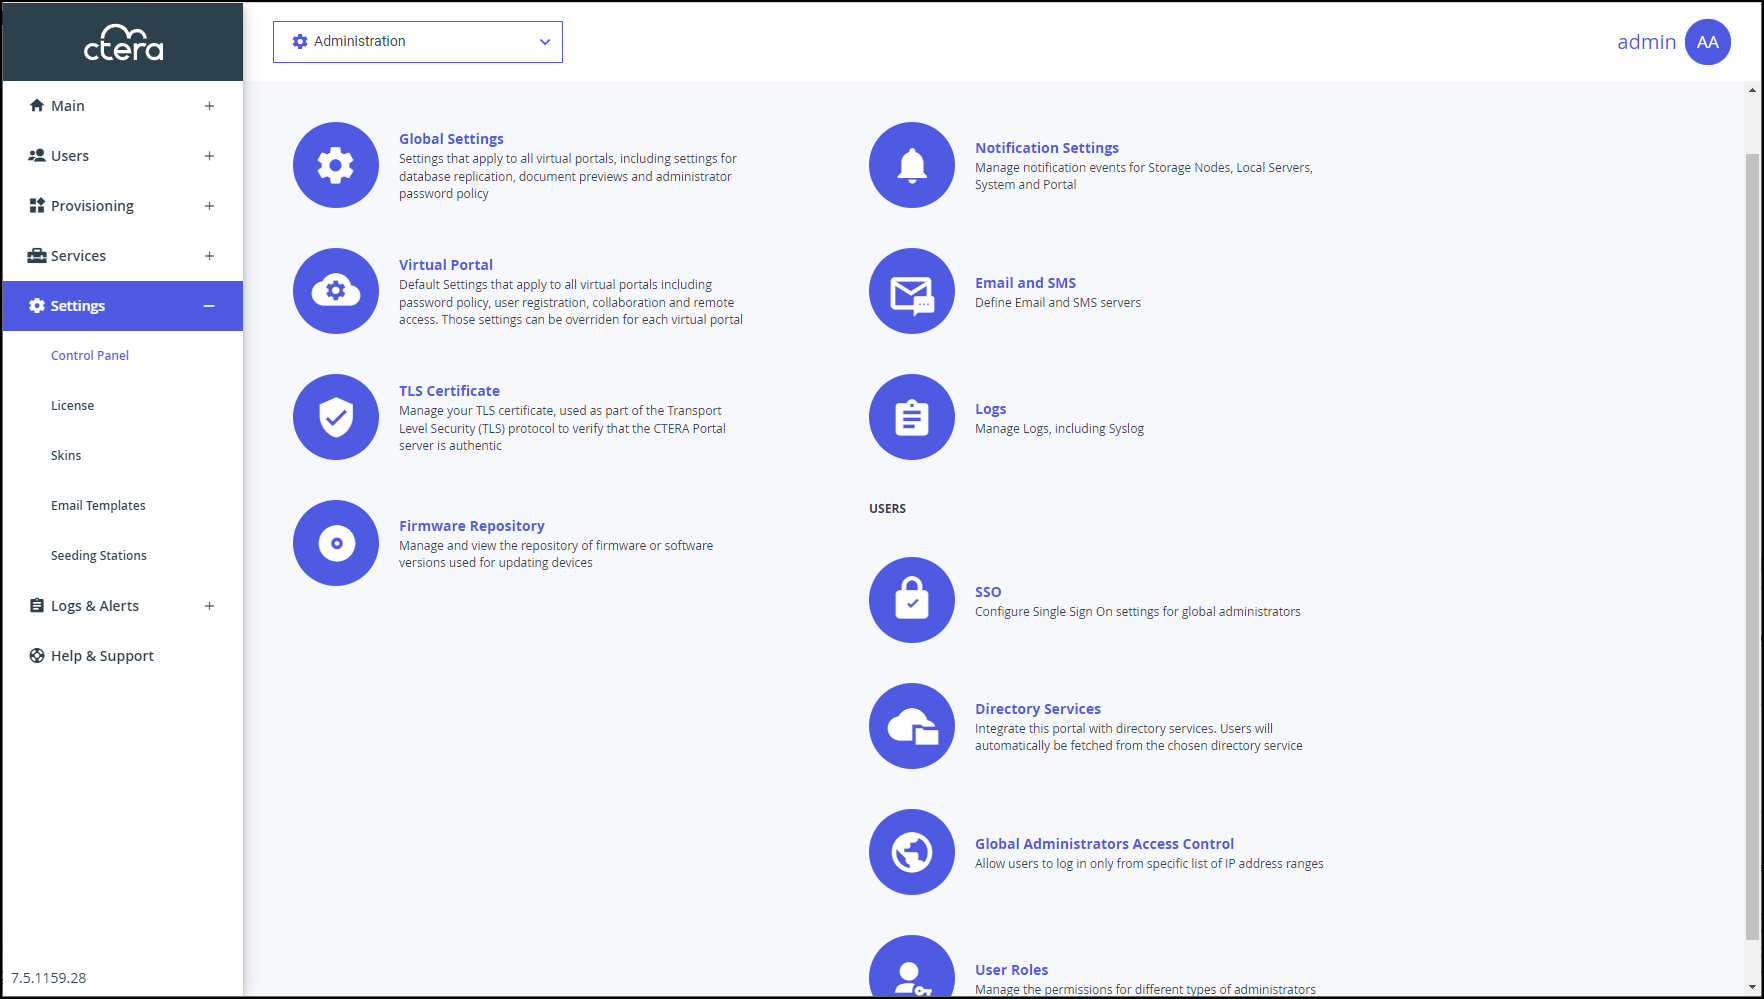
Select Global Settings under SETTINGS in the Control Panel page.
The Global Settings window is displayed.
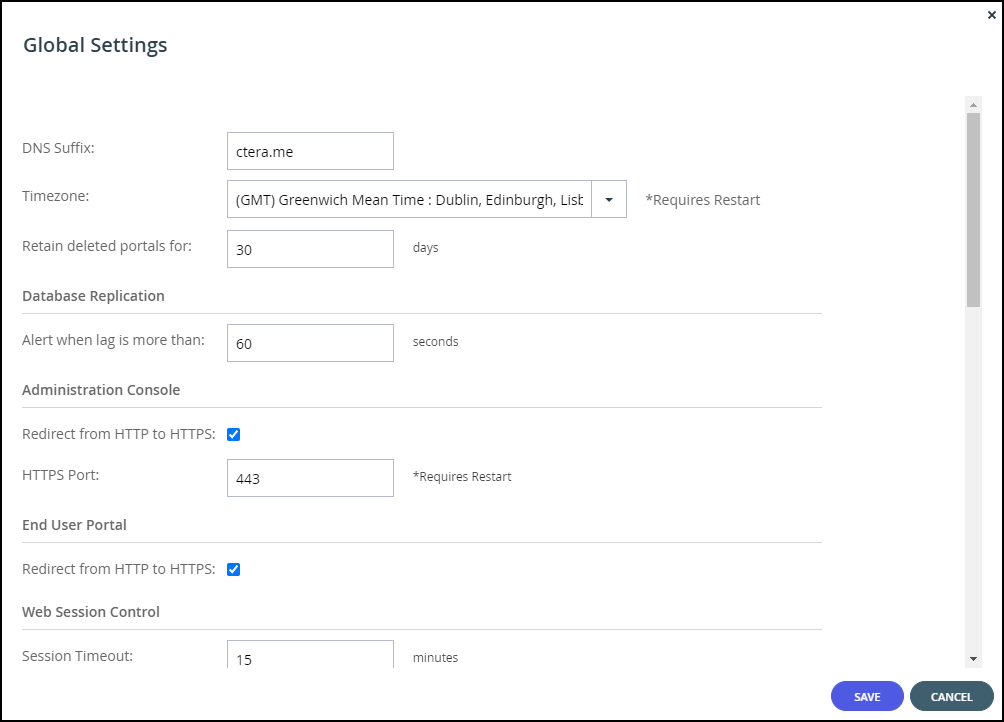
Make changes as needed.
DNS Suffix – The global DNS suffix to use for all virtual portals. The DNS suffix was set when the portal was installed, as described in the installation guide for the environment.WarningChanging the DNS suffix from the suffix specified when the portal was installed, requires CTERA to issue a new license as well as possible changes to system settings, such as the hosts file.
The DNS suffix is the suffix that is appended to each virtual portal's name, in order to create the virtual portal's DNS name. For example, if a virtual portal's name is myportal, and the DNS suffix is example.com, then the virtual portal's DNS name will be myportal.example.com. The DNS name is used to connect directly to a virtual portal.
NoteThe name of each virtual portal is configurable in the Main > Portals page. Click the portal name to change the name.
Timezone – The CTERA Portal's time zone.
NoteIf you change the Timezone, you need to restart the CTERA Portal servers for the change to take effect. Restart the CTERA Portal servers in the following order:
- Main database server.
- Replication database server, if available.
- All application or preview servers.
The Timezone change is implemented after the restart.
Retain deleted portals for – The number of days to retain a deleted virtual portal. During this retention period, the administrator can undelete the portal, but after this period, the portal is permanently deleted along with the portal content. For details, see Deleting and Undeleting Virtual Portals.
Make necessary changes to the other sections.
Click SAVE.


Database Replication

Alert when lag is more than – In the event that replication falls behind, portal administrators are notified via email after a lag time of specified number of seconds.
Administration Console

Redirect from HTTP to HTTPS – Enable automatic redirection from HTTP to HTTPS.
HTTPS Port – An HTTPS port number to change the administration portal HTTPS access port. The following HTTPS ports are allowed: 443, 1024 to 65535. Restart the portal for the new port to take effect. For more information, see Access URLs for Administrators and End Users.
End User Portal

Redirect from HTTP to HTTPS – Enable automatic redirection of end users from HTTP to HTTPS.
Web Session Control

Session Timeout – The amount of time the session remains open when there is no activity.
Document Previews

Maximum file size to preview – The maximum file size CTERA Portal end users can preview using the online file viewer.
Cache expiration period – The time for which a file is stored in the Preview server cache after it is previewed, which causes the next preview of the same file to be faster.
Viewing session timeout – The amount of time after a file is previewed that the preview session is closed. After this amount of time, the user can no longer scroll through the document. If the user wishes to continue previewing the document, the user must close the preview window and open it again.
Administrators Password Policy

Minimum Password Length – The minimum number of characters that must be used in a CTERA Portal administrator's account password.
Require password change on first login – Require administrators to change their password on their first login.
Require password change every – Require administrators to change their password after a certain number of months, then specify the desired number of months in the field provided. When the specified number of months has elapsed, the administrator's password will expire, and they will be required to configure a new password upon their next login.
Prevent reusing last... passwords – Prevent administrators from reusing a specified number of their previous passwords when they change their password. Specify the number of previous passwords you want this to apply to.
Passwords must contain at least.... of 4 character groups – Require administrators to choose passwords that contain at least a specified number of the following character groups:
- Lowercase characters
- Uppercase characters
- Numerical characters
- Special characters such as “!@#$”
Prevent using contact details in password – Prevent administrators from using their personal details in their password, including first name, last name, email, username, and company name. After checking this page, edit the content of the consent page.
Proxy Settings

You can configure the CTERA Portal behind a Proxy Server. When configured, external connections go through the proxy server, such as storage nodes, and antivirus servers.
Use Proxy – Check the Use Proxy option to configure the CTERA Portal behind a proxy server. If checked either an HTP proxy server or an HTTPS proxy server or both must be configured.
- HTTP Proxy – The address of the HTTP proxy server.
- Port – The HTTP proxy server port number. The port number must be between 1 and 65535.
- HTTPS Proxy – The address of the HTTPS proxy server.
- Port – The HTTPS proxy server port number. The port number must be between 1 and 65535.
- No Proxy For – A comma separated list of IP addresses and DNS names that will not go through the proxy server. For example, when a storage node in the cloud is used as well as an on-premises storage node, only the storage node in the cloud should go through the proxy server. In this type of scenario, the address of the on-premises storage node should be specified here.Note
When the CTERA Messaging service is used, make sure that each messaging server IP is included in the No Proxy For list.
Proxy Requires Authentication – Check to specify that the proxy server requires authentication via a username and password.
- Username – The username for authenticating to the proxy server.
- Password – The password for authenticating to the proxy server.
Note
If you configure a proxy server or change the proxy server settings, you need to restart the CTERA Portal servers for the change to take effect. Restart the CTERA Portal servers in the following order:
- Main database server.
- Replication database server, if available.
- All application or preview servers.
The proxy server settings are implemented after the restart.
Consent Page

Display consent page before login – Before logging in to the portal a consent page is displayed and only after the user accepts the terms in the consent page can the user access the portal. The consent page is enforced on all types of sign-in, such as via Active Directory, a Common Access Card (CAC) or via SAML single sign-on. The consent page text is created using HTML.
Was this article helpful?