Configuring the Primary Server
- 2 Minutes to read
- Print
- DarkLight
- PDF
Configuring the Primary Server
- 2 Minutes to read
- Print
- DarkLight
- PDF
Article Summary
Share feedback
Thanks for sharing your feedback!
Configuring the primary server is a one-time operation, the first time you access the portal.
Note
All CTERA Portal servers must not run other services. By default, CTERA portal servers are application servers.
If you are installing an additional server, proceed directly with Installing and Configuring Additional CTERA Portal Servers.
Performing Initial CTERA Portal Setup
This procedure is performed only once, on the primary server.
To perform initial CTERA Portal setup of the primary server:
Using a Web browser, browse to the CTERA Portal, via the IP address or DNS.
The Setup wizard opens, displaying the Select Server operation mode window.
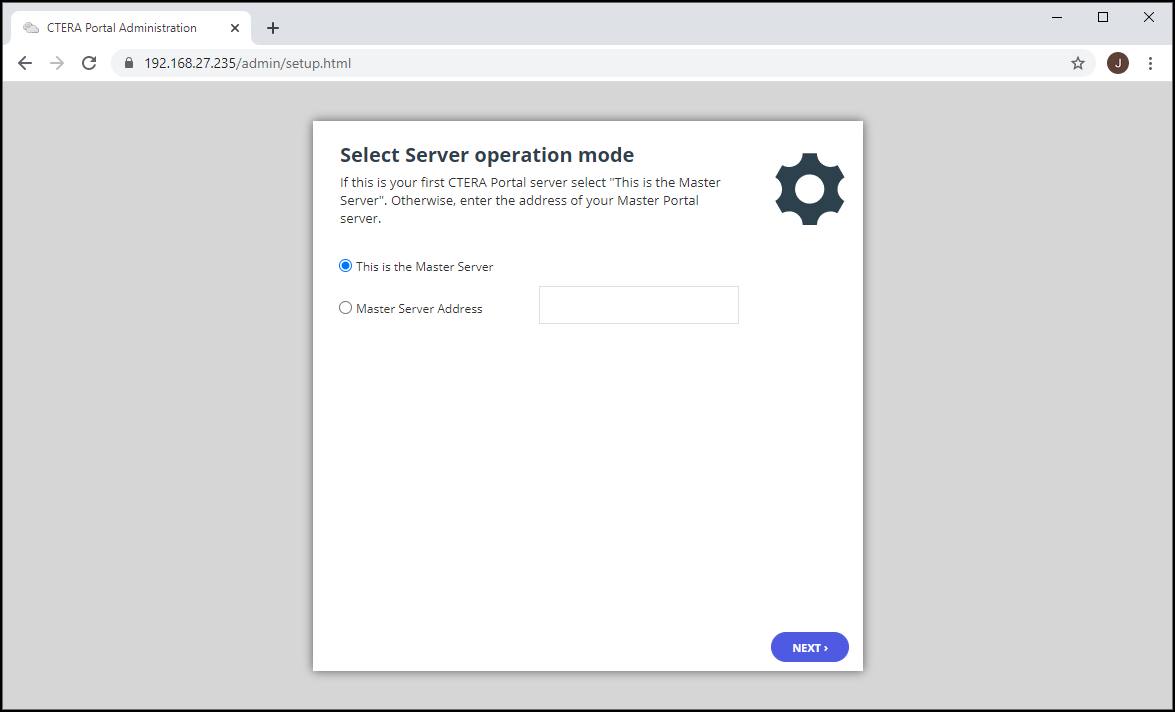
Choose This is the Master Server.
Click NEXT.
The License Agreement window is displayed.
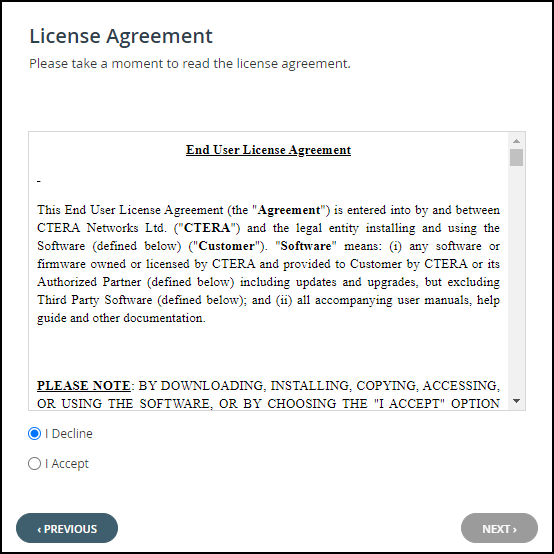
Read the agreement and then click I Accept and then click NEXT.
The database is initialized and then the Welcome to CTERA Portal window is displayed.
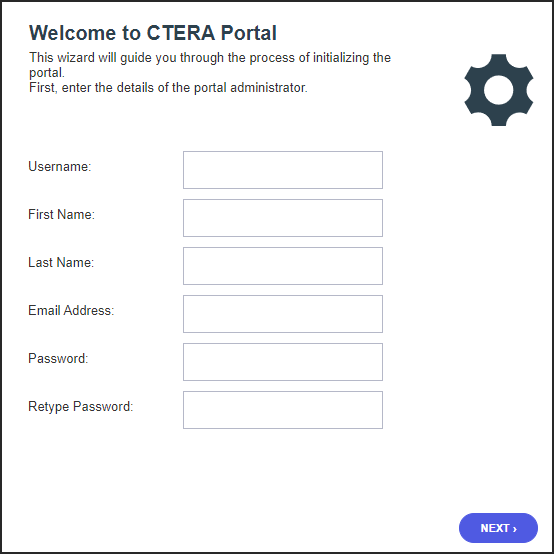
Complete the fields as follows:
Username – The name for your CTERA Portal administrator account.
First Name – The first name of the administrator.
Last Name – The last name of the administrator.
Email Address – The email address of the administrator for notifications.
Password – The password administrator will use to access the CTERA Portal.
Retype Password – The password.Click NEXT.
The Email Settings window is displayed.
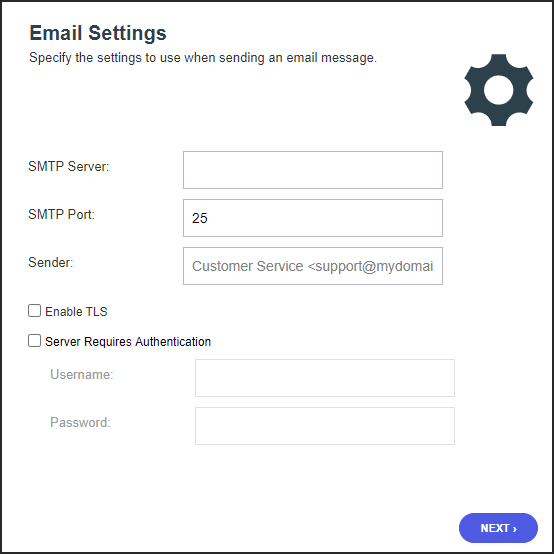
Complete the fields as follows:
SMTP Server – The outgoing mail server address for sending email messages from CTERA Portal to users.
SMTP Port – The port number for sending email messages from CTERA Portal to users. This port is usually TCP 25.
Sender – The email address that should appear in the From field of notifications. For example: CTERA Customer Service support@ctera.com.
Enable TLS – Select this option to use Transport Layer Security (TLS) encryption for sending email messages from CTERA Portal to users.
Server requires authentication – Select this option if the SMTP server requires authentication.- User Name – Type the user name that CTERA Portal should use when authenticating to the SMTP server.
- Password – Type the password that CTERA Portal should use when authenticating to the SMTP server.
WarningThe username and password you specified for the portal administrator are sent to the email address using the information specified here. If the address is incorrect, the email will not arrive and if you have not recorded the administrator username and password details and they are forgotten, you will not be able to access the portal.
Click NEXT.
The DNS Domain window is displayed.
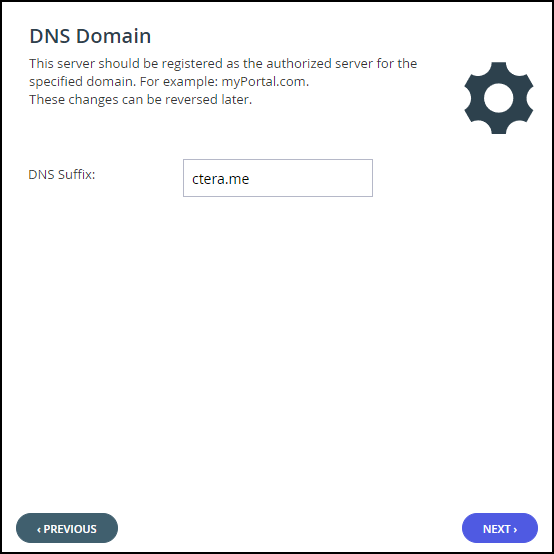
In the DNS Suffix field, type the DNS suffix to append to each virtual portal's name, in order to create the virtual portal's DNS name.
For example, if a virtual portal's name is myportal, and the DNS suffix is example.com, then the virtual portal's DNS name is myportal.example.com.NoteYou can change the DNS domain in the CTERA Portal user interface, in Settings > Global Settings.
Click NEXT.
The Wizard Completed window is displayed.Click FINISH.
The data is saved and a success message is displayed.Click OK.
CTERA Portal opens, displaying the Administrator Login page.
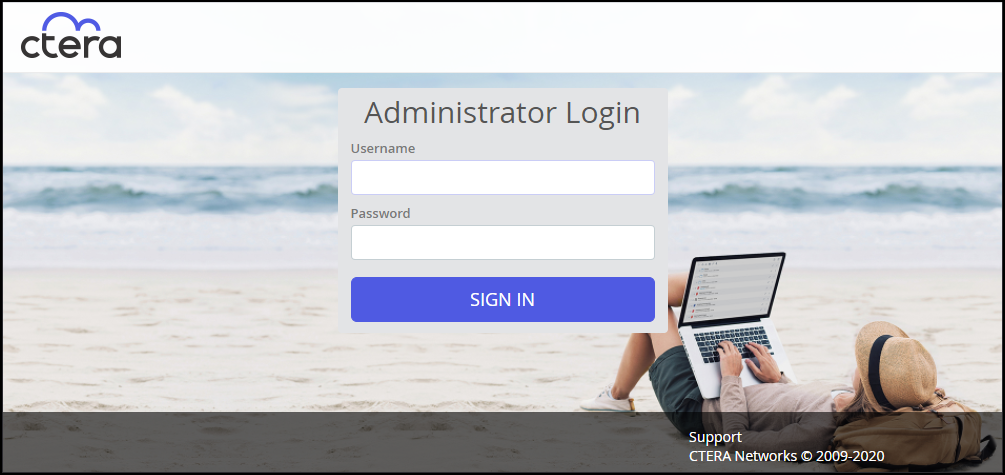
Enter the user name and password you specified in the Welcome to CTERA Portal window, above, and click SIGN IN.
The portal opens, displaying the Main > Dashboard page. By default, CTERA Portal creates a team portal called portal. For information about how to rename, view and edit this portal, or create additional reseller or team portals, see the relevant CTERA Portal Administration Guide.


Warning
The initial setup includes initializing the PostgreSQL database used by the CTERA Portal. The database must be backed up. Backing up the database is described in Backing Up the Database.
Was this article helpful?