Installing CTERA Portal Instances
- 6 Minutes to read
- Print
- DarkLight
- PDF
Installing CTERA Portal Instances
- 6 Minutes to read
- Print
- DarkLight
- PDF
Article Summary
Share feedback
Thanks for sharing your feedback!
Use the following workflow to install CTERA Portal.
- Creating a Portal Instance.
- Optionally, configure a default gateway.
- For the first server you install, follow the steps in Configuring the Primary Server.
- For any additional servers beside the primary server, install the server as described below and configure it as an additional server, as described in Installing and Configuring Additional CTERA Portal Servers.
- Make sure that you replicate the database, as described in Backing Up the Database.
Creating a Portal Instance
The portal image used to create the CTERA Portal instance is created from vhd files that are obtainable from CTERA support: the operating system vhd, CentOS-CTERA-Portal-Image-x-y-z-OS-disk.vhd, and the data disk vhd, CentOS-CTERA-Portal-Image-x-y-z-Data-Disk.vhd, where x-y-z is the version number.These files need to be moved to your Azure portal, using Azcopy.exe, available for download from https://docs.microsoft.com/en-us/azure/storage/common/storage-use-azcopy-v10. The zip file contains the azcopy.exe program.
To get the image vhd files from CTERA support:
- Log in to your Azure portal and access the Storage Accounts service to display the images.
The list of available storage accounts is displayed. - Either create a new storage account for the image or click the storage account to use for the image.
- The storage account details are displayed.
- Click Access Keys under Security + Networking in the navigation menu and note the Storage account name and the Key 1 key value.Note
Click Show keys to display the key.
- Click Storage browser in the navigation menu and then click Blob containers and select Add container.
The New container page is displayed. - Enter a name for the container and click Create.
- Click the container.
- Click Shared access signature under Security + Networking in the navigation menu.
The Shared access signature page is displayed. - Set the permissions and click Create.
- Copy the URI that is generated and save it.
The URI includes a shared access key.
To copy the vhd files:
- Run the following command from the folder where you saved AzCopy.exe for each vhd file:
AzCopy.exe cp "<source_uri>" "<destination_uri>"
source_uri – The source URI location and path of the vhd file obtained from CTERA.
destination_url – The destination URL.
The vhd file is copied to the container. This can take some time.
To create the CTERA Portal server instance:
Log in to your Azure portal and access the Images service to display the image obtained from CTERA support.
The list of available images is displayed.Click Create.
The Create an image page is displayed.
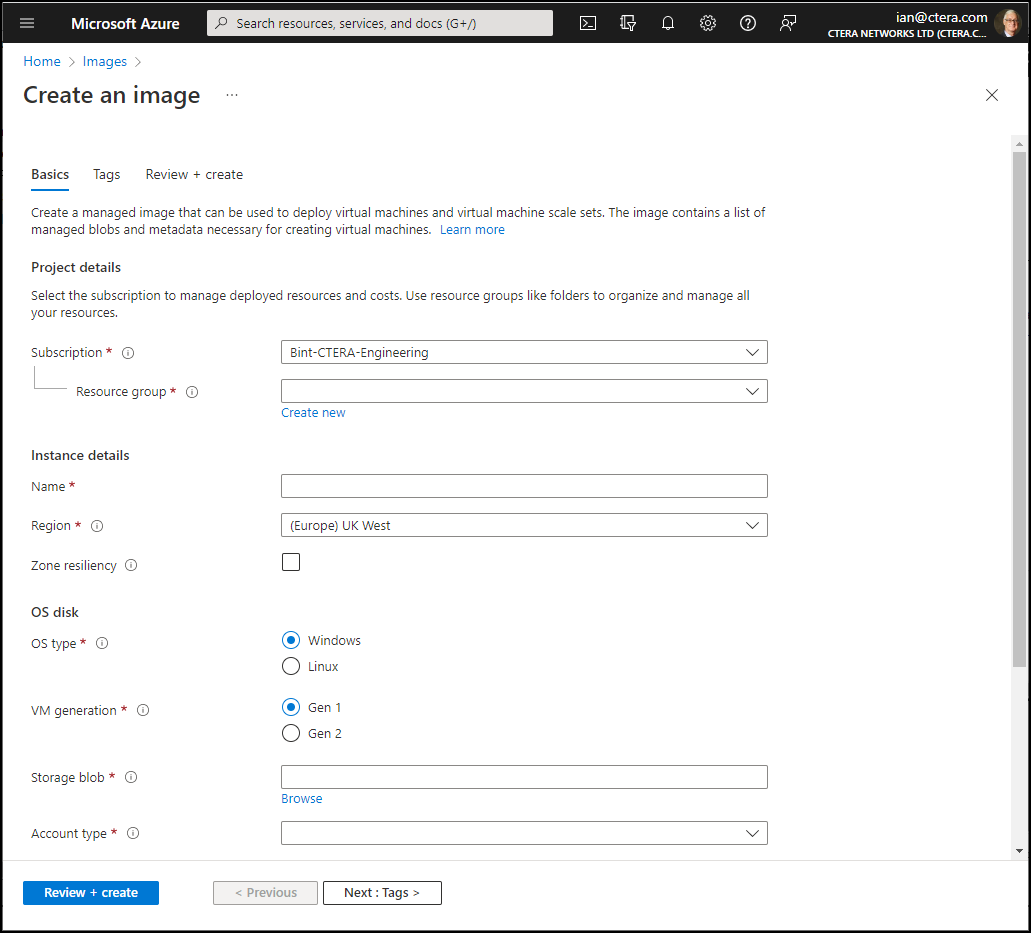
Enter the following in the Basics tab.
Resource group – The resource group to be used. The resource group must use premium storage.
Name – A name to uniquely identify the virtual machine.
Region – The region to host the image.
OS type – SelectLinux.
VM generation – SelectGen 1.NoteYou must not select
Gen 2.Storage blob – Either enter the storage blob URI for the OS vhd file from CTERA or click Browse.
The Storage accounts page is displayed.- Select the storage account from the list.
The Containers page is displayed. - Select the container from the list.
The container content is displayed. - Select the OS vhd file received from CTERA and click Select.
Account type – Select
Premium SSD.- Select the storage account from the list.
Click + Add data disk.
The data disk options are displayed.
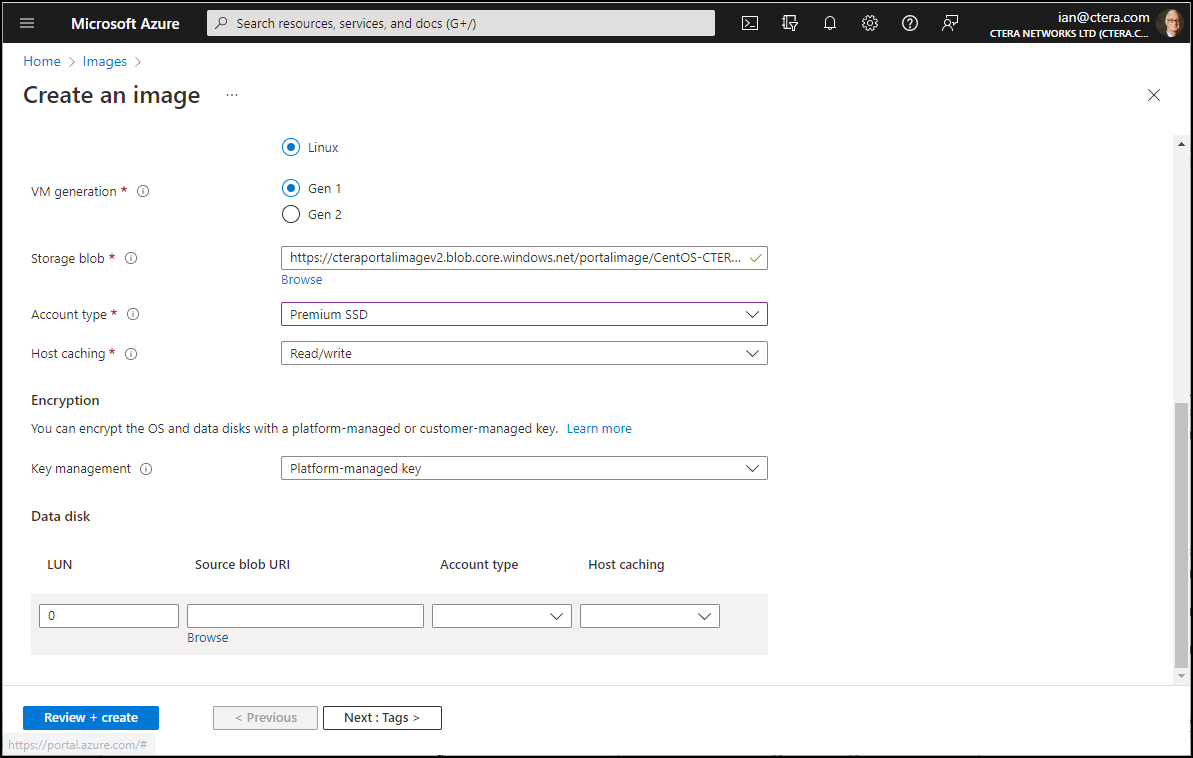
Either enter the storage blob URI for the data disk vhd file from CTERA or click Browse.
The Storage accounts page is displayed.- Select the storage account from the list.
The Containers page is displayed. - Select the container from the list.
The container content is displayed. - Select the data disk vhd file received from CTERA and click Select.
- For Account type select
Premium SSDfrom the drop-down box. - For Host caching select
Read/writefrom the drop-down box.
- Select the storage account from the list.
Leave the other fields with their defaults and click Review + create.
The information is checked and if okay, it is validated.
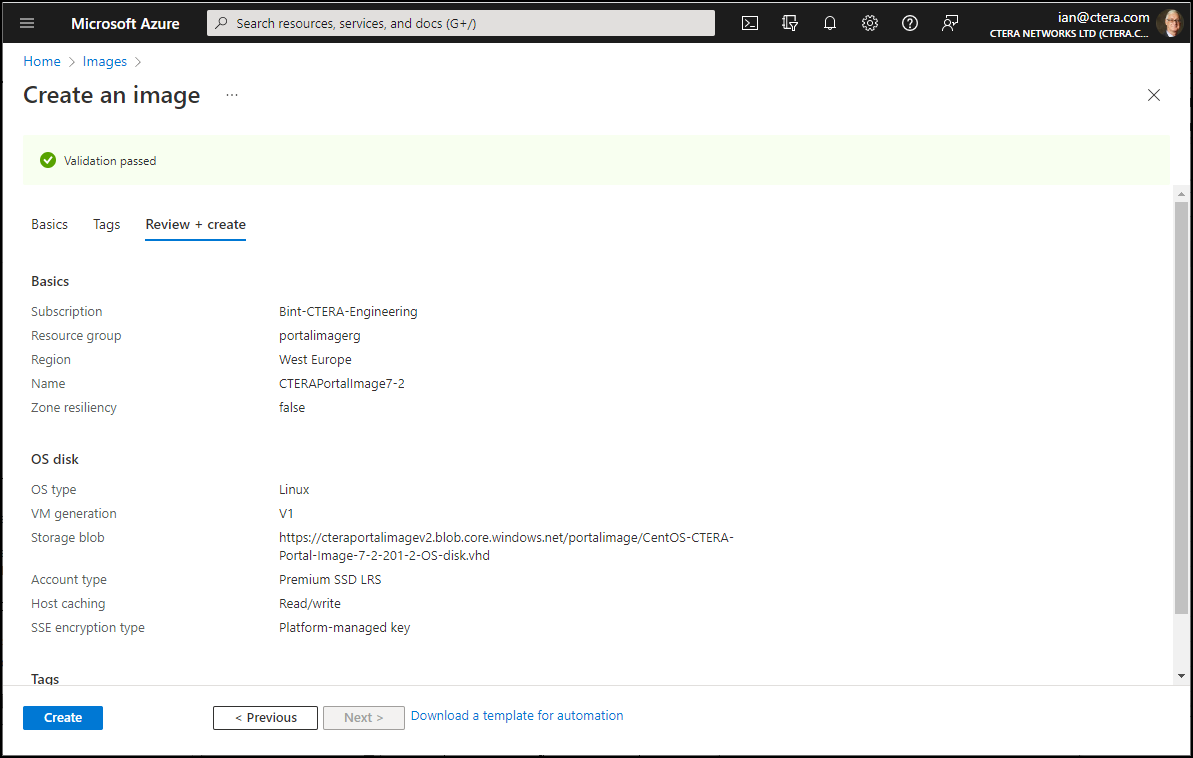
Click Create.
Deployment starts. On completion the following screen is displayed.
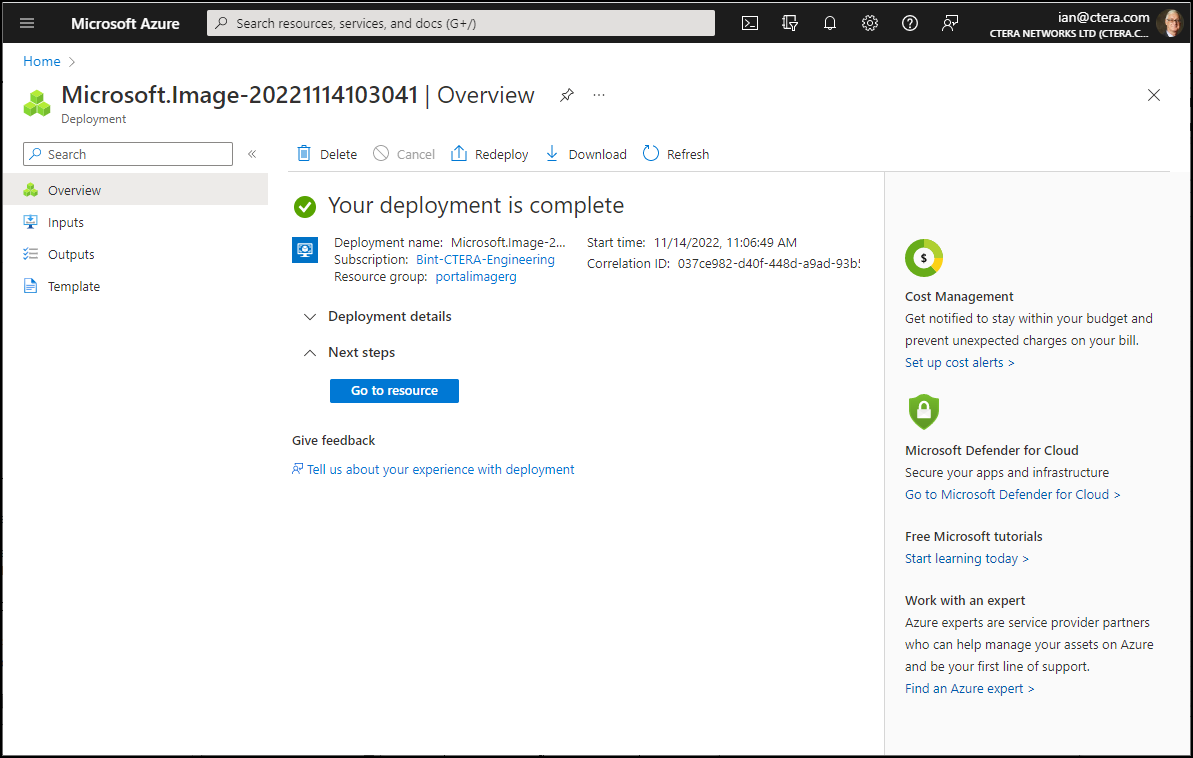
Click Go to resource.
The image details are displayed.
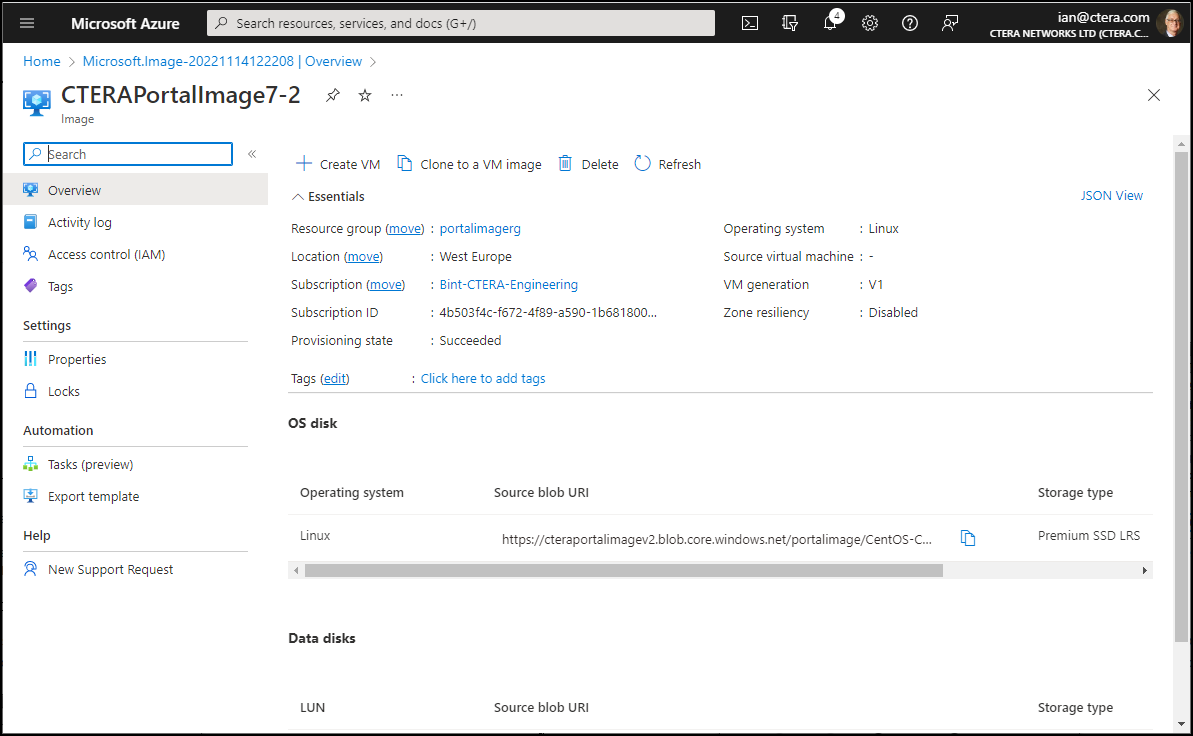
Click Create VM.
The Create a virtual machine page is displayed.
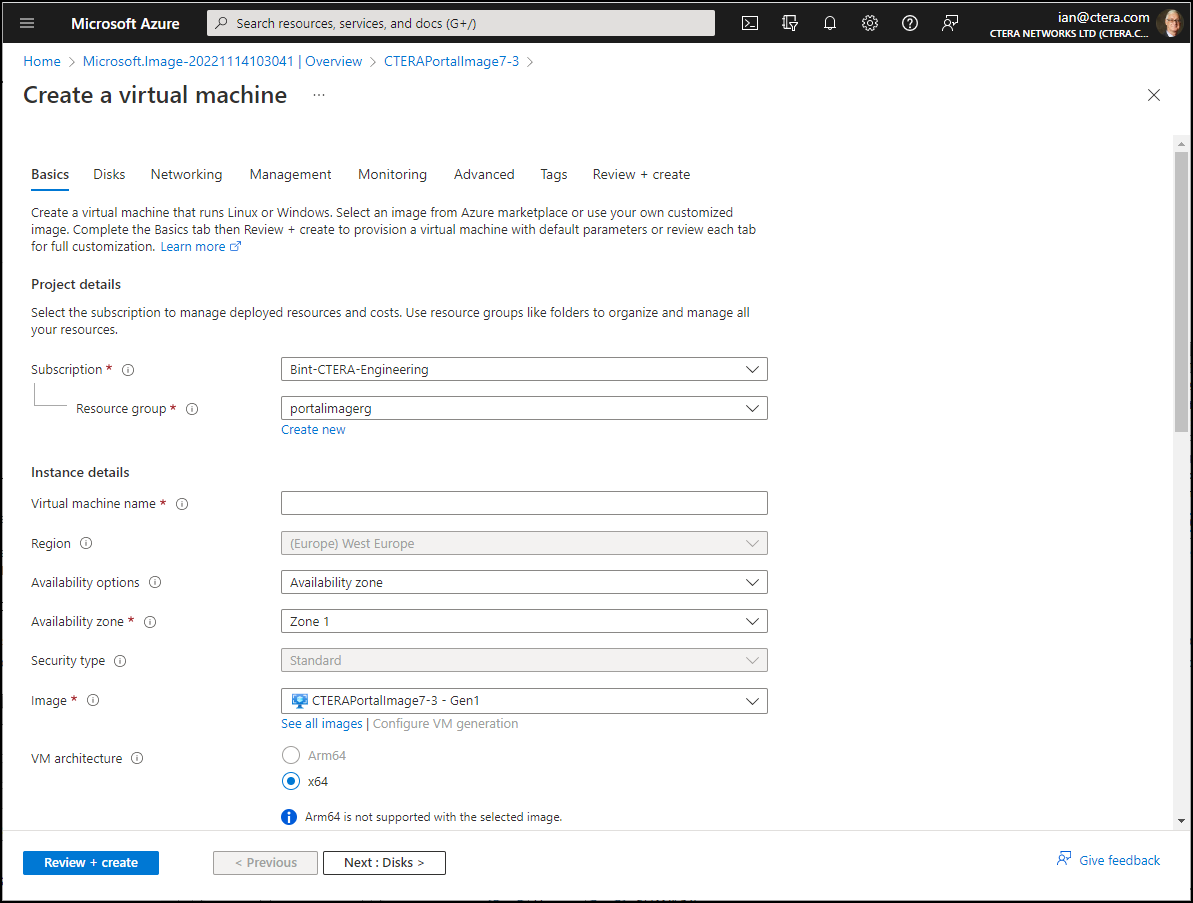
Resource group – The resource group to be used. The resource group used to create the image is the default group. The resource group must use premium storage.
Virtual machine name – A name to uniquely identify the virtual machine.
Region – The region to host the virtual machine.
Size – Click See all sizes to display the available VM sizes.
The Select a VM size page is displayed.
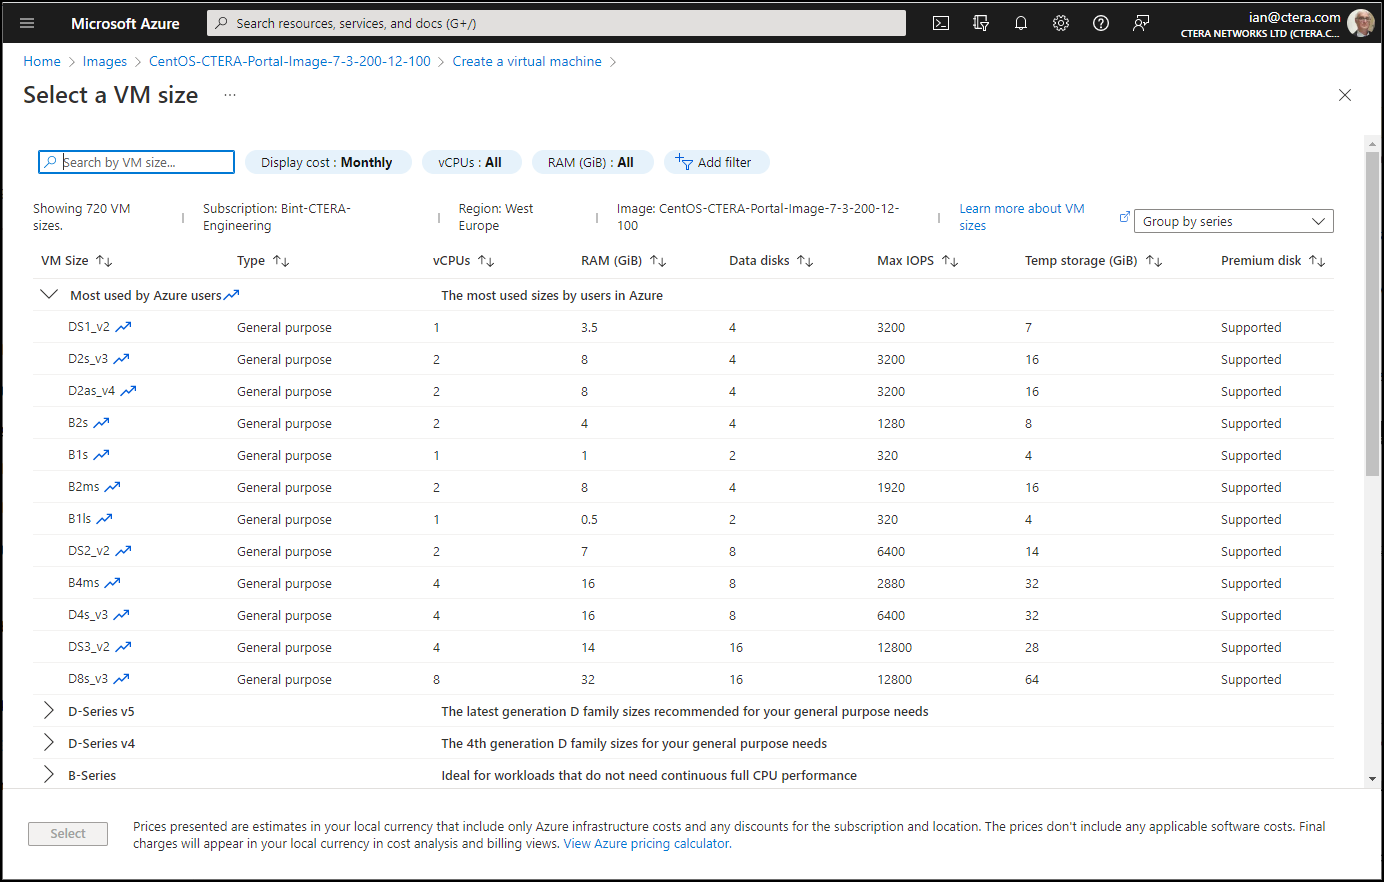
- Select a VM size that matches your requirements.
The VM size depends on the type of server you want. For details, see Requirements - Click Select.
Authentication type – Choose Password.
Username – A name to access the virtual machine. This is an administrator name to access the portal for initial configuration.NoteOnce the virtual machine has been fully configured, CTERA provides a user name and password, but this user name can also be used.
Password – Enter a password to access the instance.
Confirm password – Reenter the password.
Select inbound rules – Select HTTP (80) and HTTPS (443) from the drop-down list.
Licensing type – Select Other.
Leave the other values with their defaults.- Select a VM size that matches your requirements.
Click the Disks tab or Next: Disks.
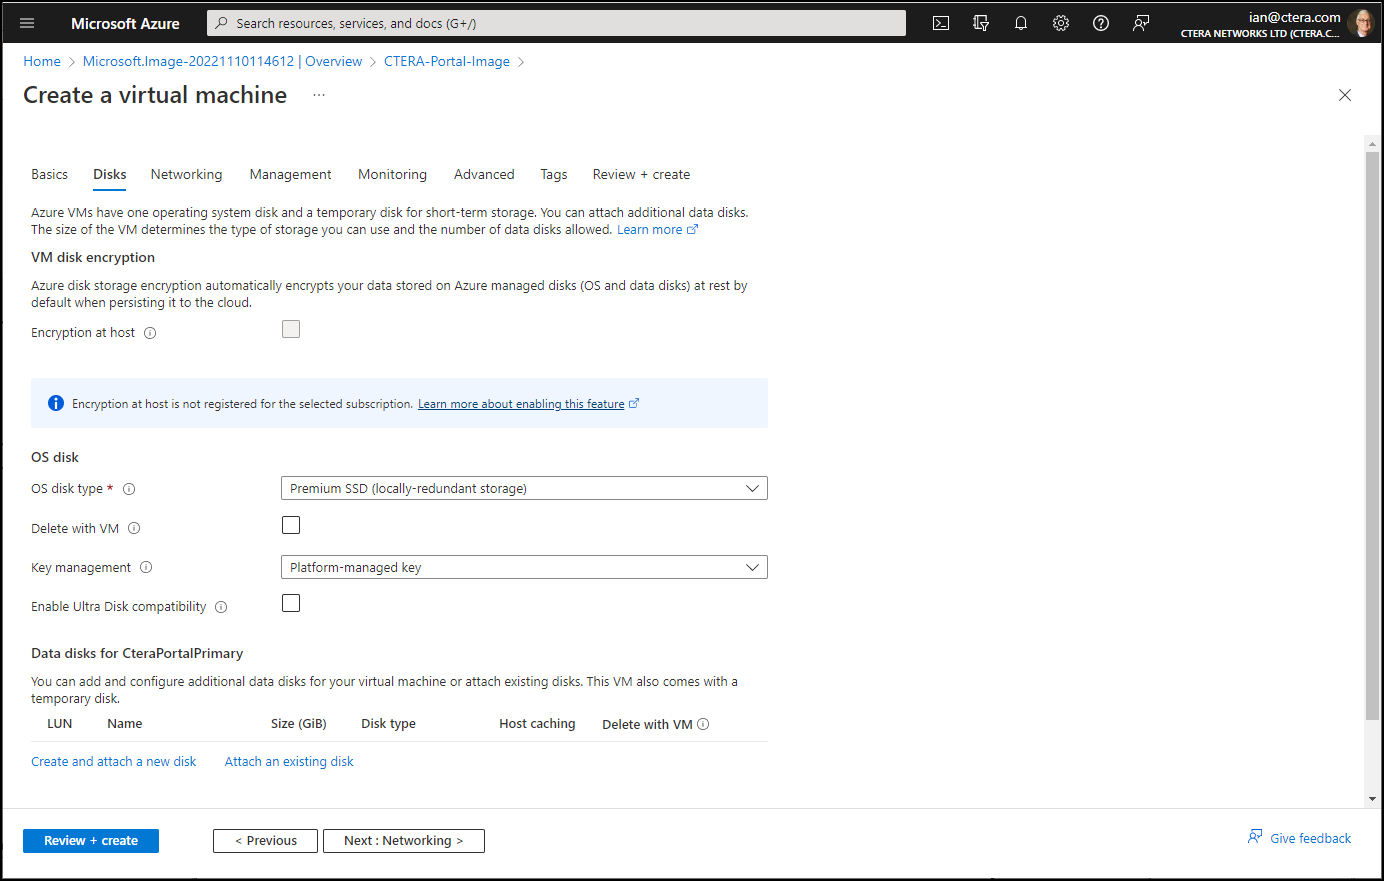
For the primary CTERA Portal database server or the secondary, replication, server, click Create and attach a new disk to create the disk for archive storage.
NoteFor all other servers, application and preview, you do not need to add a disk.
The Create a new disk page is displayed.
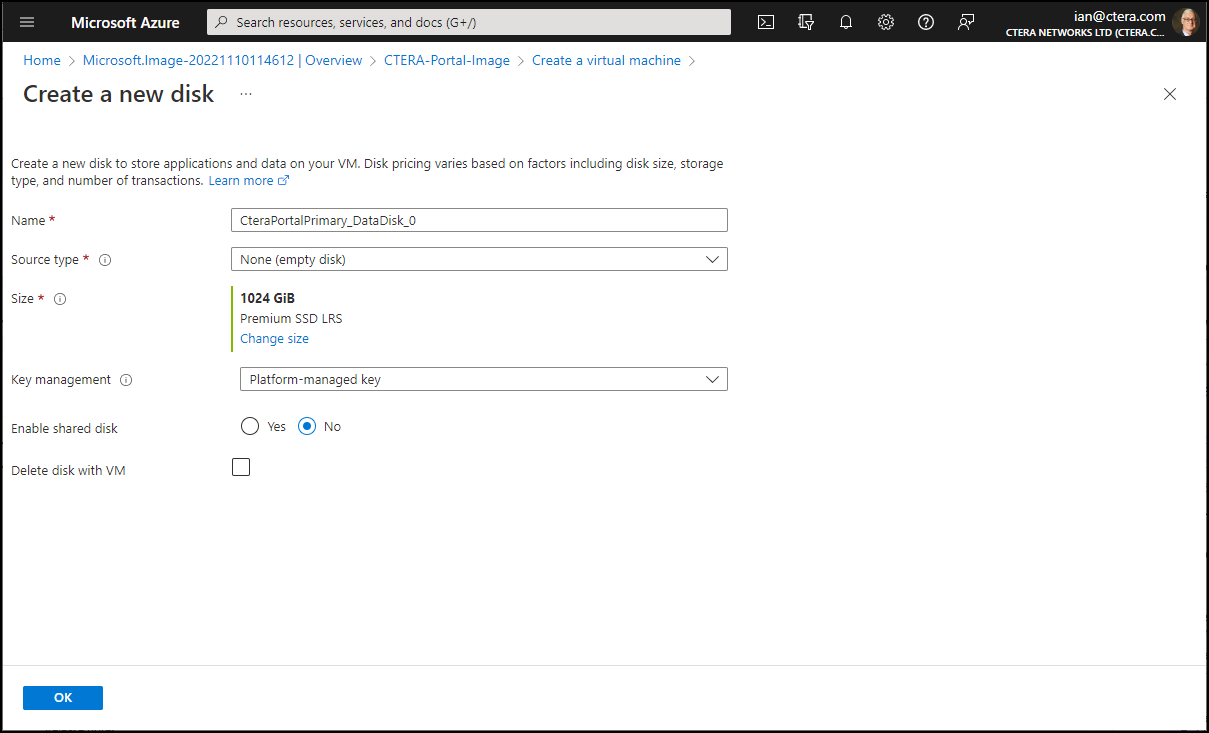
Click Change size.
The Select a disk size page is displayed.
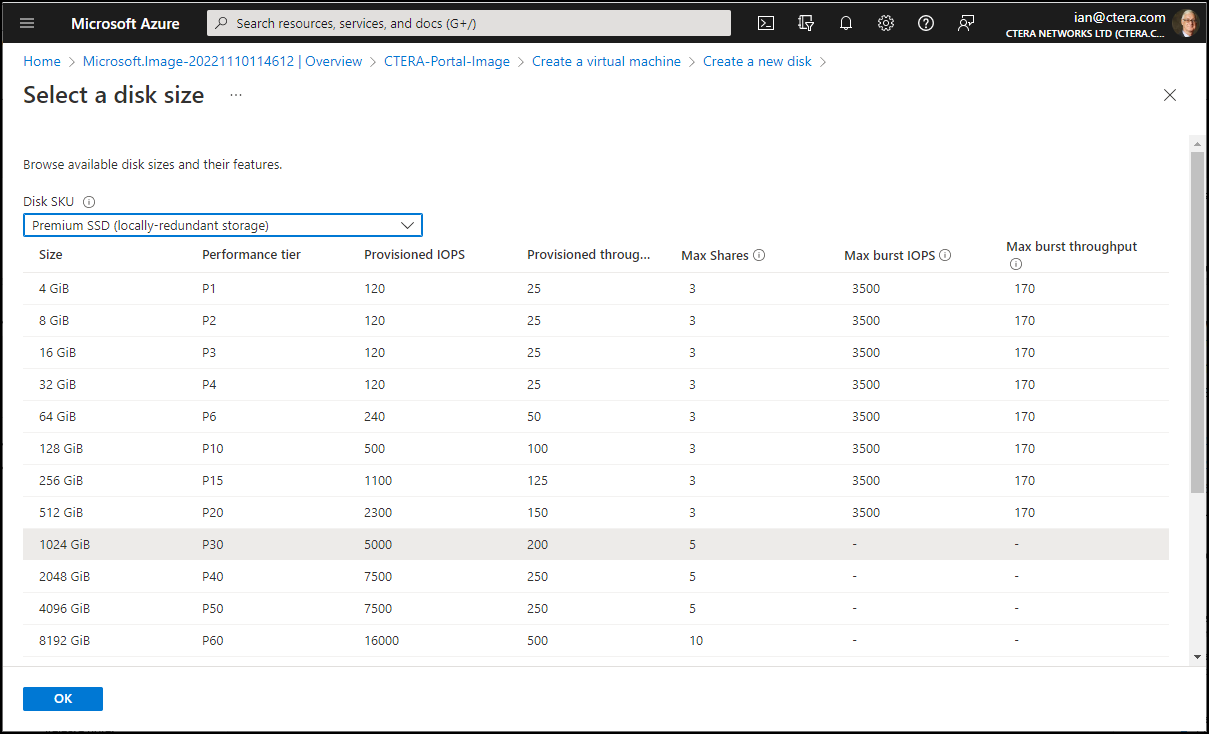
Change
Premium SSD (locally-redundant storage)toStandard HDDin the drop-down box.Under Custom disk size (GiB) enter 200 for the archive disk size and click OK.
Click OK.
Change Host Caching for the disk to
Read/write.Click Review + create.
NoteIf validation does not pass, click Review + create again.
Review the virtual machine details and click Create.
The machine is deployed and started automatically.
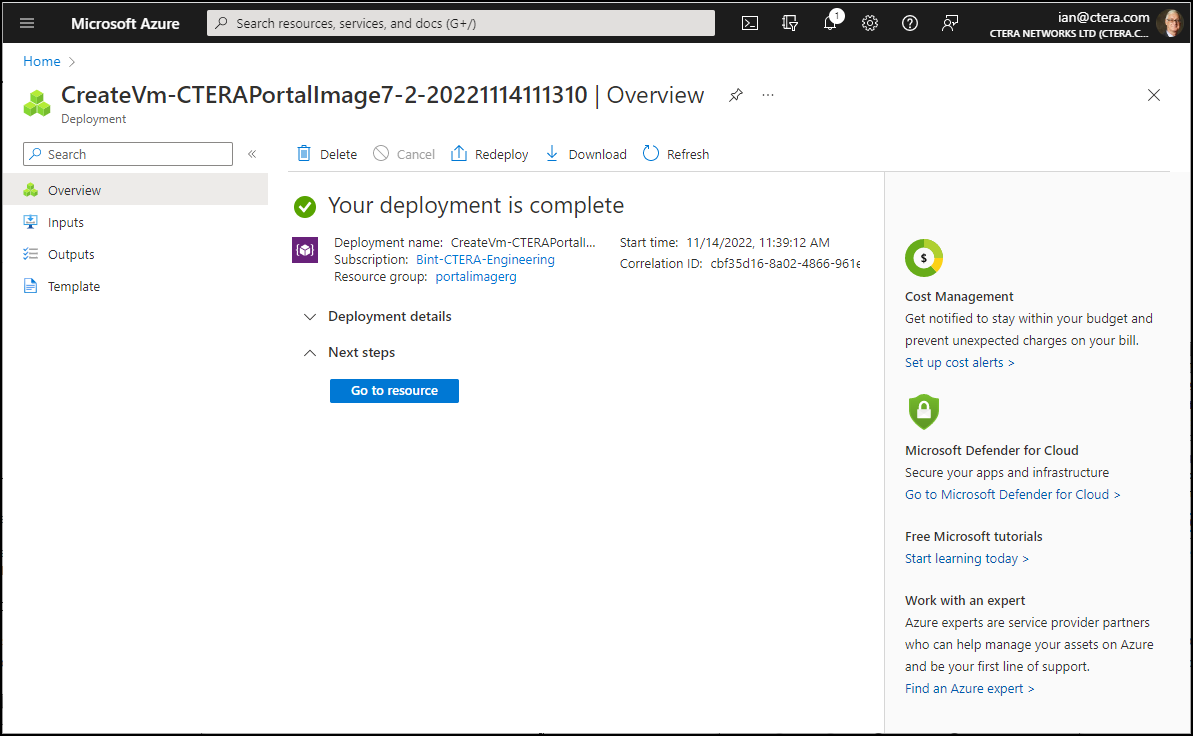
Click Go to resource to display its details.
The virtual machine includes two default disks. The OS disk is used for root, and a data disk, which is used to store the CTERA Portal database.NoteNote the Public IP address. You access the server using this address. When connecting to the server using SSH for the first time, use the
rootuser andctera321password. You are prompted to change the password.Click Networking under Settings in the navigation menu to add inbound and outbound port rules.
In the Inbound port rules tab, click Add inbound port rule.
The Add inbound security rule window is displayed.Click Add inbound port rule to add the following inbound port rules, incrementing the Priority for each rule by ‘10‘ and clicking Add after adding each rule:
Service Destination port ranges Protocol Priority Name Notes Custom 995 TCP 330 CTTP DNS (UDP) — — 340 DNS PostgreSQL — — 350 This port does not need to be accessible from the Internet. Custom 18682 TCP 360 Preview This port does not need to be accessible from the Internet. Select the Outbound port rules tab and click Add outbound port rule.
The Add outbound security rule window is displayed.Add the following ports.
NoteYou need to change the Name field, if it was used for the inbound port.
Service Destination port ranges Protocol Priority Name Notes DNS (UDP) — — 100 DNS1 HTTP — — 110 HTTP1 HTTPS — — 120 HTTPS1 Custom 18682 TCP 130 Preview1 This port does not need to be accessible from the Internet. Custom 111 TCP 140 NFS Custom 123 TCP 150 NTP SMTP — — 160 SMTP 25 is the default SMTP port. You can define a custom port for a port used in your environment.


Was this article helpful?