Installing CTERA Portal Instances
- 3 Minutes to read
- Print
- DarkLight
- PDF
Installing CTERA Portal Instances
- 3 Minutes to read
- Print
- DarkLight
- PDF
Article Summary
Share feedback
Thanks for sharing your feedback!
Use the following workflow to install CTERA Portal.
- Creating a Portal Instance using a CTERA Portal image obtainable from CTERA support.
- Logging In to the CTERA Portal Server and Configuring it with the Storage and changing the password.
- Configuring Network Settings.
- Optionally, configure a default gateway
- Additional Installation Instructions for Customers Without Internet Access.
- For the first server you install, follow the steps in Configuring the Primary Server.
- For any additional servers beside the primary server, install the server as described below and configure it as an additional server, as described in Installing and Configuring Additional CTERA Portal Servers.
- Make sure that you replicate the database, as described in Backing Up the Database.
Note
You can use block-storage-level snapshots for backup, but snapshots are periodical in nature, configured to run every few hours. Therefore, you cannot recover the metadata to any point-in-time, and can lose a significant amount of data on failure. Also, many storage systems do not support block-level snapshots and replication, or do not do so efficiently.
Creating a Portal Instance
You can install the CTERA Portal on KVM via the OpenStack console or another console. The following instructions describe how to install a CTERA Portal using the OpenStack console.
To install the CTERA Portal Server in OpenStack:
- Log in to the OpenStack console and access Admin > Images.
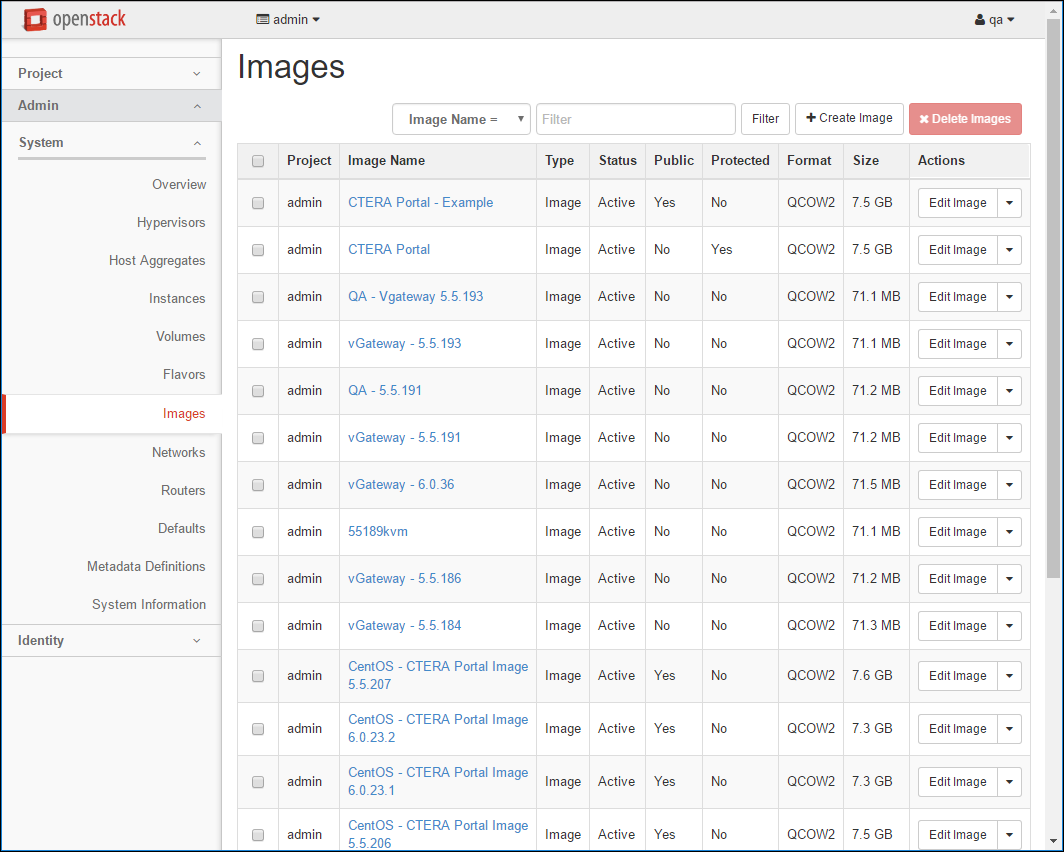
- Click Create Image.
The Create An Image screen is displayed.
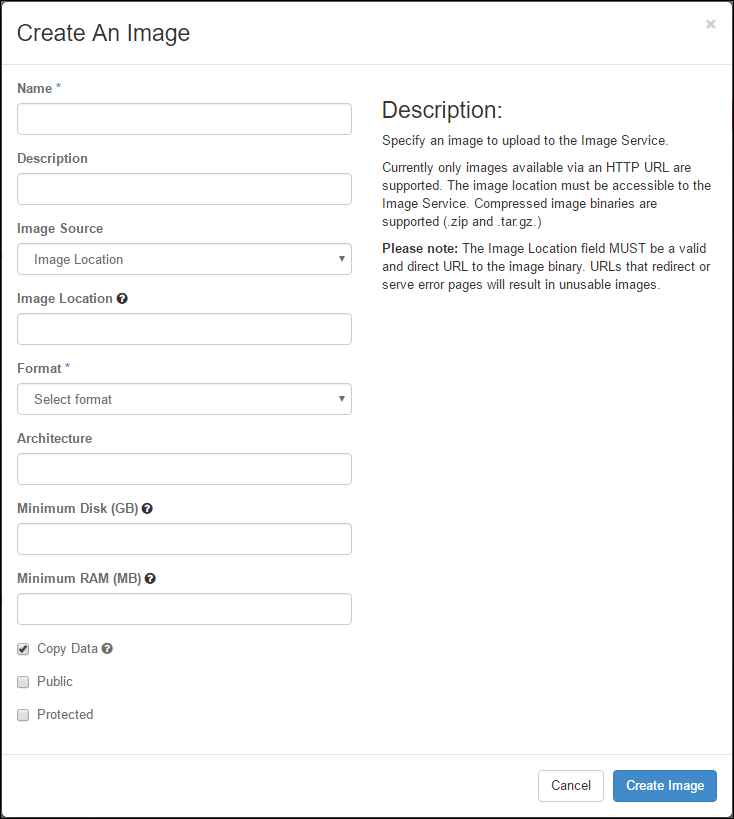
- Specify the details for the image.
Name – A unique name to identify the image.
Description – An optional description of the image.
Image Source – Select Image File.
Image File – Browse to the OpenStack image received from CTERA.
Format – Select QCOW2 - QEMU Emulator.
Architecture – Leave blank.
Minimum Disk – The minimum disk requirement is 110GB. When deploying a main database server to production, it is recommended to attach a disk sized at least 1% of the overall cloud storage you intend to allocate for the service. Prior to going to production, contact CTERA support to evaluate whether the attached drive's performance meets CTERA's main database performance requirements.
Minimum RAM – See Requirements.
Leave both Public and Protected checkboxes with their default values. - Click Create Image.
The image is created. This can take a few minutes. - Access Project > Compute > Instances.
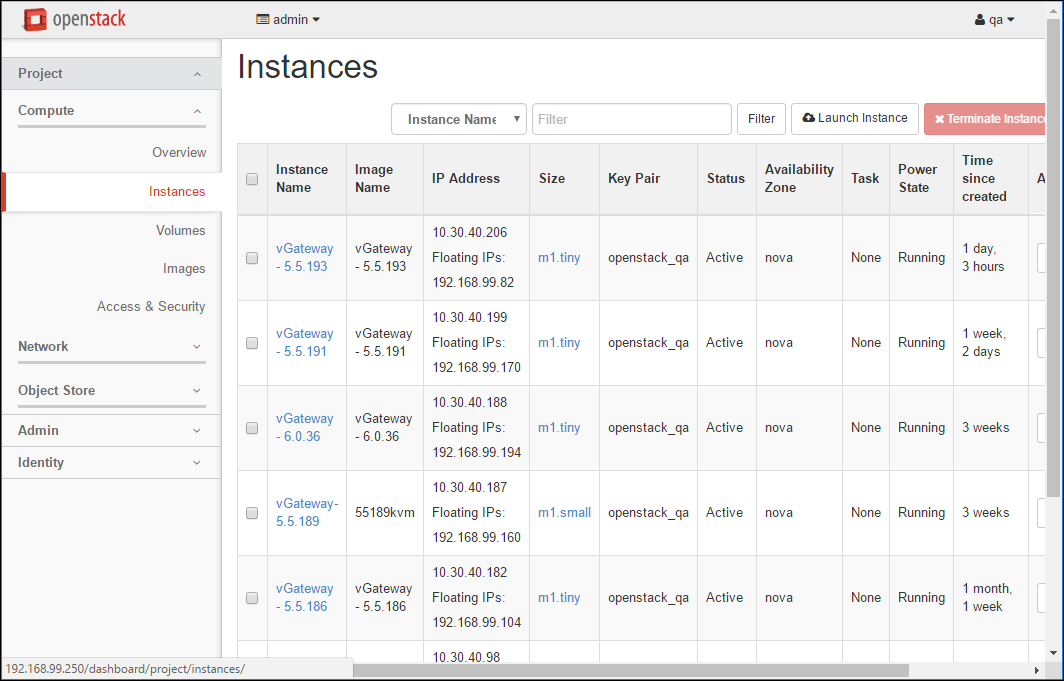
- Click Launch Instance.
The Launch Instance screen is displayed.
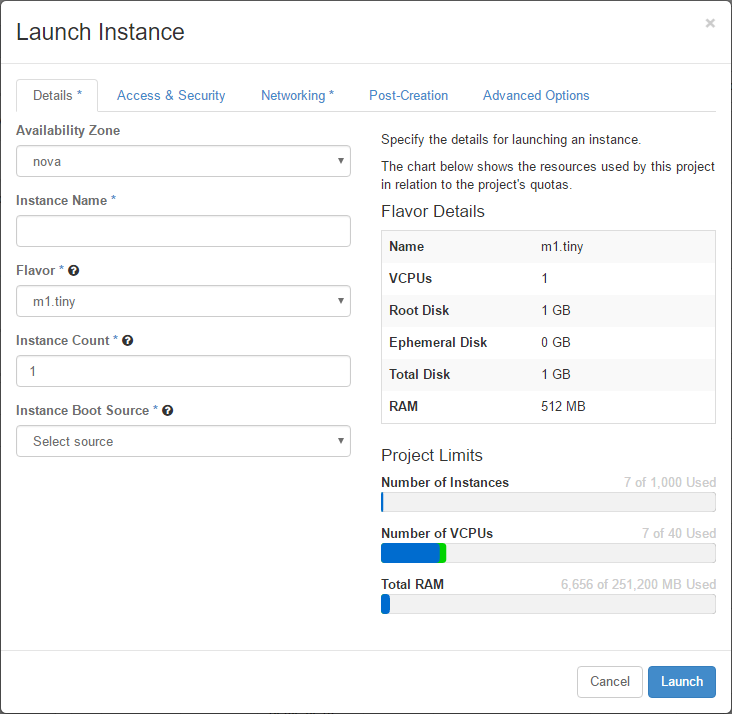
- Specify the details for the image.
Availability Zone – Select the availability zone for the instance.
Instance Name – A unique name for the instance.
Flavor – Select that meets the requirements. See Requirements.
Instance Count – Leave the default value, 1.
Instance Boot Source – Select ‘Boot from image‘
Image Name – Select the image you created for the CTERA Portal. - Click the Network tab and drag the ‘internal_network‘ option to Selected networks.
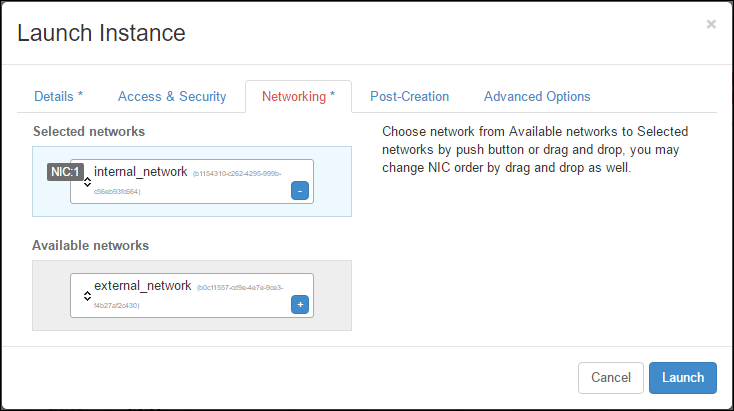
- Click Launch.
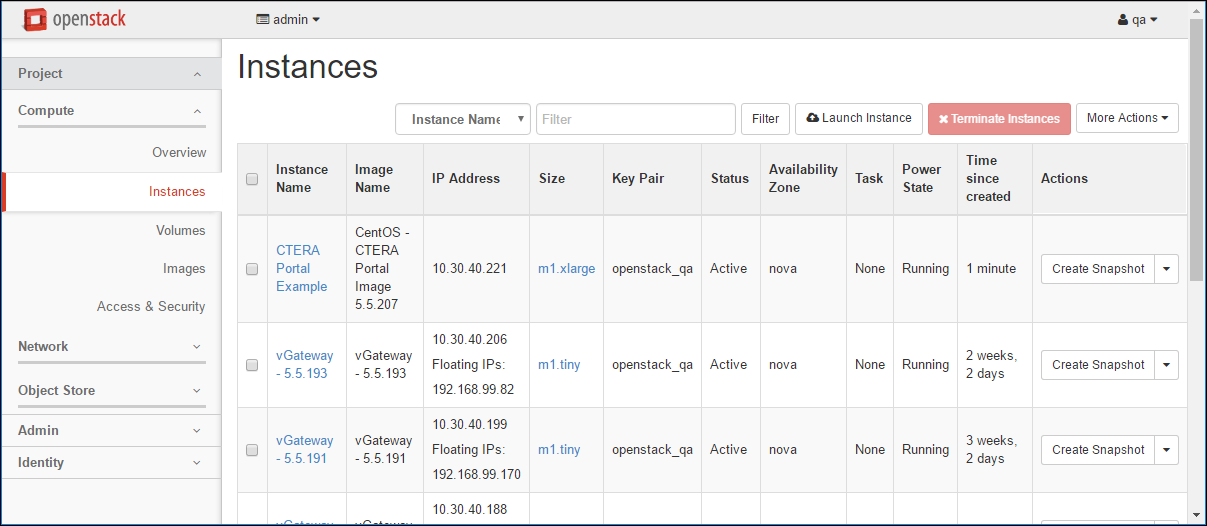
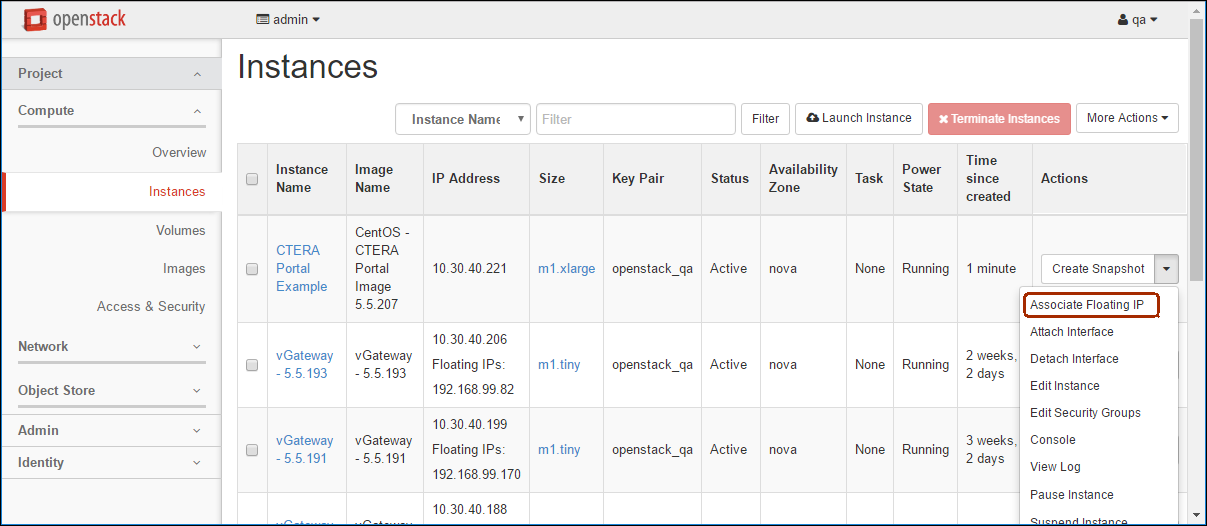
- For the portal instance, under Actions select Associate Floating IP.
The Manage Floating IP Associations window is displayed.
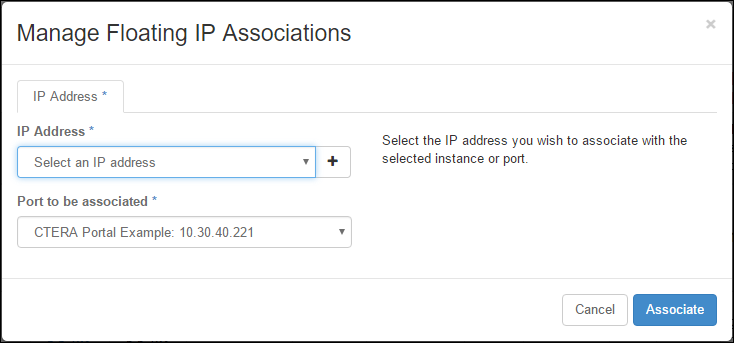
- Select an IP address and click Associate.
Refreshing the Instances screen displays the portal with the selected IP. - Access Project > Compute > Volumes.
- Click Create Volume.
The Create Volume screen is displayed.
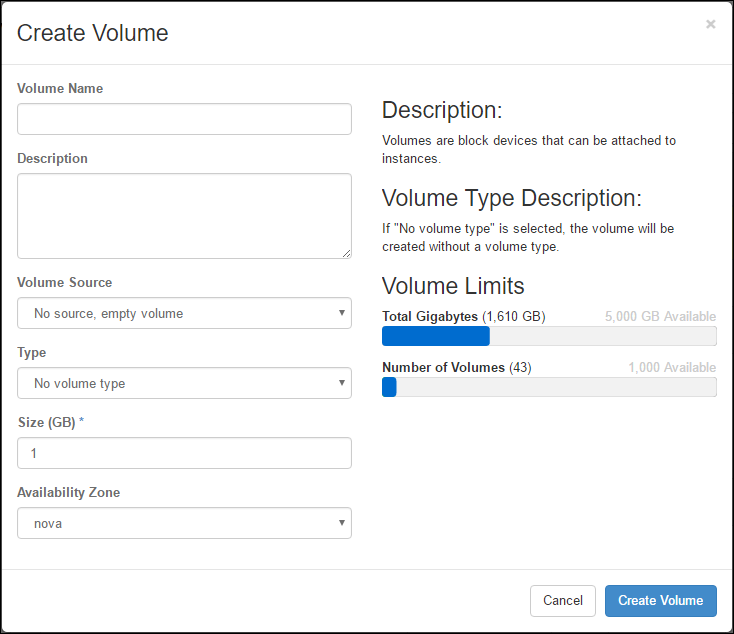
- Specify the details for the image.
Volume Name – A unique name to identify the volume.
Description – An optional description of the volume.
Volume Source – Select ‘No source, empty volume‘
Type – Selectiscsi
Size – The minimum disk requirement is 110GB. When deploying a main database server to production, it is recommended to attach a disk sized at least 1% of the overall cloud storage you intend to allocate for the service. Prior to going to production, contact CTERA support to evaluate whether the attached drive's performance meets CTERA's main database performance requirements.
Availability Zone – Select the same availability zone used for the image. - Click Create Volume.
The volume is created. This can take a few minutes. - For the new volume, under Actions select Manage Attachments.
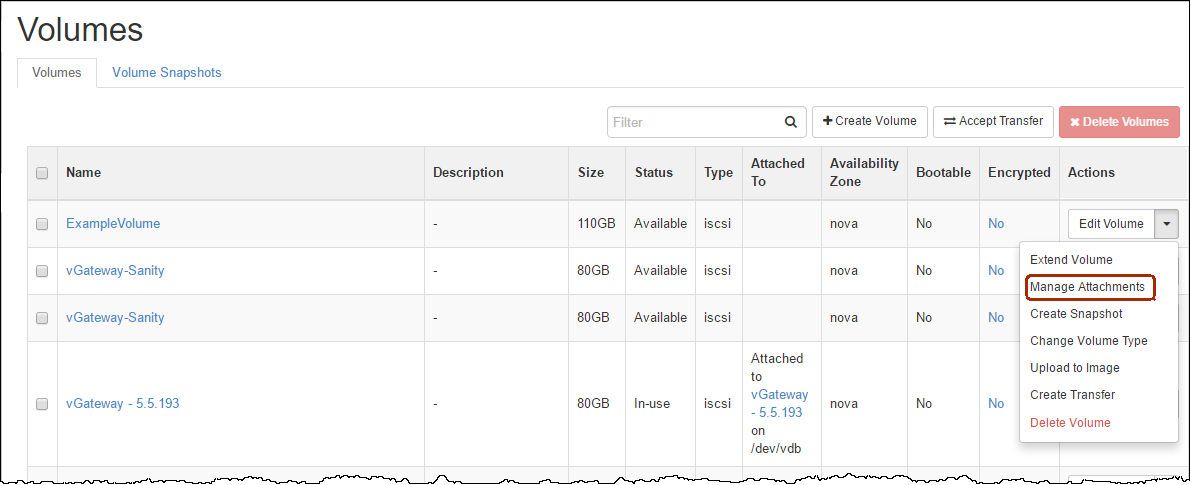
The Manage Volume Attachments window is displayed.

- Select the portal instance and click Attach Volume.
- Note the location of the storage.
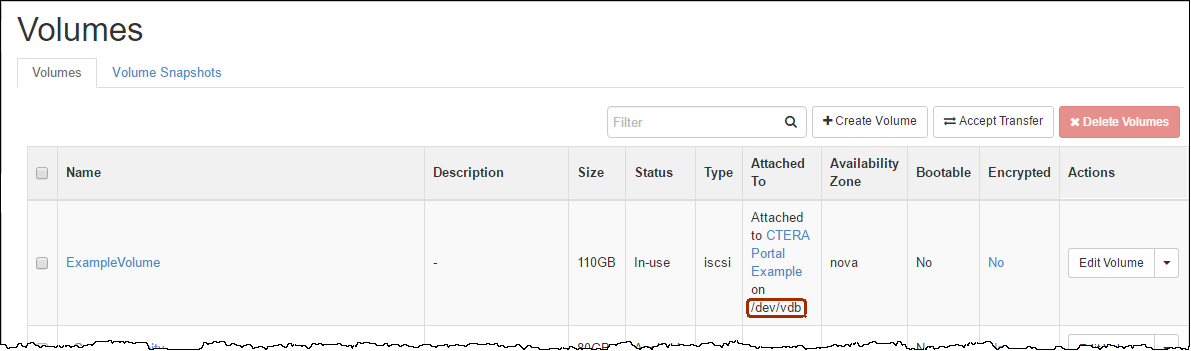


Access the new portal machine, using SSH, with the floating IP.
Logging In to the CTERA Portal Server and Configuring it with the Storage
To log in to the portal server:
- Log in as the
rootuser using SSH.
The default password isctera321
You are prompted to change the password on your first login.
To configure the CTERA Portal storage:
- Create the storage for the portal:
- Run
fdisk -lto identify the data volume added duringthe installation. - Create the storage by running
portal-storage-util.sh create_storage /dev/dm-n‘
where dm-n is the name of the storage.
A volume group and logical volume called DataPool are created. - Start the portal server by running
portal-manage.sh start

Was this article helpful?