Managing Users
- 3 Minutes to read
- Print
- DarkLight
- PDF
Managing Users
- 3 Minutes to read
- Print
- DarkLight
- PDF
Article Summary
Share feedback
Thanks for sharing your feedback!
End users are registered with the CTERA Portal and have access to the End User Portal. Each user is represented in the CTERA Portal by a user account.
Users and groups of users should be added directly in the portal or by using directory services, such as Active Directory. You can attach a directory service and fetch users and groups from the directory service. For information about using a directory service, see Using Directory Services for Users.
Viewing Users
To view all users in the portal:
Select Users > Users in the navigation pane.
The USERS page opens, displaying the users for the portal.
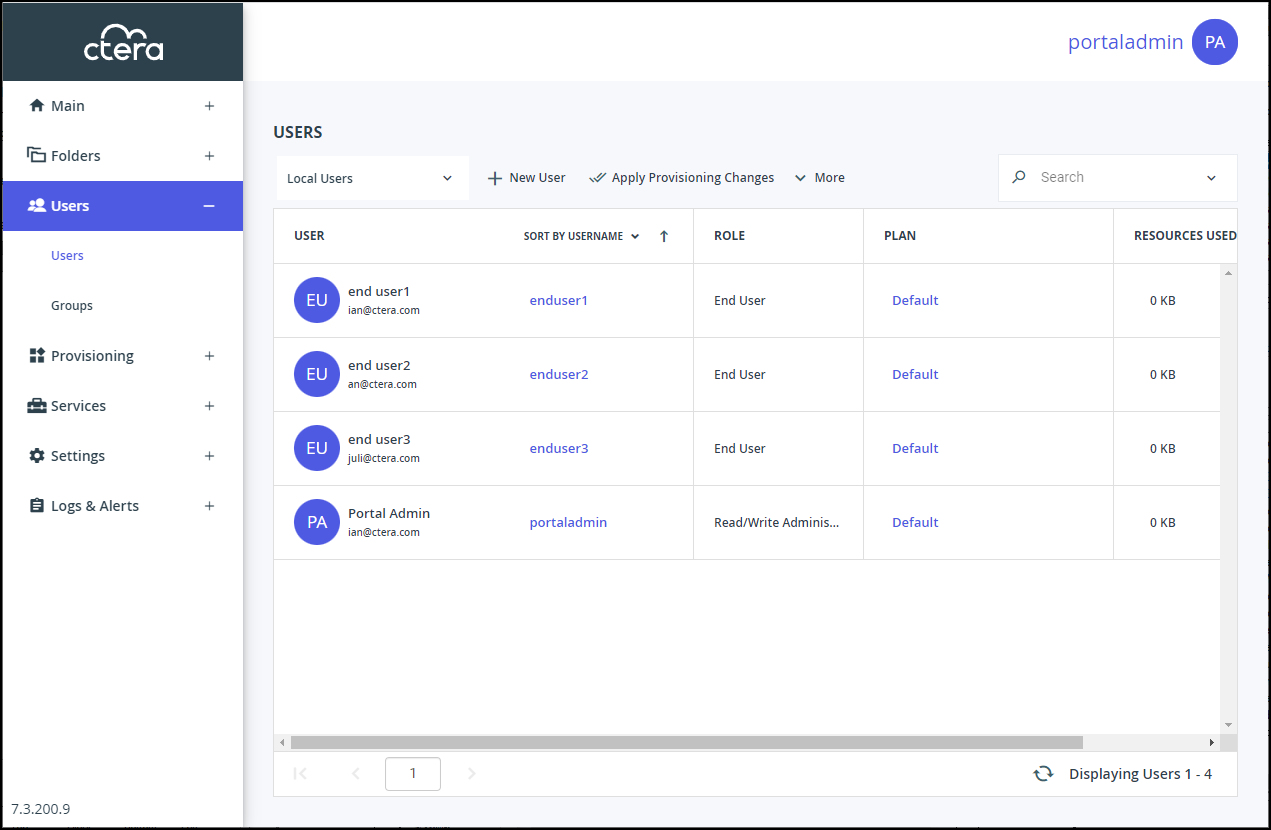
USER – The user’s first and last names.- Email (under the user name) – The administrator's email address.
- Username – The username.
- Company (under the user name) – The name of the user's company.
- Disabled – Displayed if the user is defined as disabled and cannot access the portal.
ROLE – The user role: End User, Disabled, Read/Write Administrator, Read Only Administrator, Support.
PLAN – The plan assigned to the user. You can access the plan details directly by clicking the plan. For details, see Provisioning.
RESOURCES – The resources allocated to the user. The information can be different per user. Expanding the column or clicking more > displays more information:- The number and type of CTERA Edge Filer licenses used.
- The amount of storage the user has consumed out of the total number provisioned.
- Whether or not the user has the Cloud Drive service.
- The number of CTERA Server Agents installed out of the total number provisioned.
- The number of CTERA Workstation Agents installed and using the Cloud Backup service out of the total amount provisioned.

To view only a specific type of user:
- Select Users > Users in the navigation pane.
The USERS page opens, displaying the users for the portal. - Click the filter drop-down to filter the users either by the default Local Users or by a directory services domain.
Viewing Details of a User
- Select Users > Users in the navigation pane.
The USERS page opens, displaying the users for the portal. - Click the user's name.
The user window is displayed with the user name as the window title. - Select the Details option.
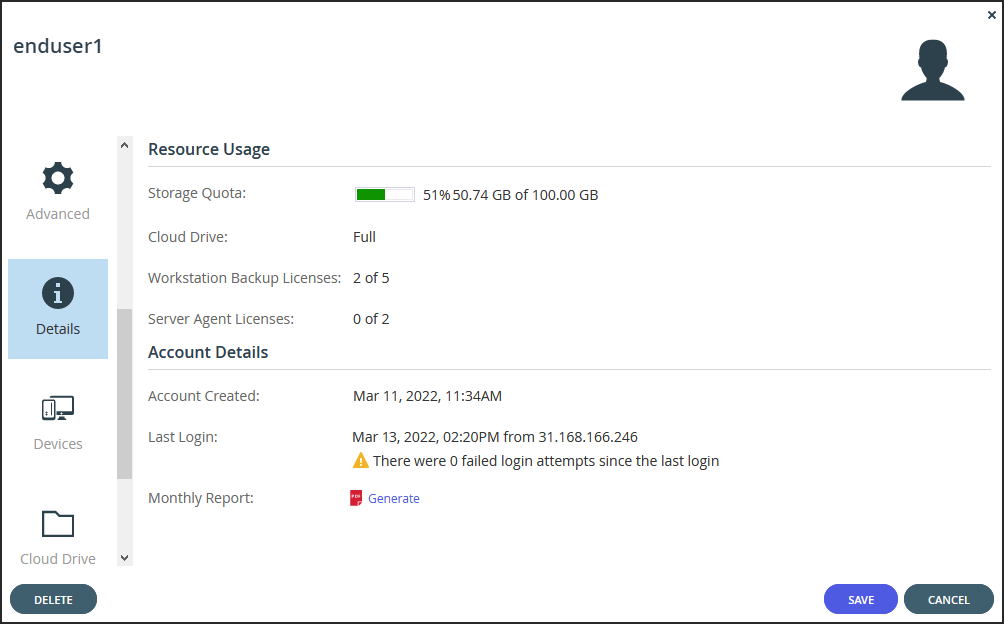
The user details that are displayed vary, dependent on the user.
Storage Quota – The amount of storage the user has consumed out of the total amount available in their subscription plan.
Cloud Drive – Whether the user is provisioned to have the Cloud Drive service.
Workstation Backup Licenses – The number of CTERA Workstation Agents installed and using the cloud backup service out of the total number available in the user account's subscription plan.
Server Agent Licenses – The number of CTERA Server Agents installed out of the total number available in the user account's subscription plan.
EVnn Licenses – The number of CTERA virtual gateway, H-Series and X-Series edge filer licenses associated with the user account. If the user's subscription plan includes virtual gateways, this number is expressed as a number of the total number of Virtual Gateways available in the user account's subscription plan.
Account Created – The date and time when the user account was created.
Last Login – The date and time when the user last signed on to the CTERA Portal as well as details about how many successful and failed times the user attempted to sign on and the IP addresses used to sign-on.
Monthly Report – A link for generating and downloading a monthly report of events in the user account in PDF format.

Manually Generating a Monthly Report for a User
You can trigger the immediate generation and sending of the monthly report for a specific user account.
To generate a monthly report for the user:
- Select Users > Users in the navigation pane.
The USERS page opens, displaying the users for the portal. - Click the user's name.
The user window is displayed with the user name as the window title. - Select the Details option.
- In the Details option, click Generate.
A report is generated and sent to the user by email.
Was this article helpful?