Managing Your Backups
- 3 Minutes to read
- Print
- DarkLight
- PDF
Managing Your Backups
- 3 Minutes to read
- Print
- DarkLight
- PDF
Article Summary
Share feedback
Thanks for sharing your feedback!
What to back up and when to schedule backups is managed is configured in the device connected to the CTERA Portal. After a backup is created in the CTERA Portal, you can manage the backup from the CTERA Portal, including viewing content, copying content, for the current backup and for previous backups in addition to restoring a backup.
To manage backed up folders and files:
- Click the BACKUPS option in the navigation pane.
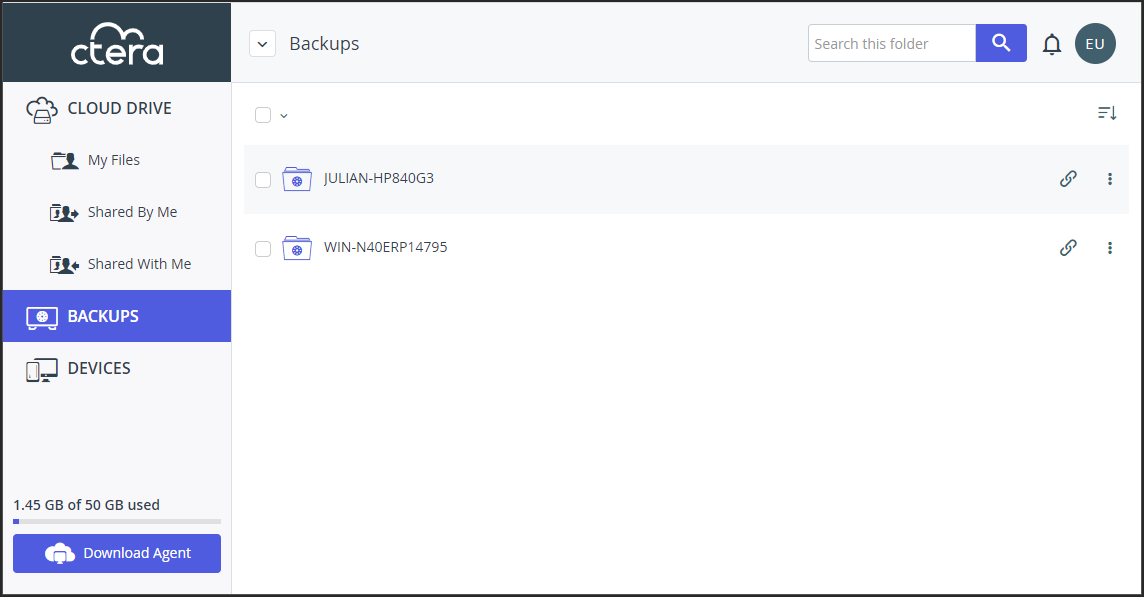
- Select a backup.
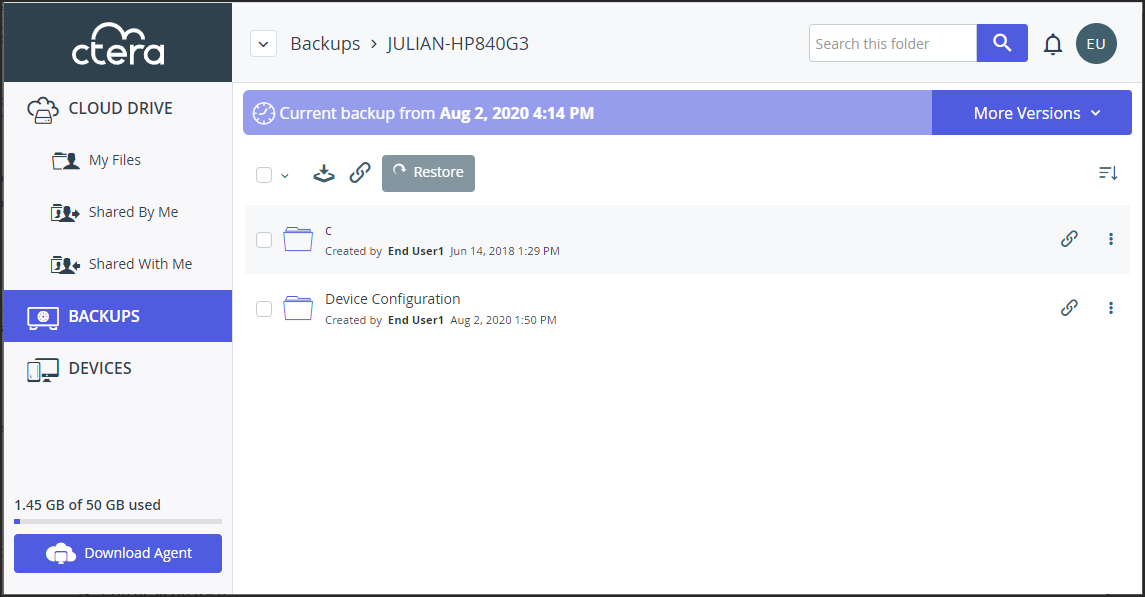
The backed up folders and files are listed.

You can restore the backup to the device or drill-down to restore only part of the backup. - Perform any of the following actions on the folders and files in the backup:
 – Download. If you selected multiple items, they are downloaded in a ZIP file. If nothing is selected, the current folder will be downloaded as a ZIP file. When accessing CTERA Portal through a Chrome browser, users can drag and drop files from the CTERA Portal directly to a local user folder such as Desktop. You can drag and drop only one file at a time.
 – Restore previous versions of a file. See Restoring a Previous Back Up.
 – Copy the selected items to a folder in the cloud drive.
 – Create or manage public links. If the folder is protected with a passphrase, you cannot create a link. See Making Content Public.
 – View Files, either using Microsoft O365 or CTERA Edit. See Viewing Backed Up Files.
 – Restore the selected folders and files to the original device. See Restoring a Backup.
 - To view previous backups of this device, click More Versions, then select the backup you want to view. See Restoring a Previous Back Up.


 – Download. If you selected multiple items, they are downloaded in a ZIP file. If nothing is selected, the current folder will be downloaded as a ZIP file. When accessing CTERA Portal through a Chrome browser, users can drag and drop files from the CTERA Portal directly to a local user folder such as Desktop. You can drag and drop only one file at a time.
 – Restore previous versions of a file. See
  – Copy the selected items to a folder in the cloud drive.
 – Create or manage public links. If the folder is protected with a passphrase, you cannot create a link. See
  – View Files, either using Microsoft O365 or CTERA Edit. See
  – Restore the selected folders and files to the original device. See
 Viewing Backed Up Files 

Before restoring folders and files from a backup, you can view the files to determine if this is the correct backup version to restore.
Dependent on the file type and the CTERA Portal set up, you can click on a file to view it directly in the CTERA Portal. If the  icon is available when you select a file, that file can be viewed using the appropriate tool for that file type.
If the file is a Microsoft Excel, PowerPoint or Word file, and using Microsoft O365 has been set up by the CTERA Portal administrator, the default is to enable viewing using Microsoft O365.
For other file types, and also for Microsoft Excel, PowerPoint and Word file when Microsoft O365 has not been set up by the CTERA Portal administrator, a Google Chrome extension is available to view files using the appropriate tool for that file type.
Note
The Google Chrome extension is only available when accessing the CTERA Portal from Google Chrome and a CTERA Agent must be installed on the machine used to access the CTERA Portal and this agent must be connected to the CTERA Portal.
Restoring a Backup
After verifying that a selected backup is the one to restore you can restore the whole backup or folders and files in the back up.
To restore a backup:
- In BACKUPS, drill-down to the backup to restore.

- Select what you want to restore and click
 .
.

- Specify how to handle file conflicts:
- Overwrite the current version with the backup version.
- Only overwrite the current version with the backup version if the backup version is a more recent version.
- Keep the current version and restore the backup version with a new name: the files name followed by the original date of the file.
- Skip restoring the backup file.
- Specify where to restore the backup on the device where the backup was run.
- Click Start Restore.

 .
.
Restoring a Previous Back Up
You can view, download, and restore previous versions of a backed up file.
To restore a previous version of a backup:
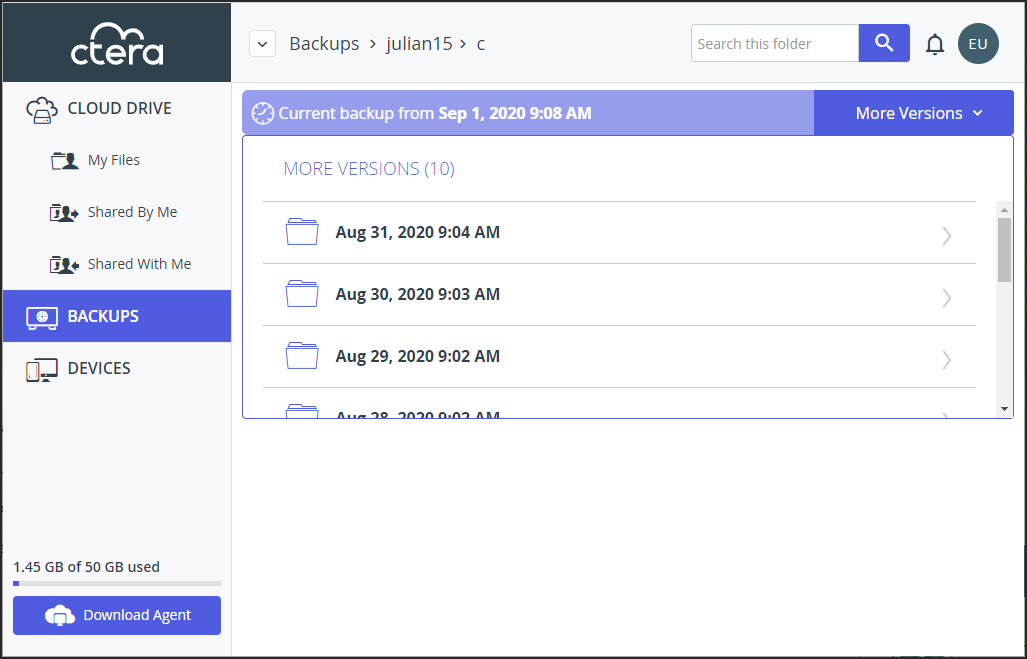
- In your backup, drill-down to the backup with a previous version to restore.
- Click More Versions to see the list of all backed up versions.
The list of backup versions that exist is displayed.


Note
If you select a single file and click , the File Version window is displayed, listing the different backup versions that exist for the file. You download the selected backup file version, or, preview the selected backup file, to decide if it is the file you want to restore, or, restore the selected backup file, or, copy the selected backup file to another location.
- Click the version you want to restore.
The list of folders and files backed up at the chosen date and time are displayed. - The procedure to restore the selected version is the same as for the current version, described in Restoring a Backup.
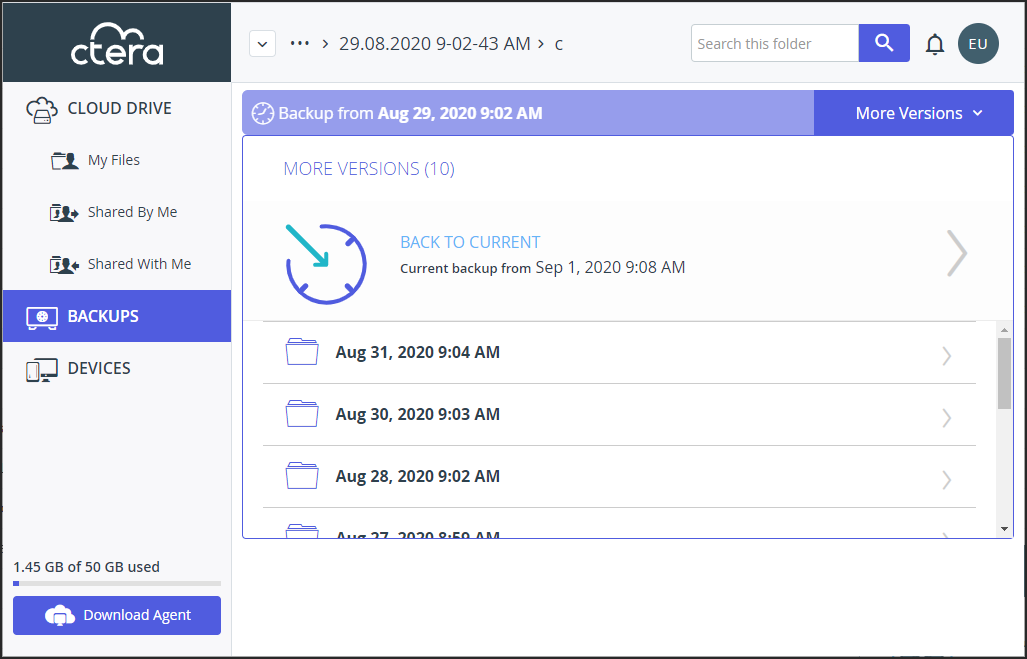
To return to the current backup after selecting a previous version:
- Click More Versions and select the BACK TO CURRENT option.

Was this article helpful?