You can create an administrator and then configure what events and alerts you want to receive to the administrator email.
When specifying user names for the global administrators, if you will be using SSO for the administrator to log on to the portal, the user names must match the SAML identity provider user names. For details about setting up SAML SSO, see Using SAML 2.0 For Single Sign-on.
A global administrator from Active Directory cannot log on using SAML, LDAPS or Kerberos.
Adding and Editing a Local Global Administrator
A global administrator can be defined in Active Directory. For details, see Adding a Global Administrator From Active Directory.
To add or edit a local global administrator:
-
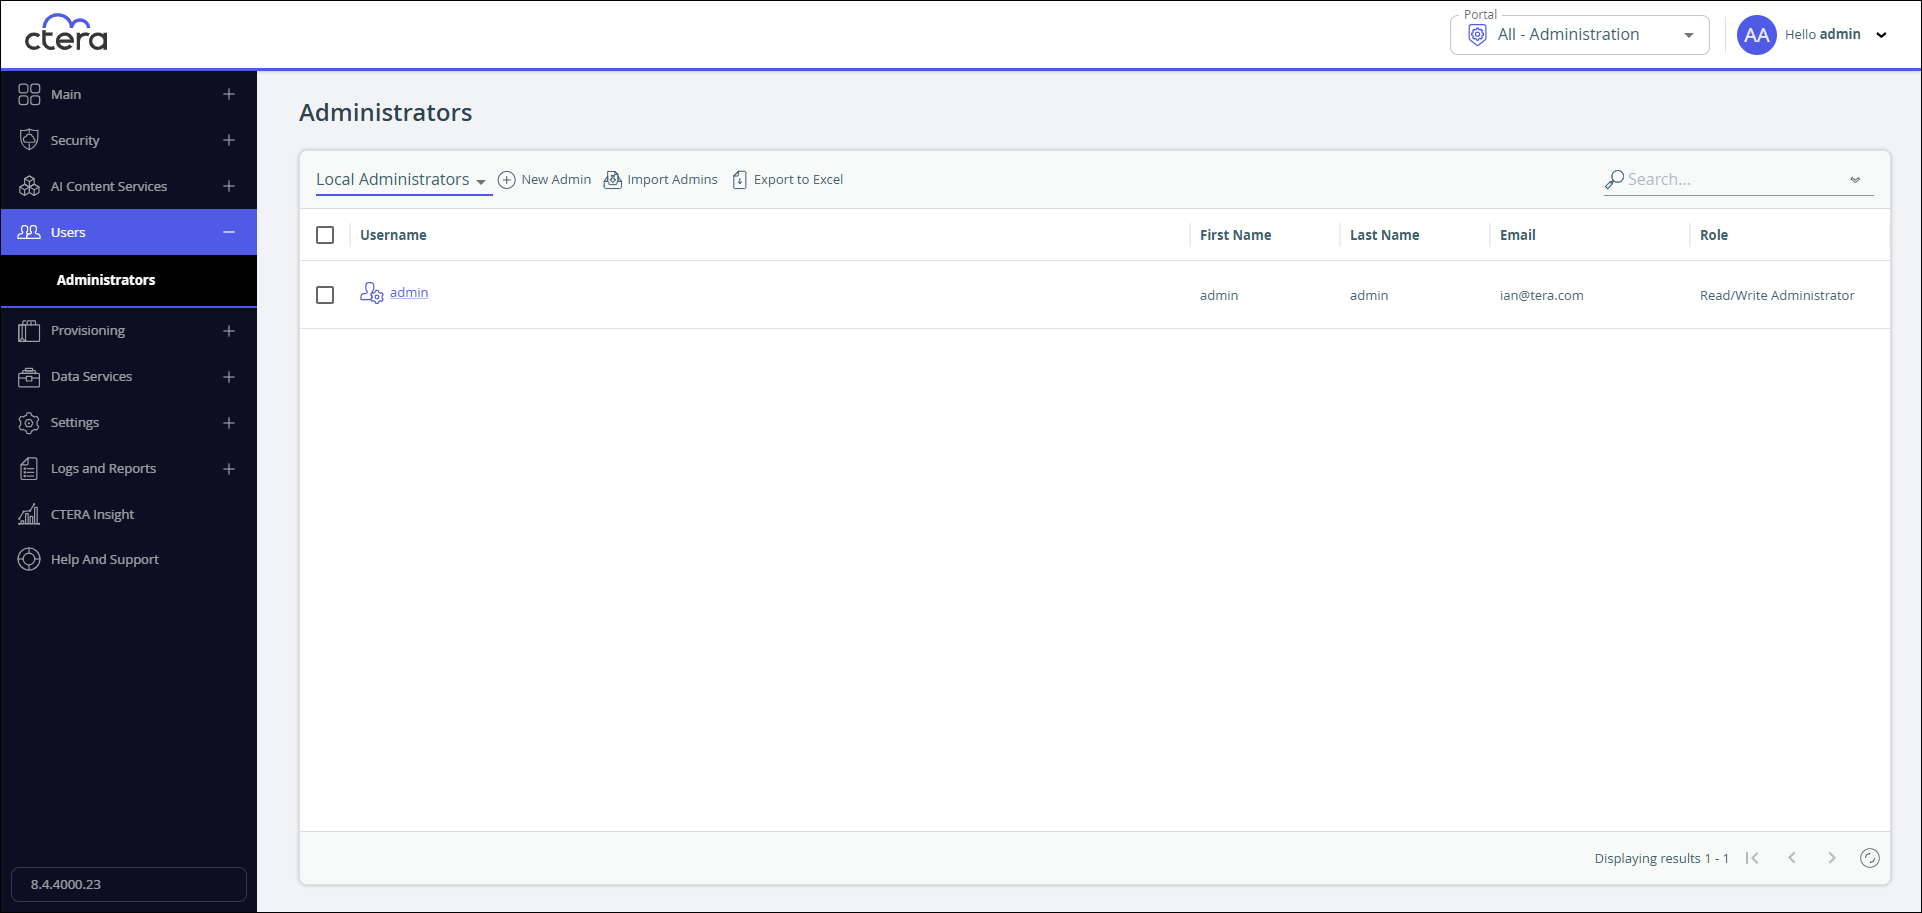
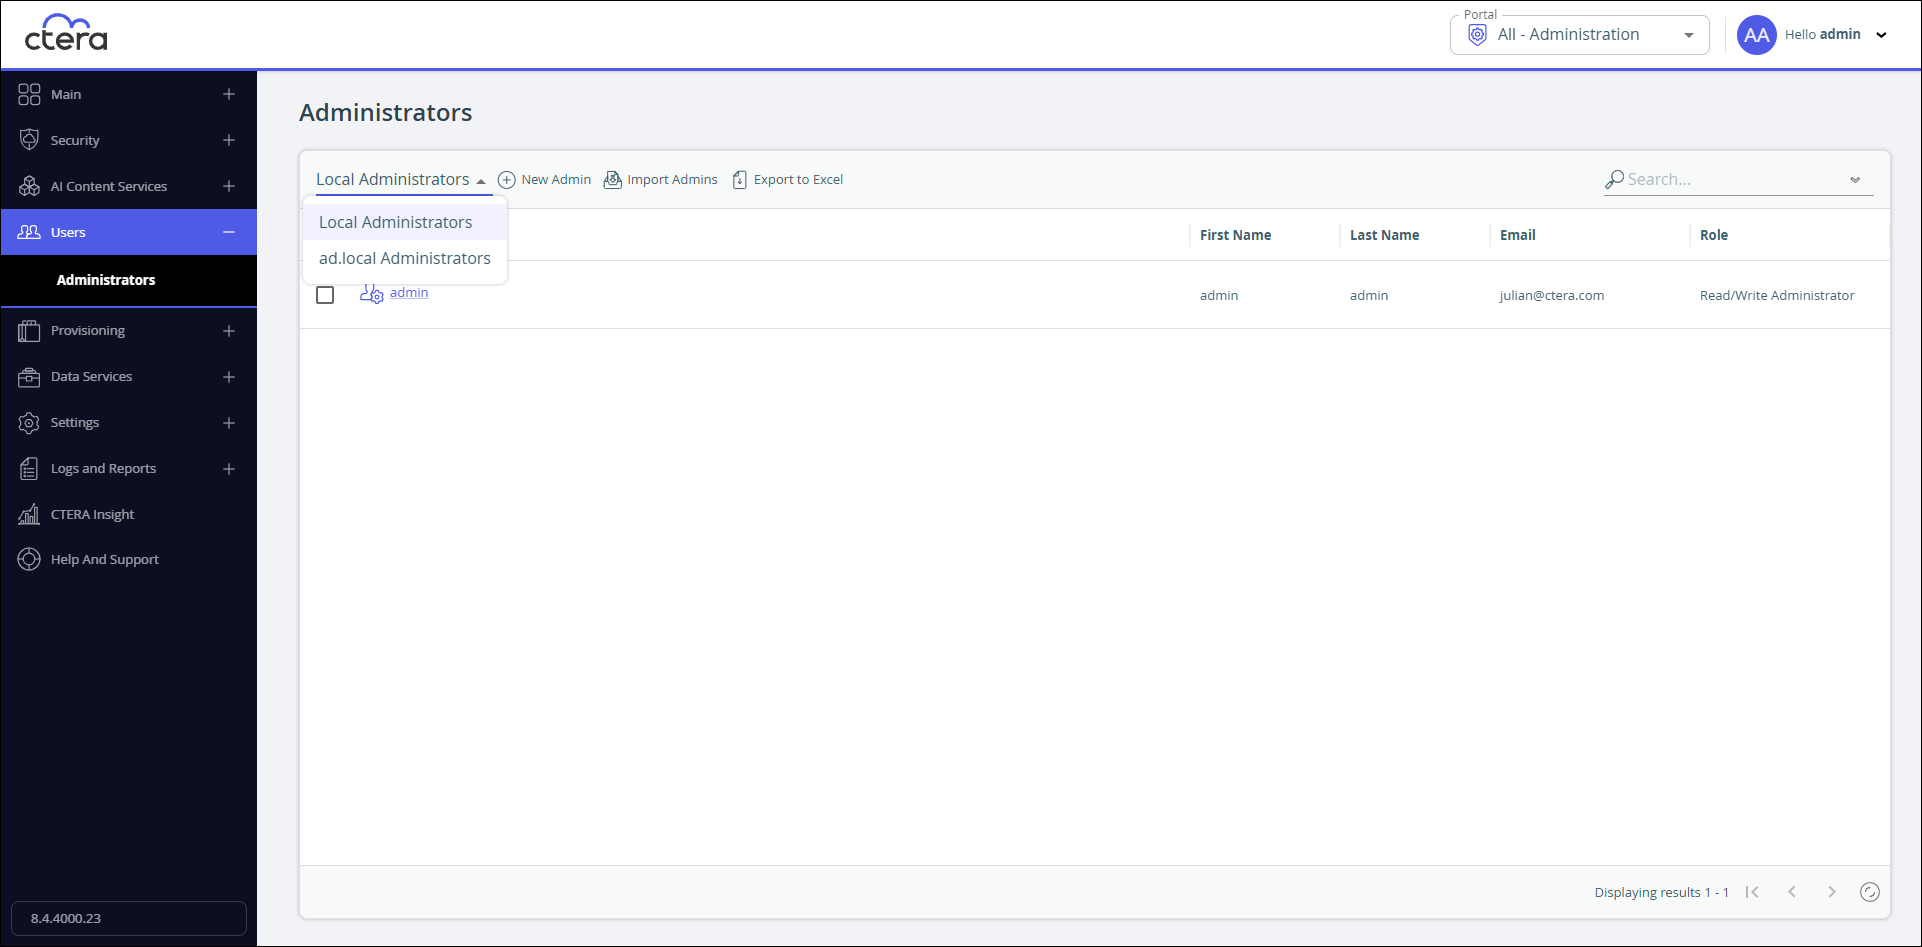
In the global administration view, select Users > Administrators in the navigation pane.
The Administrators page is displayed.
-
Make sure that Local Administrators is displayed.
-
Either,
- Add an administrator, click New Admin.
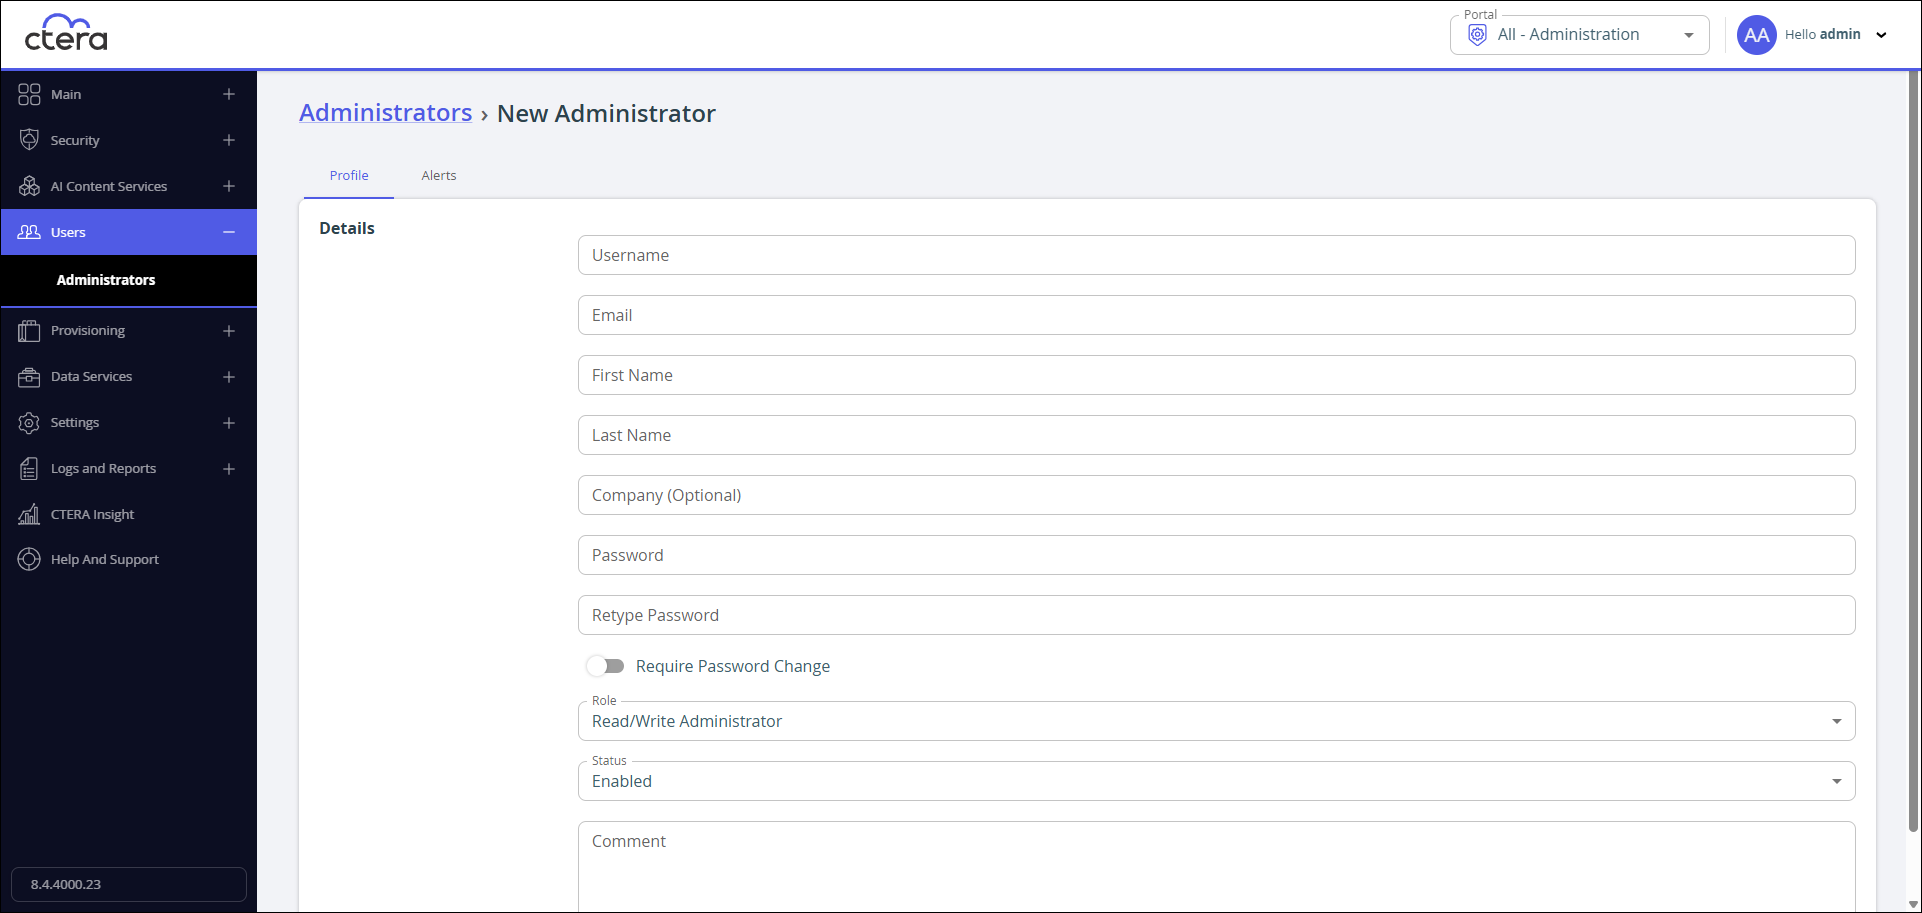
The New Administrator page is displayed.
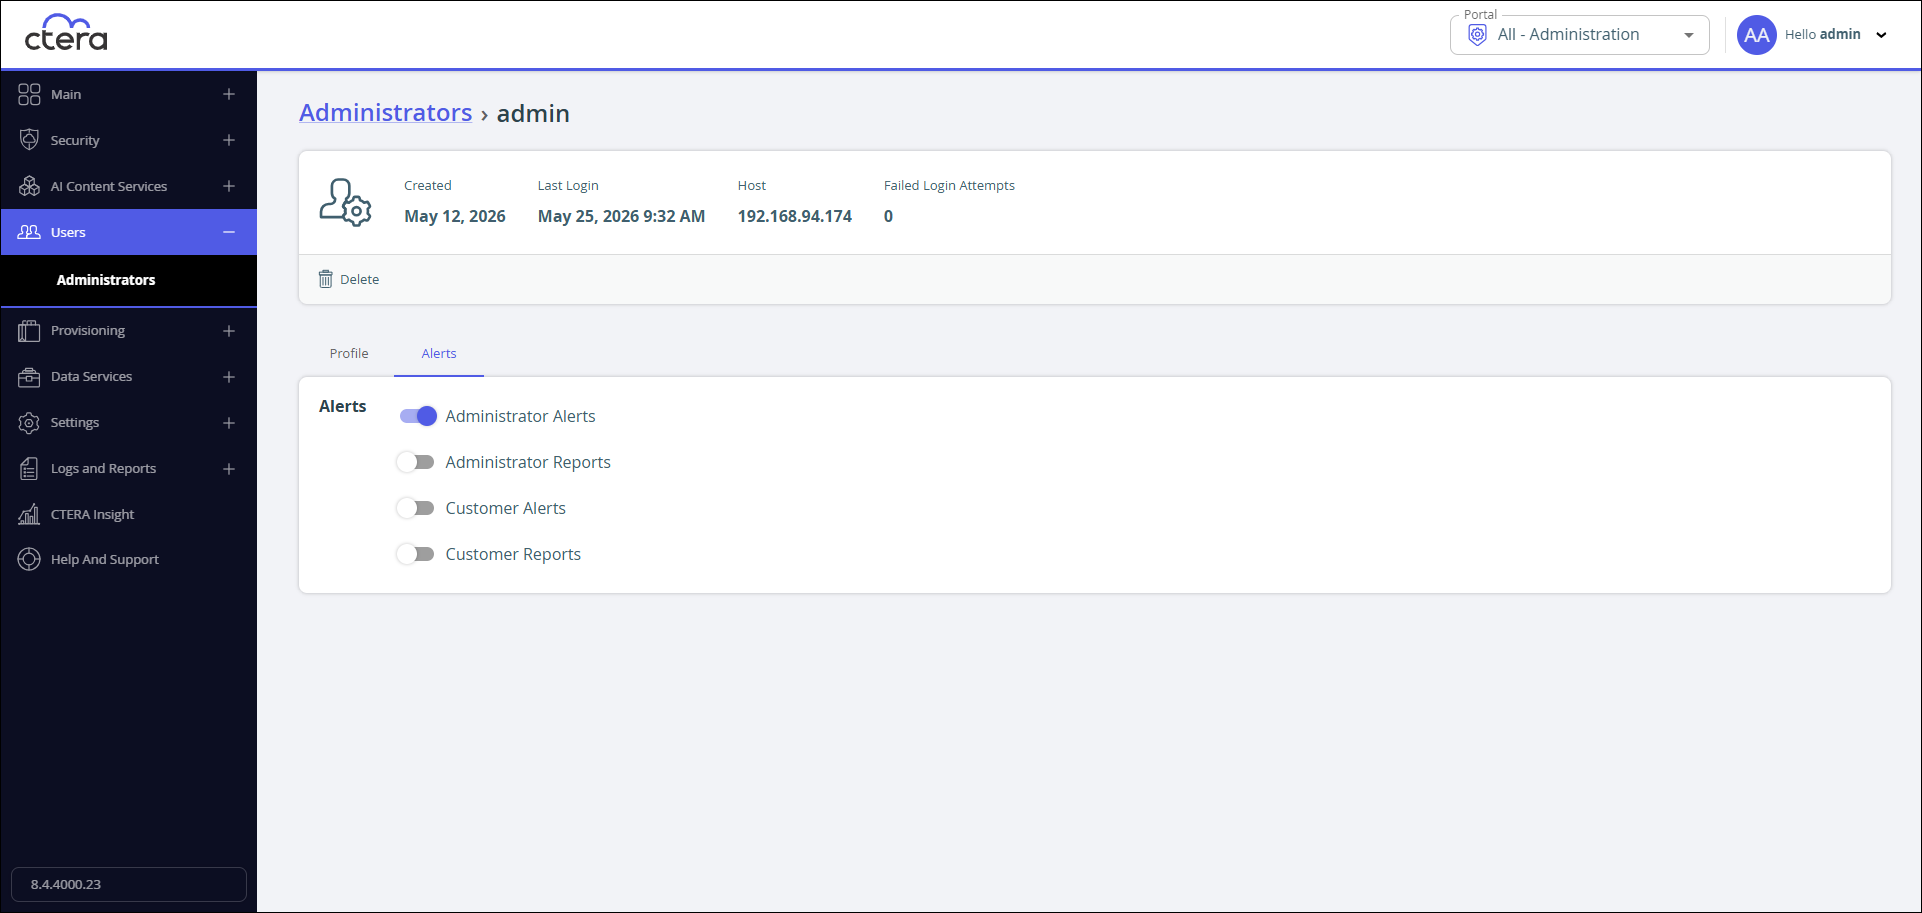
Or, - Edit an existing administrator, click the administrator's name.

The administrator page is displayed with the username of the administrator as the page title and account details: The creation date of the account and the last login.
- Add an administrator, click New Admin.
-
Enter the Profile details:
Username – A user name for the administrator.
Email – The administrator's email address.
First Name – The administrator's first name.
Last Name – The administrator's last name.
Company (Optional) – The name of the administrator's company.
Password – A password for the administrator. By default, the password must be at least 7 characters long. The minimum password length can be changed. See Administrators Password Policy.
Retype Password – Retype the password.
Require password change – Slide on to specify an expiration date for the administrator’s password. When the password has expired, the administrator must specify a new password on the next login.
Role – Specify the administrator's role. CTERA Portal includes built-in global administrator roles:- Disabled – The administrator role is disabled.
- Read/Write Administrator – The administrator has read-write permissions throughout the ortal.
- Read Only Administrator – The administrator has read-only permissions throughout the portal.
- Support – The administrator has read/write access to devices, user accounts, folders, and folder groups, and read-only access to all other settings in the portal.
- Compliance Officer – The administrator can access the portal as an administrator with read-write permissions and also manage compliance settings for cloud drive folders.
- Archive Operator – The user can manage data archiving.
NoteYou can customize these roles, adding or removing permissions as described in Customizing Administrator Roles.
Status – The administrator status.
- Enabled – The account is enabled, and the administrator can access the portal.
- Disabled – The account is disabled, and the administrator cannot access the portal.
The default value for new administrators is Enabled.
NoteThe currently logged in administrator cannot be disabled.
Comment – A description of the administrator.
-
Optionally, select the Alerts option.
-
Slide on the types of alerts this administrator will receive.
Administrator Alerts – Notifications about all virtual portal-level problems.
Administrator Reports – Monthly reports of all virtual portal-level activity, such as cloud storage usage over the month and devices registered with the portal.
Customer Alerts – Notifications about all device-level problems.
Customer Reports – Notifications about customer activity. -
Click Save.
Adding a Global Administrator from Active Directory
CTERA Portal can be integrated with Microsoft Active Directory. If you are integrating the CTERA Portal with Active Directory, make sure the ports described in the planning part of the portal installation guide are opened.
Global administrator accounts are automatically fetched and refreshed from Active Directory, and authentication is performed using Active Directory.
Global Administrators must have an email address, as well as a first and last name, defined in Active Directory. Users without one of these attributes cannot log in to the portal and will cause synchronization to fail.
A global administrator from Active Directory cannot log on using SAML, LDAPS or Kerberos.
Nested groups are not supported by default since supporting nested groups has a performance impact. If you need support for nested groups, contact CTERA support.
After Active Directory administrators are fetched, they can be viewed in the portal. The administrator from Active Directory cannot be edited in the CTERA Portal, except to change the Status to Disabled.
When integrated with Active Directory, the portal first checks if the global administrator is defined locally before checking Active Directory.
Integrating CTERA Portal with Active Directory
Before integrating the portal to Active Directory, set up integration with TLS:
- LDAPS (TCP port 636) and Global Catalog TLS (TCP port 3269) ports must be opened.
- Domain controllers must have a domain controller certificate with the EKU (Enhanced Key Usage) Client Authentication/ServerAuthentication.
- On the domain controller, open the Certificates MMC and export the domain controller certificate into
.cerformat. - Import the certificate on each CTERA Portal application server:
- Log in to each CTERA Portal application server using SSH.
- Run the command:
portal-cert.sh import -f <certificate>.cer <Alias_Name>where certificate is a name for the certificate and Alias_Name is a name you can use to identify the certificate.NoteYou only need to import the certificate and not the whole certificate chain.
- After importing the certificate to each CTERA Portal application server, run the command to start the portal:
portal-manage.sh restart - Follow the instructions in the To set up defining an administrator from Active Directory procedure below, checking Use TLS.
- Remove access to ports TCP 389 and TCP 3268.
- On the domain controller, open the Certificates MMC and export the domain controller certificate into
To set up an administrator from Active Directory:
-
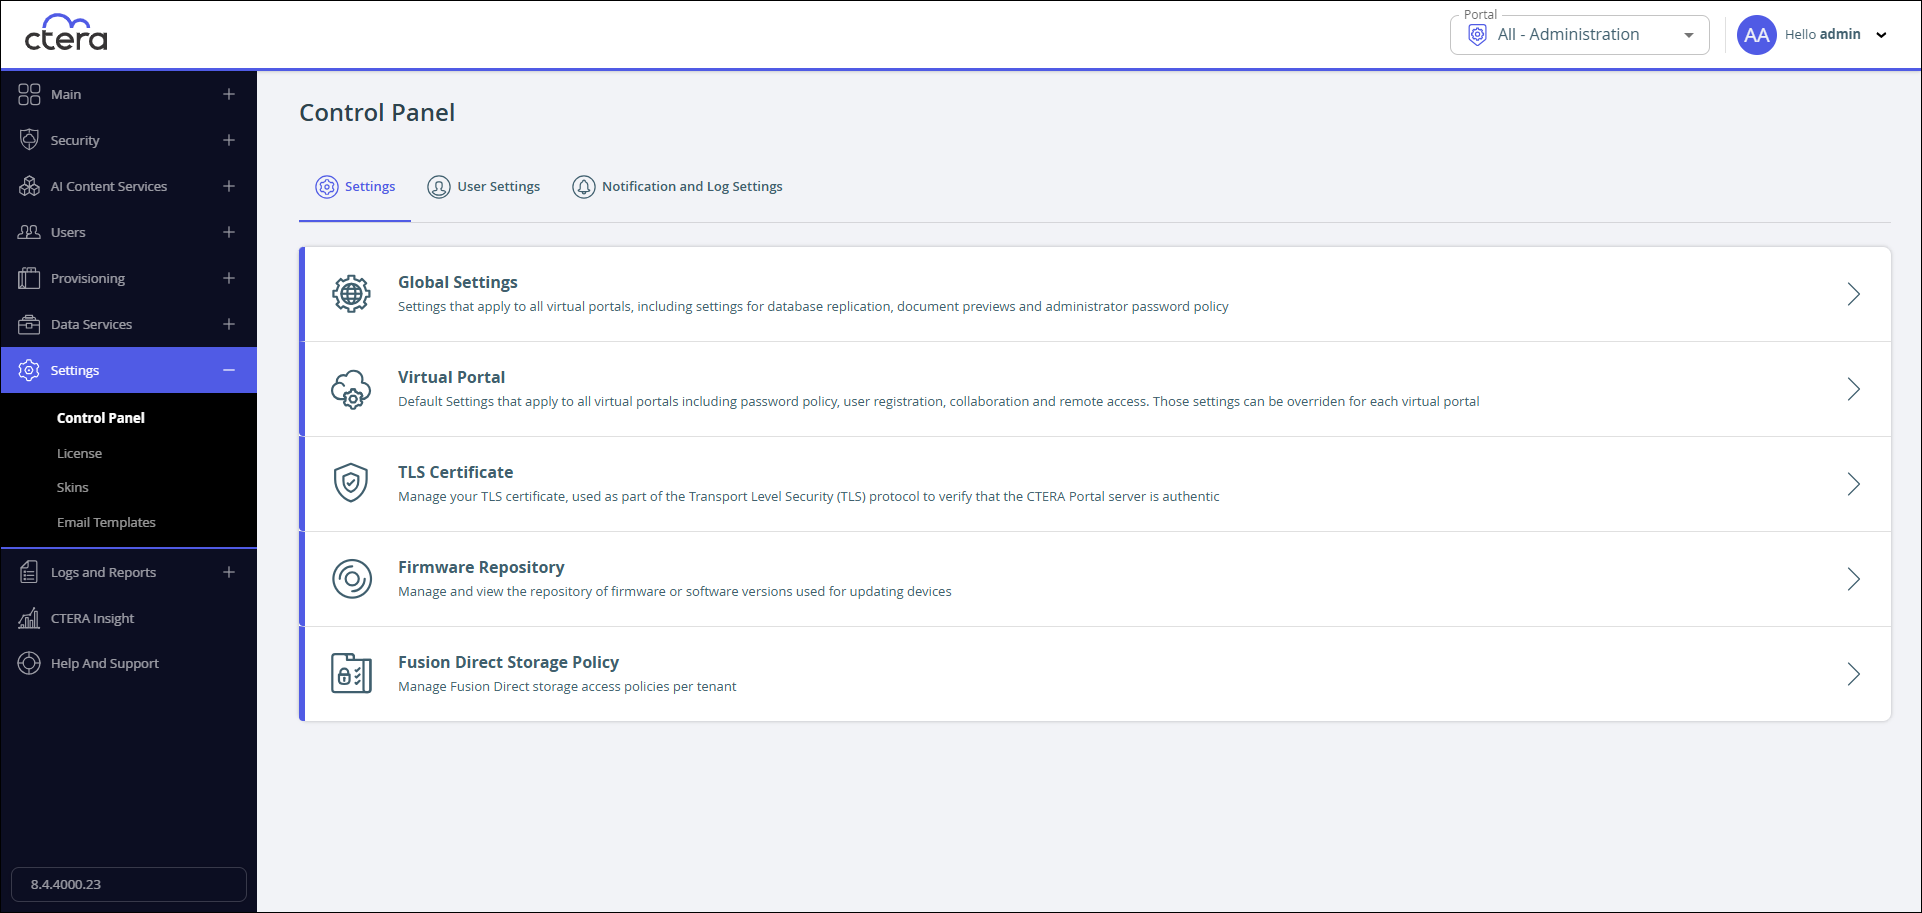
In the global administration view, select Settings > Control Panel in the navigation pane.
The Control Panel page is displayed.
-
Select Directory Services under User Settings.
The Directory Services page is displayed.
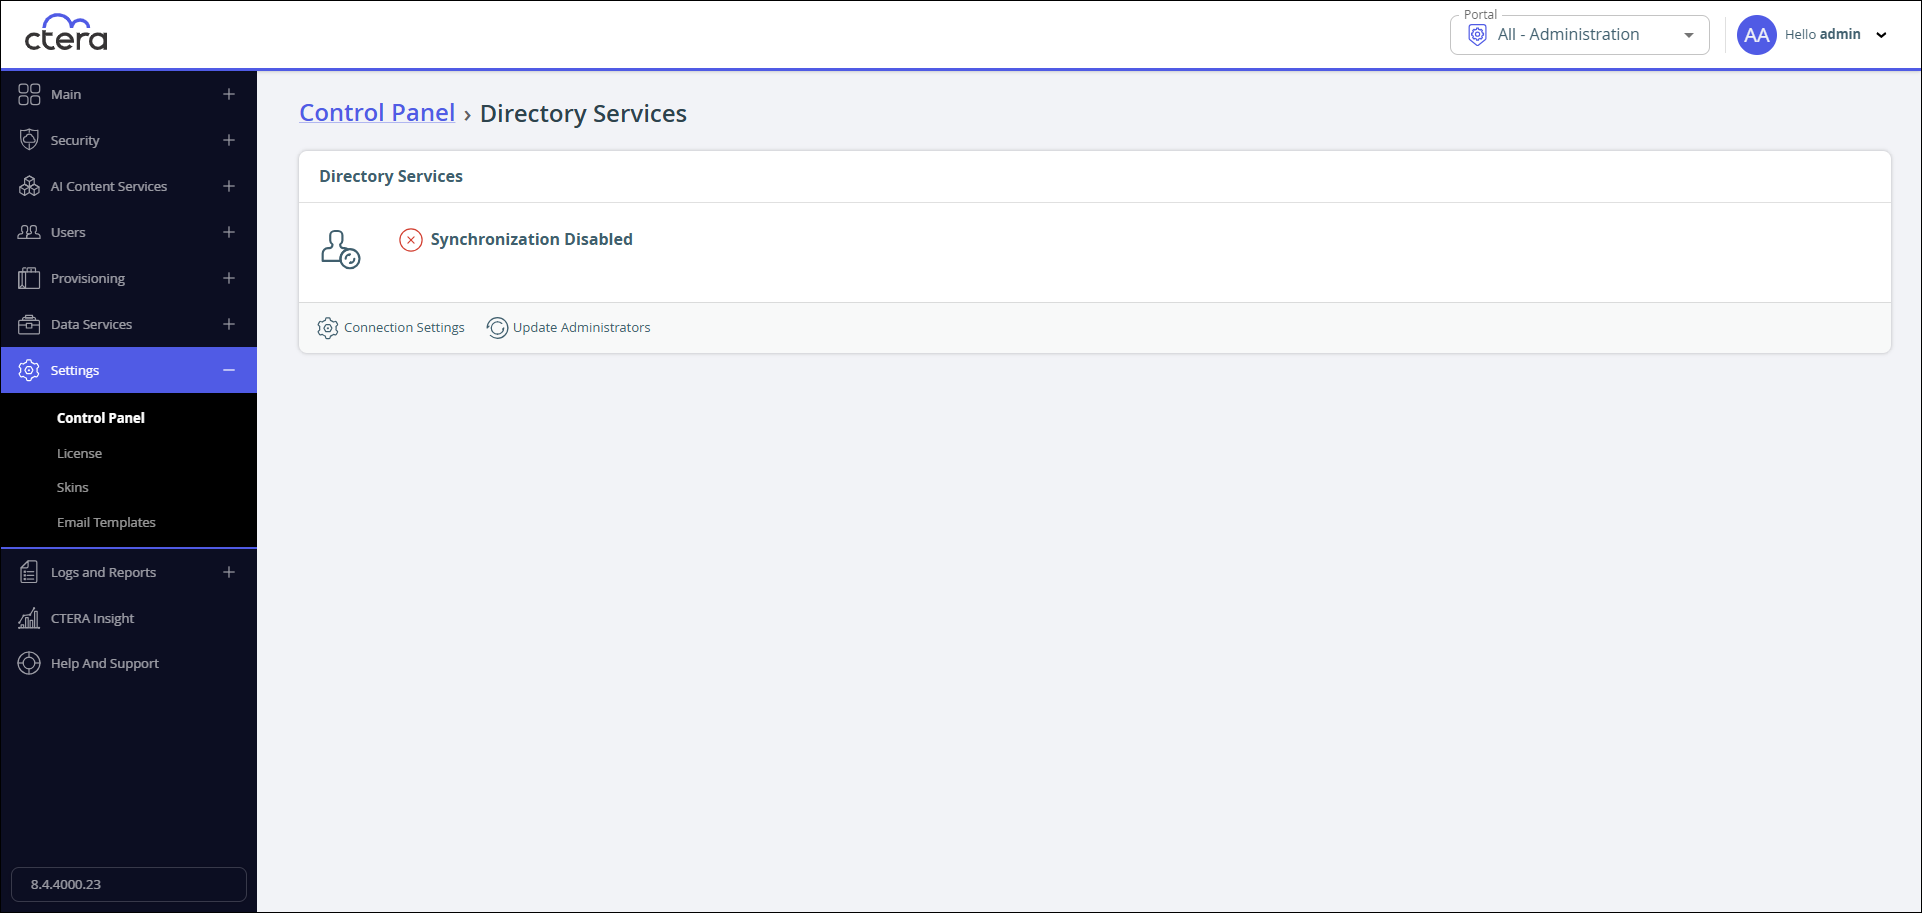
-
Click Connection Settings to set directory settings, including enabling connecting to a directory service.
-
Slide Enable directory synchronization on.
The Directory Services > Settings page is displayed.
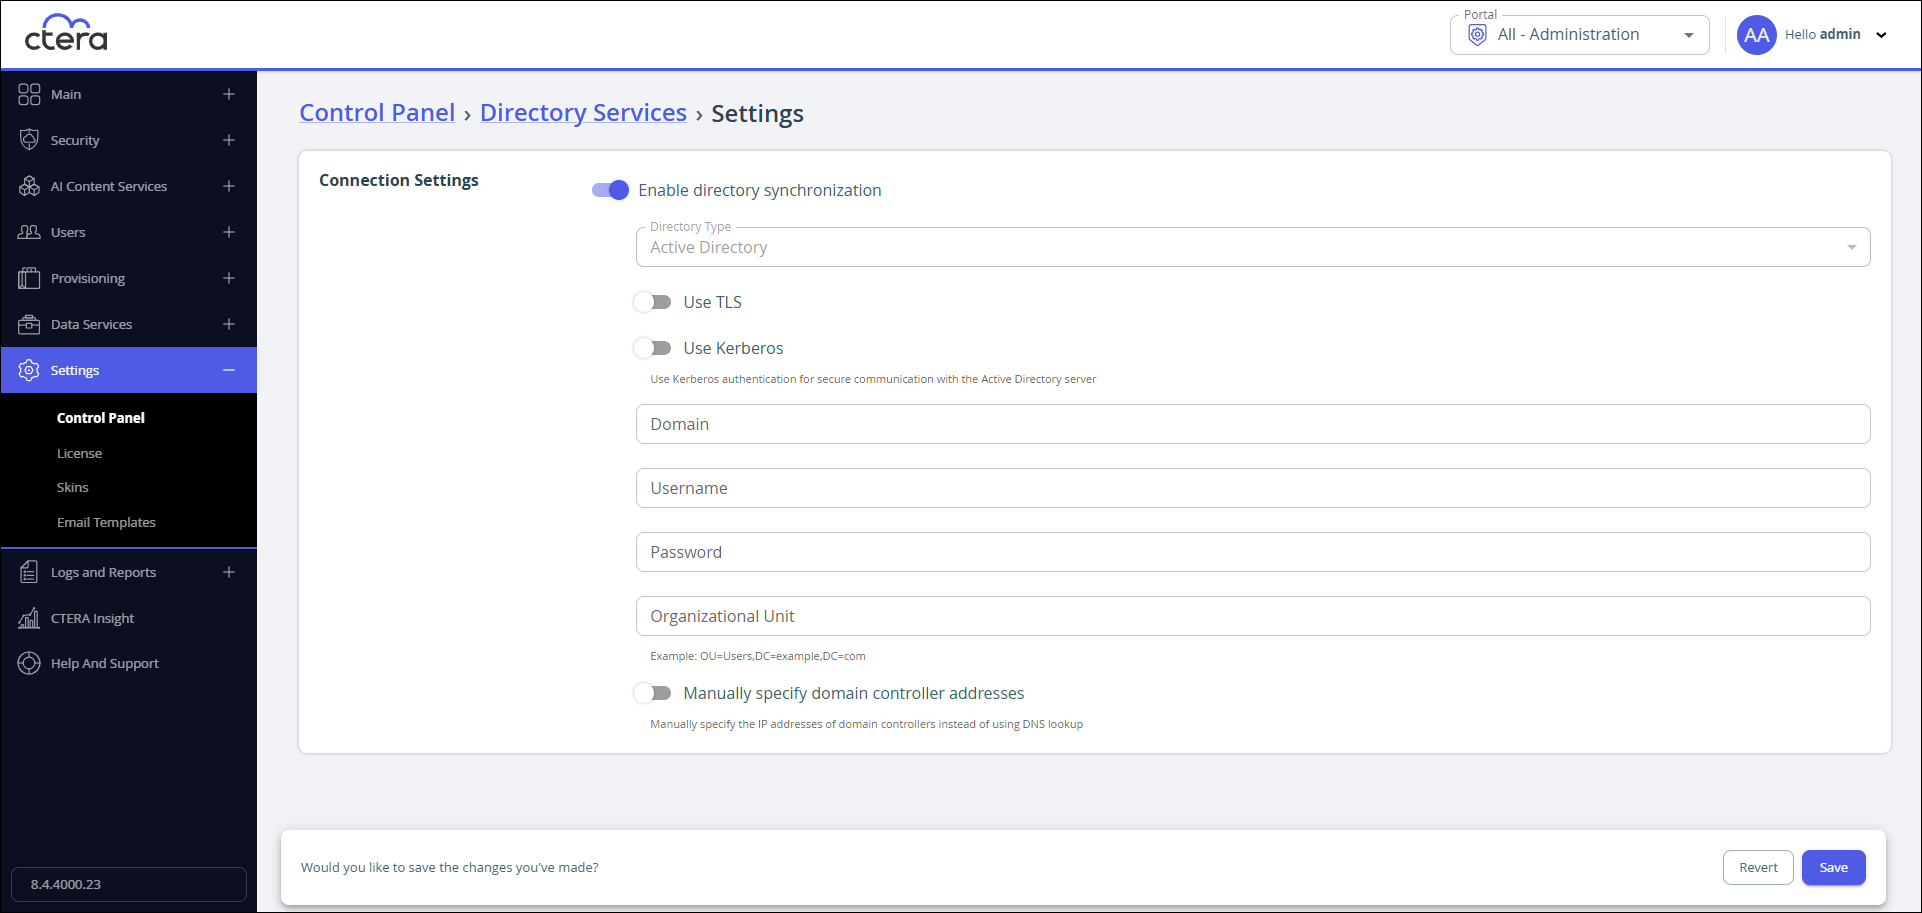
Directory Type – Integration is with Active Directory.
Use TLS – Connect to the Active Directory domain using TLS.
Use Kerberos – Use the Kerberos protocol for authentication when communicating with the Active Directory domain. This is useful for achieving Single Sign-on (SSO) with Windows computers. If unchecked, NTLM is used.
Domain – The name of Active Directory domain with which you want to synchronize users.
Username – The name to use for authenticating to Active Directory.
Password – The password for authenticating to Active Directory.
Organizational Unit (Optional) – The name of the organizational unit within the Active Directory domain.
Manually specify domain controller addresses – The IP address of the Active Directory domain controllers. If unchecked, DNS is used to automatically find the domain controllers.- Primary – The address of the primary domain controller.
- Secondary – The address of the secondary domain controller.
-
Click Save.
The portal connects to the domain.
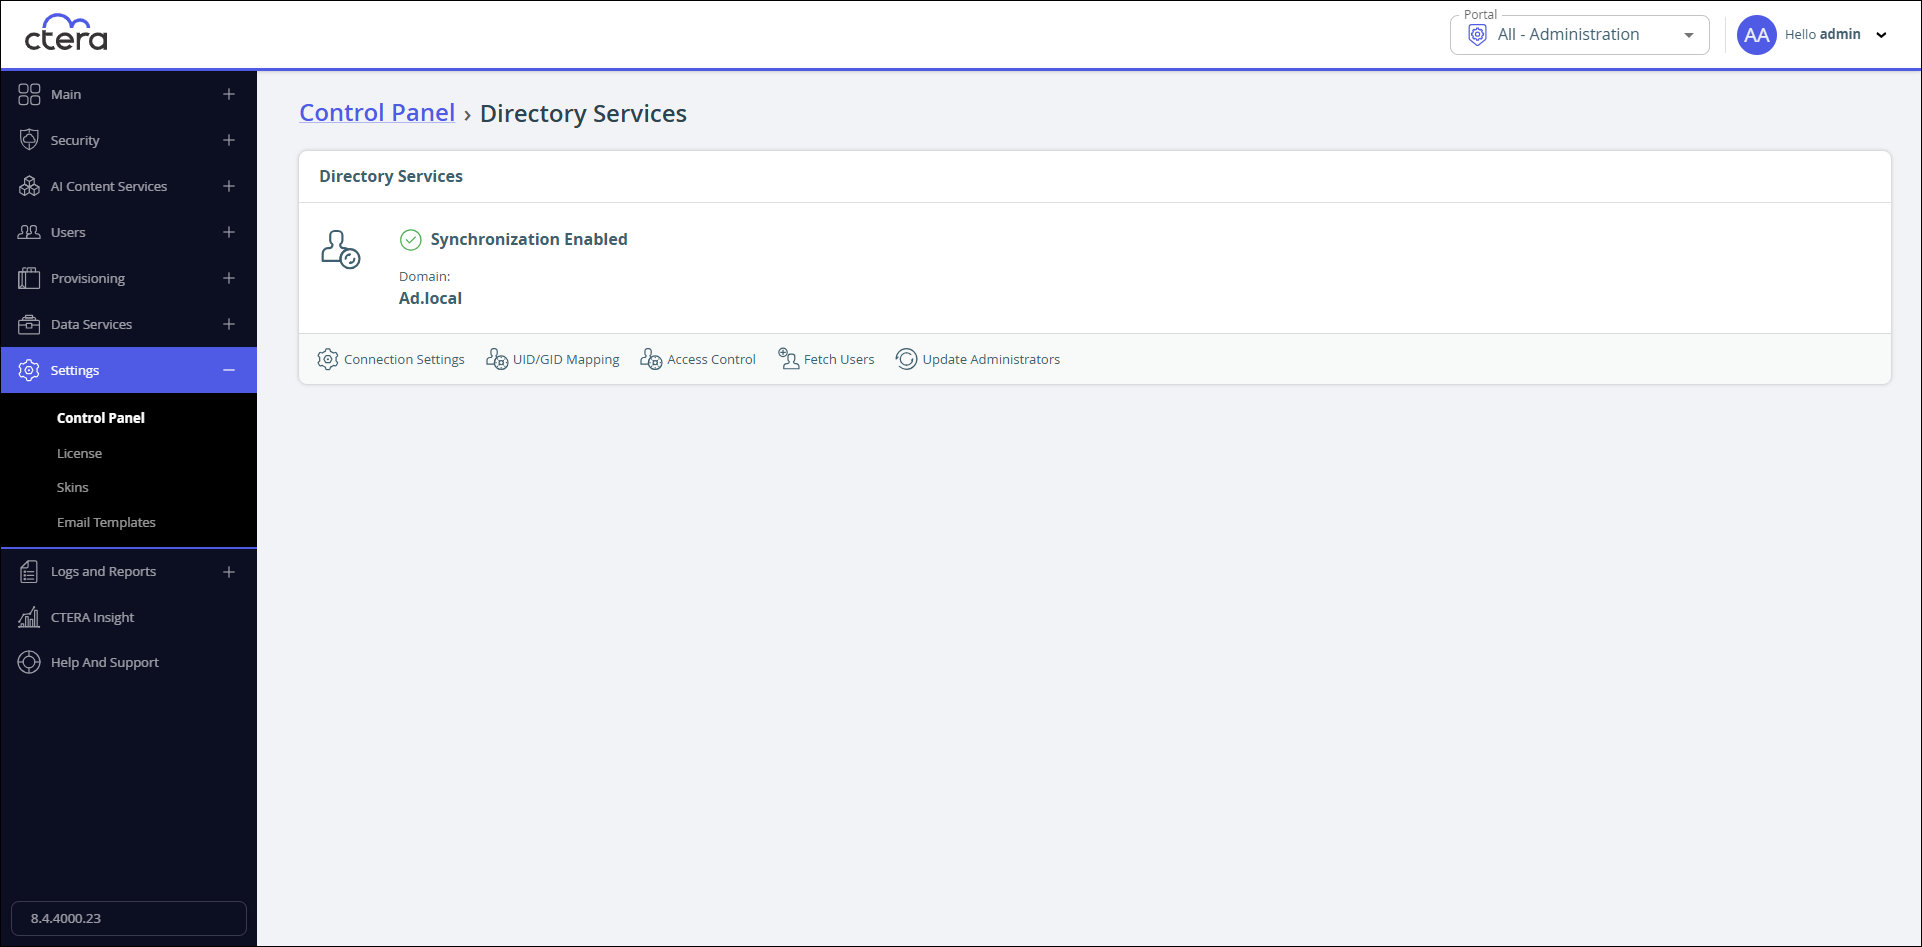
-
Click the UID/GID Mappings tab.
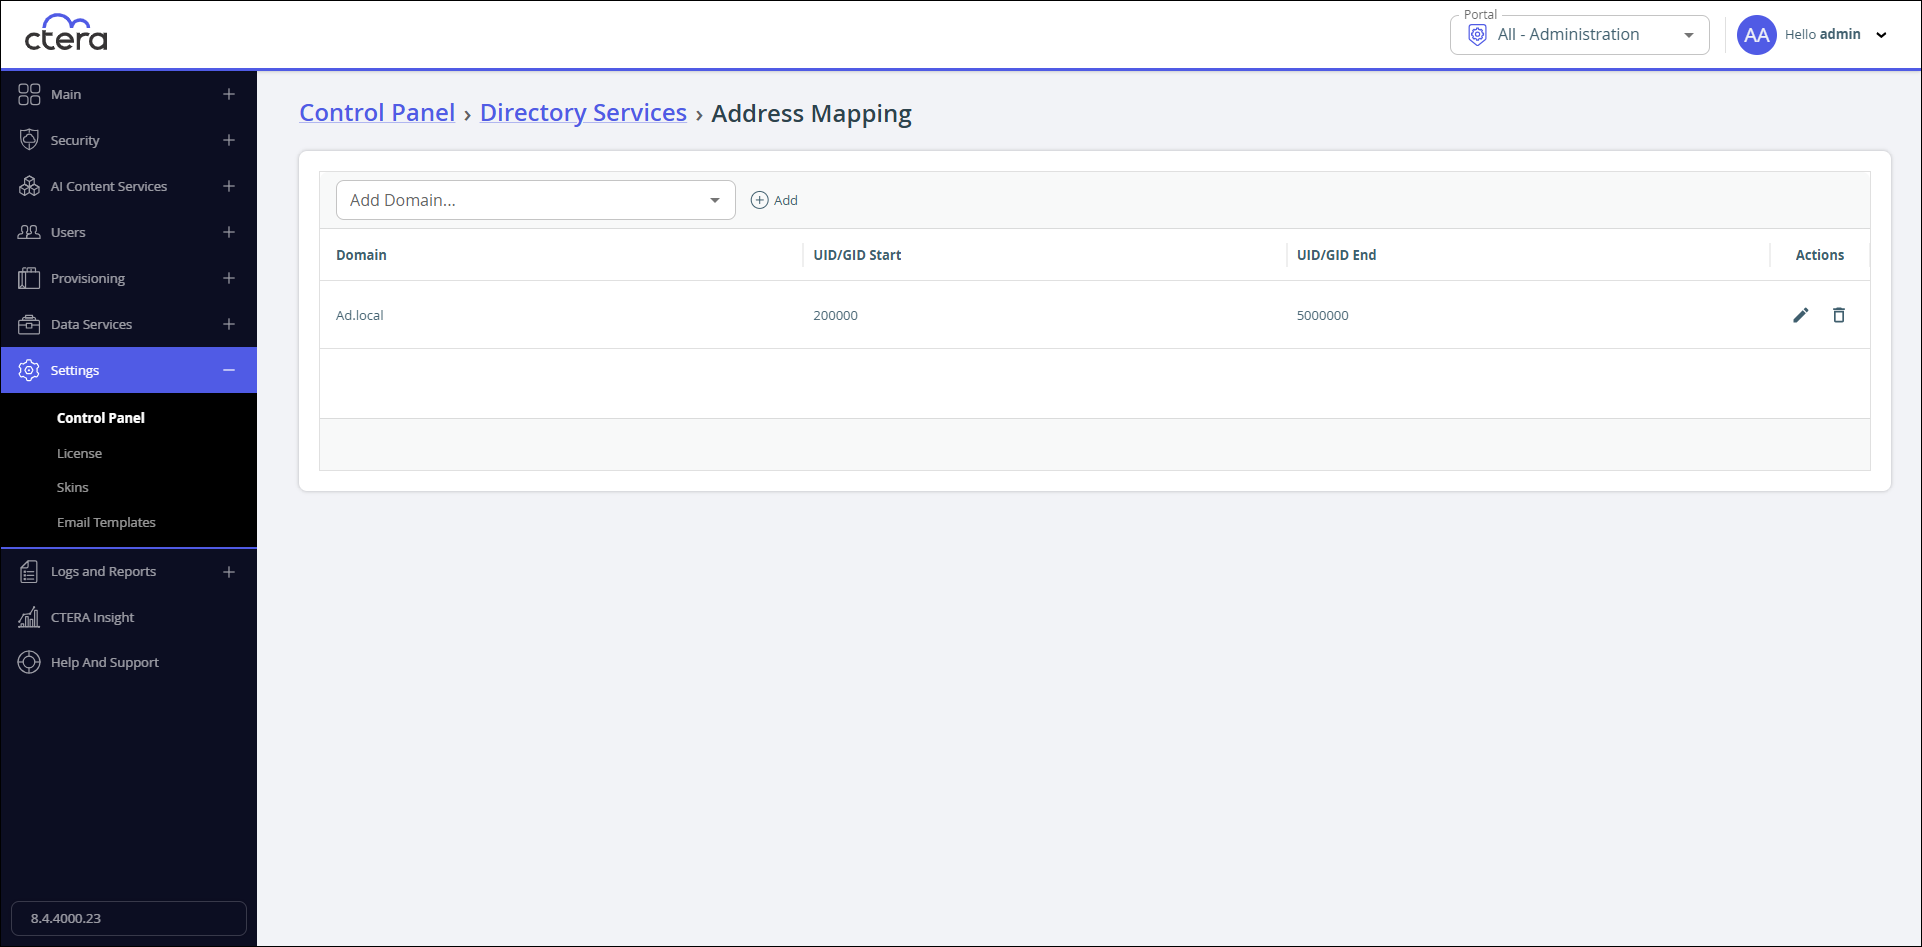
-
To add the other Active Directory domains in the tree/forest, do the following for each one:
- Select the domain to add to the group and click Add.
- In the Add domain field, enter the Active Directory domain name, or select it from the drop-down list.
- Click Add.
The domain is added. - In the UID/GID Start field enter the starting number in the range of portal user and group IDs (UID/GID) to assign to users and user groups from this Active Directory domain.
- In the UID/GID End field enter the ending number in the range of portal user and group IDs (UID/GID) to assign to users and user groups from this Active Directory domain.
- You can re-order the list of added domains by selecting a domain and clicking Move Up or Move Down.
The order in which domains are displayed represents the order in which the domains are displayed in lists throughout the portal interface.
- Select the domain to add to the group and click Add.
-
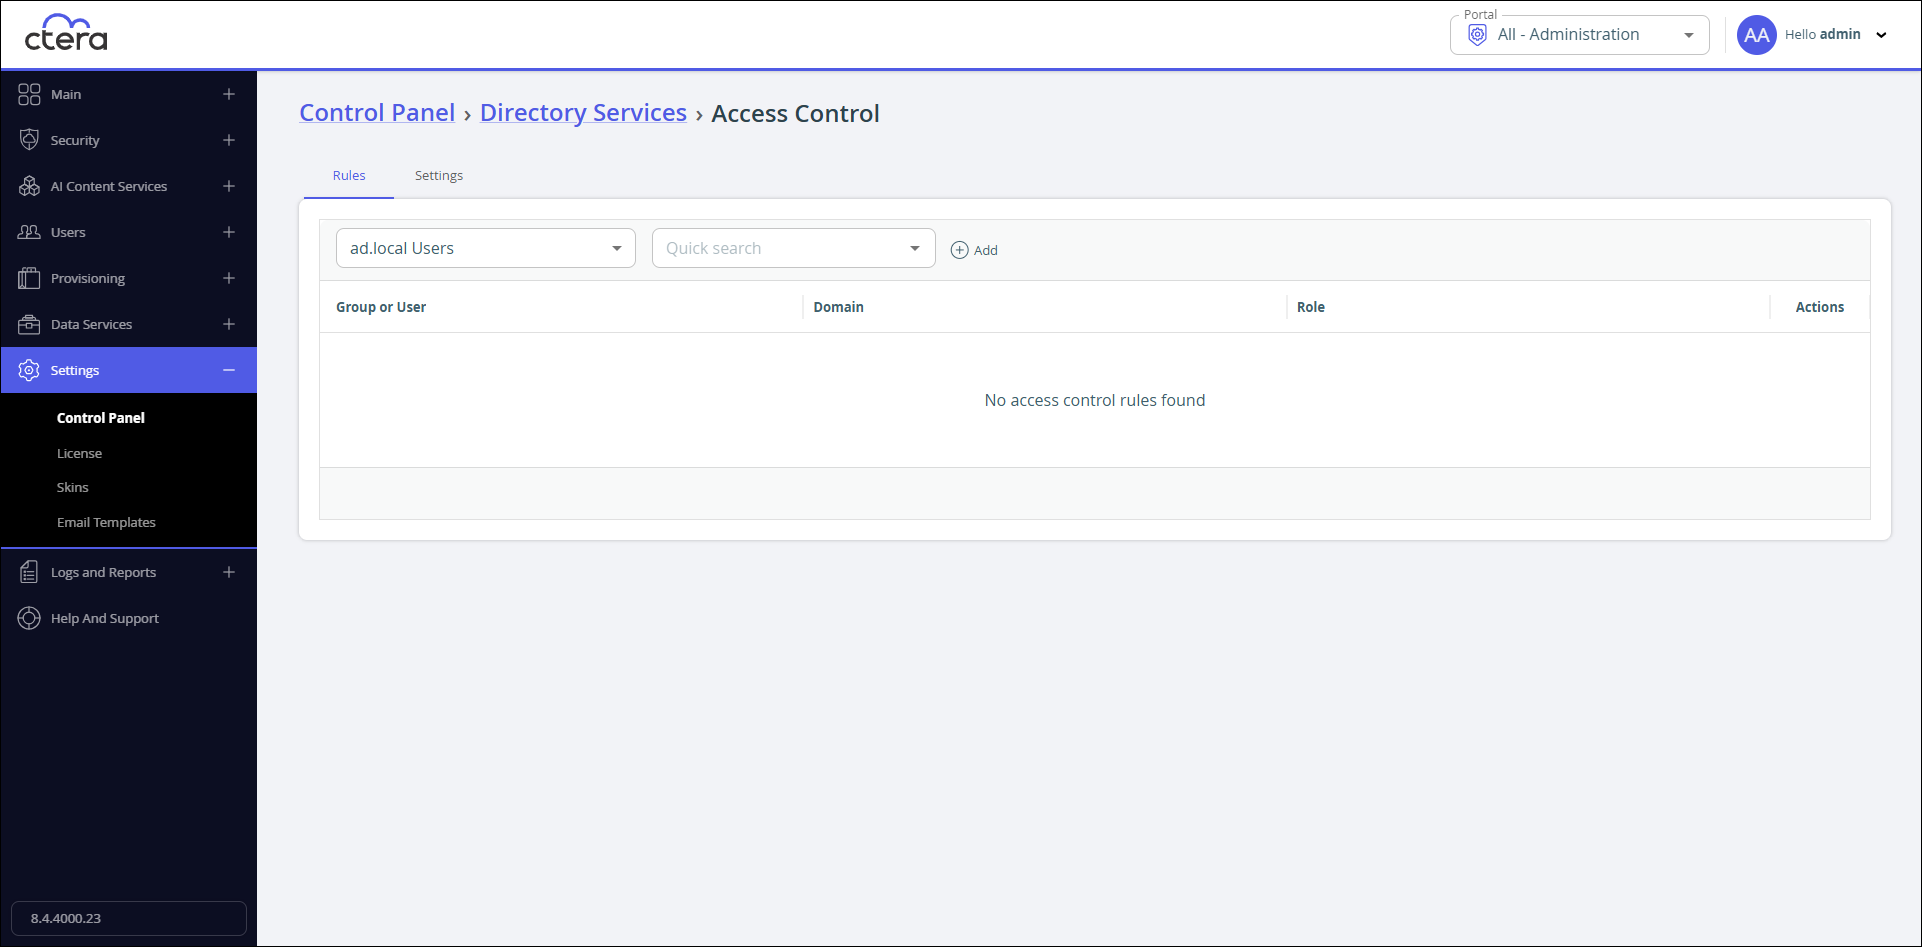
In the Directory Services page click the Access Control tab.
-
Add each global administrator allowed to access the portal:
- In the drop-down list, select one of the following:
Domain Users – Search the users defined in directory service.
Domain Groups – Search the user groups defined in directory service. - Select the user or user group from the Quick Search drop-down list or enter a string that is displayed anywhere within the name of the user or user group you want to add.
- Select the user or group and click Add.
The user or user group is added to the list of users and user groups with access to the portal. - In the Role column select the user role from the drop-down list.
- Disabled – The administrator role is disabled.
- Read/Write Administrator – The administrator has read-write permissions throughout the ortal.
- Read Only Administrator – The administrator has read-only permissions throughout the portal.
- Support – The administrator has read/write access to devices, user accounts, folders, and folder groups, and read-only access to all other settings in the portal.
- Compliance Officer – The administrator can access the portal as an administrator with read-write permissions and also manage compliance settings for cloud drive folders.
- Archive Operator – The user can manage data archiving.
- Click
 in the Actions column to save the changes.
 - Click
 to edit the role or
  to delete the group or user.
- In the drop-down list, select one of the following:
-
Click Settings to assign a role for group or user with no match in the access control list, select the user role from the If no match, assign this role drop-down list: Disabled, Read/Write Admin, Read Only Admin, Support, Compliance Officer, or Archive Operator.
-
Click Save.
-
Click Close.
Synchronization with the directory server is enabled. The global administrators in the portal are automatically updated at midnight of every night with the users in Active Directory. -
To immediately fetch the administrators, in the Directory Services page click the Fetch Users tab to retrieve specific users.

- In the drop-down list, select one of the following:
Domain Users – Search the users defined in directory service.
Domain Groups – Search the user groups defined in directory service. - Select the user or user group from the Quick Search drop-down list or enter a string that is displayed anywhere within the name of the user or user group you want to add.
- Select the user or group and click Add.
The user or user group is added to the list of users and user groups with access to the portal.
- In the drop-down list, select one of the following:
-
Click Save.
-
Click Close.
Deleting Global Administrators
You cannot delete the global administrator that is currently logged in to the CTERA Portal.
To delete a global administrator:
-
In the global administration view, select Users > Administrators in the navigation pane.
The Administrators page is displayed. -
Select either Local Administrators or Domain Administrator.
-
Either,
- Select the administrator row to delete and click Delete.
A confirmation window is displayed. - Click OK to confirm.
Or,
- Click the administrator username.
The administrator window is displayed with the administrator details. - Click Delete.
A confirmation window is displayed. - Click Delete to confirm.
- Select the administrator row to delete and click Delete.
The administrator is deleted.