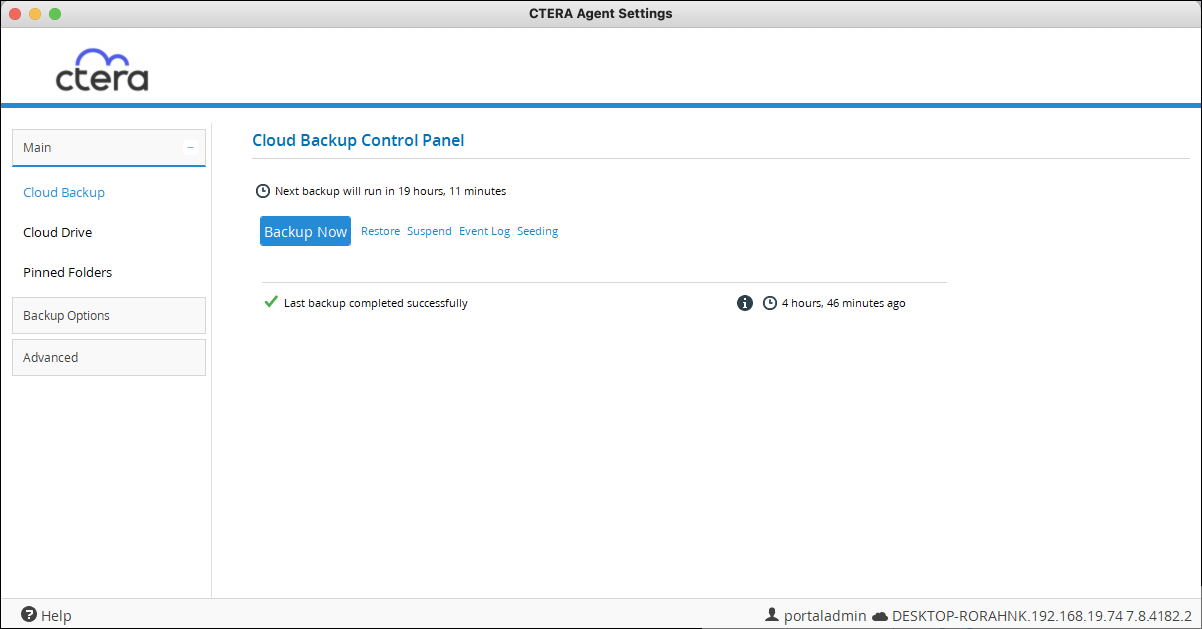
The first time cloud backup runs, CTERA Agent performs a full cloud backup for the selected folders. Depending on the size of your data set, this might take a long time. Subsequent backups are performed incrementally and normally take much less time than the initial backup. Only data that has actually changed is uploaded.
CTERA uses data compression and data deduplication techniques to ensure that the backup happens as quickly and efficiently as possible.
In addition to backing up your files, when cloud backup runs, the configuration of your CTERA Agent is automatically backed up to the portal, from where it can be easily downloaded and used to restore your configuration settings, as needed.
Backed up files are kept according to the retention policy defined on the portal.
What Files Are Backed Up
The particular set of files that is backed up when the Cloud Backup service runs is controlled by a combination of selection mechanisms:
Backup Files – Files directly selected for backup. You can select entire folders or specific files. For details, see Selecting Files to Back Up.
Backup Sets and Exclude Sets – Filters that you can define to determine which files to include or exclude in the backup, based on criteria of your choice, such as file type, location, modification date, and so on. For details, see Backup and Exclude Sets.
These options can be used in combination. When all options are used, CTERA Agent determines the final set of files to include in a backup operation by performing the following checks for each file:
- If the file is contained in an Exclude Set, the file is skipped.
- If the file is contained in a Backup Set, the file is backed up.
- If the file is contained in a folder that was selected for backup in the folder selection page, the file is backed up.
When you have a lot of information to back up, the initial backup to the cloud can take a long time. If enabled, you can prepare a disk that contains the files you want to include in your backup. You deliver this disk to your service provider to use to set up your initial backup over a LAN. For details, see Preparing a Backup Seeding Hard Drive.
Preparing a Backup Seeding Hard Drive
The feature to prepare a seeding hard drive might not be available as it depends on whether this feature is offered by the service provider.
When you have a lot of information to back up, you can speed up the initial backup by preparing a drive that contains all of the files you want to include in your initial backup. You then deliver this seeding drive to the service provider, and the service provider uses the drive to create the initial backup.
The seeding drive can optionally be encrypted using AES-256 and RSA public key encryption for additional security.
To prepare a backup seeding hard drive:
-
Select the files and folders you want to include in the initial backup. These files and folders will be written to the seeding drive.
-
Right-click the CTERA Agent Menu Bar icon,
 , and select Settings.
Or,
Click the settings icon, , in the bottom right corner of the CTERA Agent window.
The CTERA Agent Settings window is displayed.

-
In the Cloud Backup Control Panel page click Seeding.
NoteThis option is displayed only if the backup seeding service is supported by your service provider.
The Select Seeding Destination window is displayed.
-
Choose the drive to use as the seeding drive.
WarningThe original content of this drive will be deleted.
-
Optionally, to encrypt the seeding drive, select the Use encryption check box.
-
Click Finish.
-
Click Yes in the confirmation message that is displayed.
The selected files and folders are written to the seeding drive.
Deliver the seeding drive to your service provider.
During the time your service provider is loading the backup seeding drive to your account, the backup service will be temporarily disabled for your CTERA agent.