By default, the CTERA Portal server obtains an IP address using DHCP. In a production environment it is recommended to use a static IP address. Also when your infrastructure includes more than one network, you have to configure CTERA Portal for the appropriate network. You configure network settings by using nmtui, the built-in network manager.
Before changing the IP address for the portal server instance you must wait until all the portal services, such as Nomad and Consul, have loaded. Loading the portal services take at least 5 minutes.
If you changed the IP address after the installation but before the full deployment of portal services like Nomad and Consul, run portal-manage.sh resetdb before initializing the portal or joining it to an existing portal cluster.
To use nmtui:
- Log in as
rootusing SSH or through the console. - Run the following command:
nmtui
The NetworkManager TUI screen is displayed.
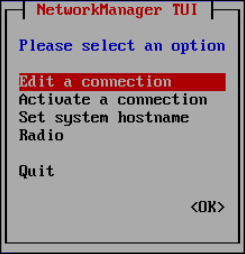
- Use the keyboard arrow keys to navigate between options.
Changing the CTERA Portal Server's Hostname
To change the CTERA Portal server's hostname:
- In nmtui, navigate to Set system hostname and press Enter.
The Set Hostname screen opens, displaying the current portal hostname.
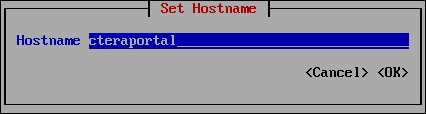
- In the field provided, enter the server hostname.
- Navigate to OK and press Enter.
A confirmation message is displayed. - Press Enter.
The new hostname is configured. - Navigate to Quit and press Enter to exit nmtui.
- You need to reboot the system for the change to take effect. You can reboot the system by entering the command:
reboot
Configuring a Network Interface
Listing Network Interfaces
To list all network interfaces:
- Run the following command:
ifconfig
Configuring a Static IP Address for a Network Interface
To configure a static IP address for a network interface:
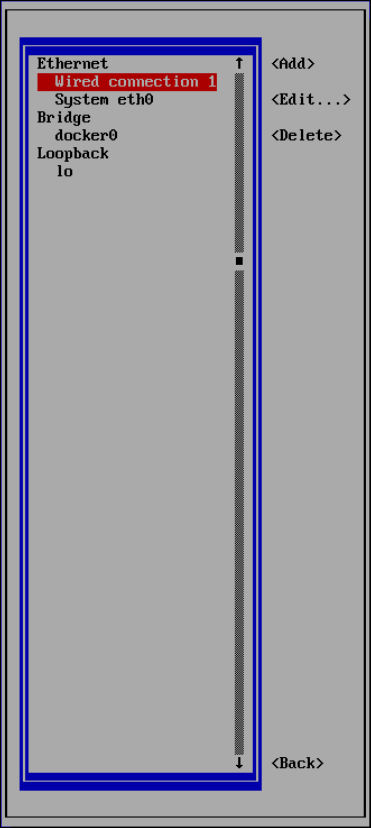
- In nmtui, navigate to Edit a connection and press Enter.
A window opens, displaying all network adapters attached to the CTERA Portal server.
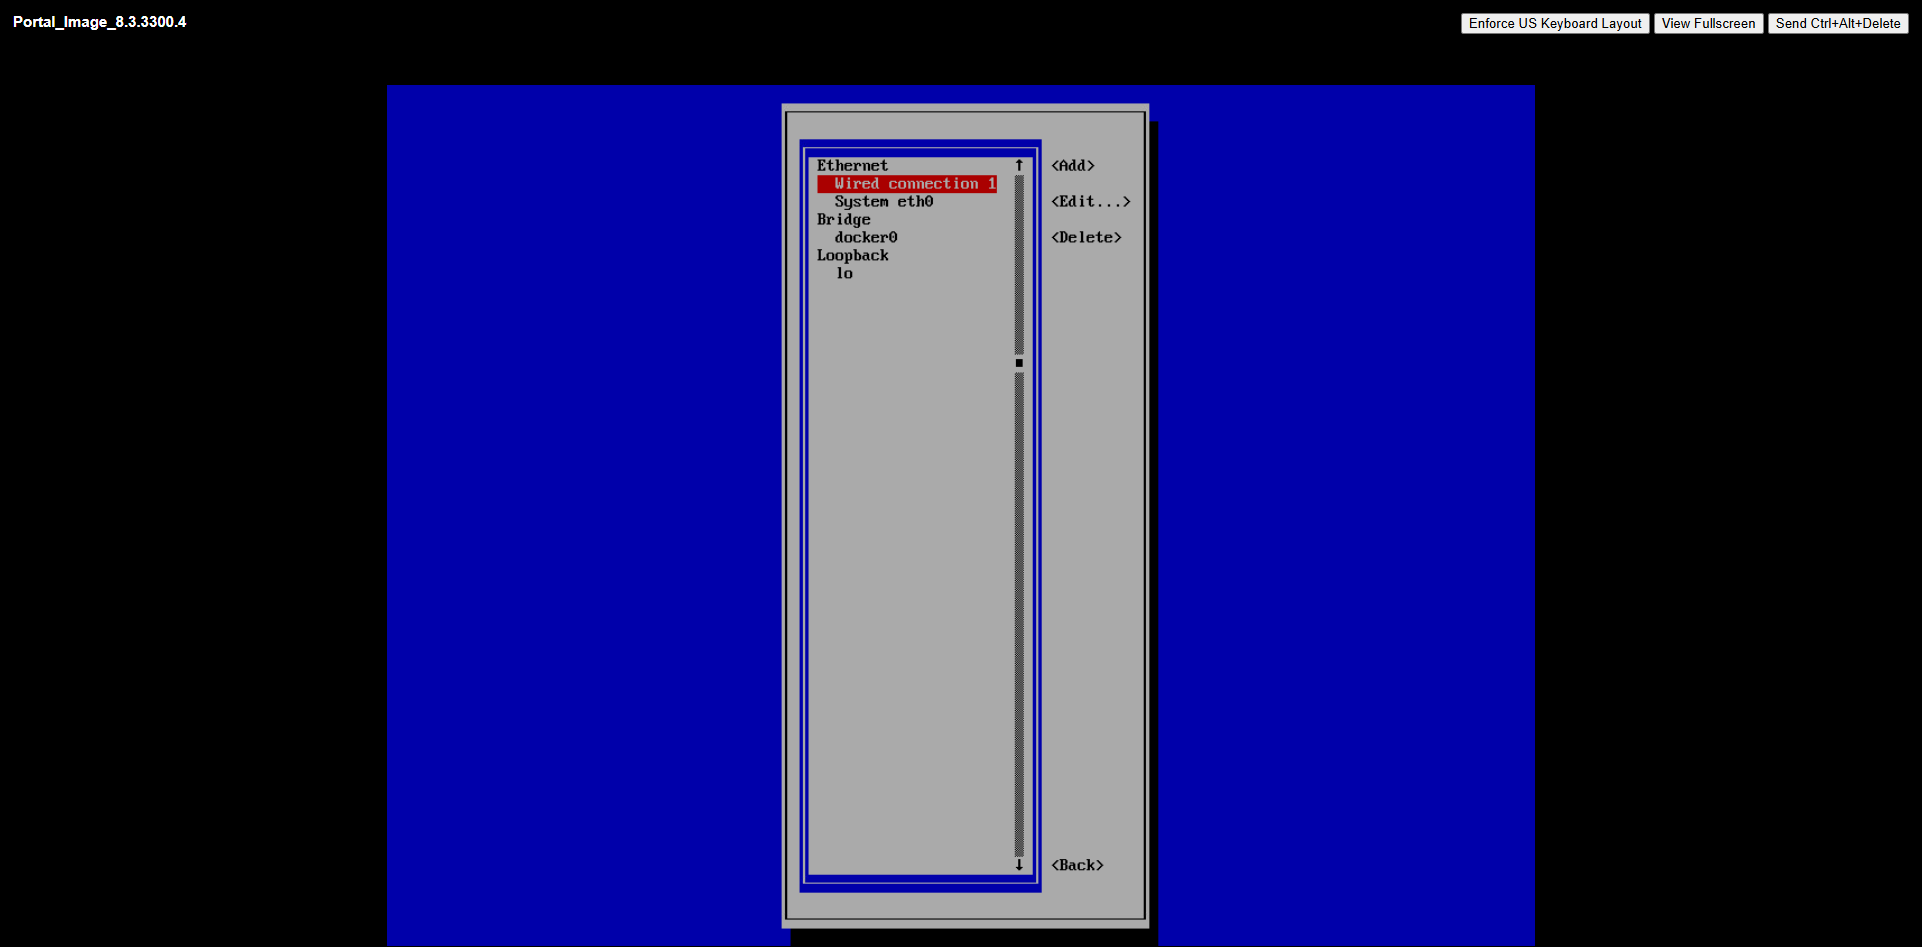
- Navigate to the network adapter for which you want to set a static IP address and press Enter.
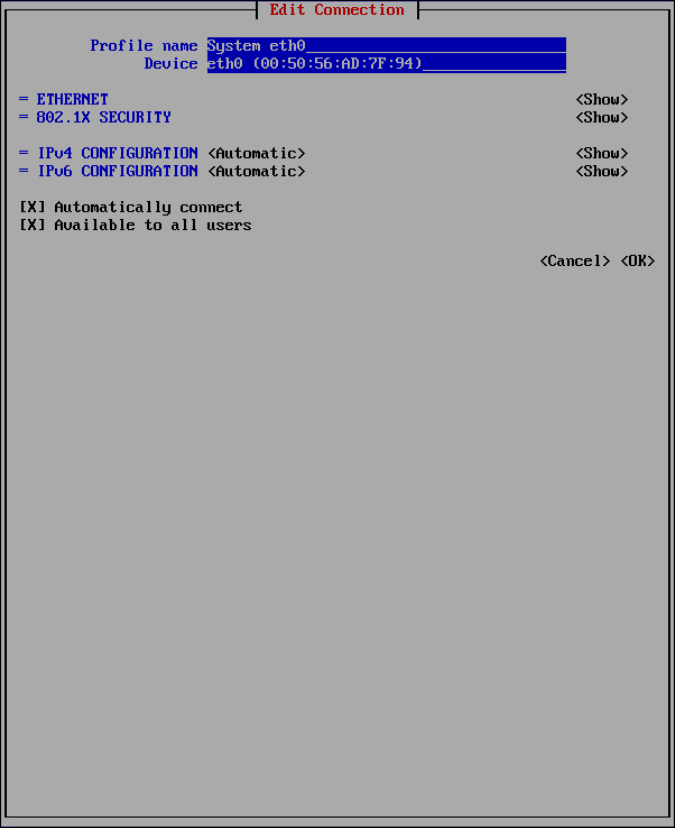
The Edit connection window is displayed.
 Note
NoteCTERA recommends that the
eth0network is the default network assigned for the external network andWired connection 1oreth1is assigned for the internal network. - Navigate to Automatic next to IPv4 CONFIGURATION, press Enter, and then select Manual.
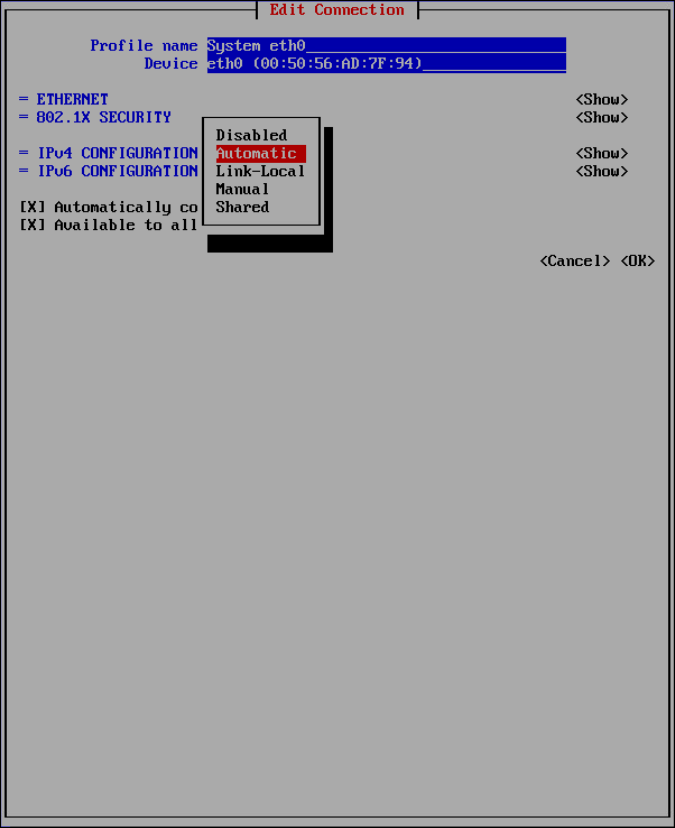
- Press Enter.
- Navigate to Show next to IPv4 CONFIGURATION and press Enter.
Additional fields are displayed.
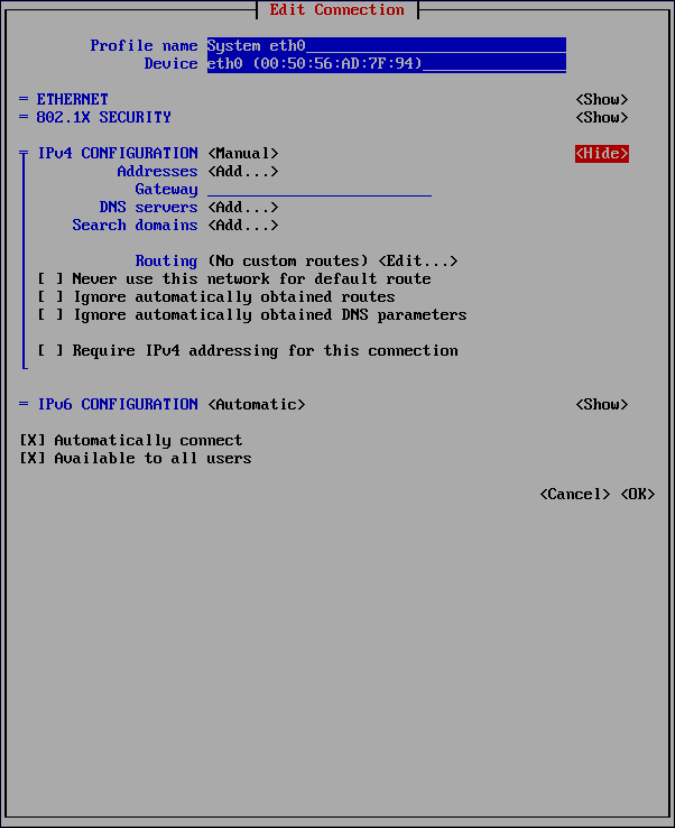
- Navigate to Add next to Addresses and press Enter.
- Type the static IP address.
To specify a subnet mask, use the classless inter-domain routing (CIDR) notation. For example:- To set a class C subnet mask [255.255.255.0], use:
IP_Address/24, for example, 192.168.98.204/24 - To set a class B subnet mask [255.255.0.0], use:
IP_Address/16, for example, 192.168.98.204/16
You can refer to the following link for a full IPv4 CIDR reference: https://en.wikipedia.org/wiki/Classless_Inter-Domain_Routing#IPv4_CIDR_blocks.
- To set a class C subnet mask [255.255.255.0], use:
- To configure a default gateway for the current network interface, navigate to Gateway, and then type the IP address of the default gateway.
- To configure a DNS server, navigate to Add next to DNS servers, press Enter, and then enter the IP address of the DNS server.
You can add multiple DNS servers if desired, by repeating this step.
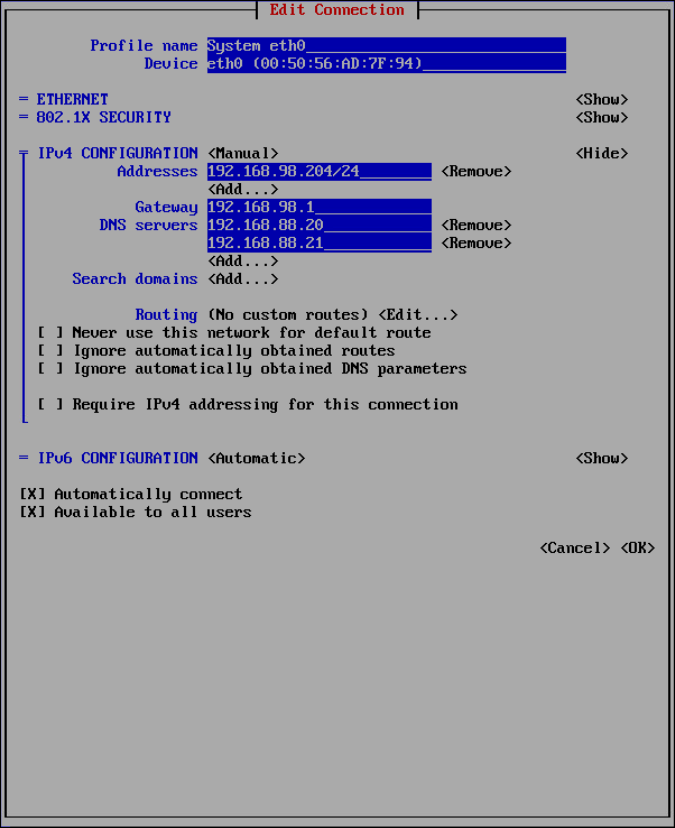
- Navigate to OK and press Enter.
- Navigate to Activate a connection and press Enter.
- Repeat the procedure for the second network,
Wired connection 1oreth1 - Navigate to Quit and press Enter to exit nmtui.
Your changes take effect.
If using SSH to access nmtui, navigating to Activate a connection and pressing Enter can close the SSH session. To prevent this from happening, enter the following command: sudo systemctl restart NetworkManager
Enabling DHCP for a Network Interface
If you want to use DHCP, for example, for a demo, and you are configured to use a static IP, you can change to DHCP using nmtui.
To enable DHCP for a network interface:
- In nmtui, navigate to Edit a connection and press Enter.
A window opens, displaying all network adapters attached to the CTERA Portal server.
- Navigate to the network adapter for which you want to enable DHCP, and then press Enter.
The Edit connection screen is displayed.
- Navigate to Manual next to IPv4 CONFIGURATION, press Enter, and then select Automatic.
- Navigate to OK and press Enter.
- Navigate to Activate a connection and press Enter.
- Navigate to Quit and press Enter to exit nmtui.
Your changes take effect.
If using SSH to access nmtui, navigating to Activate a connection and pressing Enter can close the SSH session. To prevent this from happening, enter the following command: sudo systemctl restart NetworkManager
Deactivating a Network Interface
To deactivate a network interface:
- In nmtui, navigate to Activate a connection and press Enter.
The following window opens, displaying all network adapters for the CTERA Portal server.
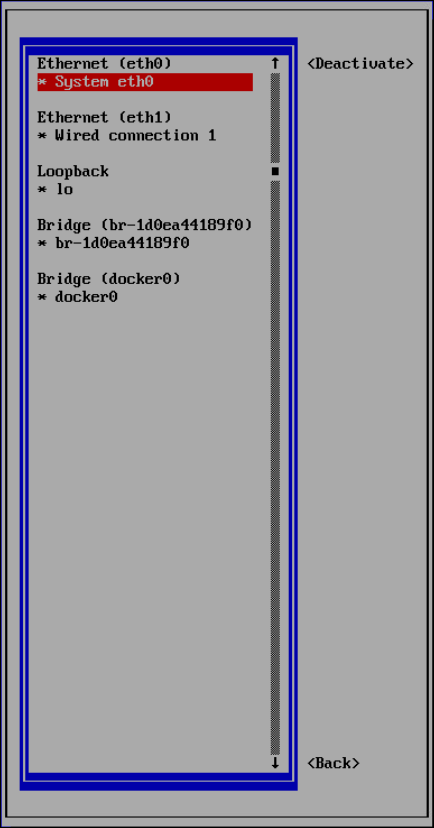
The asterisk (*) to the left of a network adapter's name indicates that the network adapter is activated. - Navigate to the network adapter you want to deactivate and press Enter.
- Navigate to Back and press Enter.
- Navigate to Quit and press Enter to exit nmtui.
The network adapter is deactivated.
Activating a Network Interface
To activate a network interface:
- In nmtui, navigate to Activate a connection and press Enter.
The following screen opens, displaying all network adapters attached to the portal server:
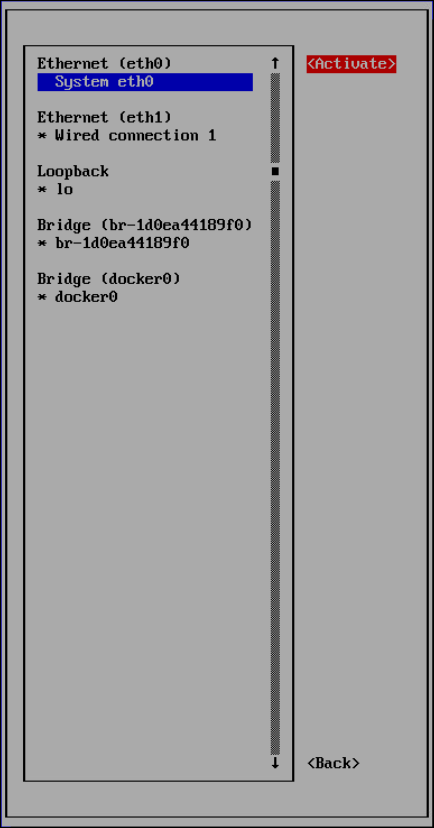
- Navigate to the deactivated network adapter, a network adapter without an asterisk, that you want to activate and press Enter.
- Navigate to Back and press Enter.
- Navigate to Quit and press Enter to exit nmtui.
The network adapter is activated. The asterisk (*) to the left of a network adapter's name indicates that the network adapter is activated.
Configuring Static Routes
To configure a static route for a network interface:
- In nmtui, navigate to Edit a connection and press Enter.
A window opens, displaying all network adapters attached to the CTERA Portal server.
- Navigate to the network interface for which you want to set a static route and press Enter.
The Edit connection window is displayed.
- Navigate to Edit next to Routing and press Enter.
The following window is displayed.
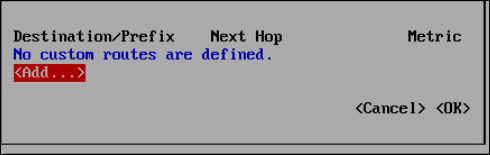
- Navigate to Add and press Enter.
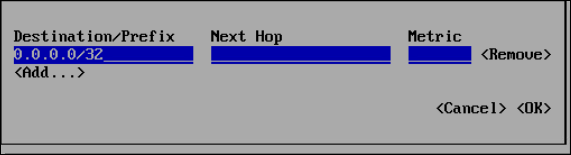
- In the fields provided, type the network destination/prefix, the next hop, and the route metric.
Note
To add another static route, navigate to Add and press Enter, and then specify the route details.
To remove an existing route, navigate to Remove next to the static route you want to remove and press Enter. - When done configuring static routes, navigate to OK and press Enter.
- Navigate to OK and press Enter.
- Navigate to Back and press Enter.
- Navigate to Activate a connection and press Enter.
- Navigate to Quit and press Enter to exit nmtui.
Your changes take effect.
If using SSH to access nmtui, navigating to Activate a connection and pressing Enter can close the SSH session. To prevent this from happening, enter the following command: sudo systemctl restart NetworkManager
To view the list of static routes, run the following command: netstat –rn