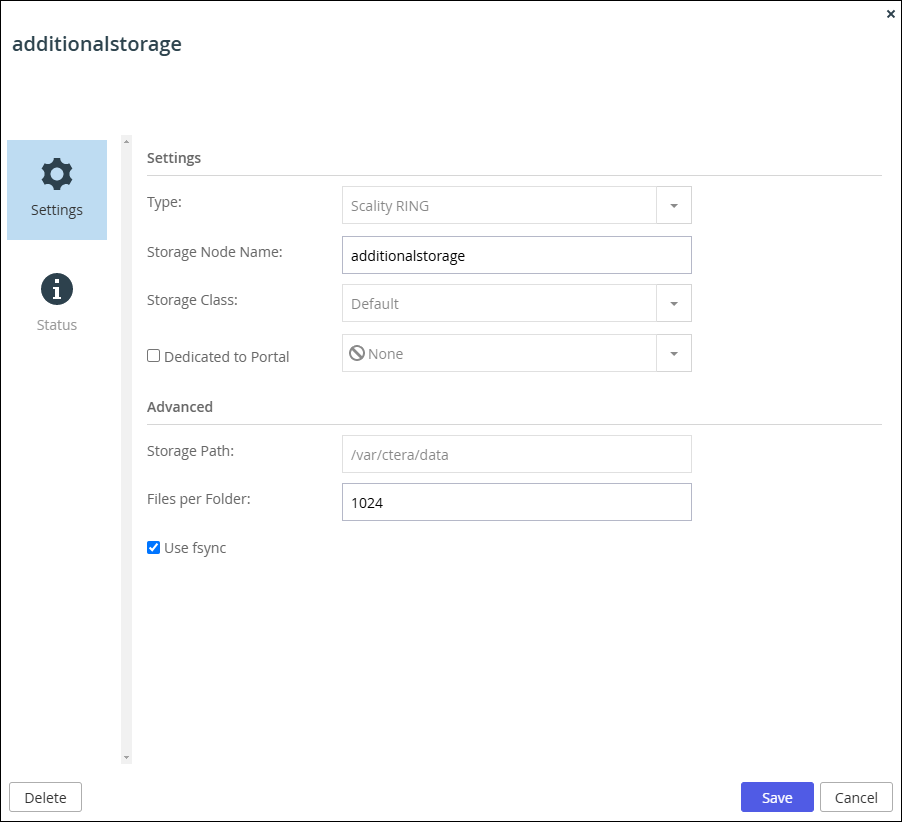
When you create a storage node, the node is by default in read/write mode.
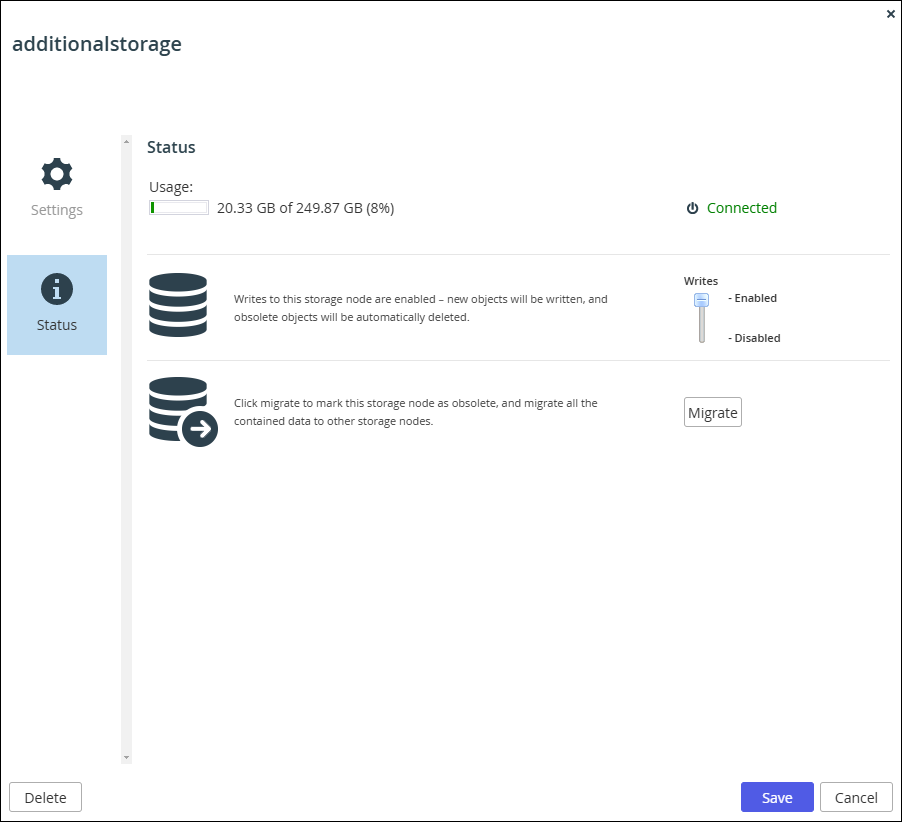
You can enable or disable writes to a storage node whenever needed, such as when you are about to replace a storage node and you want to stop new data blocks from being written to the node. While writes are disabled on a node, any new data blocks to be written are directed to other storage nodes that are write-enabled. Also, the node goes into read-delete mode, in which CTERA Portal deletes any blocks on the node deemed to be no longer in use.
To enable or disable writes to a storage node:
- In the global administration view, select Main > Storage Nodes in the navigation pane.
The Storage Nodes page is displayed.
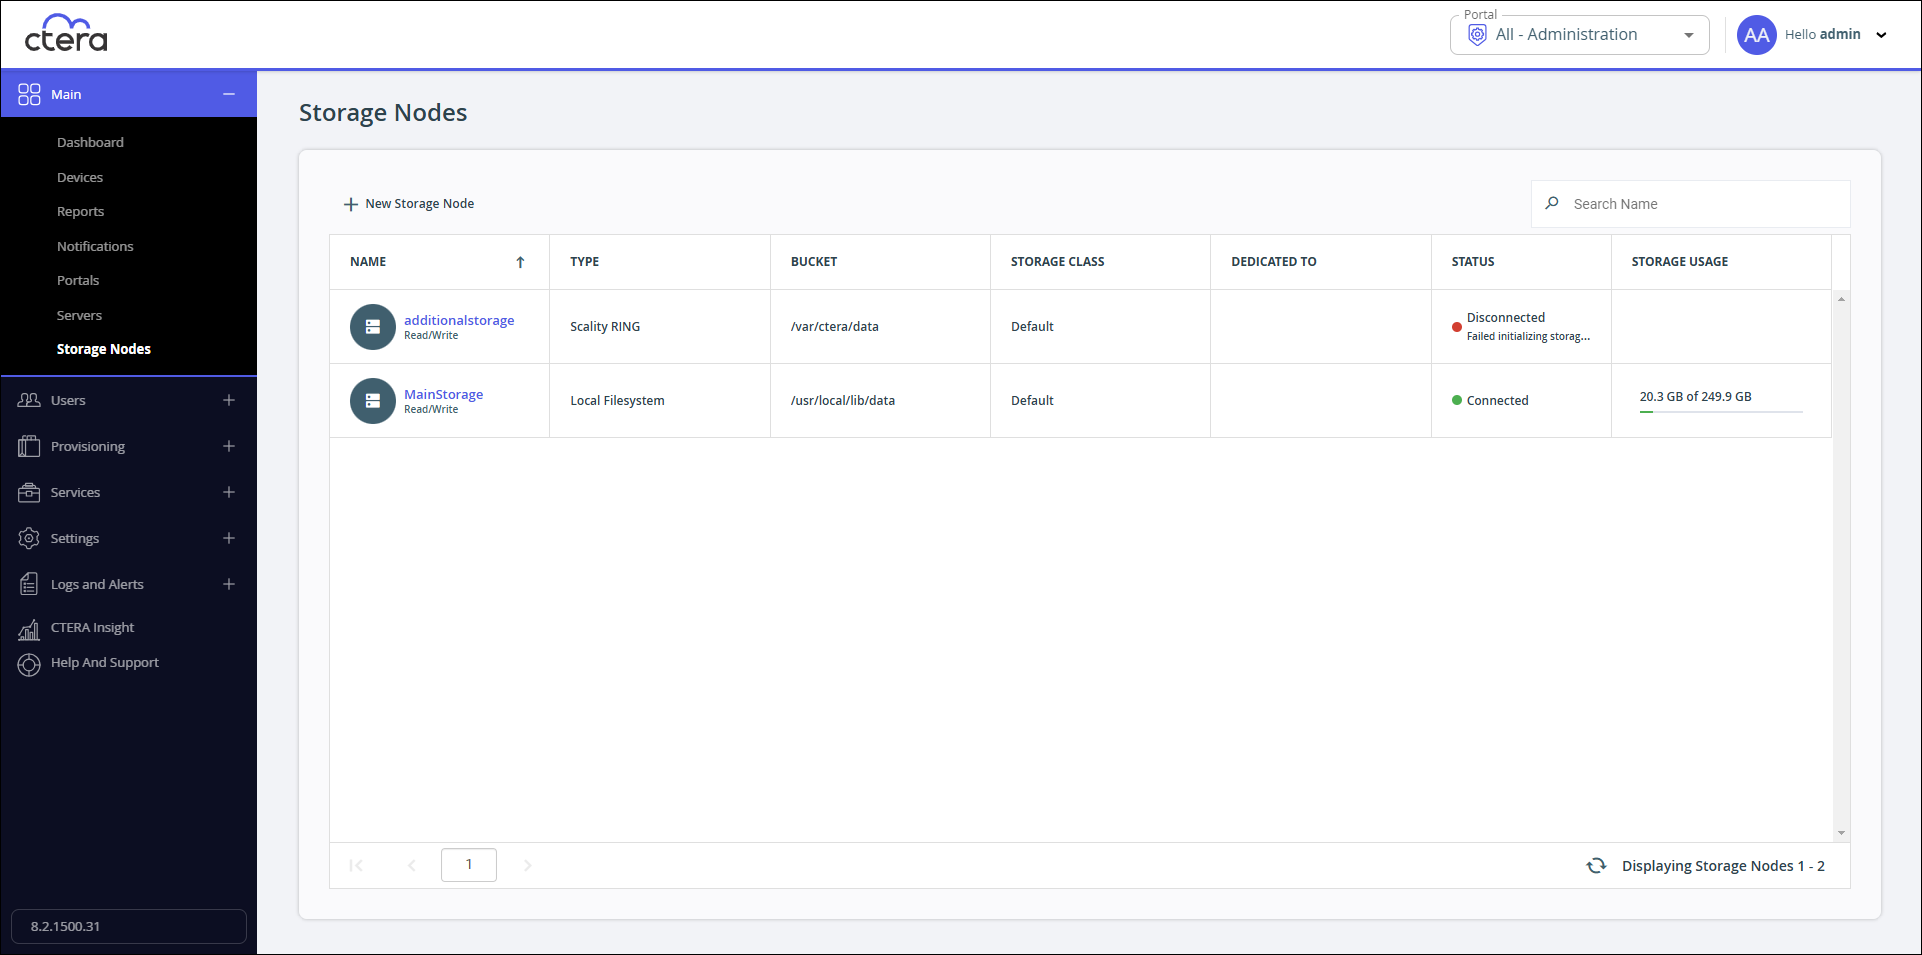
- Click the storage node name.
The storage node window is displayed with the storage node name as the window title.
- Select the Status option.
 Note
NoteFor storage like the Local Filesystem storage node, which is the default storage node when setting up the CTERA Portal, Usage displays the amount of storage available, followed by the amount of used storage.
For Amazon S3 storage, the amount used is displayed.

For cloud storage and S3 storage other than Amazon S3, no usage is displayed.
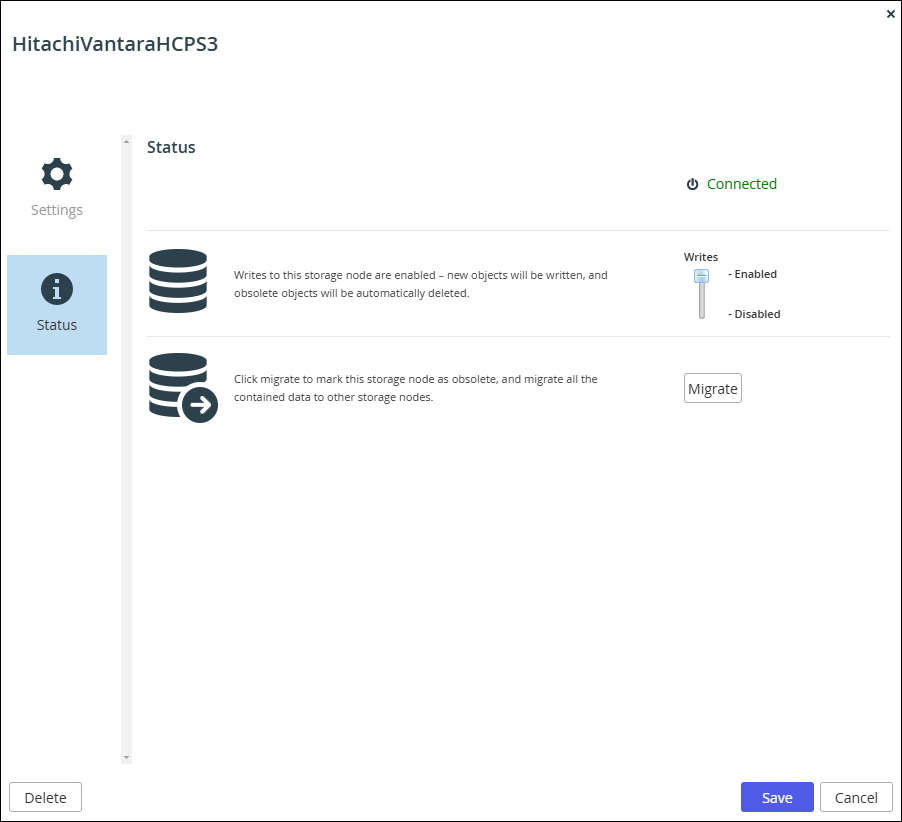
- Slide the Writes bar to Enabled or Disabled.