Before setting up the CTERA Edge Filer, you have to configure the CTERA Portal to which the CTERA Edge Filer will connect, as described in Configuring the CTERA Portal as a Precondition to Setting Up the CTERA Edge Filer. After configuring the CTERA Portal and installing the CTERA Edge Filer, you need to perform an initial CTERA Edge Filer setup. On first access to the CTERA Edge Filer, you set up a CTERA Edge Filer administrator and then a wizard guides you through connecting to a CTERA Portal and storage and user setup. You can skip any of the wizard steps and perform them later, as described in the Administrator Guide.
After this initial CTERA Edge Filer setup, the file server structure is synced from the CTERA Portal to the CTERA Edge Filer.
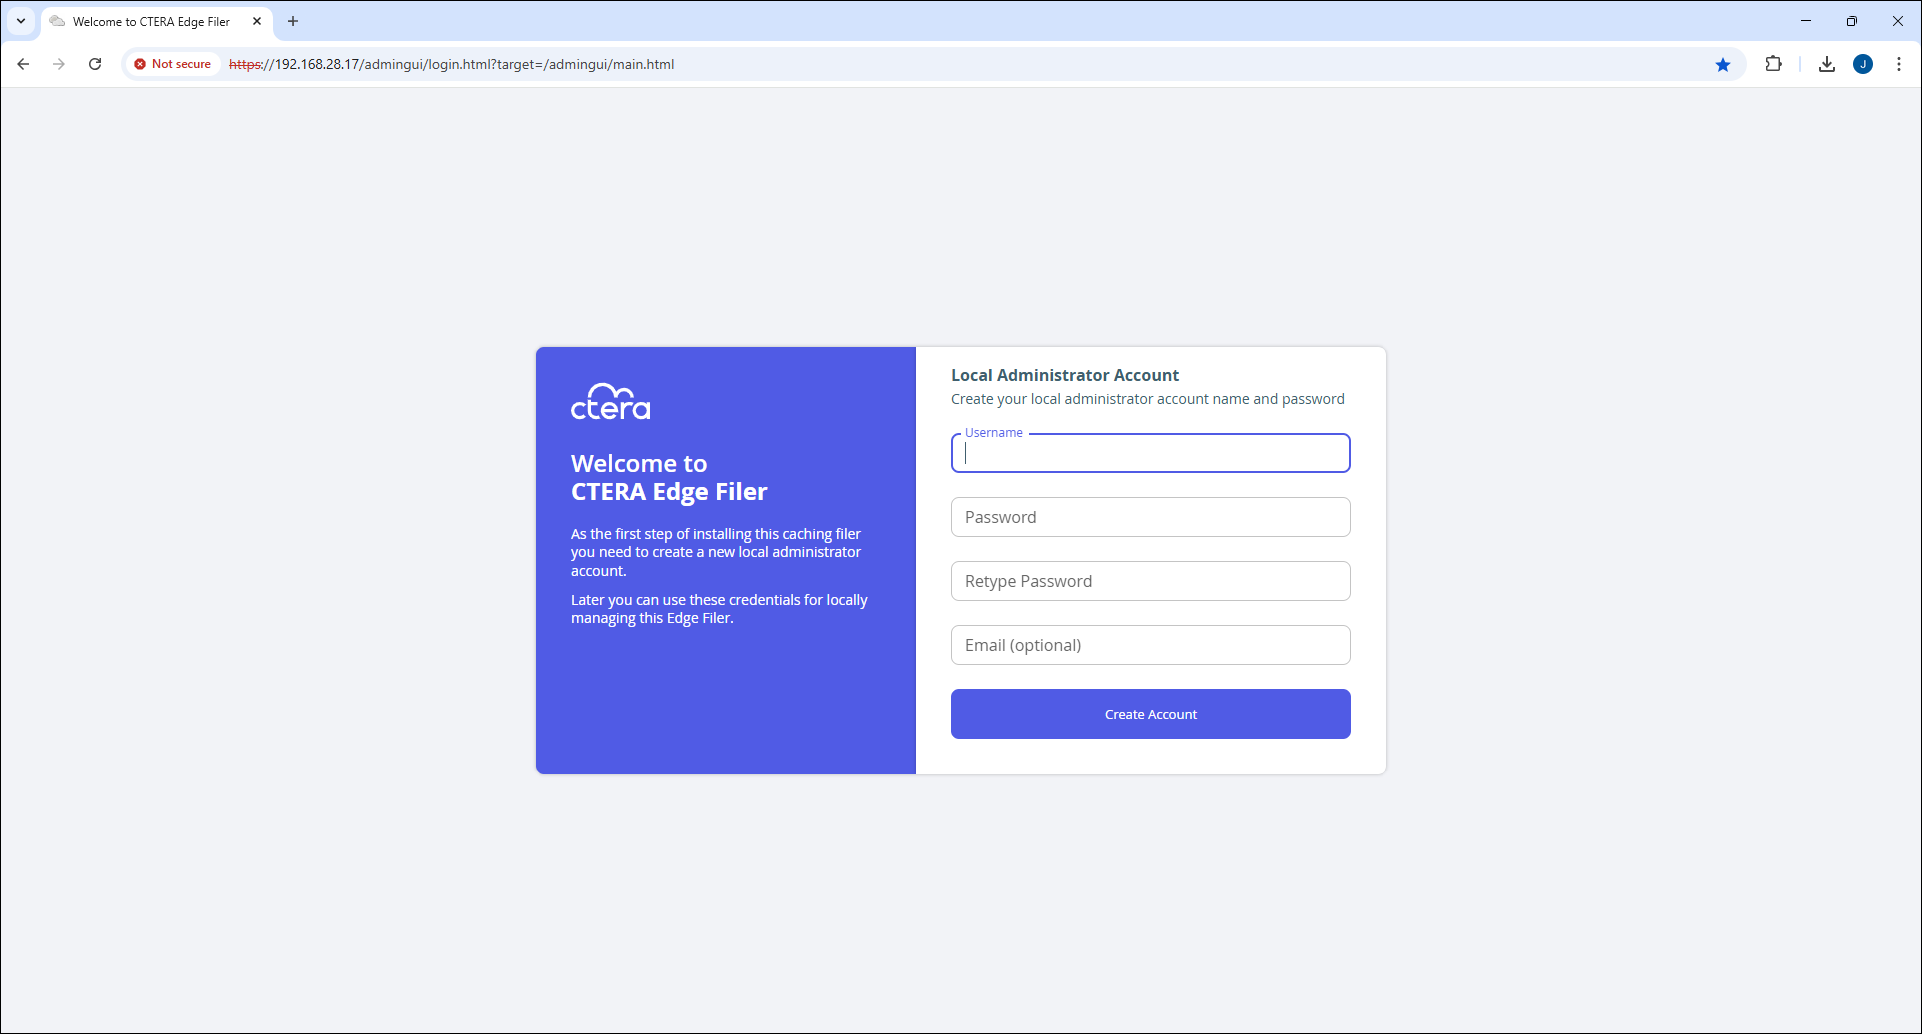
To access the CTERA Edge Filer and initial setup:
-
Open any web browser.
-
Enter the CTERA Edge Filer's IP address to navigate to the device.
NoteThe URL to enter must be https and not http. That is,
https://edge_filer_ip_addressand nothttp://edge_filer_ip_addresswhich is the default when copying the IP address from environments such as Microsoft Azure.When you connect to the web interface for the first time, your browser displays the Welcome to CTERA Edge Filer page.
-
Choose a user name and password for the administrator. The password must be at least eight characters and must include at least a letter, digit and special character, such as ~, @, #, $ , %, ^, & , (.
-
Optionally, enter an email for receiving notifications regarding the CTERA Edge Filer.
NoteAfter the edge filer is connected to a portal, the portal administrator receives all notifications.
-
Click Create Account.
NoteFor V Series edge filers, if the CTERA Edge Filer virtual machine does not have a data disk, the following message window is displayed.
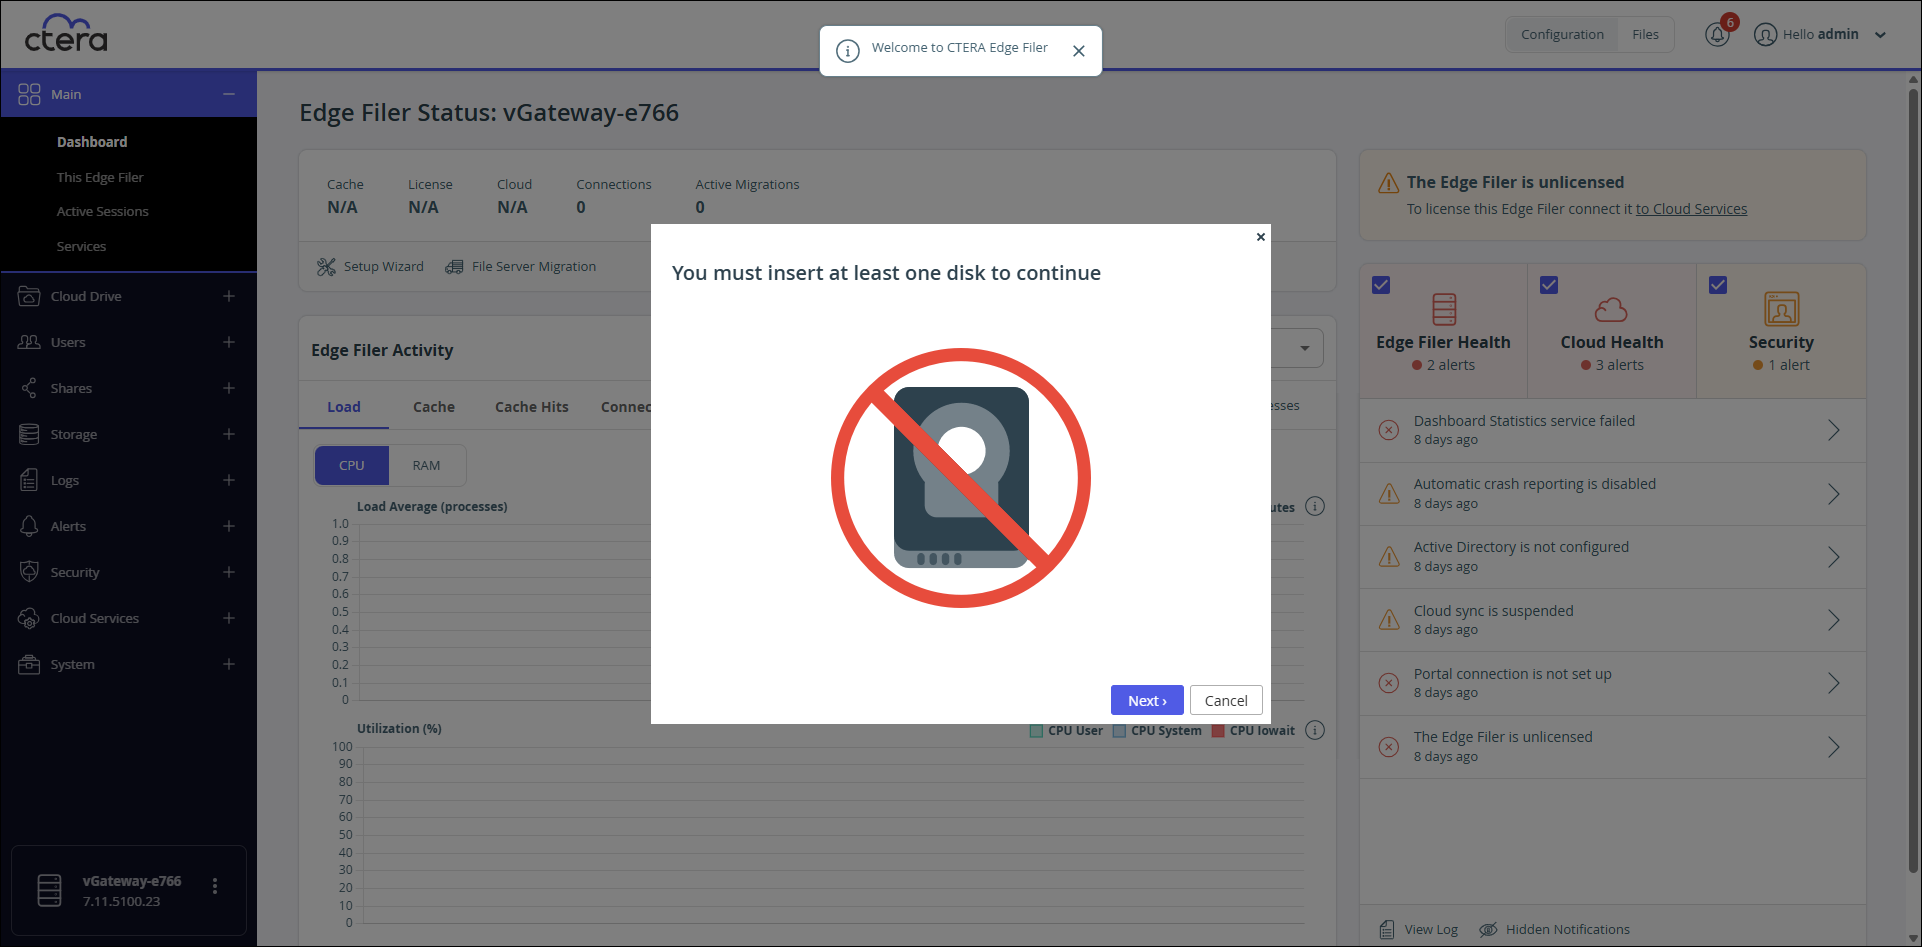
Click Cancel to close the wizard and then Yes to run the wizard after adding a disk to the edge filer virtual machine. Add a disk to the CTERA Edge Filer virtual machine.
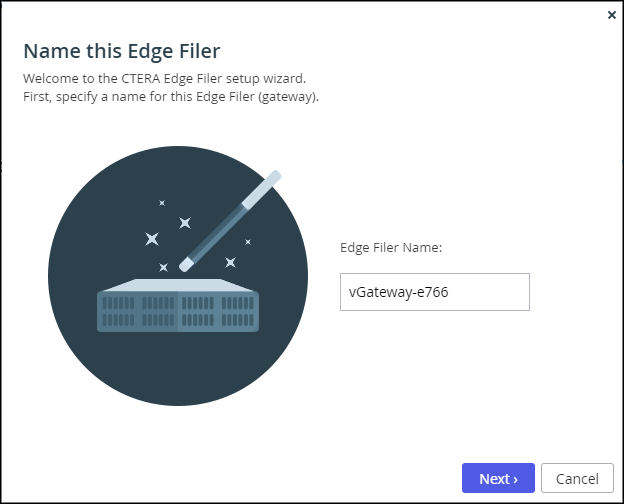
If you logged out of the edge filer, the setup wizard starts when you log back in. If you did not log out, in the edge filer Dashboard page run Setup Wizard.The Name this Edge Filer window is displayed.
-
Either keep the CTERA Edge Filer default name or enter a new name to identify the CTERA Edge Filer.
NoteYou can also change the CTERA Edge Filer name after the initial setup, as described in Setting Up the CTERA Edge Filer.
-
Click Next.
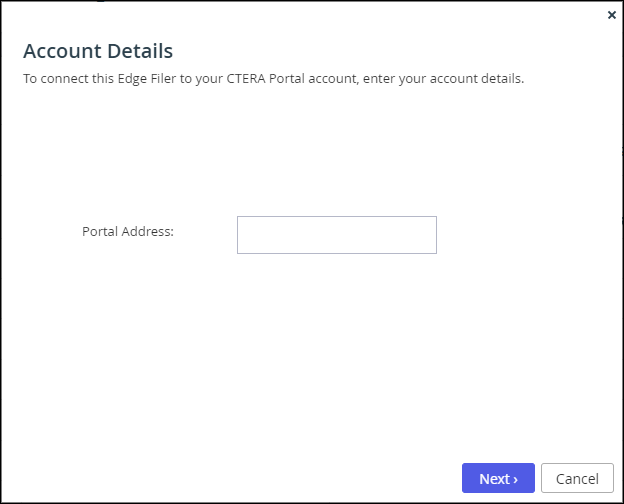
The administration user interface is displayed to set up the CTERA Edge Filer, starting with the Account Details window.
-
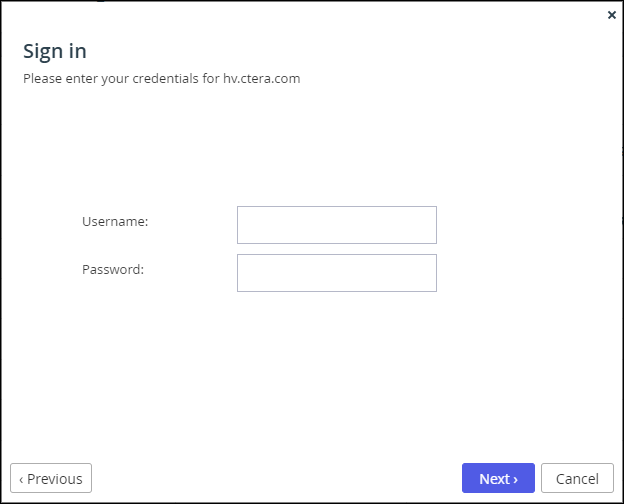
Enter the DNS name of the CTERA Portal to which you have an account and want to connect the CTERA Edge Filer to, in the Portal Address field and click Next.
Do not use the IP address of the CTERA Portal.
The edge filer should always connect to an application server and not to either the primary database server or to the secondary replication server.NotesIf the CTERA Portal sends an unknown or untrusted CA certificate, a warning is displayed when connecting an edge filer to the portal. If you approve the trust, the server certificate is pinned and the public key is saved, and all the chain passes verification. If the portal certificate is changed, for example, after it has expired, and the new certificate is generated for the portal using the same key, the new certificate is also trusted.
The Sign in window is displayed.
 Note
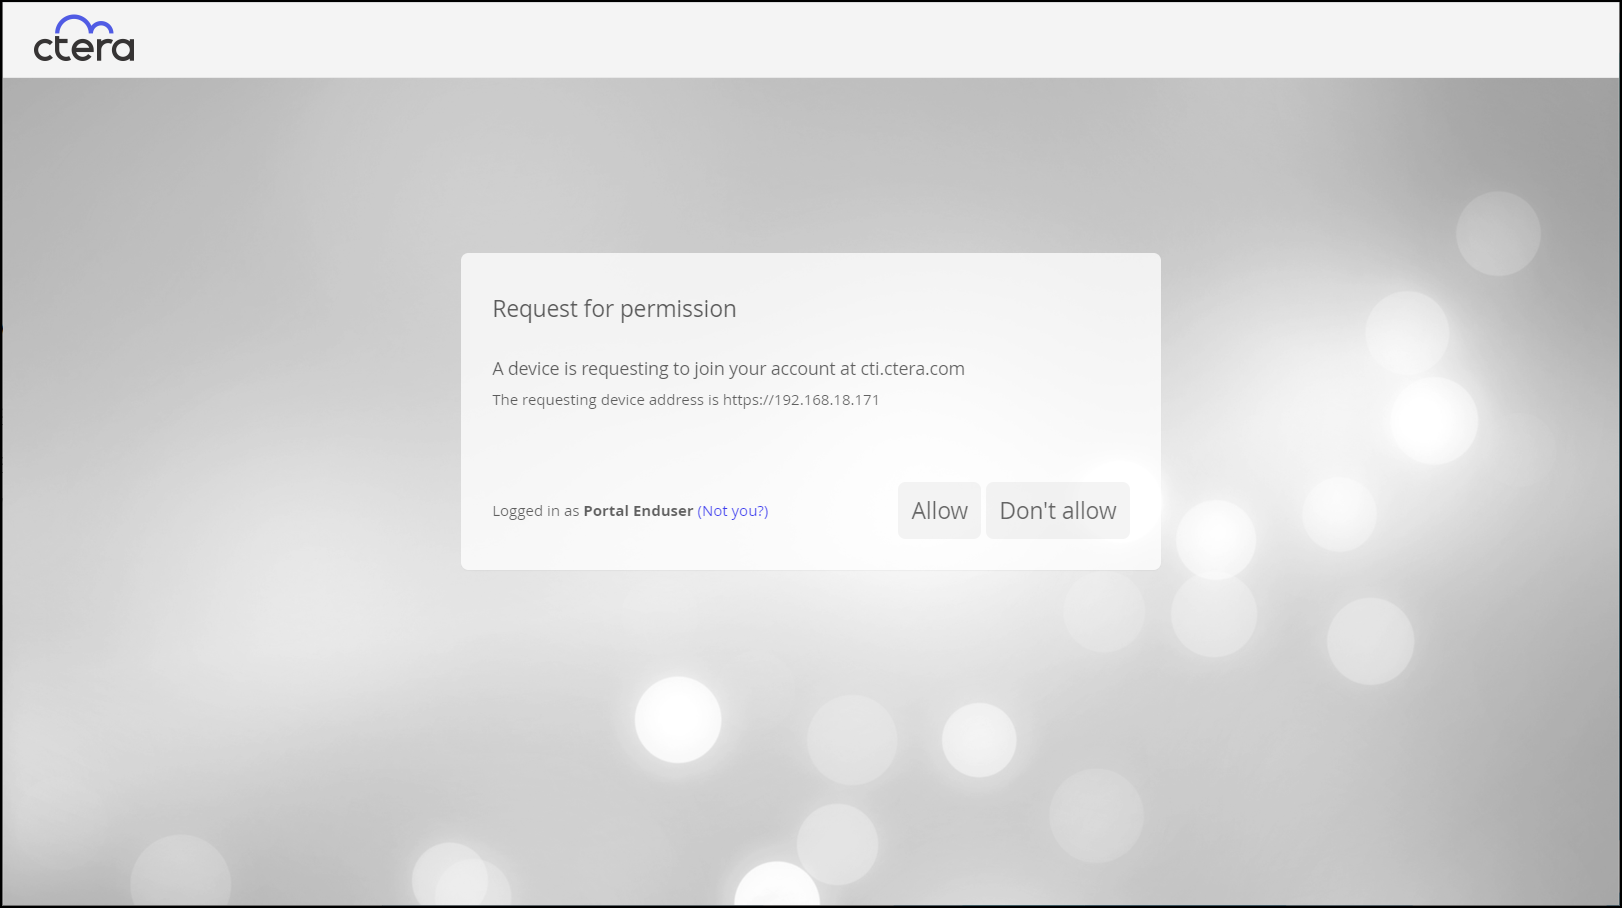
NoteIf single sign-on has been set up to the portal, the following screen is displayed.
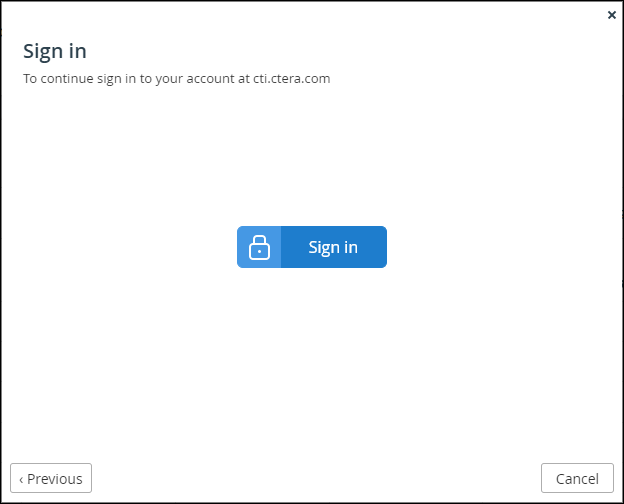
In this case, instead of the next step, click Sign In and then Allow in a new browser window that is displayed.
The Select License window is displayed with the available licenses. -
Enter the CTERA Portal designated user username and password, set in Configuring the CTERA Portal as a Precondition to Setting Up the CTERA Edge Filer to access the CTERA Portal and click Next.
The Select License window is displayed with the available licenses.
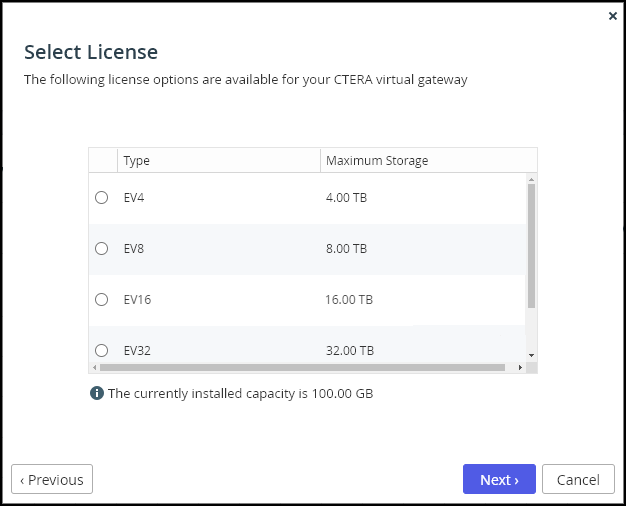
The available storage is displayed. -
Select the license for the edge filer and click Next.
The Gateway Mode window is displayed.
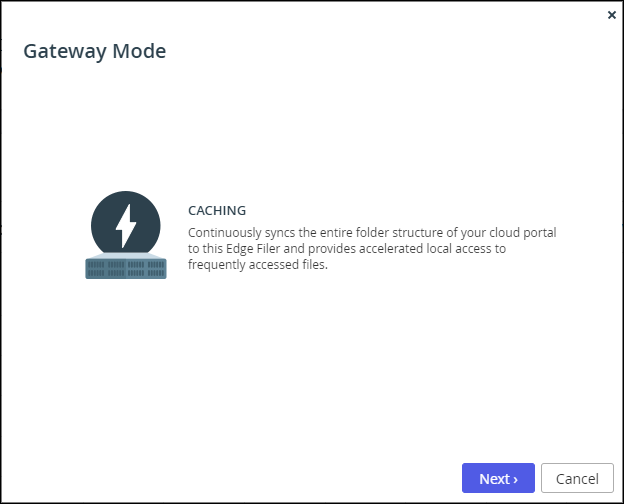
CACHING – Provides users with LAN speed access to all the shared cloud folders on the CTERA Portal. Shared storage is on the CTERA Portal with stubs saved on the CTERA Edge Filer. A stub is a file with a tiny footprint that contains the metadata about the file, such as the file name, size, and modification date. Only the folder and file metadata and not the actual file content is saved locally. Thus, the CTERA Edge Filer can have much less physical storage than is made available to users, who have access to both the local CTERA Edge Filer storage and the CTERA Portal storage. Systems with many file changes, where only some of the files are required locally, don’t over use bandwidth between the cloud and CTERA Edge Filer. Only the required files are passed across the wire. When a user accesses a file stub, the file is opened without delay, by streaming the file content from the cloud. After the download has completed, the file is unstubbed. Any changes to the file are synced back to the CTERA Portal. Folders that are always required can be pinned, in which case the files in the folders, and not the stubs, are stored on the CTERA Edge Filer. -
Click Next.
The Easy Storage Setup window is displayed, showing the number of virtual disks.
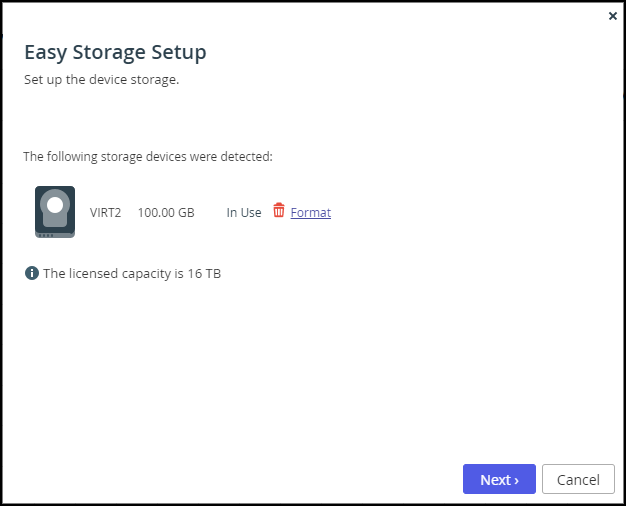
The maximum storage allowed for the selected CTERA Edge Filer license is also displayed. -
Click Next.
Either:
The Proposed Actions window is displayed with the recommended configuration, for example, when the edge filer has more than one disk defined for it.
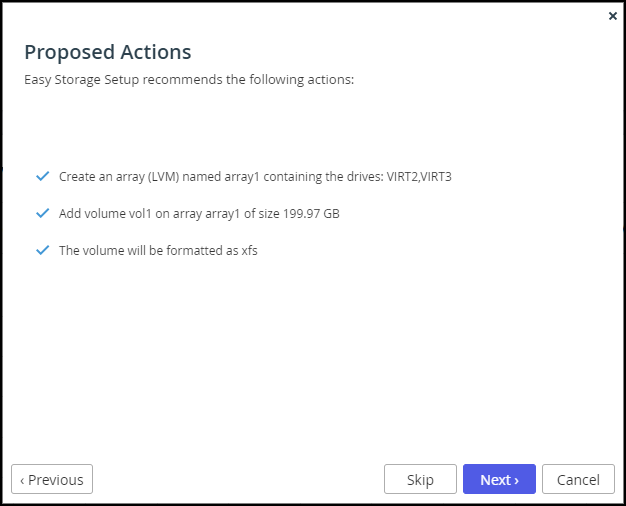
CTERA recommends accepting the proposed actions and clicking Next and not clicking Skip.
Or:
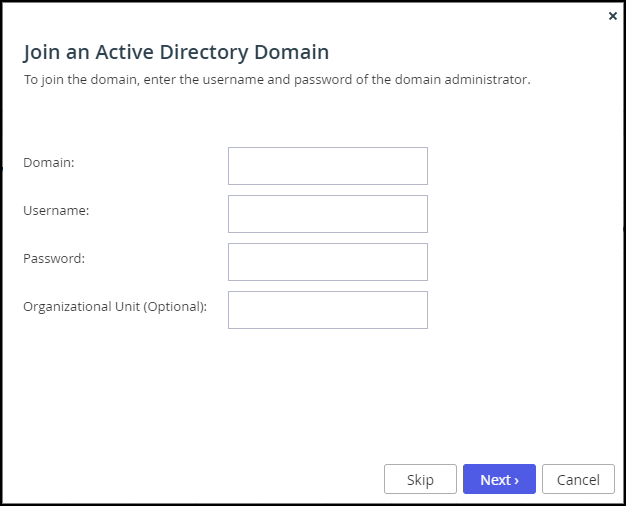
The Join an Active Directory Domain window is displayed.
-
Specify the domain details so that the CTERA Edge Filer is populated with the users from your Active Directory domain and click Next or, if you want to set up Active Directory later, click Skip.
NotesUntil Active Directory is configured, there is a security alert.
- In the Username and Password fields, type the domain administrator's username and password.
- The Active Directory domain controller must be read/write and not read-only.
- Optionally, in the Organizational Unit field, type the name of the organizational unit within the Active Directory domain. The format is a path and can contain the following:
CN=Fully qualified domain name, such as gatewayName.portalName.portalSuffix
L=Locality Name, for example, London
ST=State or Province Name, for example, London
O=Organization Name, for example, CTERA Networks
OU=Organizational Unit Name, for example, Sales
C=Country Name, for example, GB
STREET=Street Address
DC=Domain Component, for example com
UID=Userid
The Wizard Completed window is displayed.
-
Click Finish.
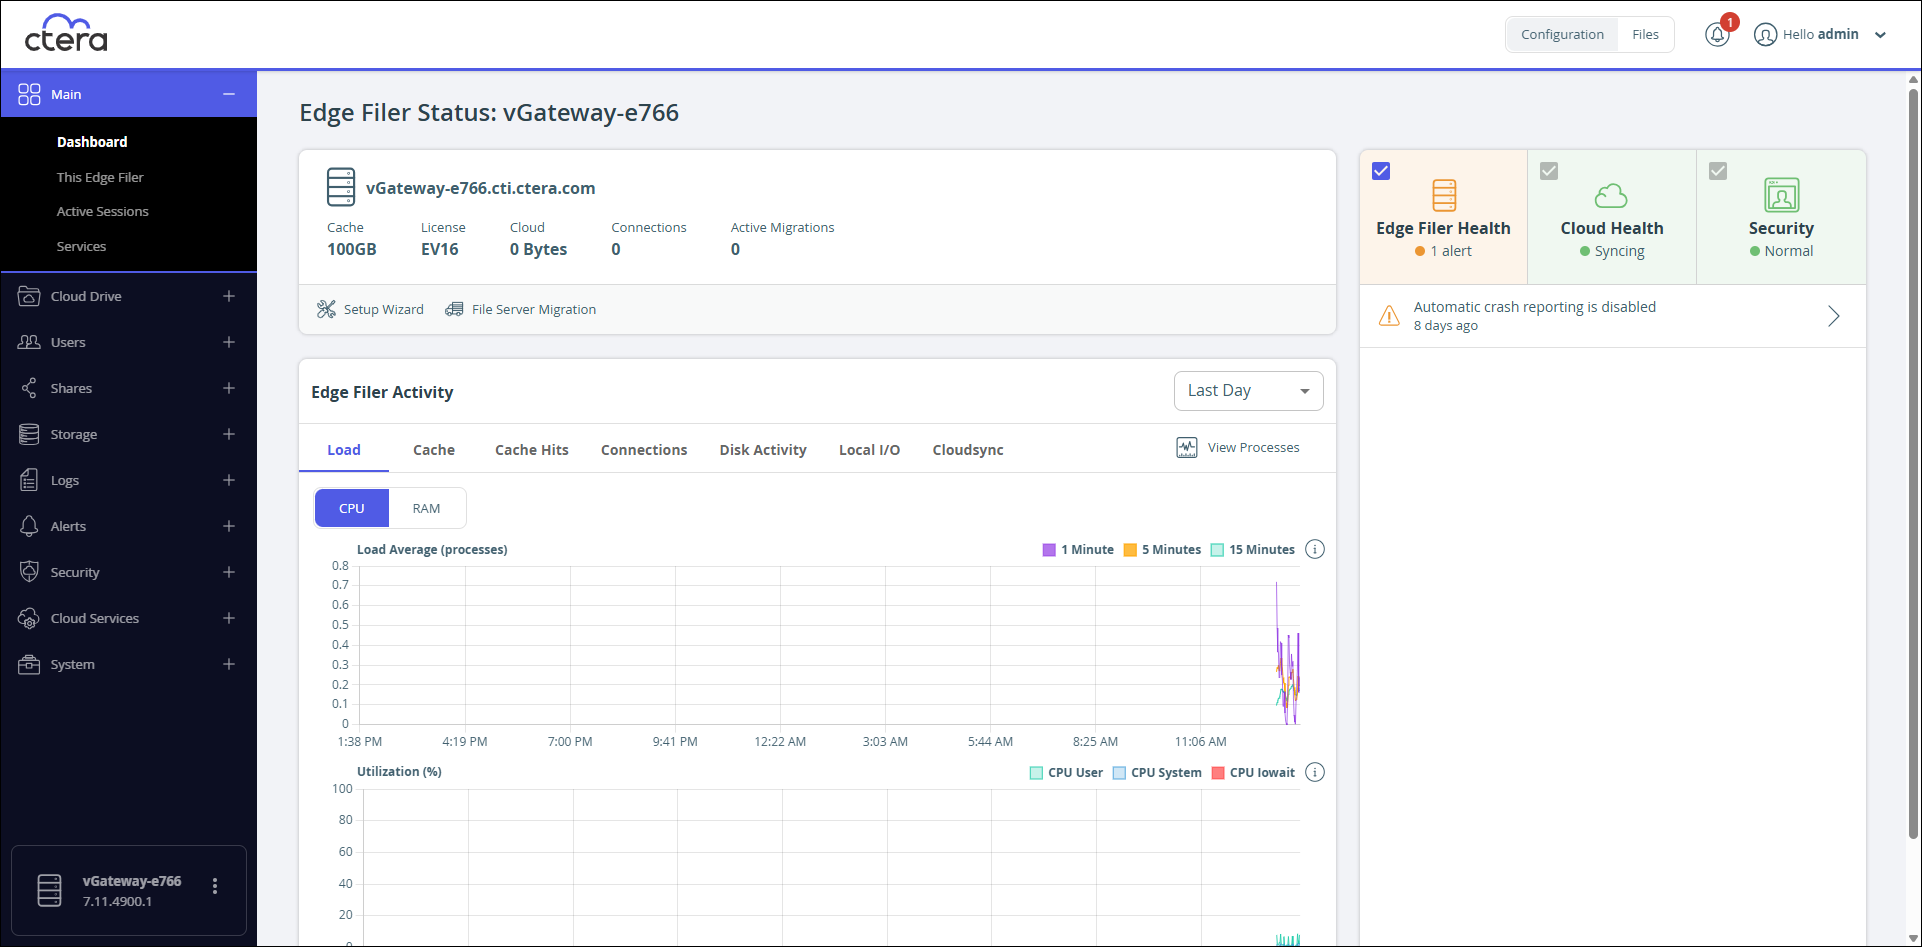
The Configuration view Main > Dashboard page is displayed.
 Note
NoteAn Edge Filer Health warning is displayed that automatic crash reporting is not enabled. You can enable automatic crash reporting as described in Automatically Sending Crash Reports to Support.
If you did not set up Active Directory, a security alert is displayed in the dashboard on completion of the wizard. You can rerun the wizard by selecting Main > Dashboard and click Setup Wizard to set Active Directory.
An LVM array, array1, which includes all the disks, and a single volume, vol1, are created.
You can migrate a file server to CTERA Edge Filer so that end users who are familiar with a given folder structure and share, while using the file server, continue to see the same folder structure and shares after migration to the CTERA Edge Filer. If you are replacing an existing file server with the CTERA Edge Filer, continue with Migrating a File Server.
When more than one DNS server is in use at the site, you can define the primary and secondary DNS servers, described in Managing Network Settings.