Installing the CTERA Edge Filer in a Proxmox Environment
Installing the CTERA Edge Filer involves creating and configuring a virtual machine and then performing an initial configuration, described in First Time Setup.
The latest CTERA Edge Filer qcow2 file is available from CTERA support.
Warning
The CTERA Edge Filer installation must be done using the qcow2 file and not by cloning an existing CTERA Edge Filer.
Note
Before beginning, ensure you have downloaded the qcow2 image from CTERA Support.
To install the edge filer:
- Log in to the Proxmox console.
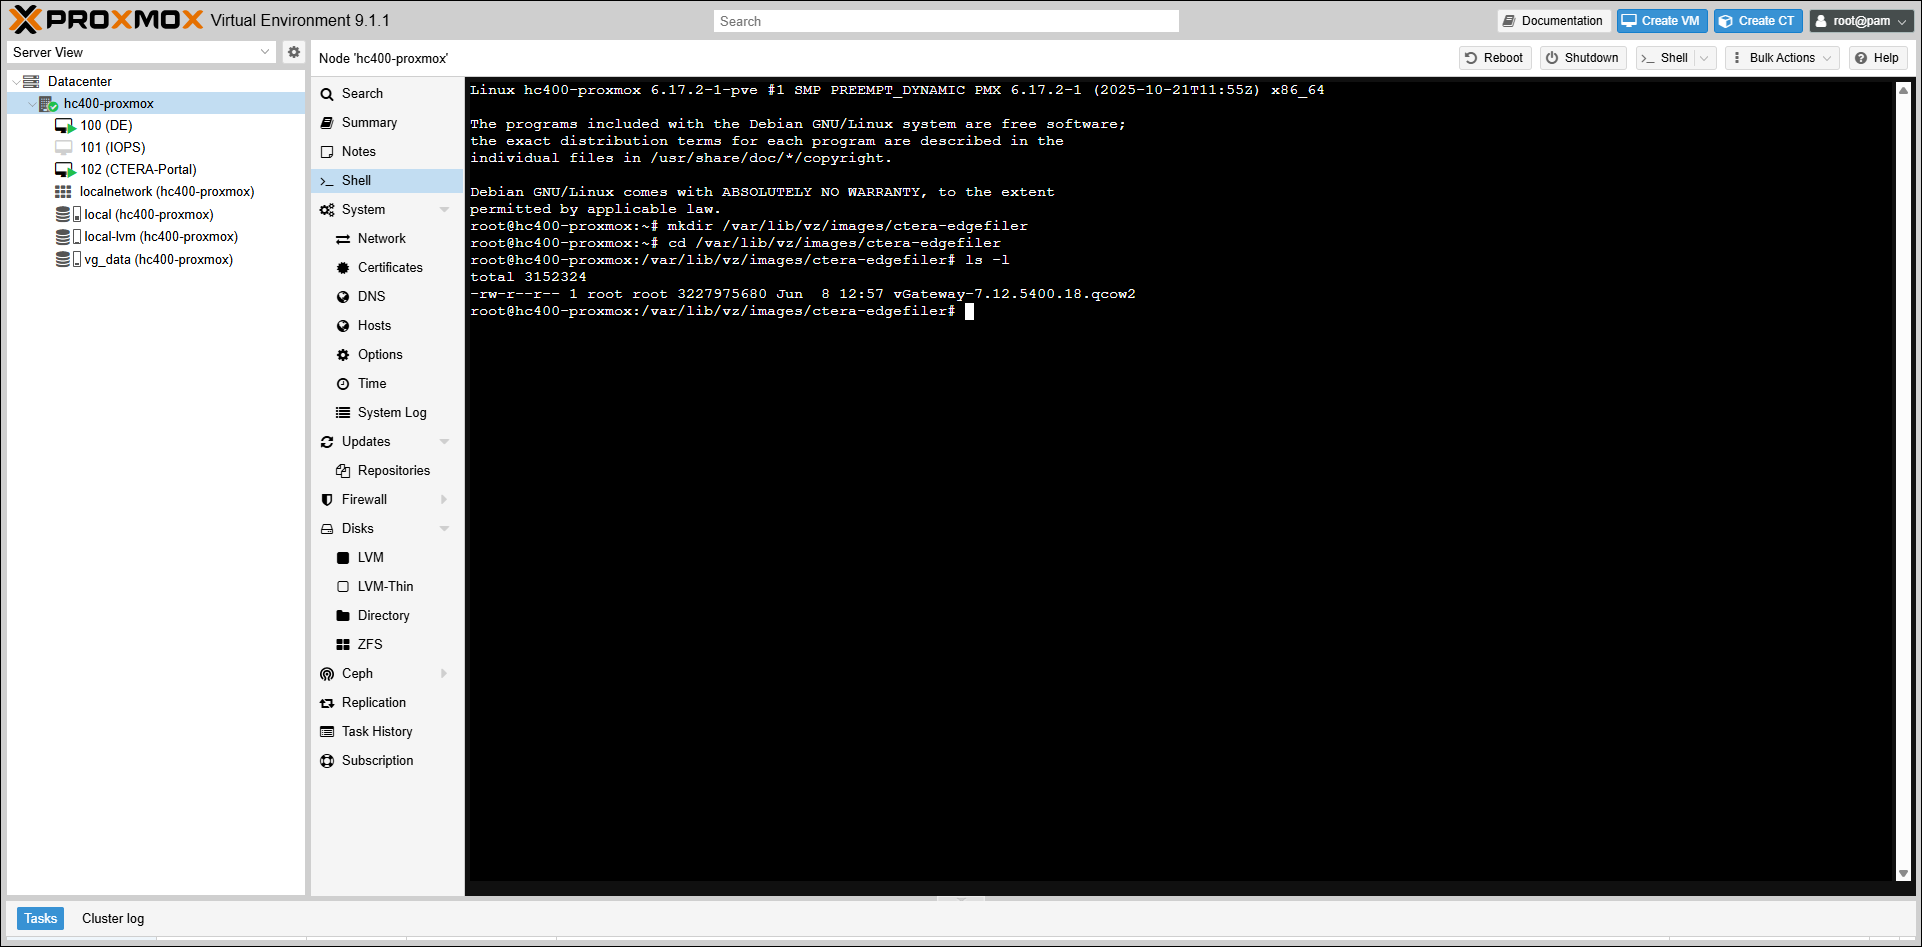
The dashboard is displayed. - Select the datacenter node and click Shell.

- Run the following command to create the CTERA Edge Filer image directory in Proxmox:
mkdir /var/lib/vz/images/ctera-edgefiler - Copy the edge filer qcow2 image to the
/var/lib/vz/images/ctera-edgefilerdirectory.
You can use a tool like WinSCP to copy the file.
- Click Create VM.
The Create: Virtual Machine window is displayed.
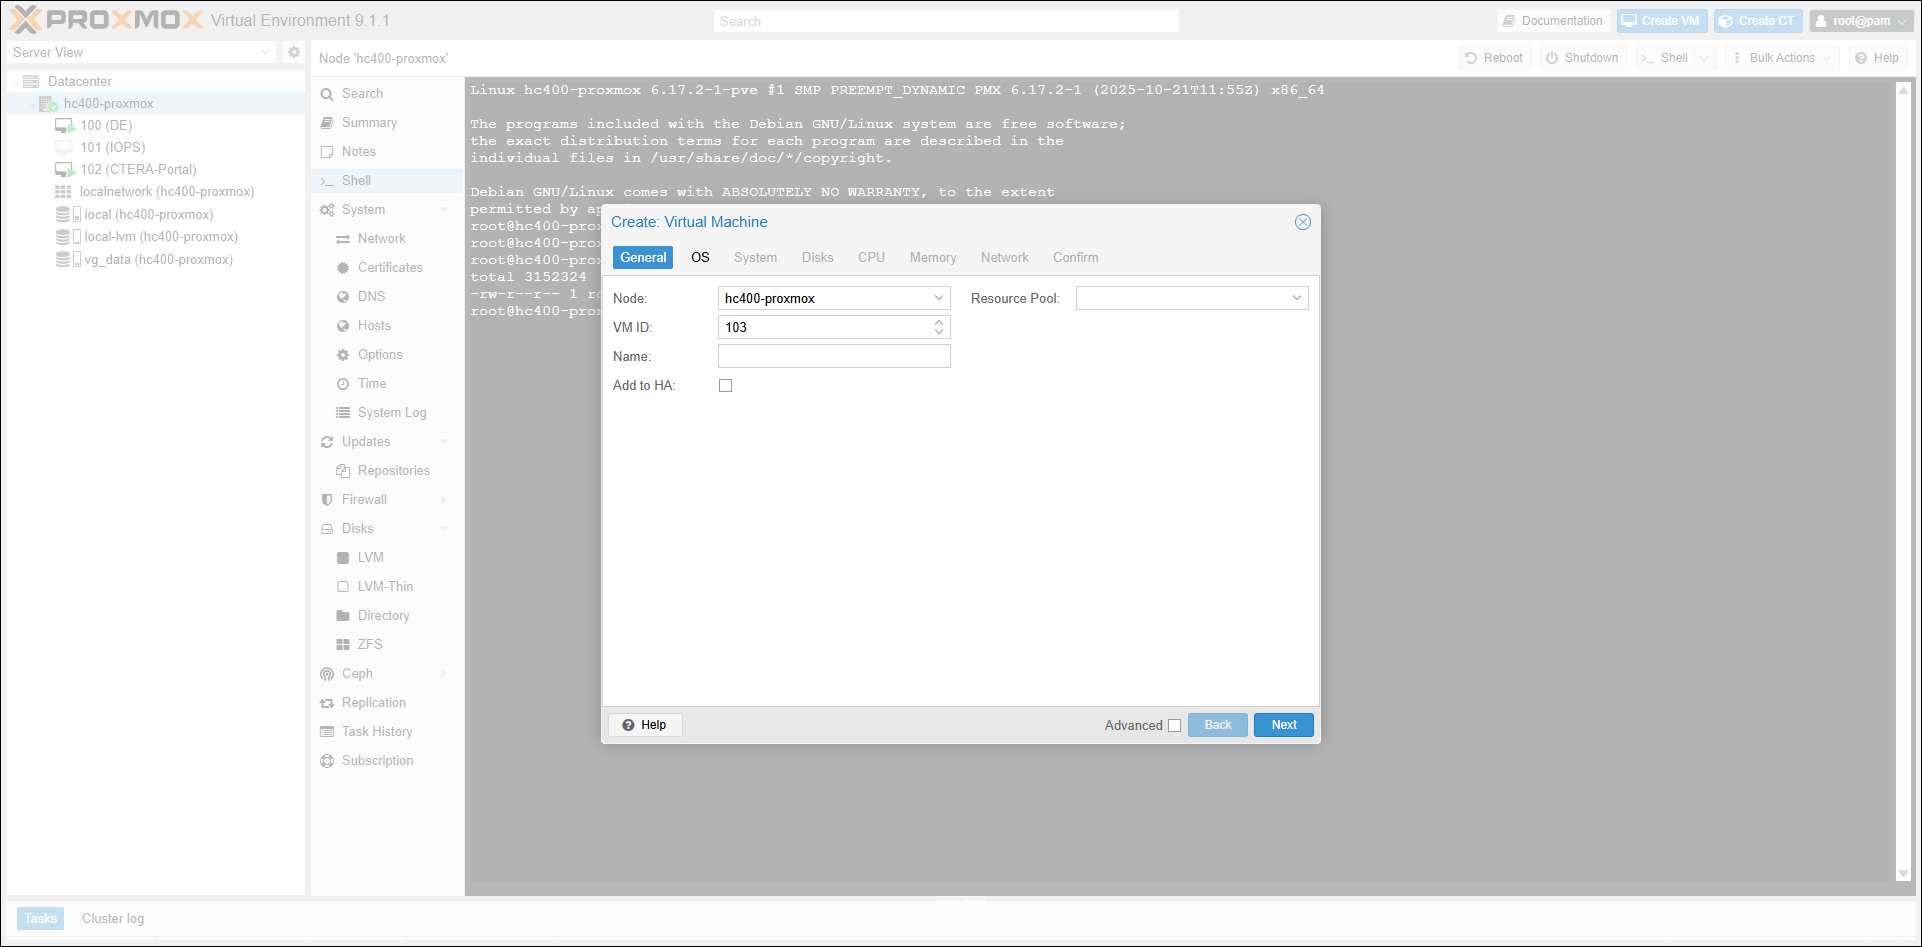
- Enter a unique name to identify this edge filer in the Name field and click Next.
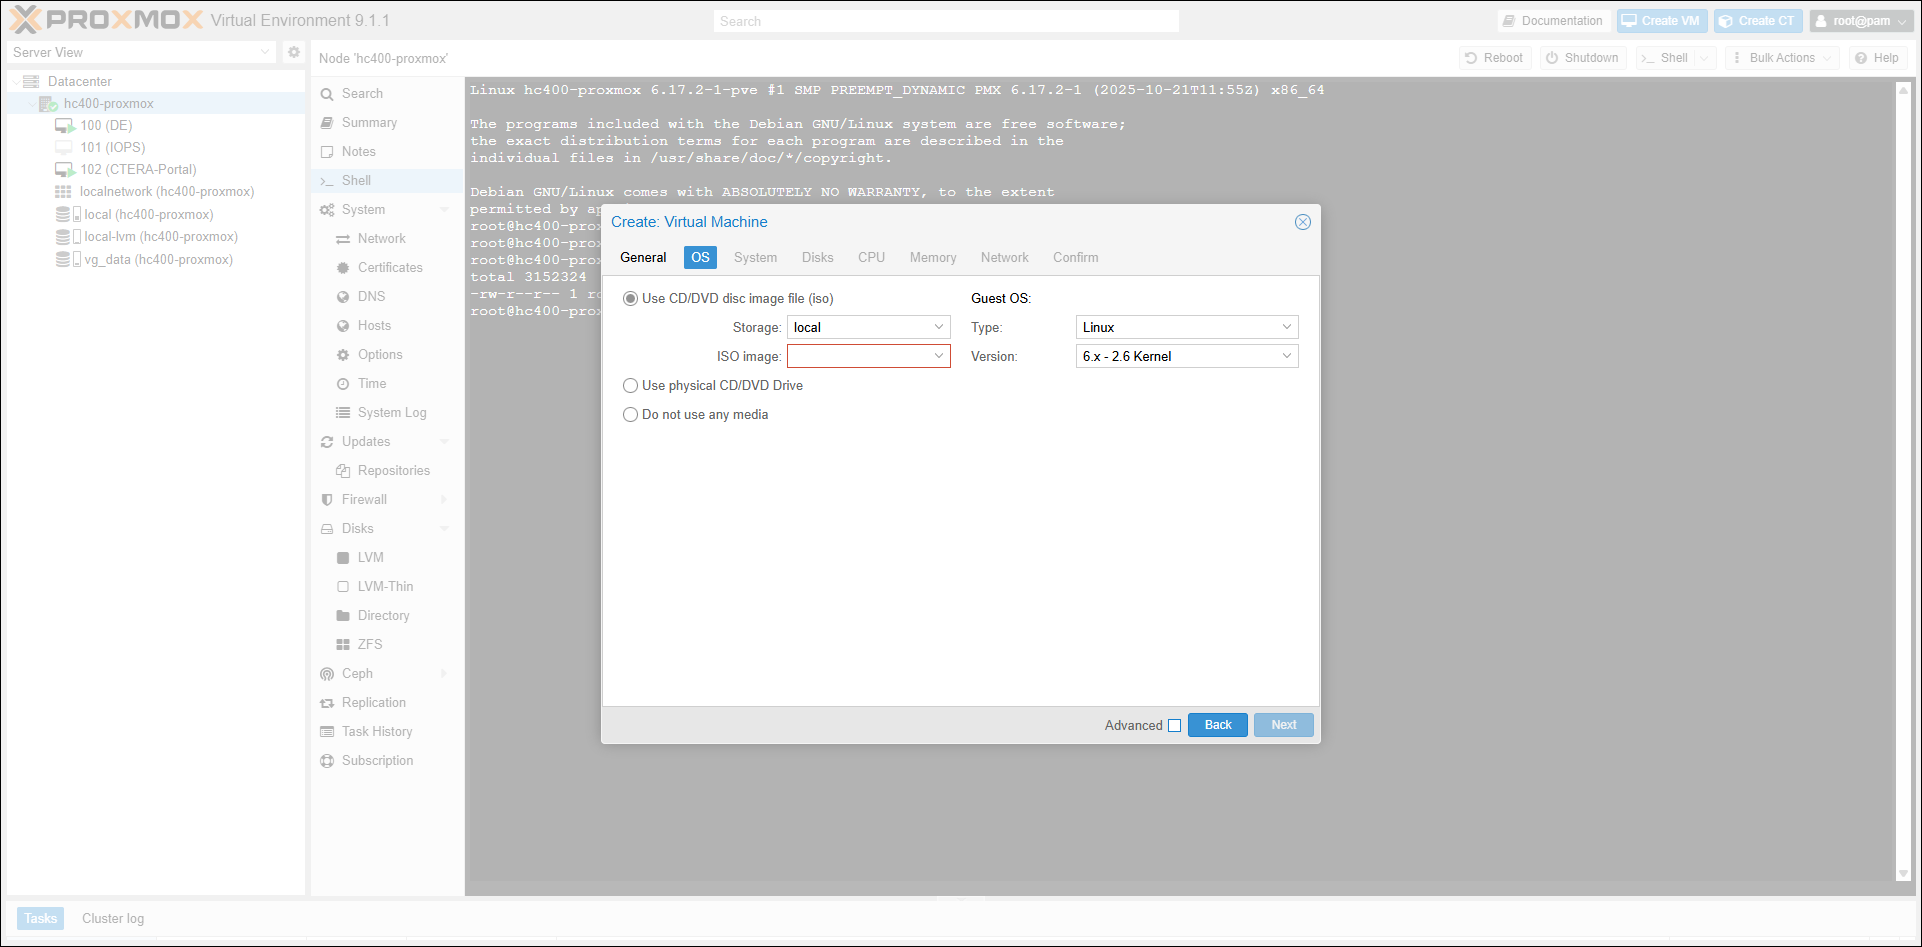
- Select the Do not use any media option and click Next until you display the Disks tab.

- Click Add.
SCSI1 is added to the list.
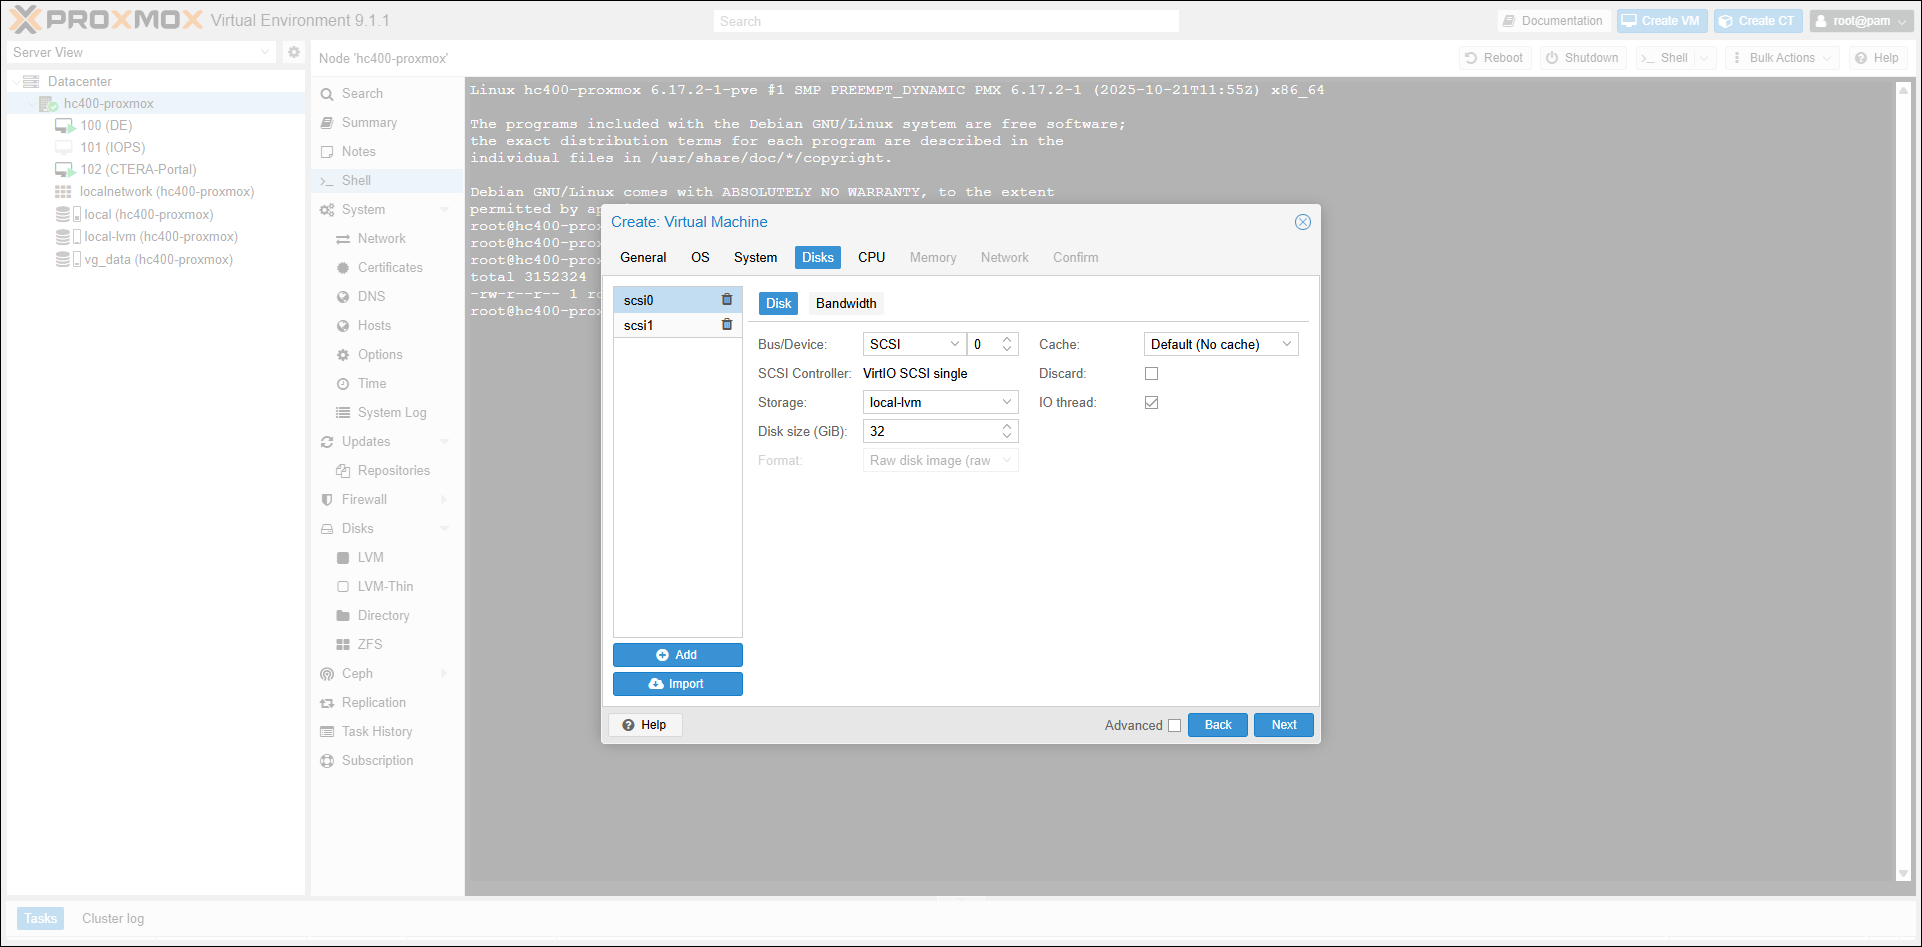
- Select SCSI1 and then select the storage from the Storage list.
- Specify the disk size.
- Click Next or the CPU tab.
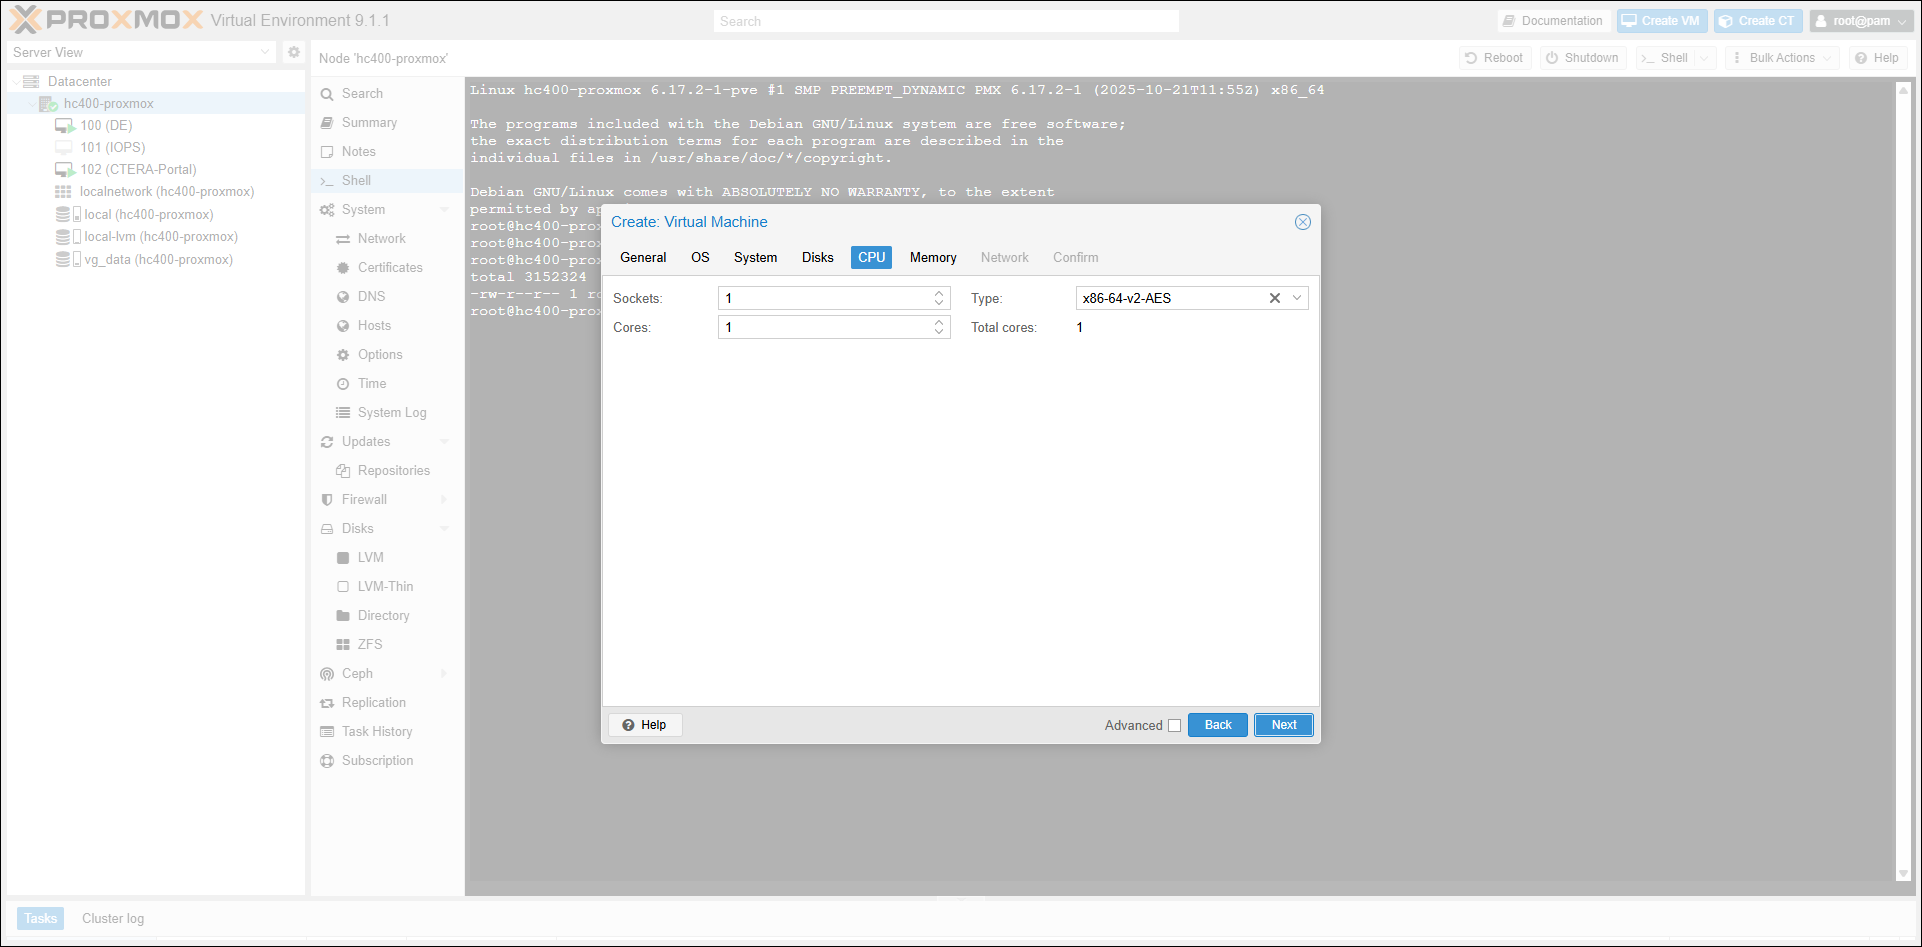
- Specify the number of vCPUs. The recommended vCPUs is the license number/4. For example, 8 vCPUs for an edge filer with an EV32 license. The vCPUs is the number you specify for Sockets multiplierd by the number of Cores.
Note
Check Advanced to see the vCPUs.
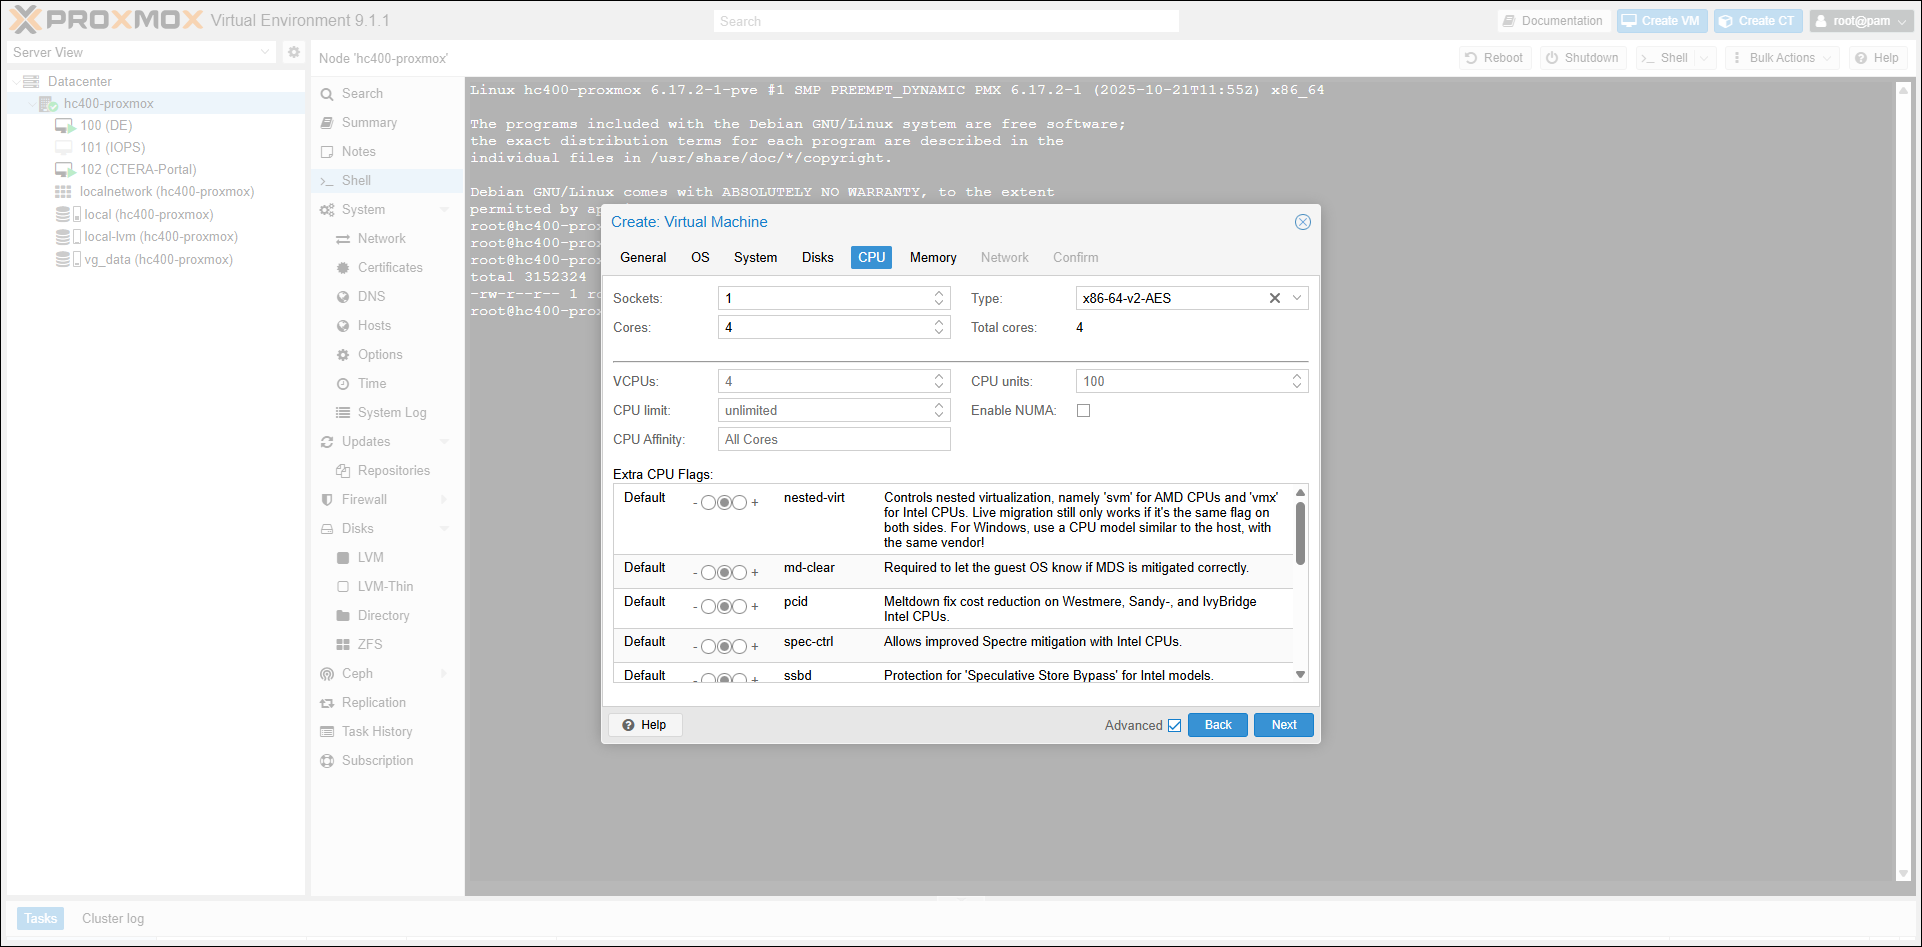
- Click Next.
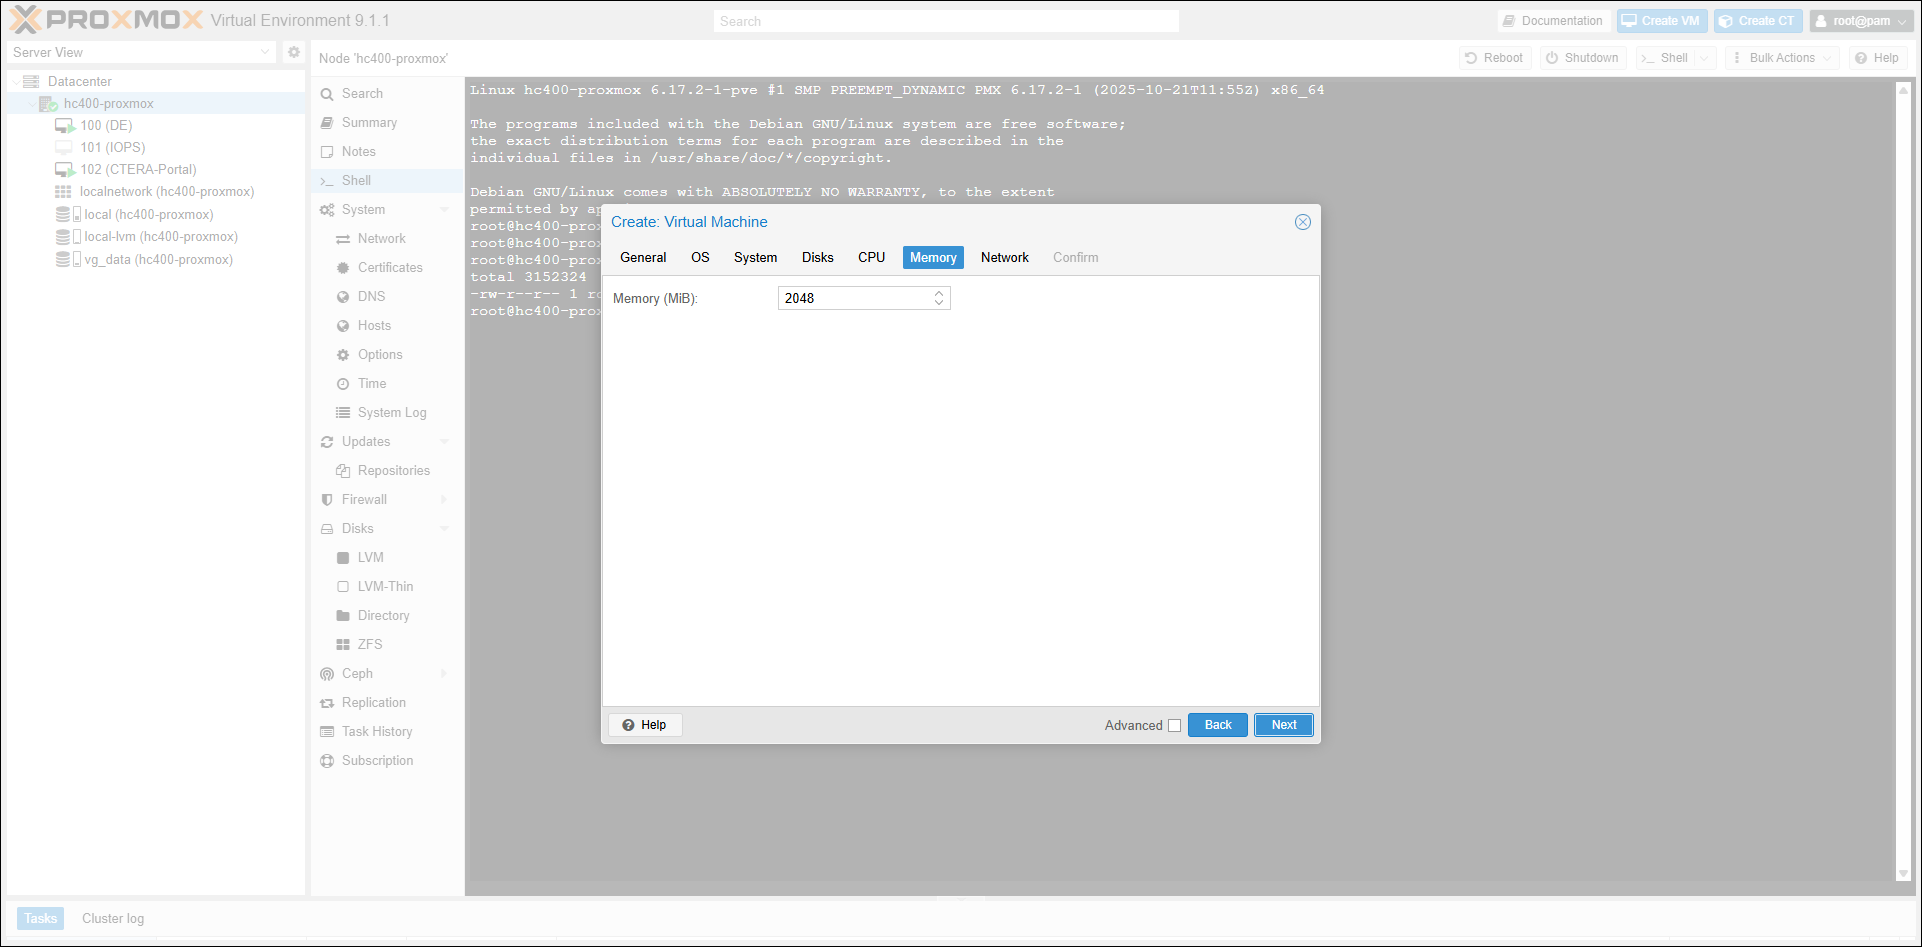
- Enter the RAM amount in the Memory (MiB) field.
The minimum RAM requirement is 8192MB (8GB). CTERA recommends that the amount of RAM is the license number/2. For example, specify 16384MB (16GB) for an edge filer with an EV32 license. - Click the Next until you display the Confirm tab.
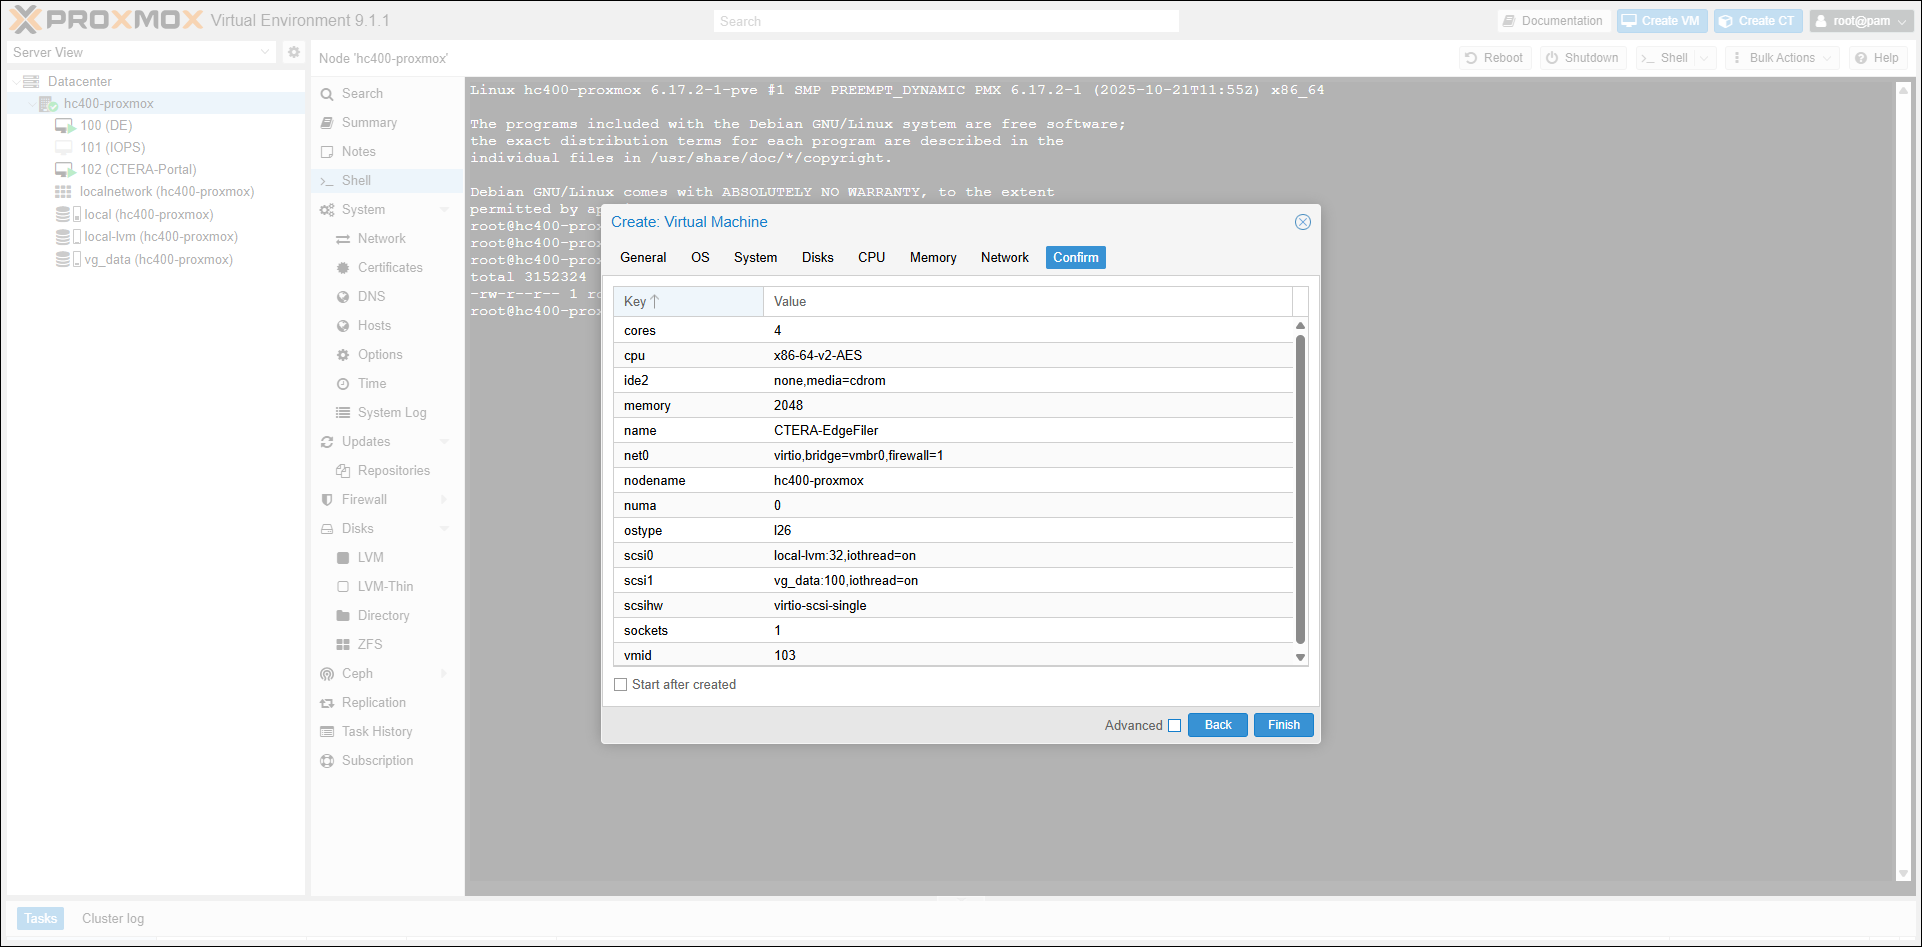
- Review the details and then click Finish.
- Select the datacenter node and click Shell.
- Run the following commands:
Where:qm importdisk vmid /var/lib/vz/images/ctera-edgefiler/file.qcow2 storage qm set vmid --scsihw virtio-scsi-pci --scsi0 storage:vm-vmid-disk-1
vmid is the edge filer VM id, such as103
file is the CTERA Edge Filer image. For example,vGateway-version.qcow2where version is the version number of the edge filer. The value is case sensitive. That is, for example,vGateway-7.12.54000.20.qcow2and notvgateway-7.12.54000.20.qcow2
storage is the name of the storage.
The VM image is overwritten with the edge filer image.
storage:vm-vmid-disk-1sis the disk name specified at the end of theimportdiskcommand.

- Right-click the VM in the navigation pane and click Start.
The VM is powered on and the Console option is enabled. - Click Console.
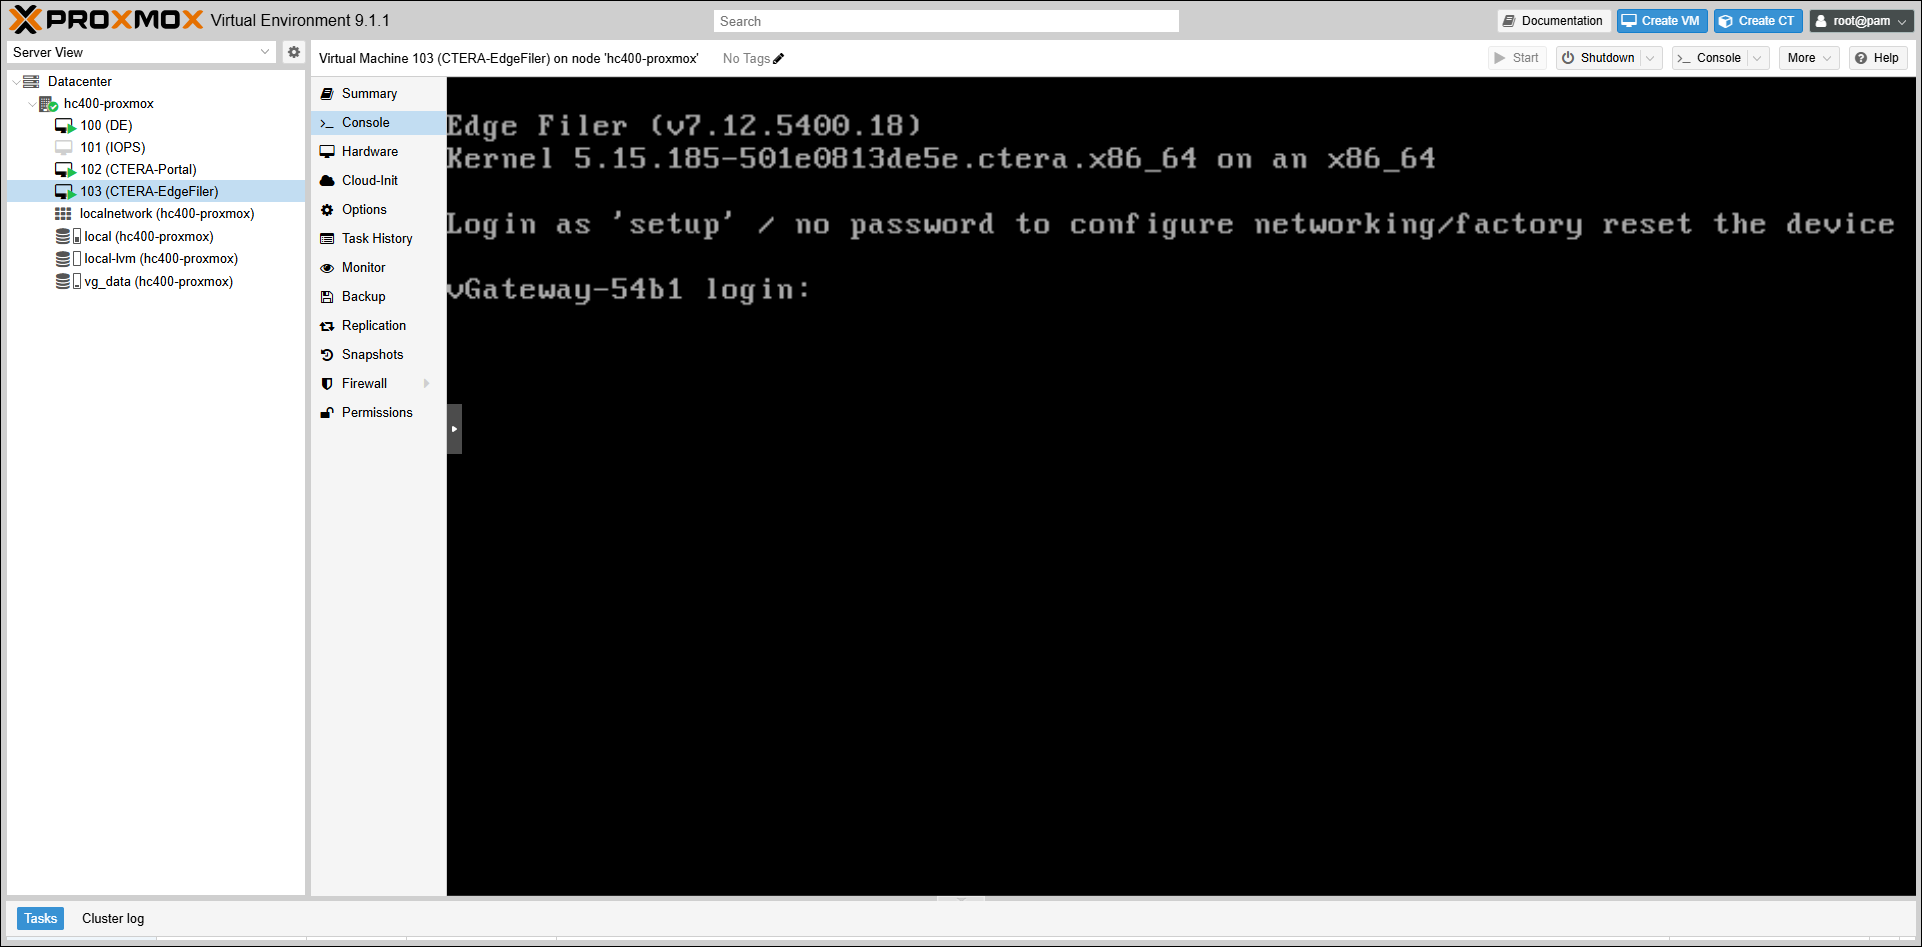
- Login in with the username
setupand no password, as instructed.
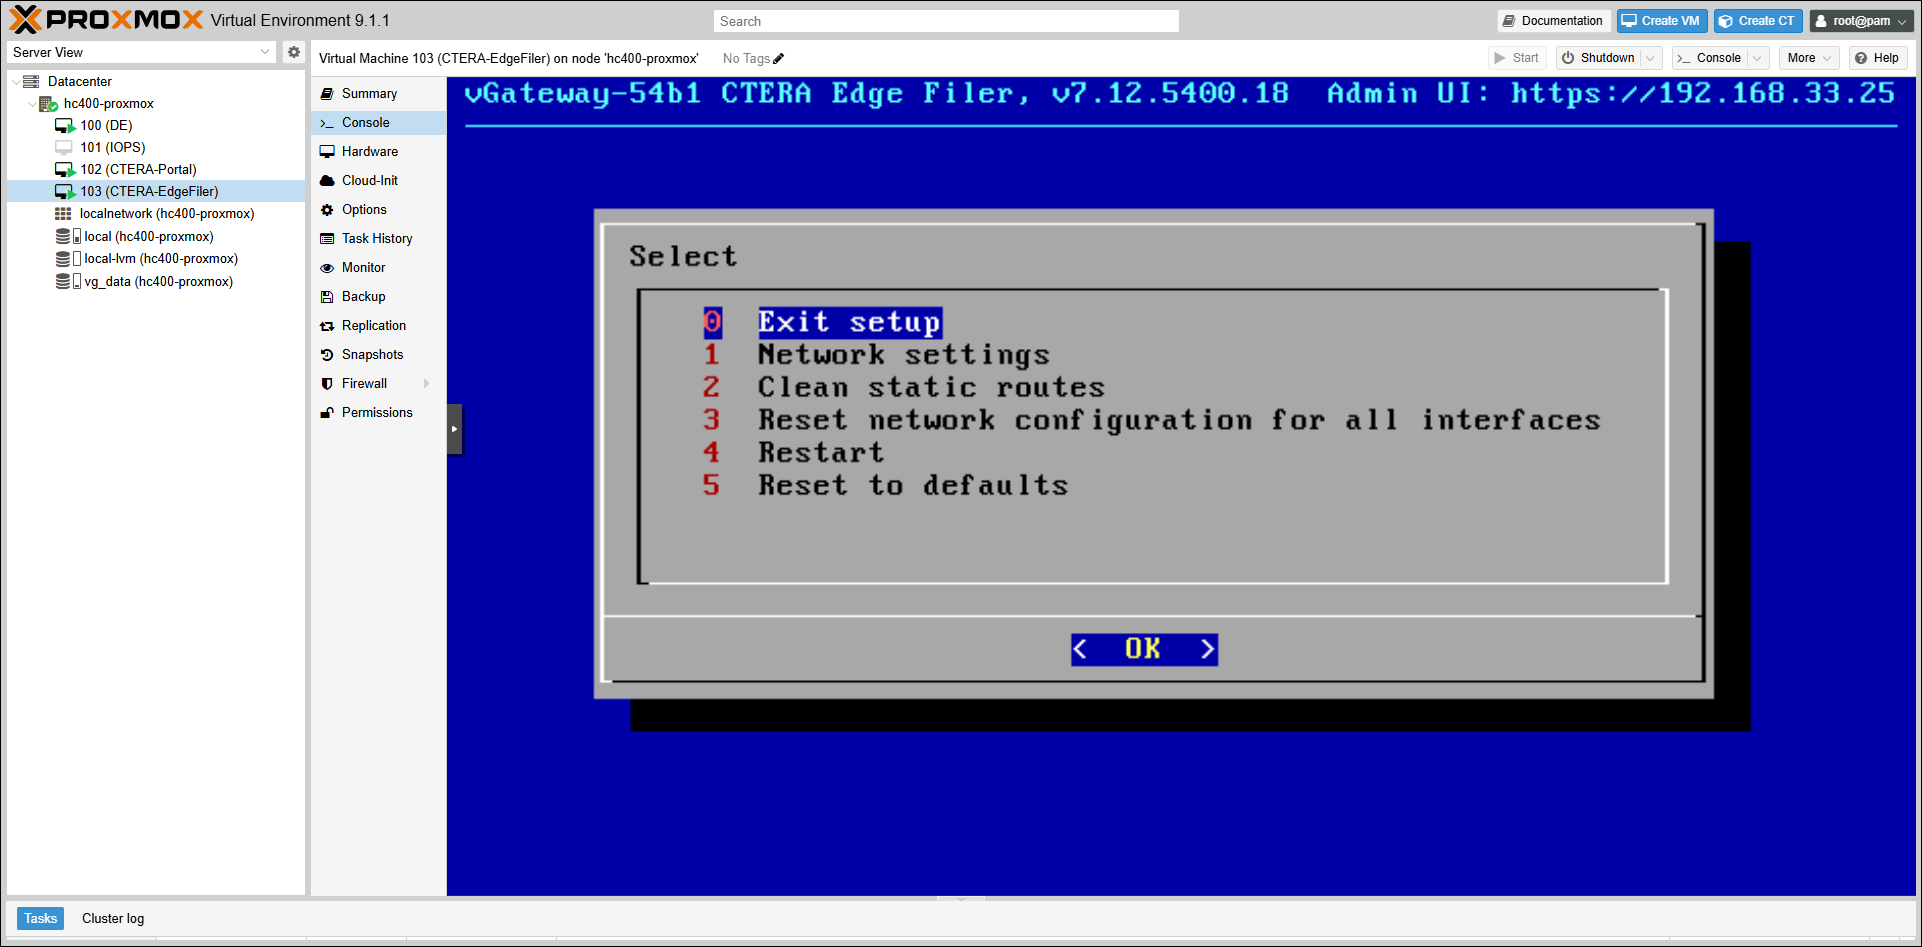
Using DHCP, after a few seconds, the IP address to access the CTERA Edge Filer is displayed in the top right of the console.
Otherwise, set a static IP address, as described below. - Continue with First Time Setup.
Setting a Static IP Address
If you did not customize the template to set the static IP address during the installation, you can set it from the virtual machine.
To set the virtual machine static IP address:
- Access the virtual machine.
- Select Console
The following login screen is displayed:
- Login in with the username
setupand no password, as instructed.
Using DHCP, after a few seconds, the IP address to access the CTERA Edge Filer is displayed in the top right of the console.
- Click in the console to transfer the keyboard control to the console and, if necessary, use the arrow keys to scroll to Network settings.
- Press Enter.
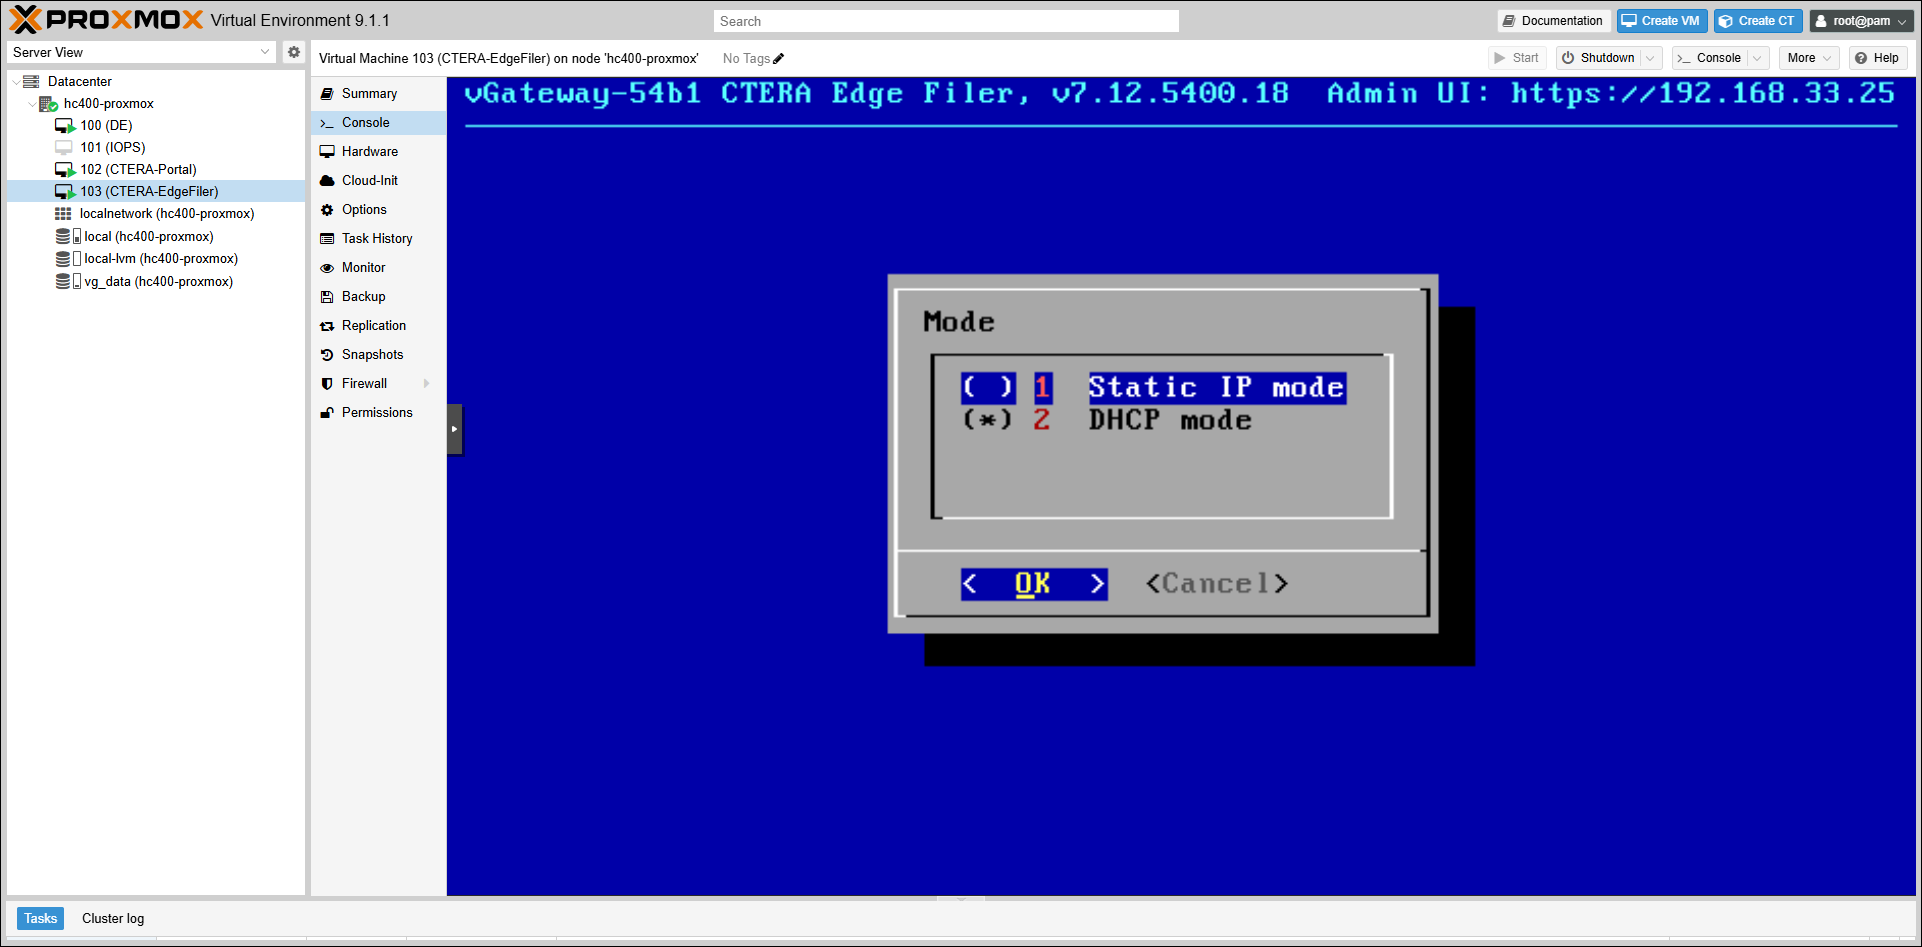
- Select Static IP mode and press OK.
- Complete the configuration for static mode by entering the static IP, netmask, default CTERA Edge Filer IP and the primary and secondary DNS server IPs.
- Press OK.