Installing the CTERA Edge Filer in a Red Hat OpenShift Environment
Installing the CTERA Edge Filer involves creating and configuring a virtual machine and then performing an initial configuration, described in First Time Setup.
The CTERA Edge Filer can be installed in a Red Hat OpenShift environment.
Contact CTERA, and request the latest qcow2 CTERA Edge Filer disk image. Add this image to the machine where you run the Red Hat OpenShift console.
The CTERA Edge Filer installation must be done using the qcow2 file and not by cloning an existing CTERA Edge Filer.
To install the CTERA Edge Filer in a Scale Computing HyperCore environment:
- Log in to the Red Hat OpenShift console.

- If necessary, change the view to Administrator, in the top left drop-down.
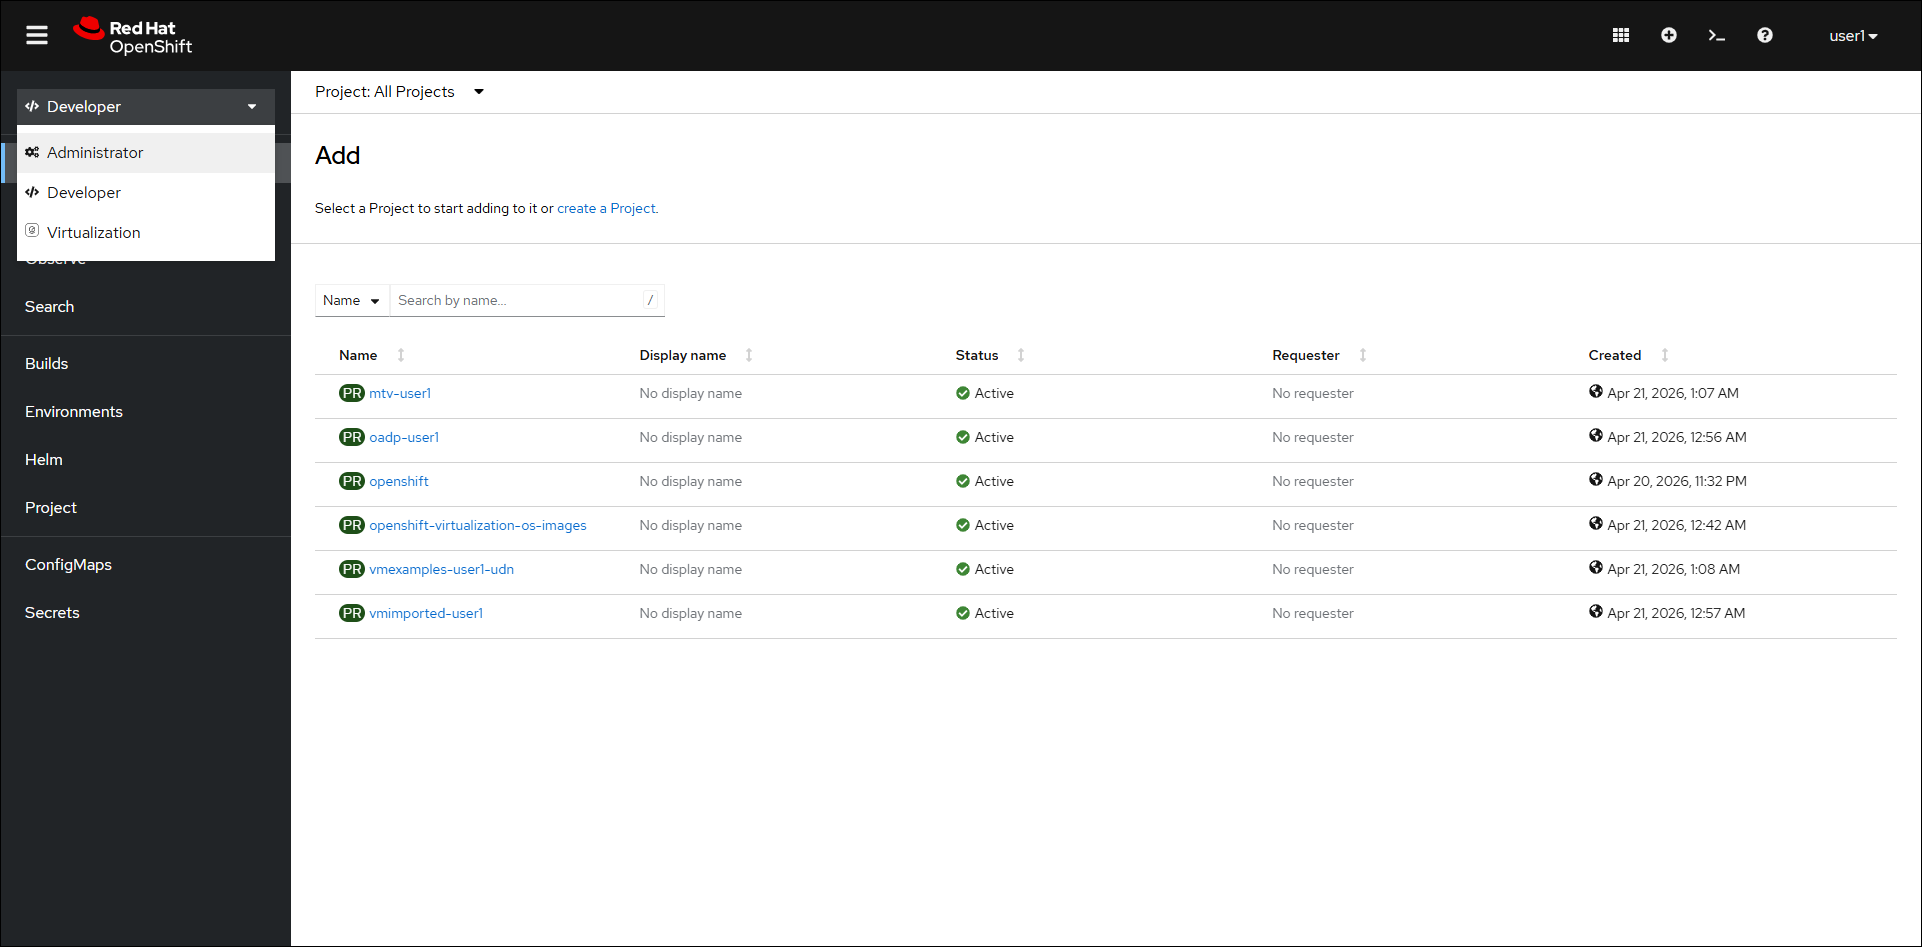
The Projects page is displayed. - Click Virtualization > Templates in the navigation pane.
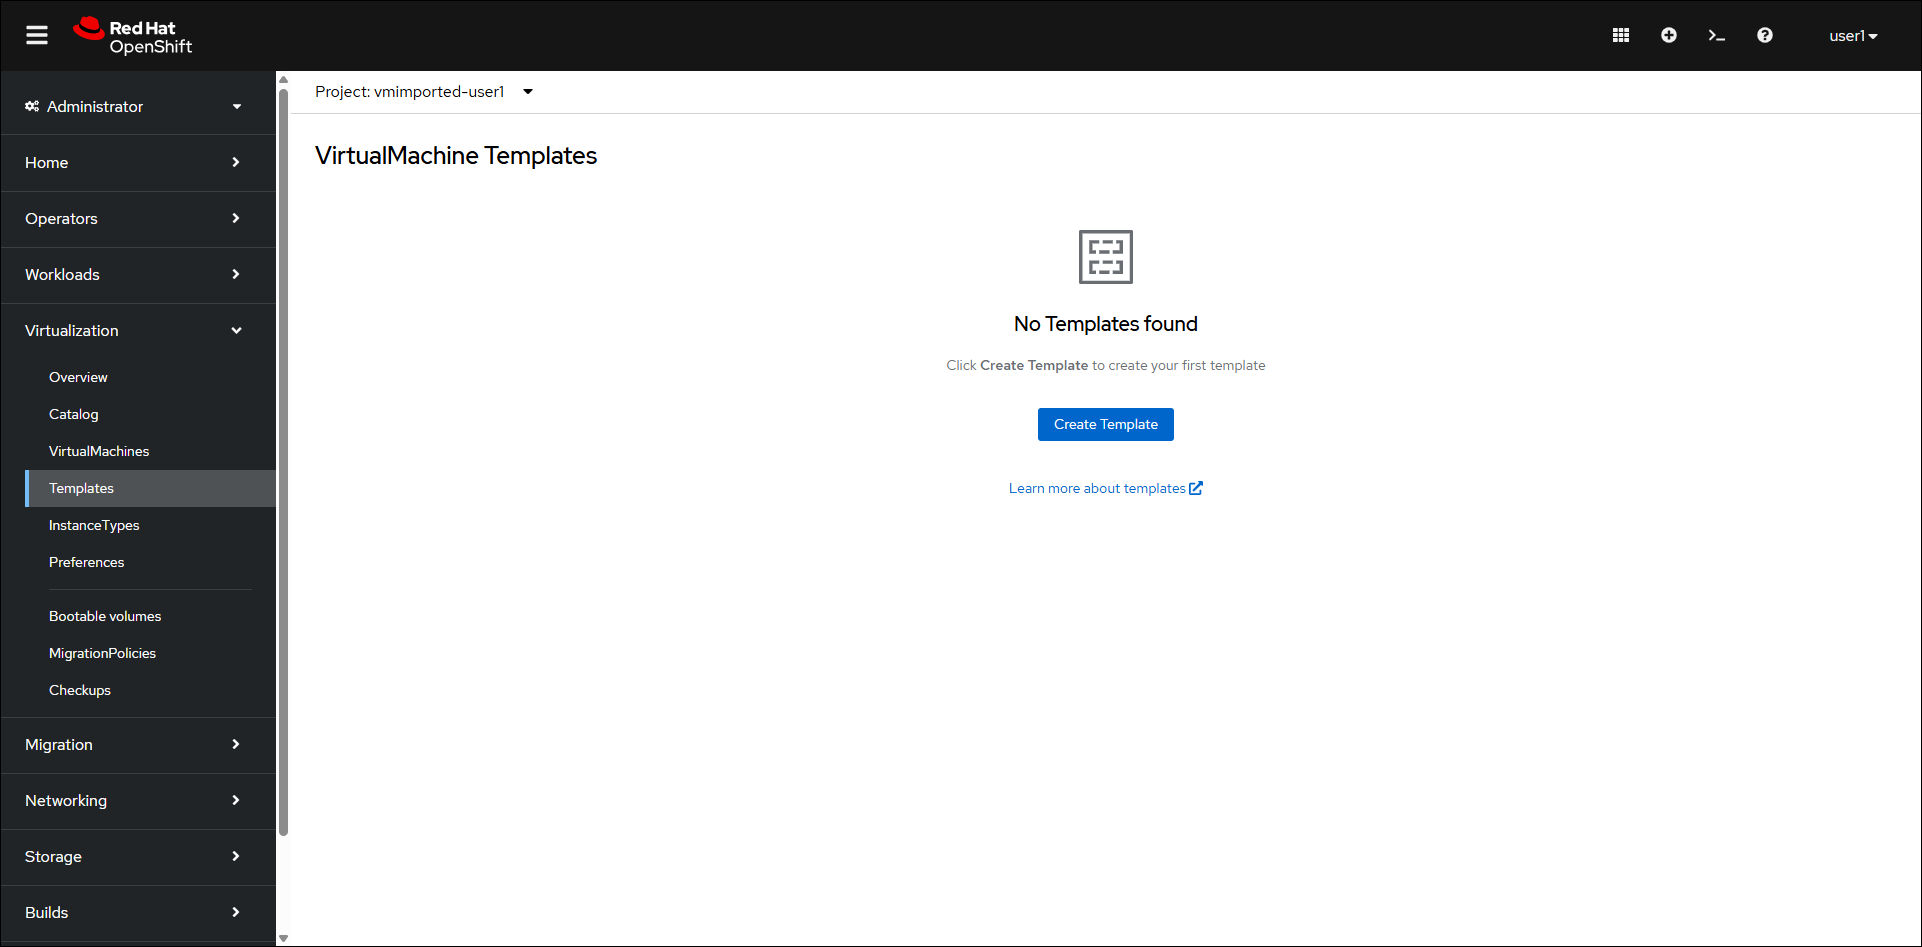
If the VM from uploaded QCOW2 - UEFI + 1 disk is displayed, continue with step 4, otherwise:- Click Create Template.
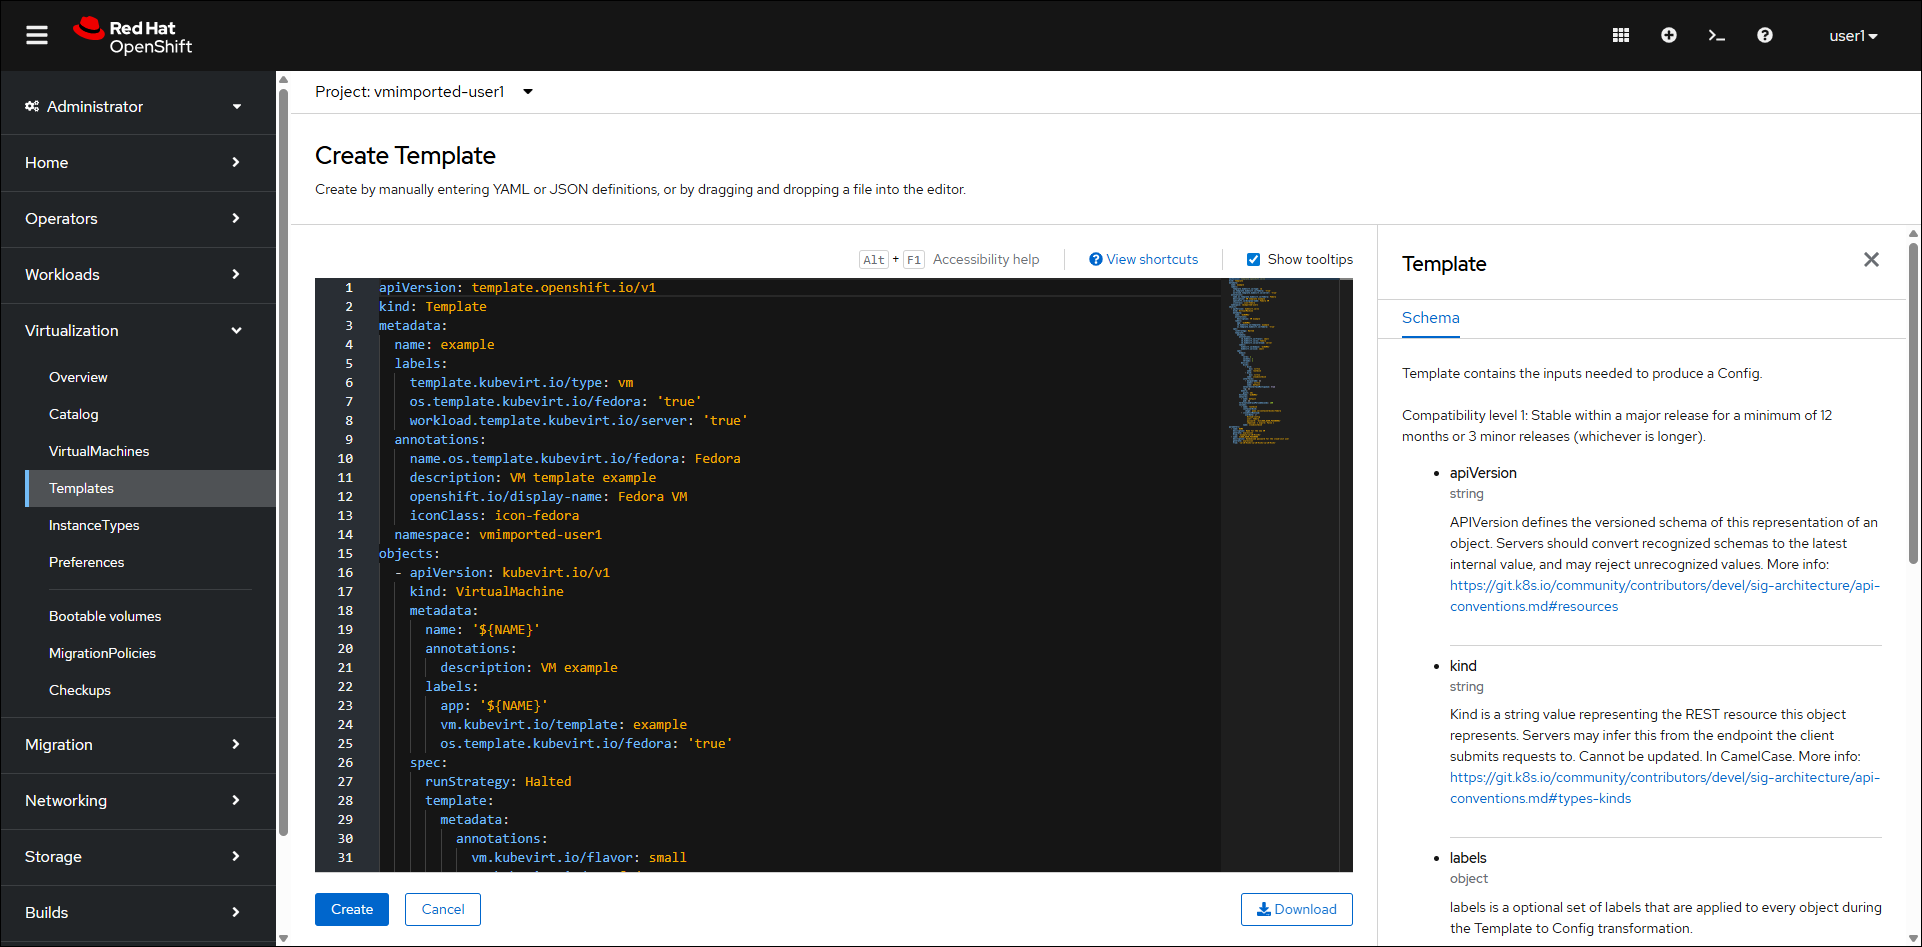
- Replace the code with the following:
kind: Template apiVersion: template.openshift.io/v1 metadata: name: vm-from-upload-uefi-plus1 namespace: vmimported-user1 uid: 21ddfbbf-1b4b-47eb-b9c6-d17c114946ba resourceVersion: '2149121' creationTimestamp: '2026-03-23T06:33:18Z' labels: os.template.kubevirt.io/other: 'true' template.kubevirt.io/type: vm workload.template.kubevirt.io/server: 'true' annotations: description: Create a VM with a disk that you upload manually (QCOW2) openshift.io/display-name: VM from uploaded QCOW2 - UEFI + 1 disk managedFields: - manager: Mozilla operation: Update apiVersion: template.openshift.io/v1 time: '2026-03-23T06:33:18Z' fieldsType: FieldsV1 fieldsV1: 'f:metadata': 'f:annotations': .: {} 'f:description': {} 'f:openshift.io/display-name': {} 'f:labels': .: {} 'f:os.template.kubevirt.io/other': {} 'f:template.kubevirt.io/type': {} 'f:workload.template.kubevirt.io/server': {} 'f:objects': {} 'f:parameters': {} objects: - apiVersion: kubevirt.io/v1 kind: VirtualMachine metadata: name: '${NAME}' labels: app: '${NAME}' spec: running: false dataVolumeTemplates: - apiVersion: cdi.kubevirt.io/v1beta1 kind: DataVolume metadata: name: '${NAME}-rootdisk' spec: source: upload: {} storage: resources: requests: storage: '${ROOTDISK_SIZE}' - apiVersion: cdi.kubevirt.io/v1beta1 kind: DataVolume metadata: name: '${NAME}-datadisk1' spec: source: blank: {} storage: resources: requests: storage: '${EXTRA1_SIZE}' template: metadata: annotations: vm.kubevirt.io/flavor: small vm.kubevirt.io/os: centos9 vm.kubevirt.io/workload: server labels: kubevirt.io/domain: '${NAME}' kubevirt.io/size: small spec: architecture: amd64 domain: cpu: cores: 1 sockets: 1 threads: 1 devices: disks: - name: rootdisk disk: bus: virtio - name: datadisk1 disk: bus: virtio interfaces: - name: default masquerade: {} model: virtio networkInterfaceMultiqueue: true rng: {} features: acpi: {} smm: enabled: true firmware: bootloader: efi: secureBoot: false machine: type: q35 resources: requests: memory: 2Gi evictionStrategy: LiveMigrate networks: - name: default pod: {} terminationGracePeriodSeconds: 180 volumes: - name: rootdisk dataVolume: name: '${NAME}-rootdisk' - name: datadisk1 dataVolume: name: '${NAME}-datadisk1' parameters: - name: NAME description: VM name value: CTERA required: true - name: ROOTDISK_SIZE description: Must be >= qcow2 virtual size value: 32Gi - name: EXTRA1_SIZE description: Extra disk size value: 250Gi - Click Create.
- Click Create Template.
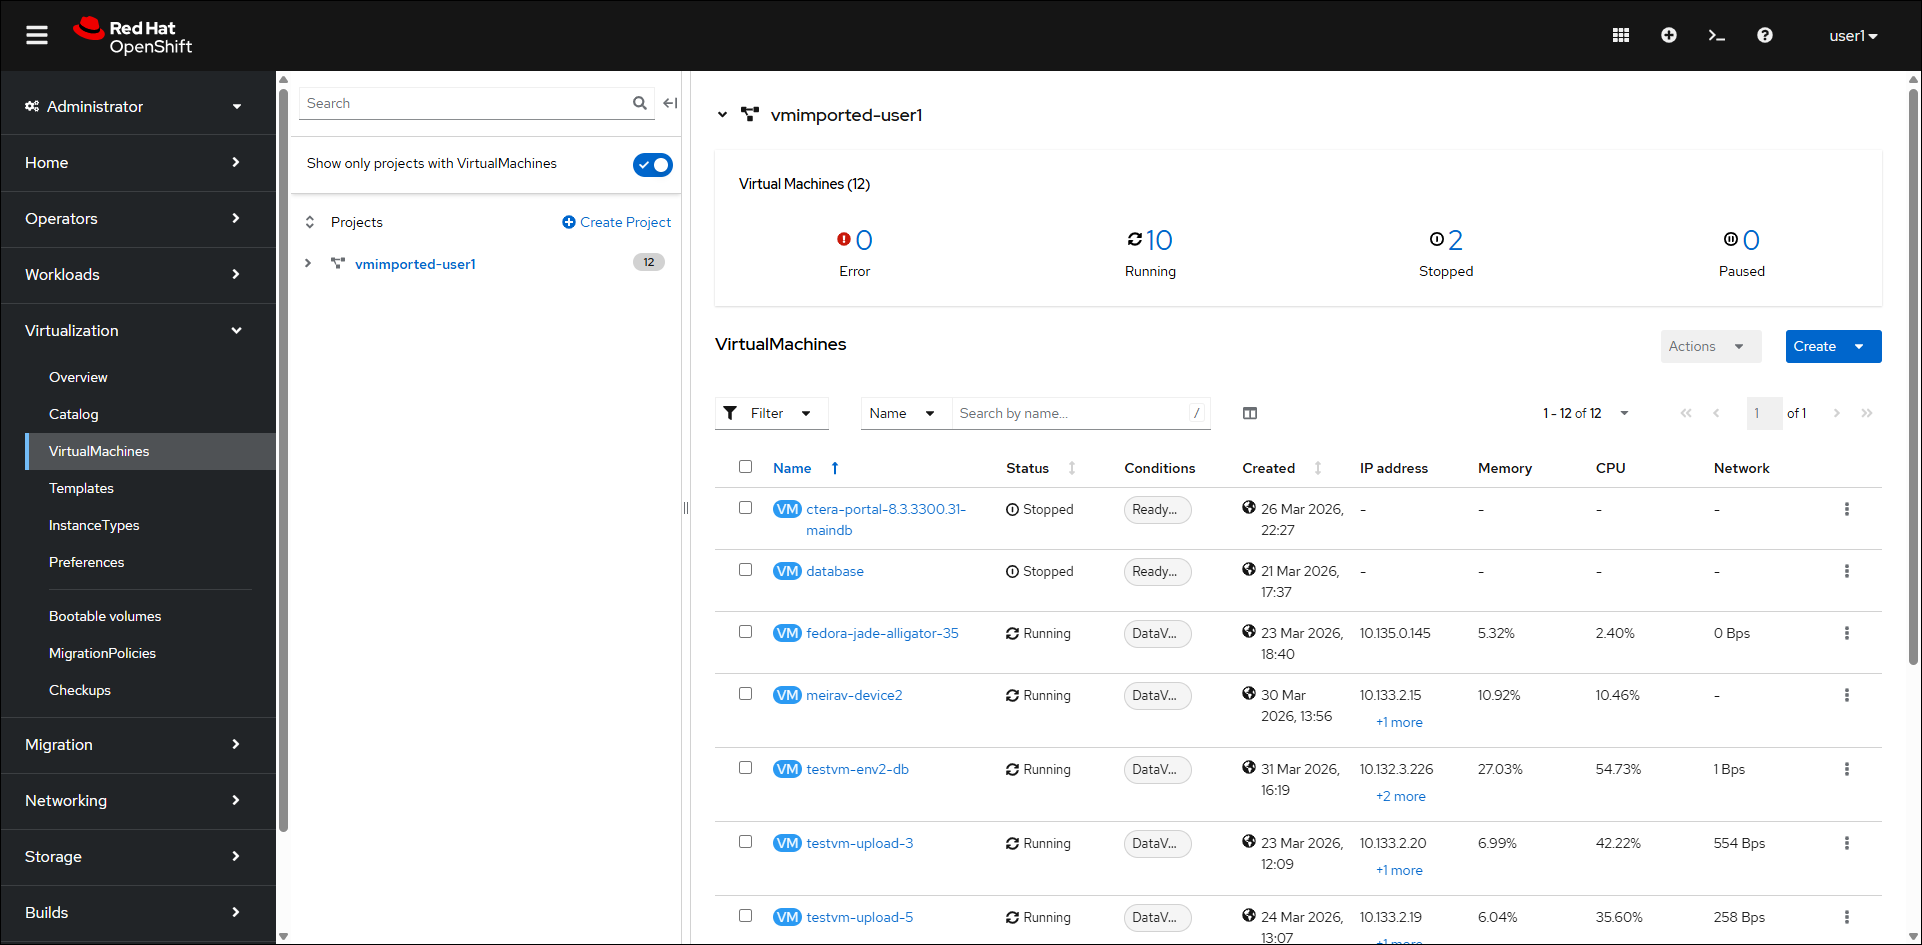
- Click Virtualization > VirtualMachines in the navigation pane.
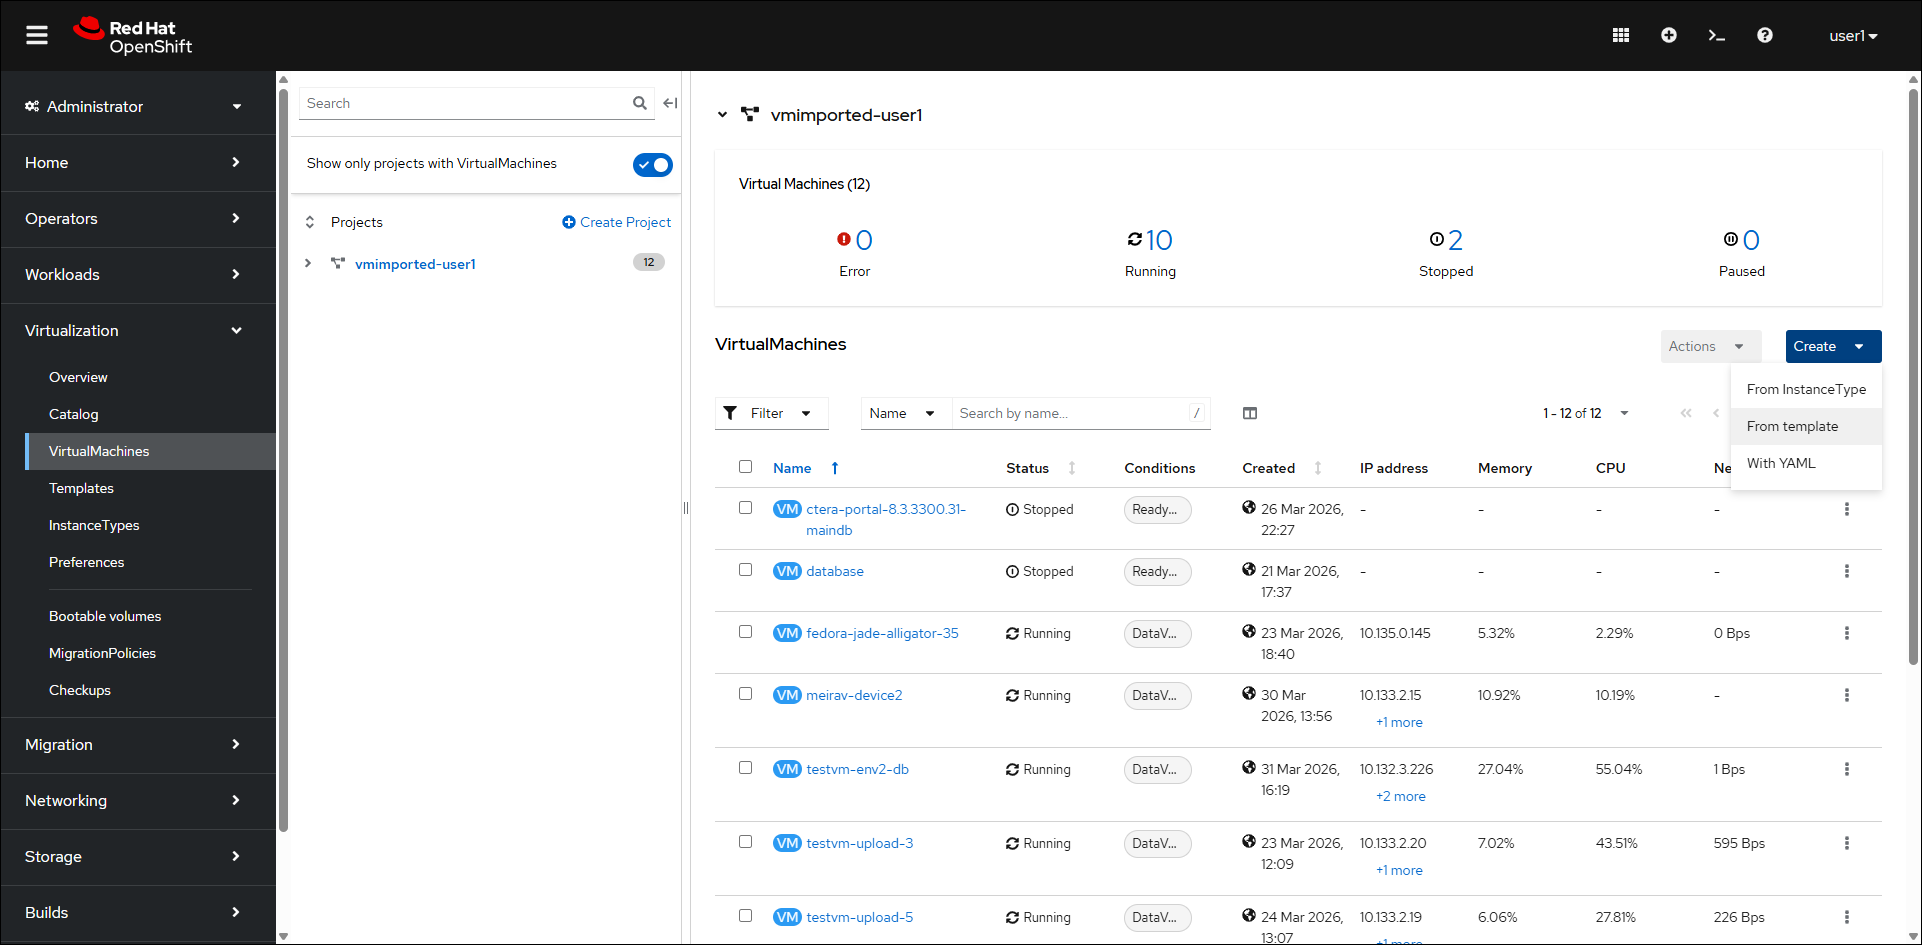
- Click Create > From template.
The Create new VirtualMachine page is displayed.
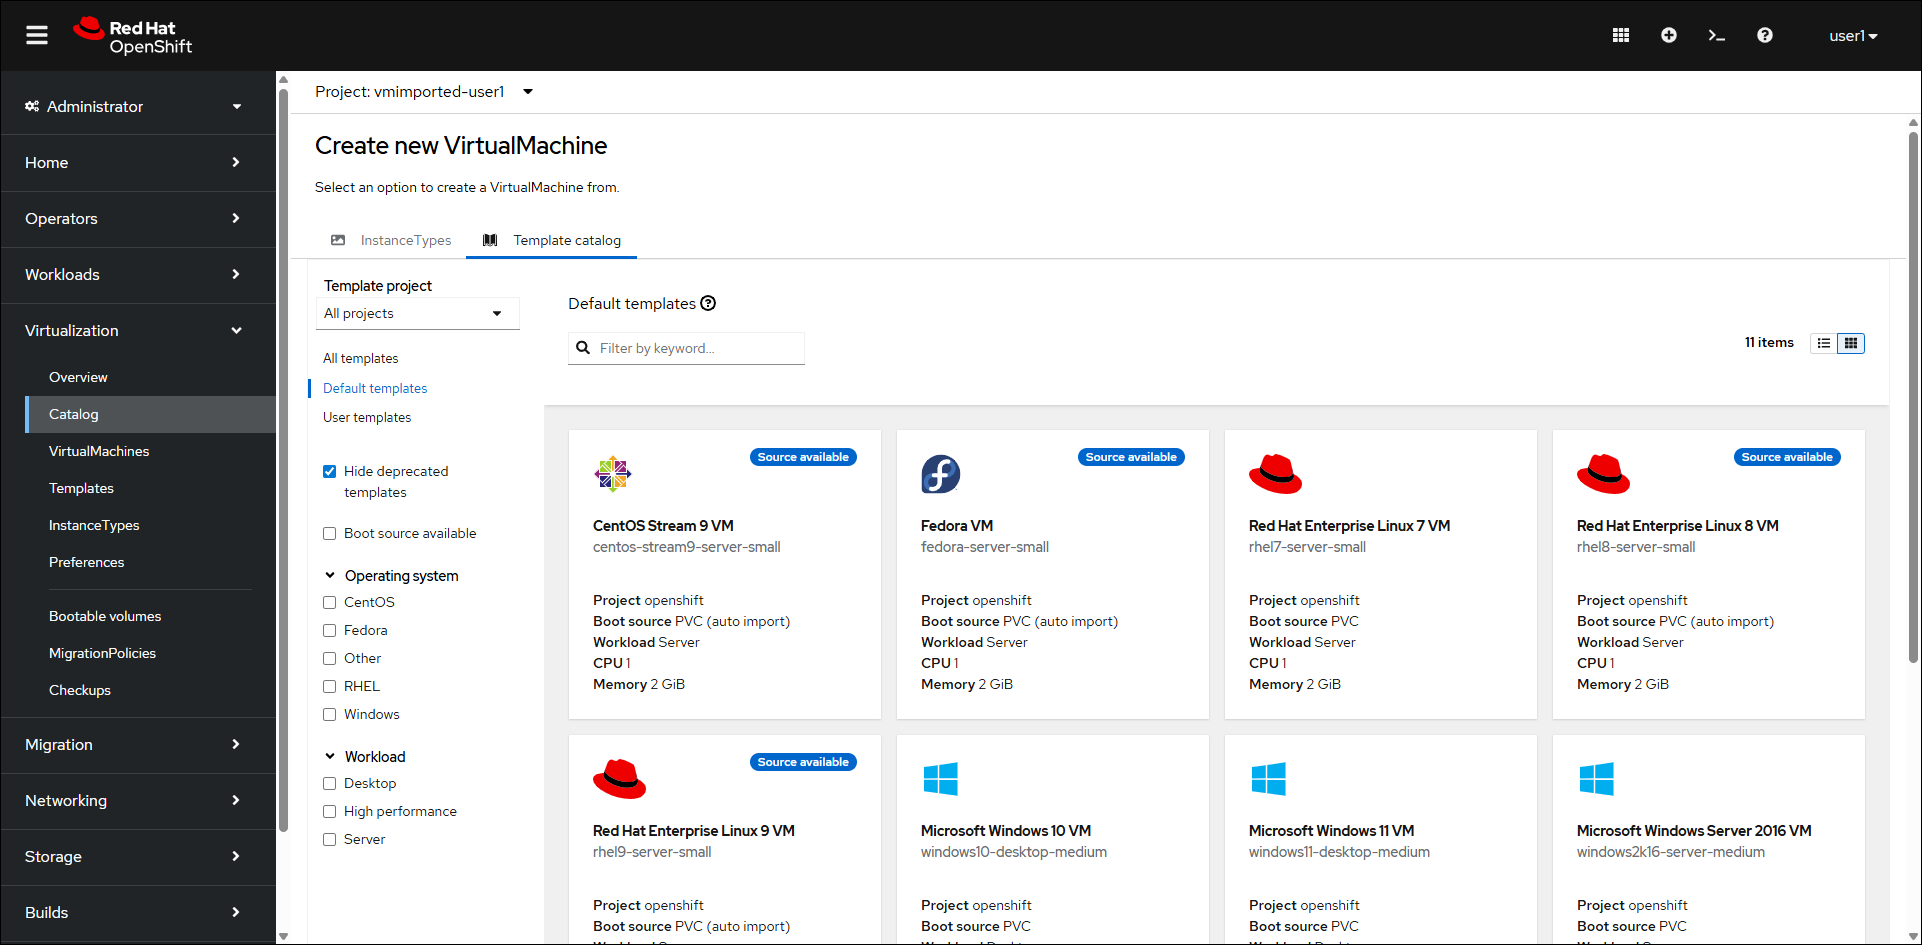
- Click User templates.
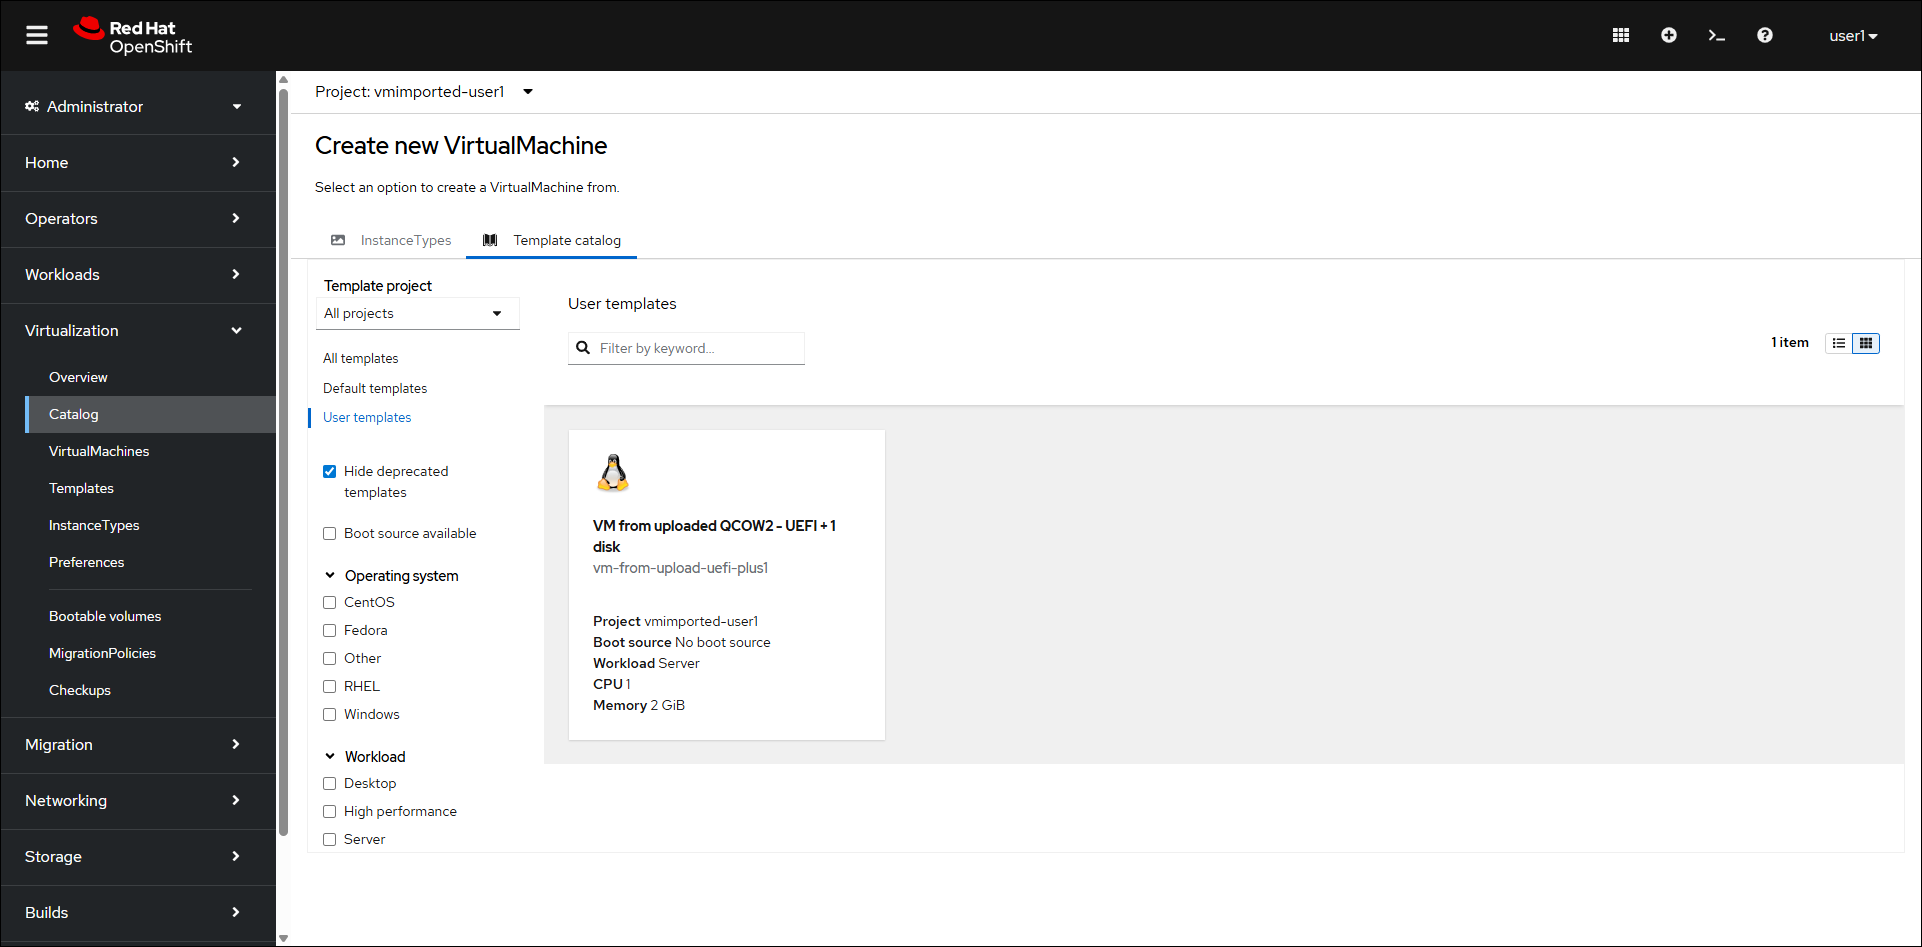
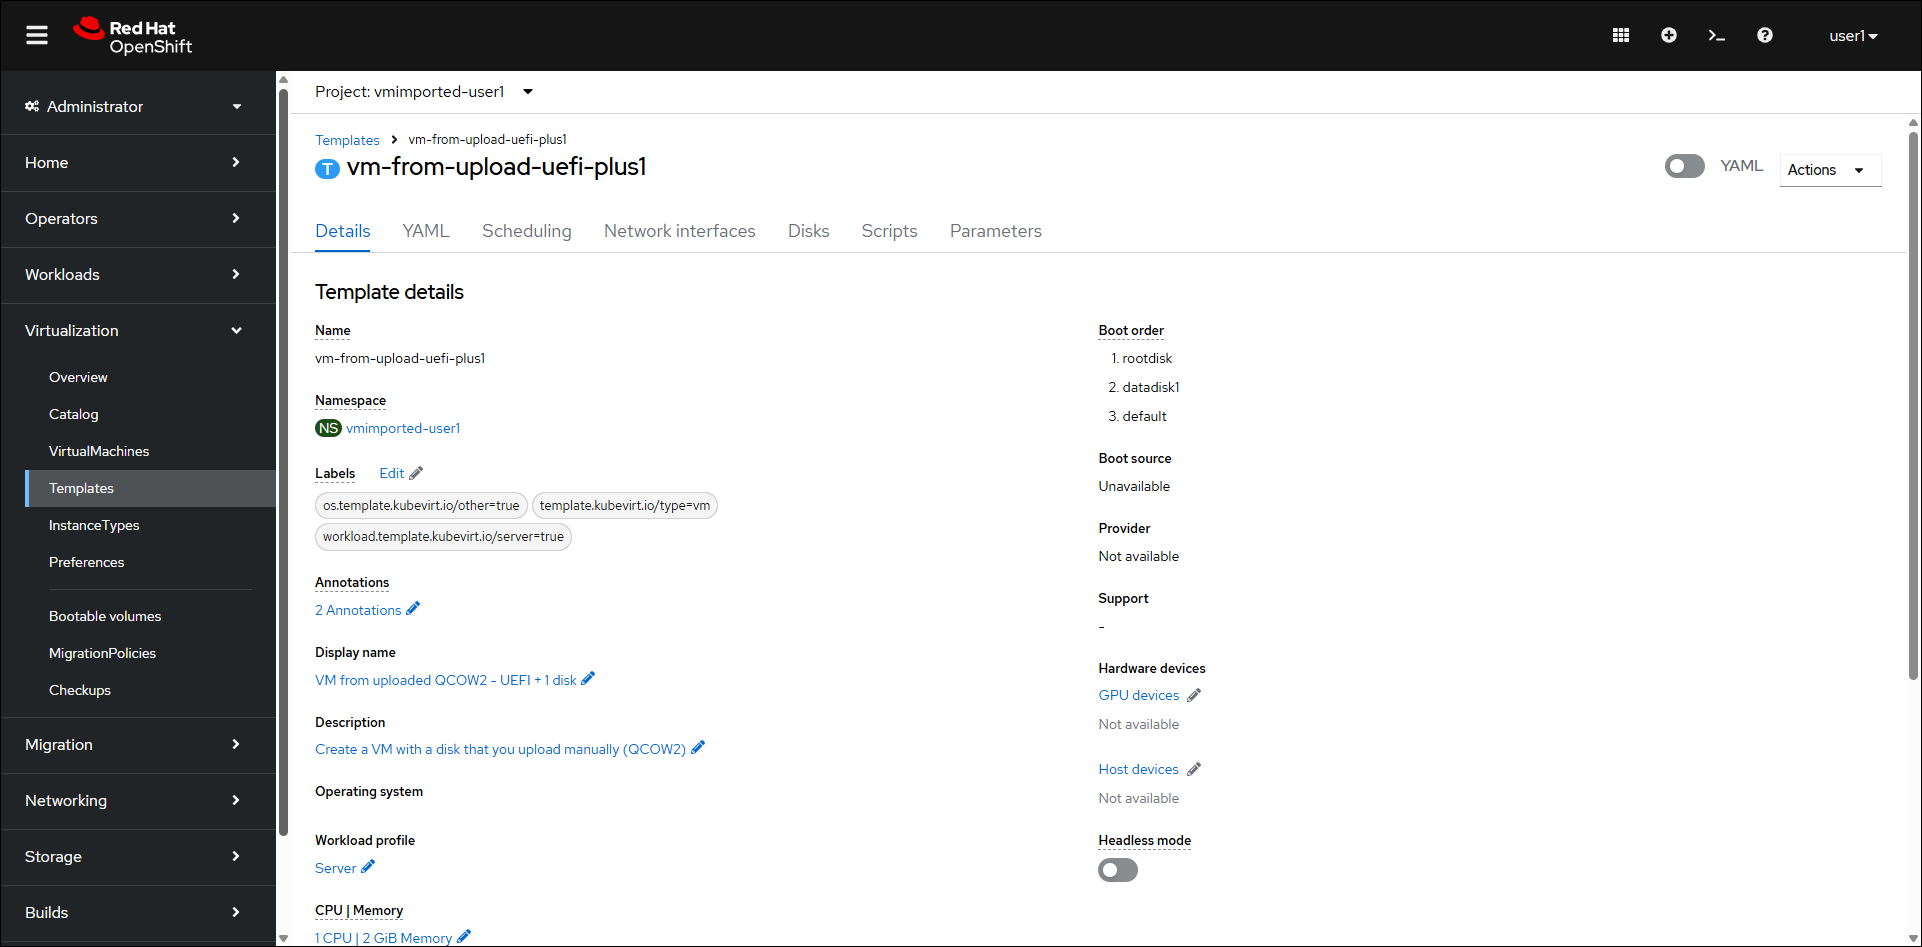
- Click the VM from uploaded QCOW2 - UEFI + 1 disk option.
The VM from uploaded QCOW2 - UEFI + 1 disk blade is displayed.

- For Disk source select Upload (Upload a new file to a PVC).

- Browse to the CTERA Edge Filer qcow2 image file,
vGateway-<version>.qcow2where version is the CTERA Edge Filer version, and select it. - Set the Disk size to
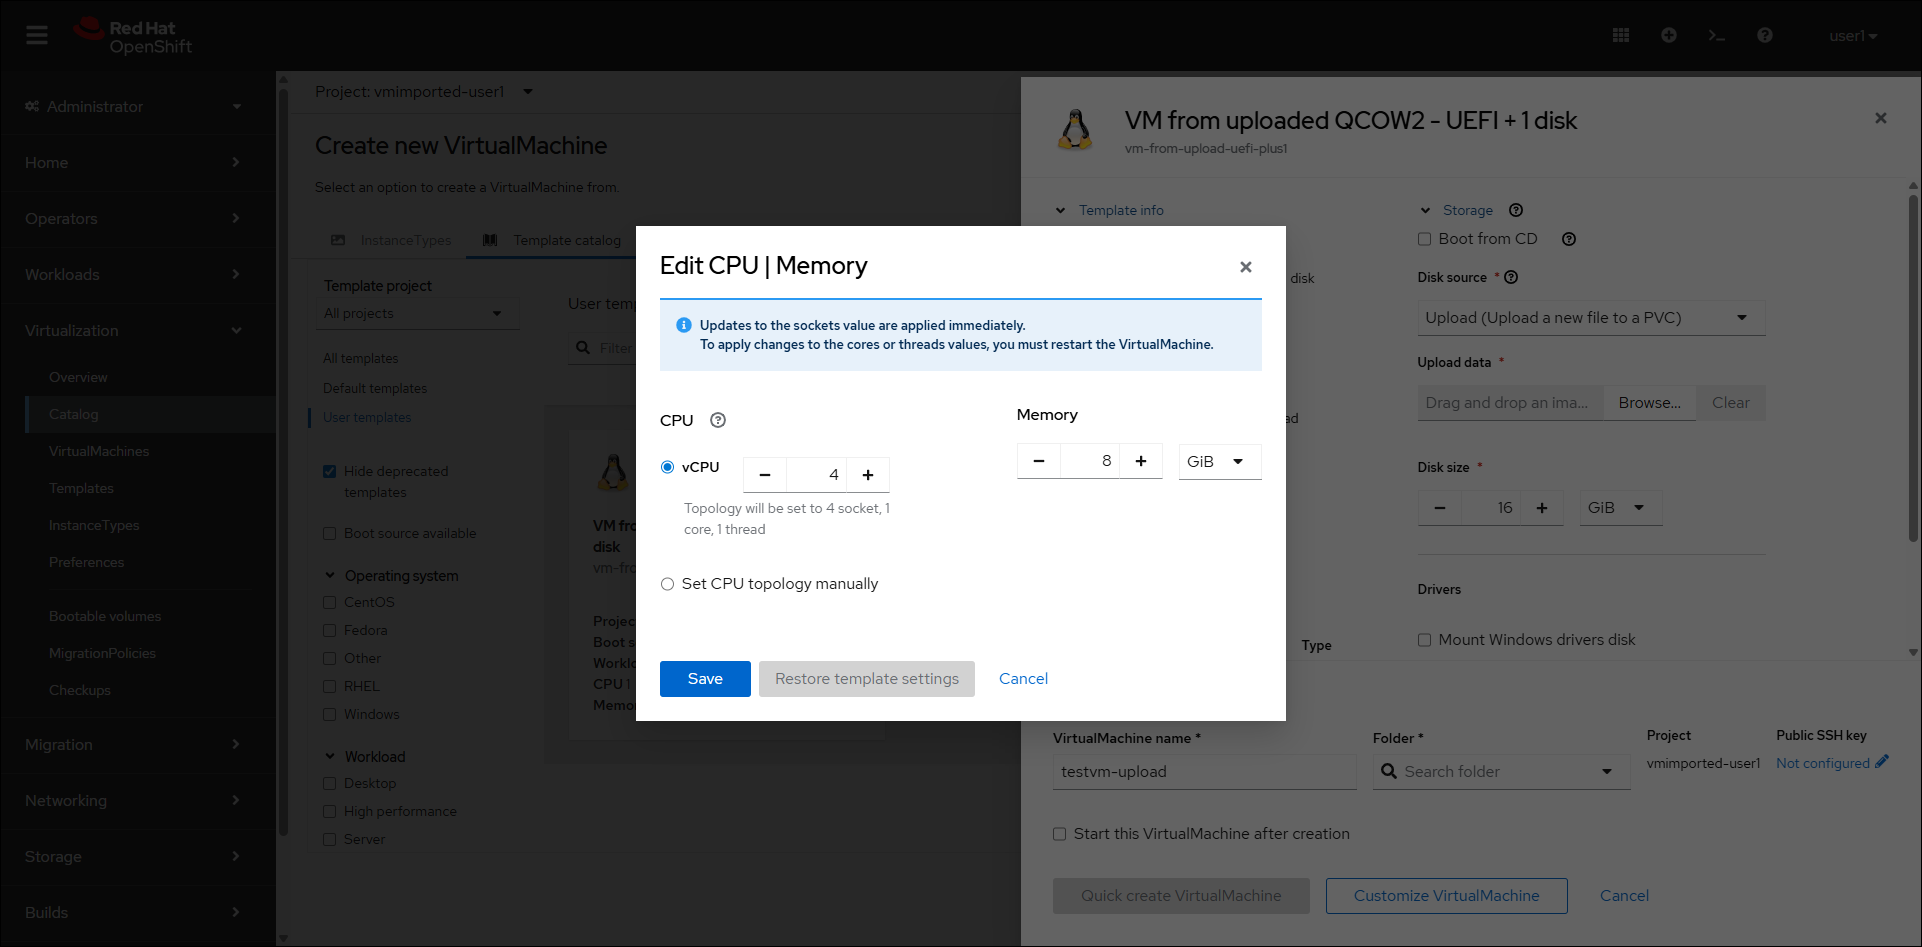
16Gib. - Click CPU | Memory and set at least 4 vCPUs and at least 8GiB memory. CTERA recommends that the number vCPUs is the license number/4 and the amount of RAM is the license number/2. For example, an edge filer with an EV32 license should start with 8 vCPUs and 16GB RAM. CTERA recommends consulting with CTERA support to assess what is required for your specific workload.
- Click Saveand then click Optional parameters in the VM from uploaded QCOW2 - UEFI + 1 disk blade.
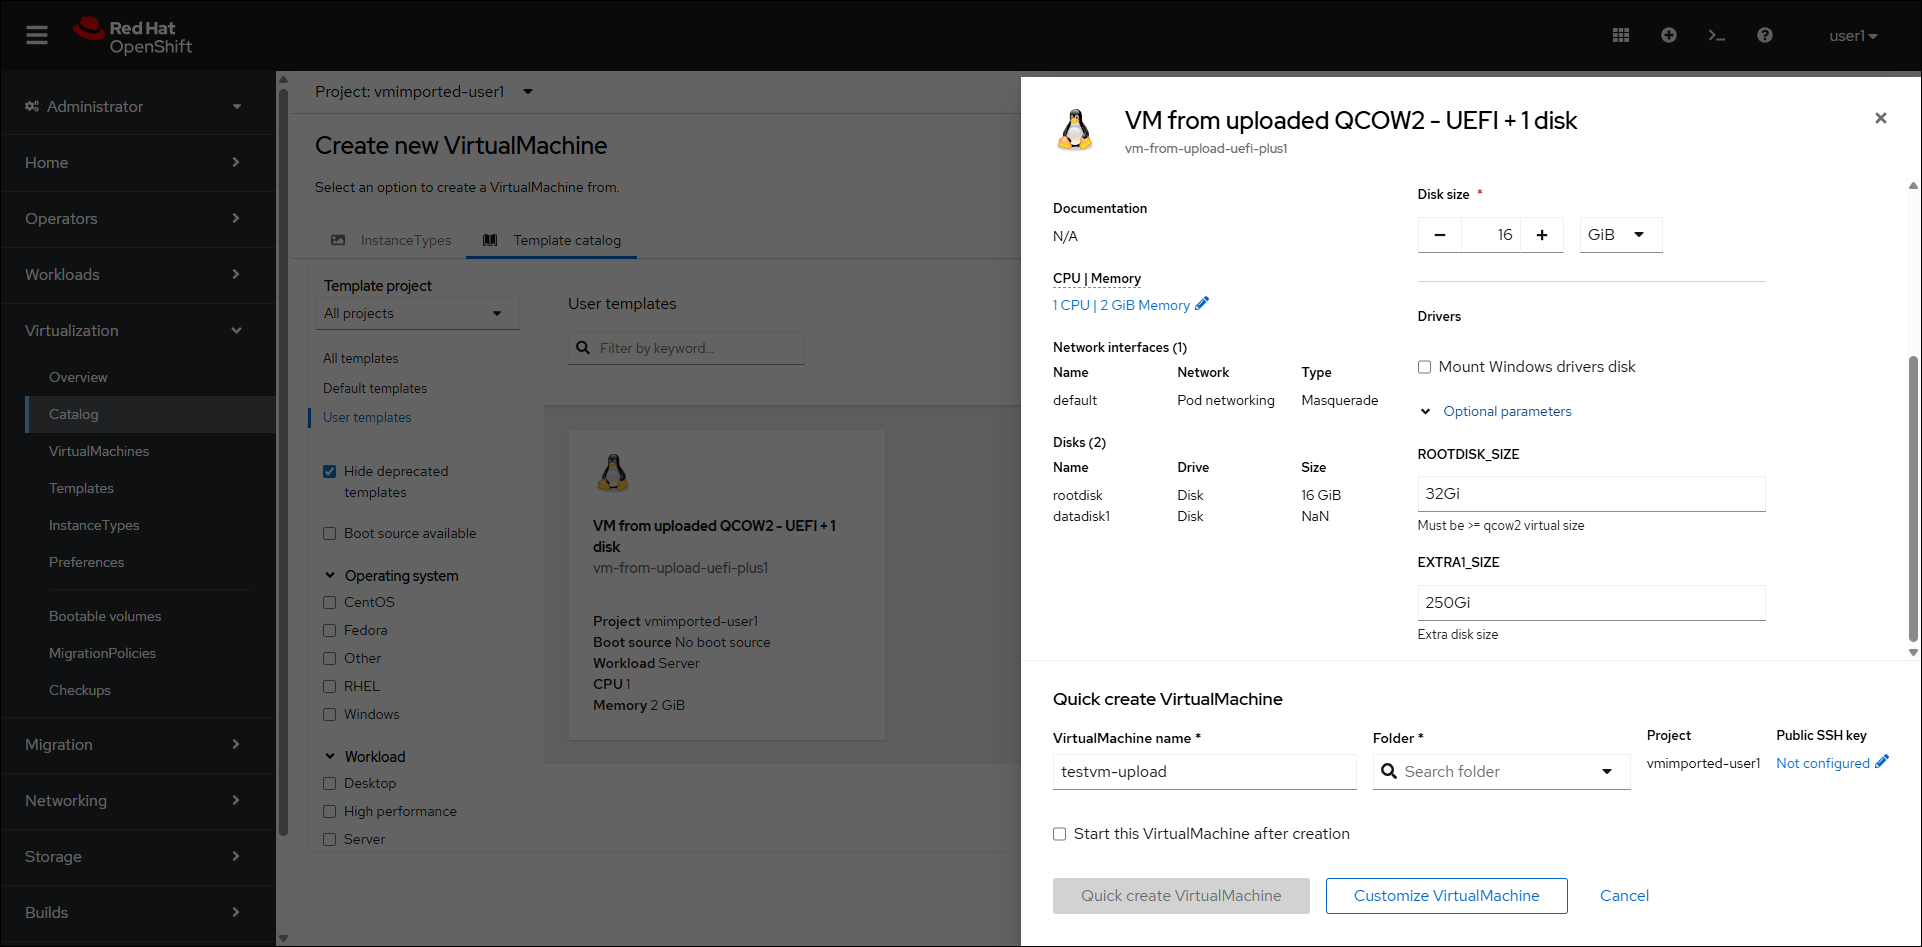
- Change the ROOTDISK_SIZE to
16Giand the value to the amount of storage you will require for the edge filer. CTERA recommends storage of at least 20% of the CTERA Portal Global Name Space. The maximum storage is dependent on the license.- For an EV16 license, the maximum is 16TB.
- For an EV32 license, the maximum is 32TB.
- For an EV64 license, the maximum is 64TB.
- For an EV128 license, the maximum is 128TB.
- For an EV256 license, the maximum is 256TB.

- Enter a name for the edge filer in the VirtualMachine name field In the VM from uploaded QCOW2 - UEFI + 1 disk blade. The name must be only lower case alphanumeric characters, '-' or '.', and must start and end with an alphanumeric character.
- Click Customize VirtualMachine.
The upload of the qcow2 image starts. - When the upload finishes, click Create VirtualMachine.
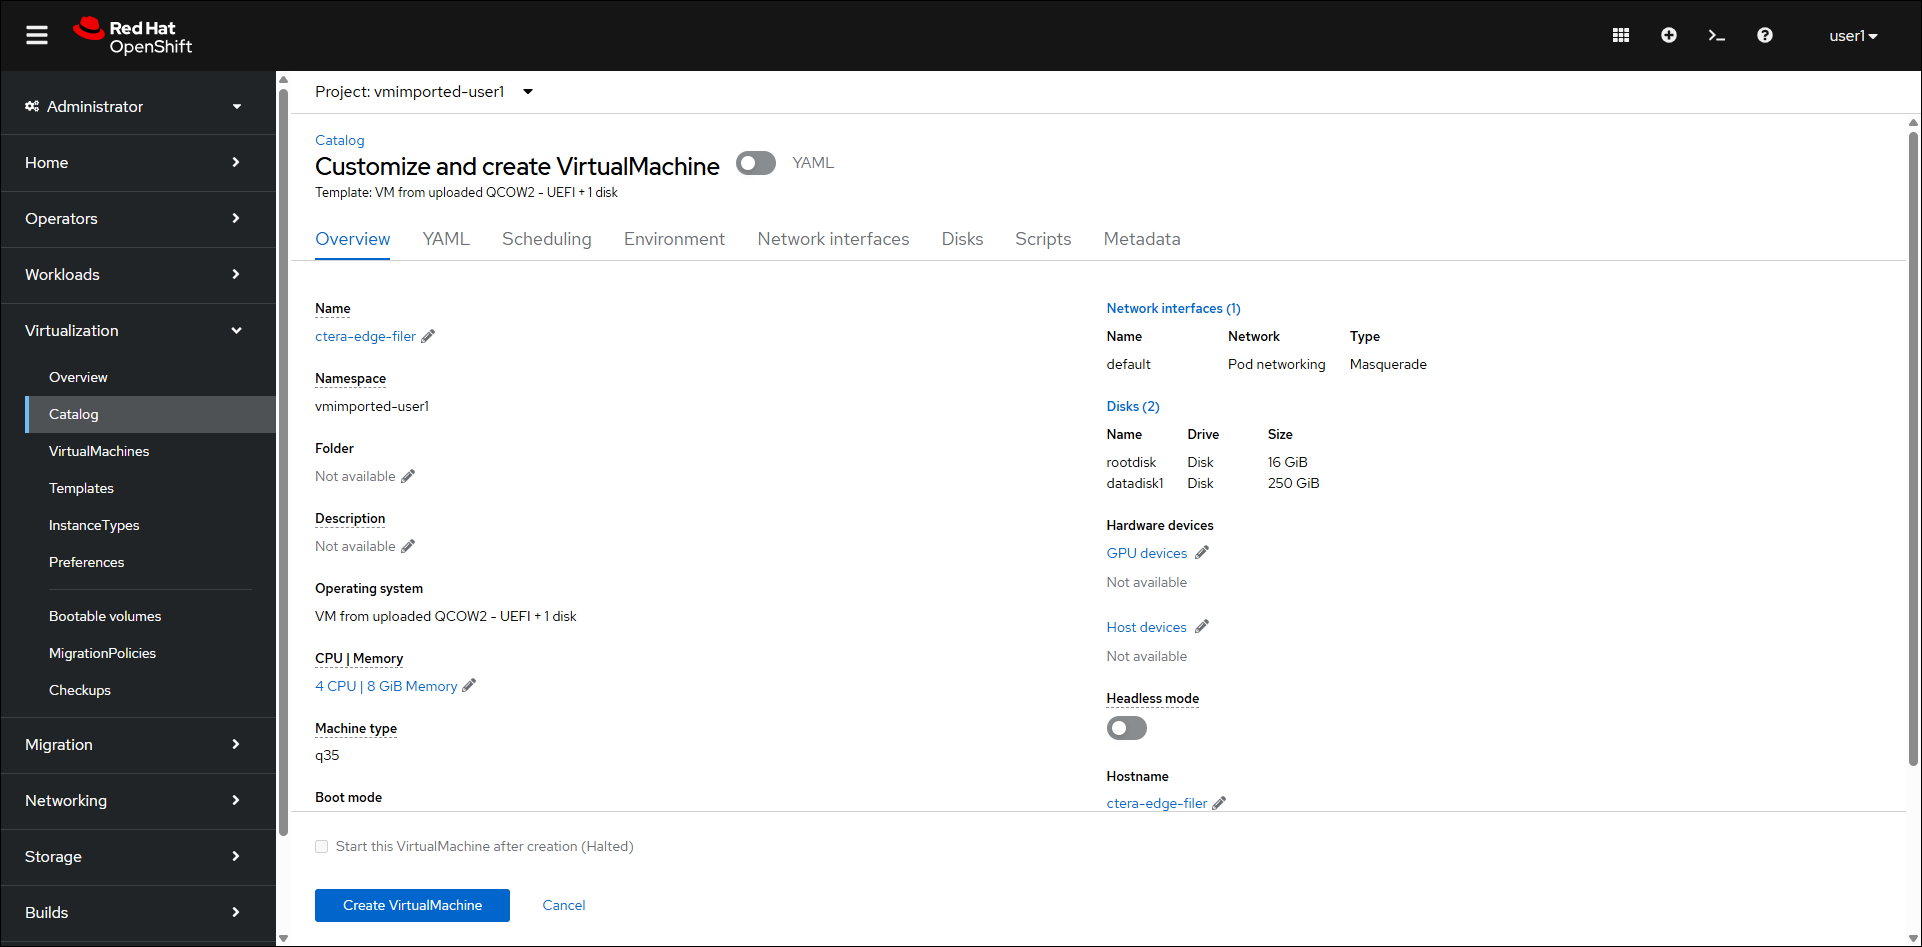
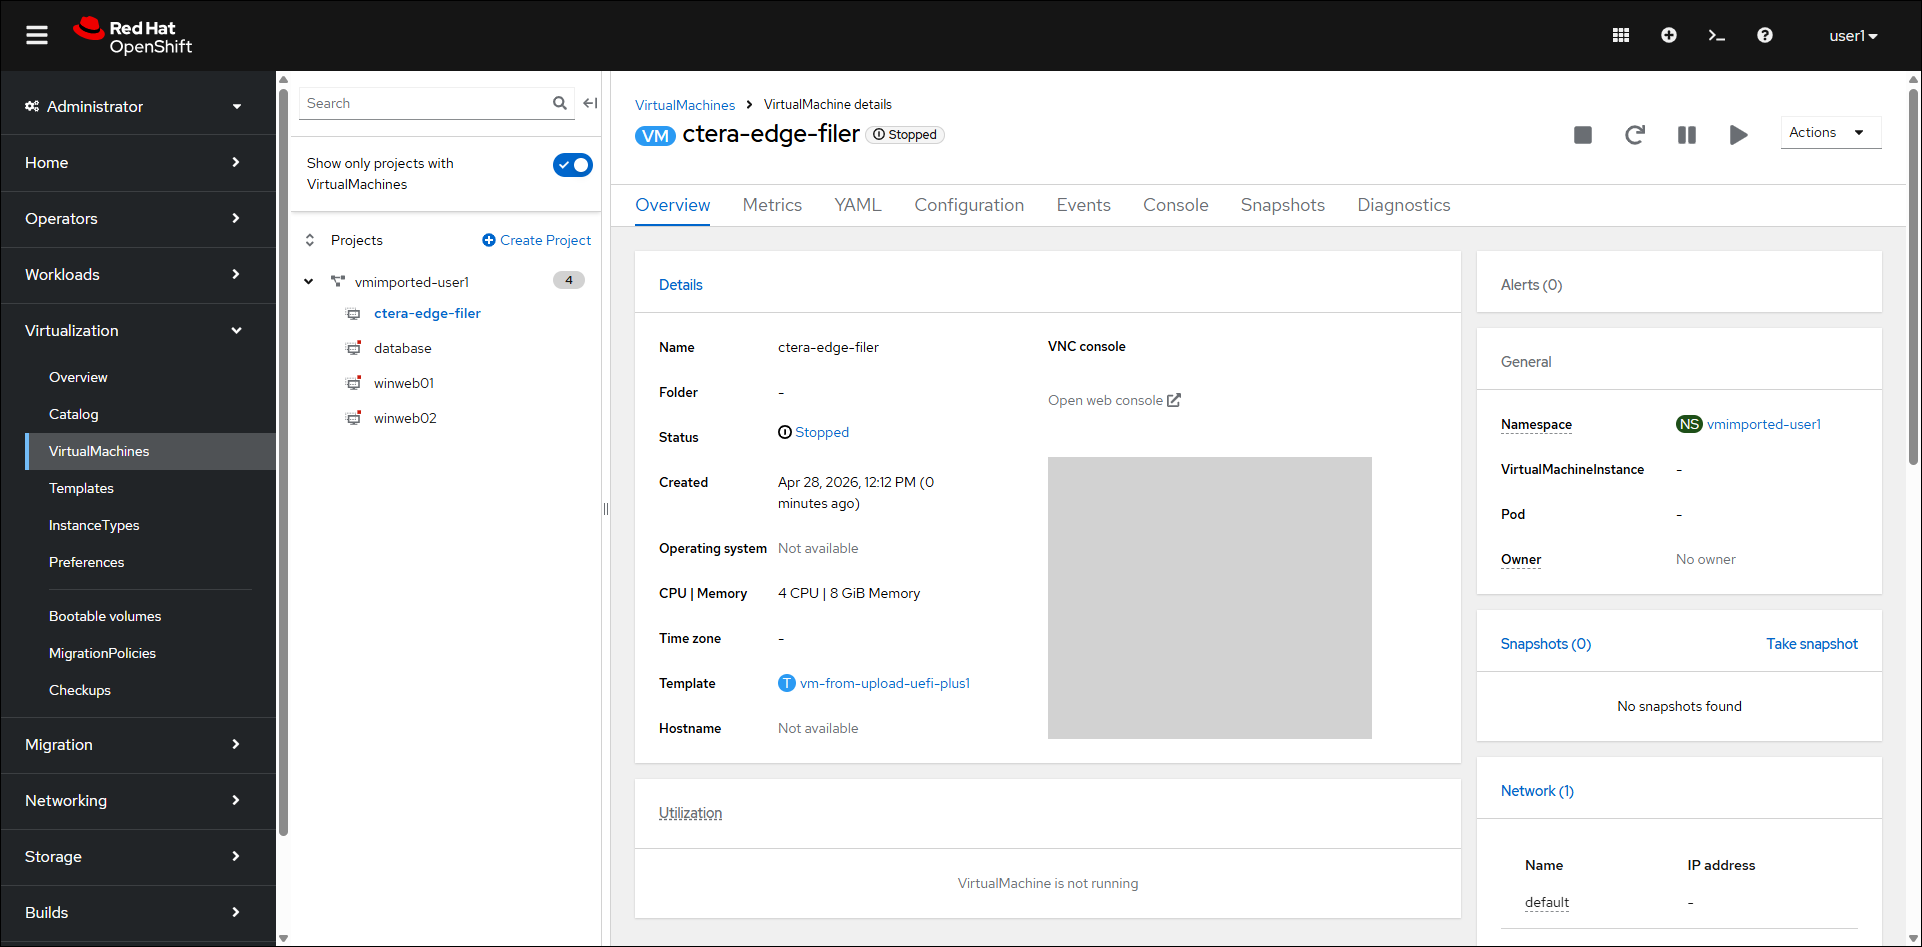
The virtual machine is created.
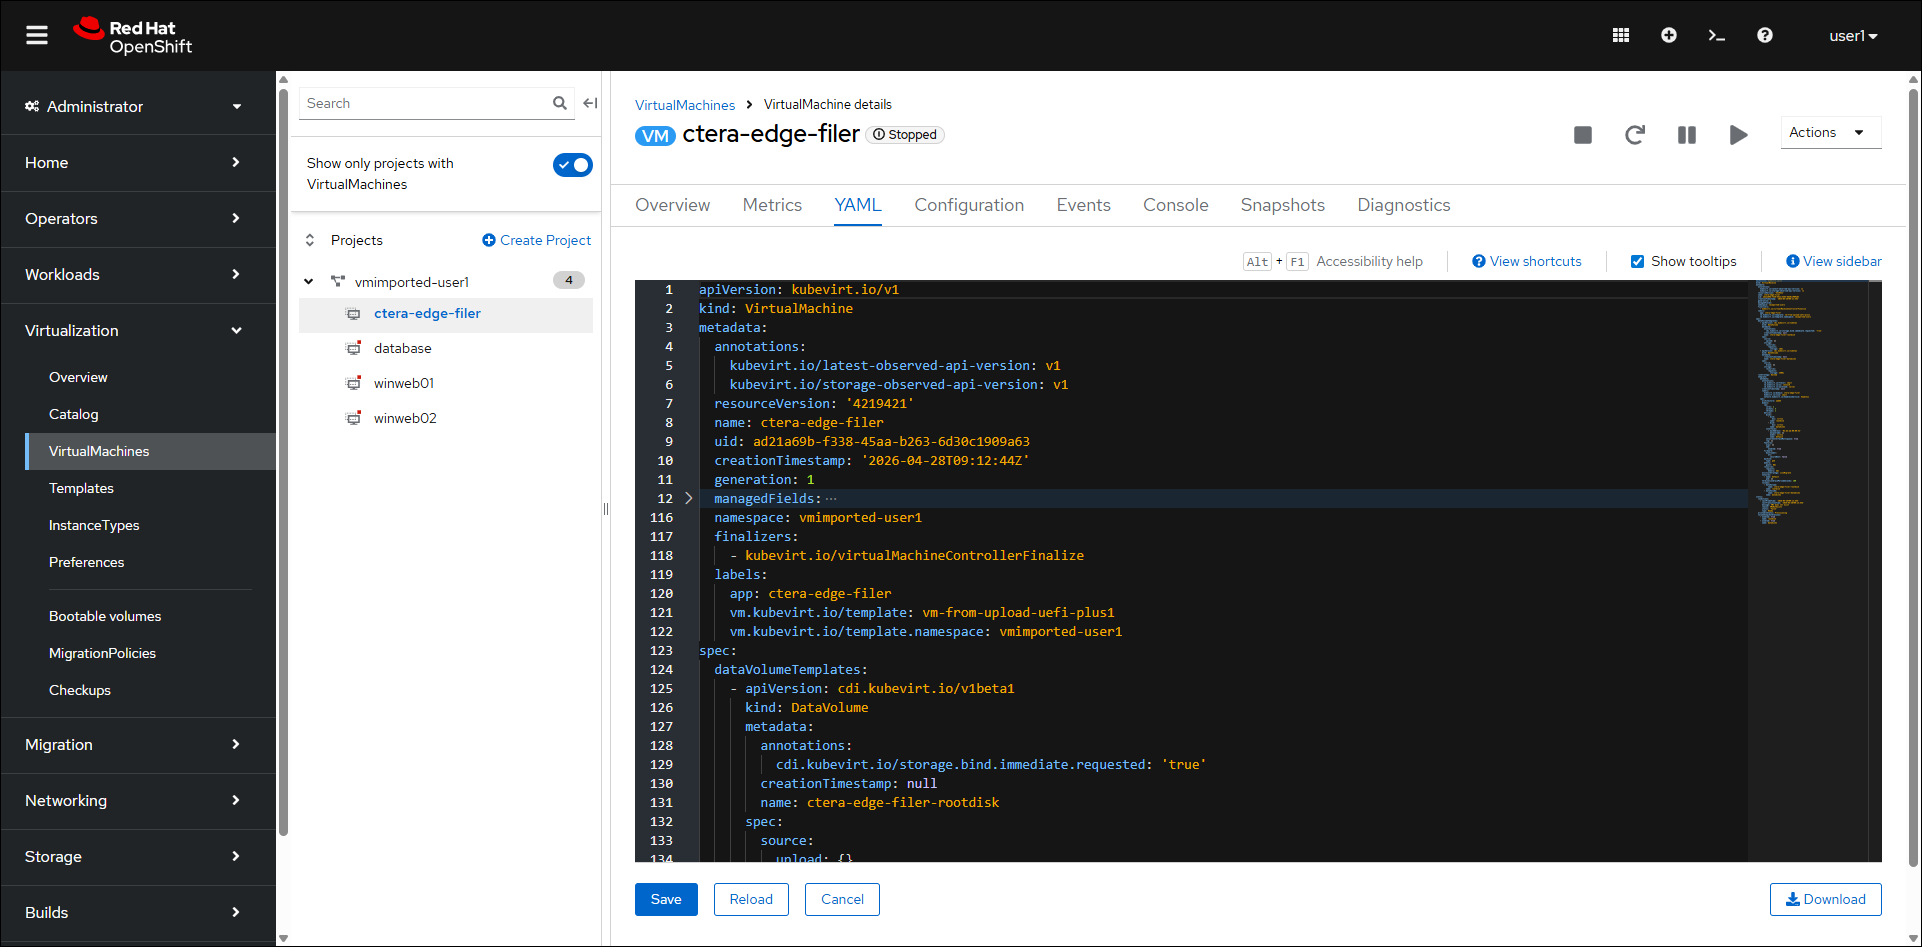
- Click the YAML tab.
- Add the following highlighted text under Interfaces.
- bridge: {}
  model: virtio
  name: ctera-vlan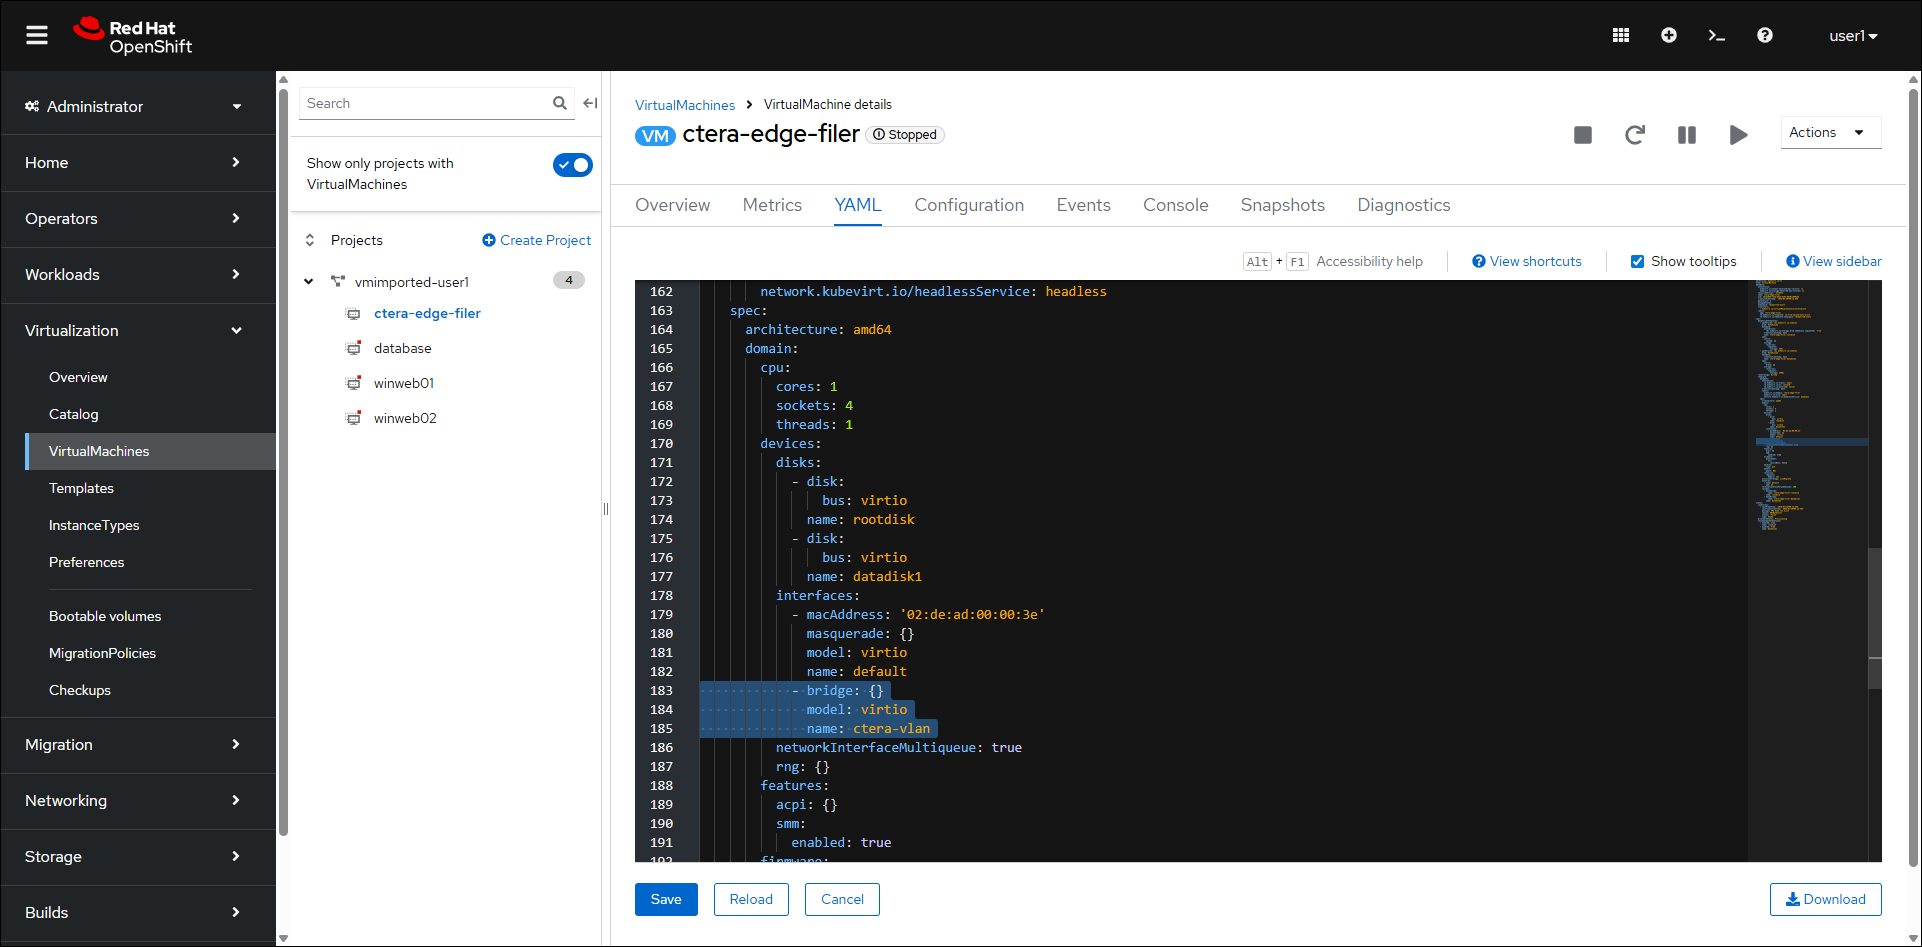
- Add the following highlighted text under networks:
- multus:
    networkName: ctera-vlan
  name: ctera-vlan
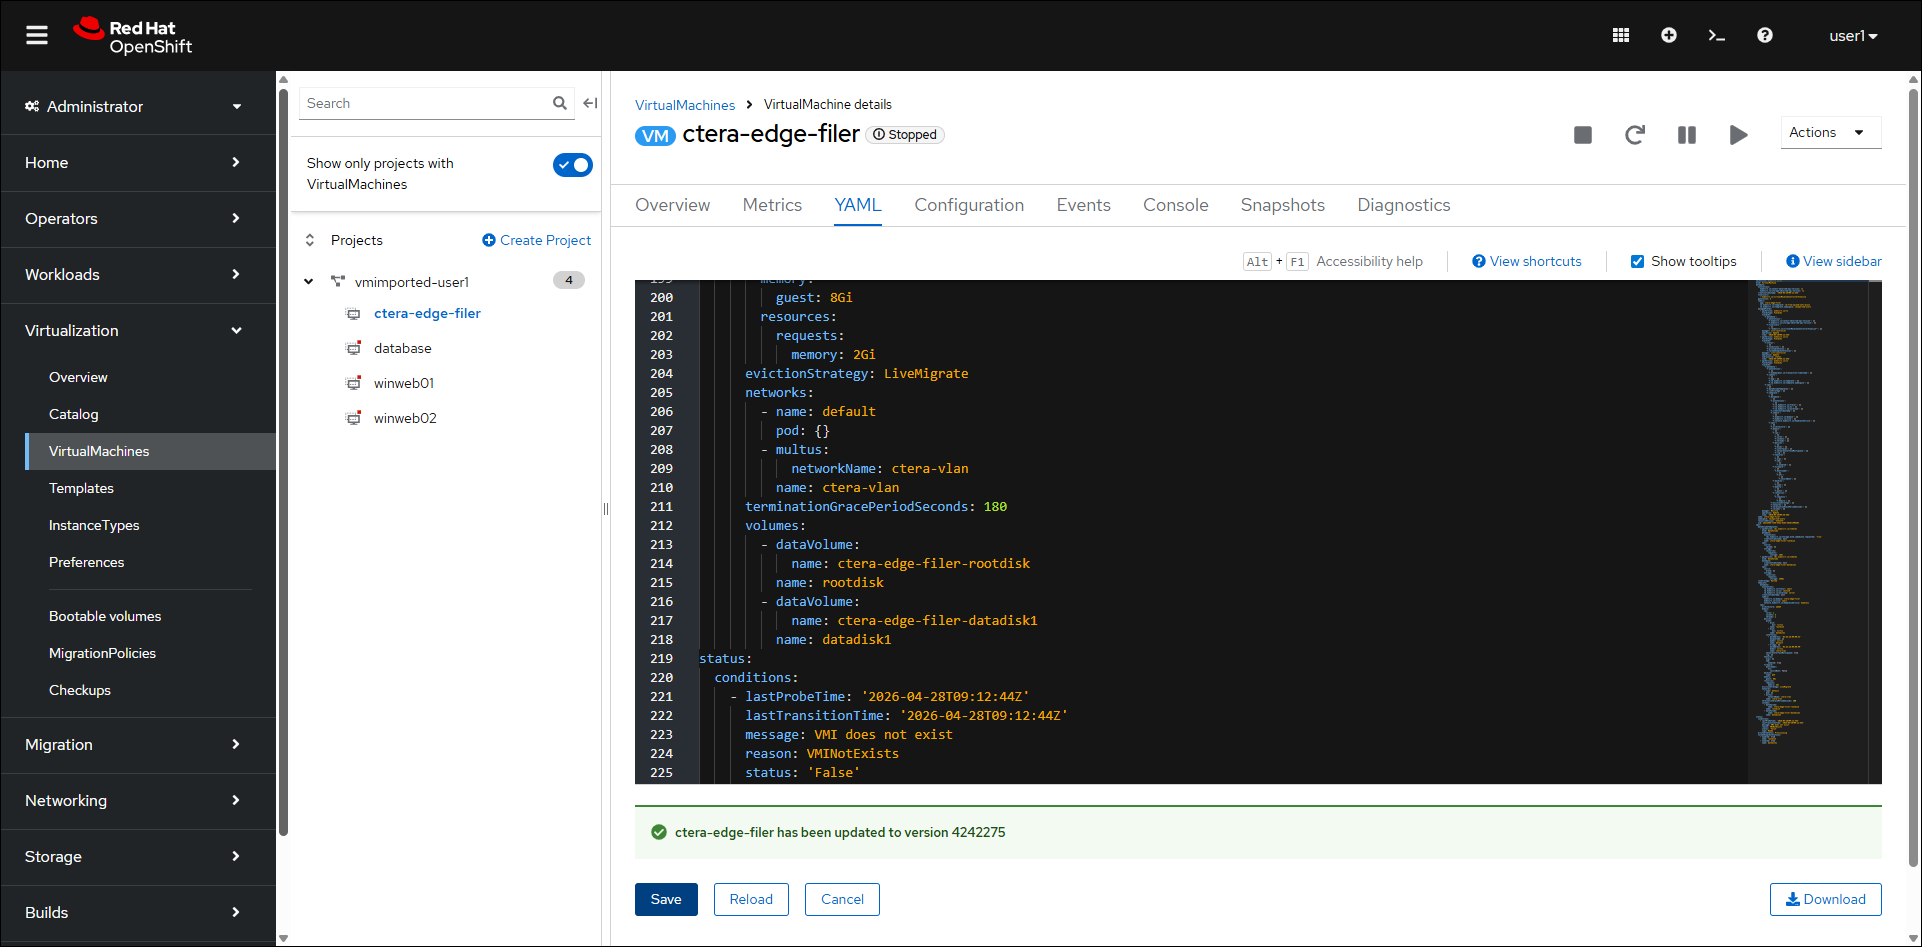
- Click Save.
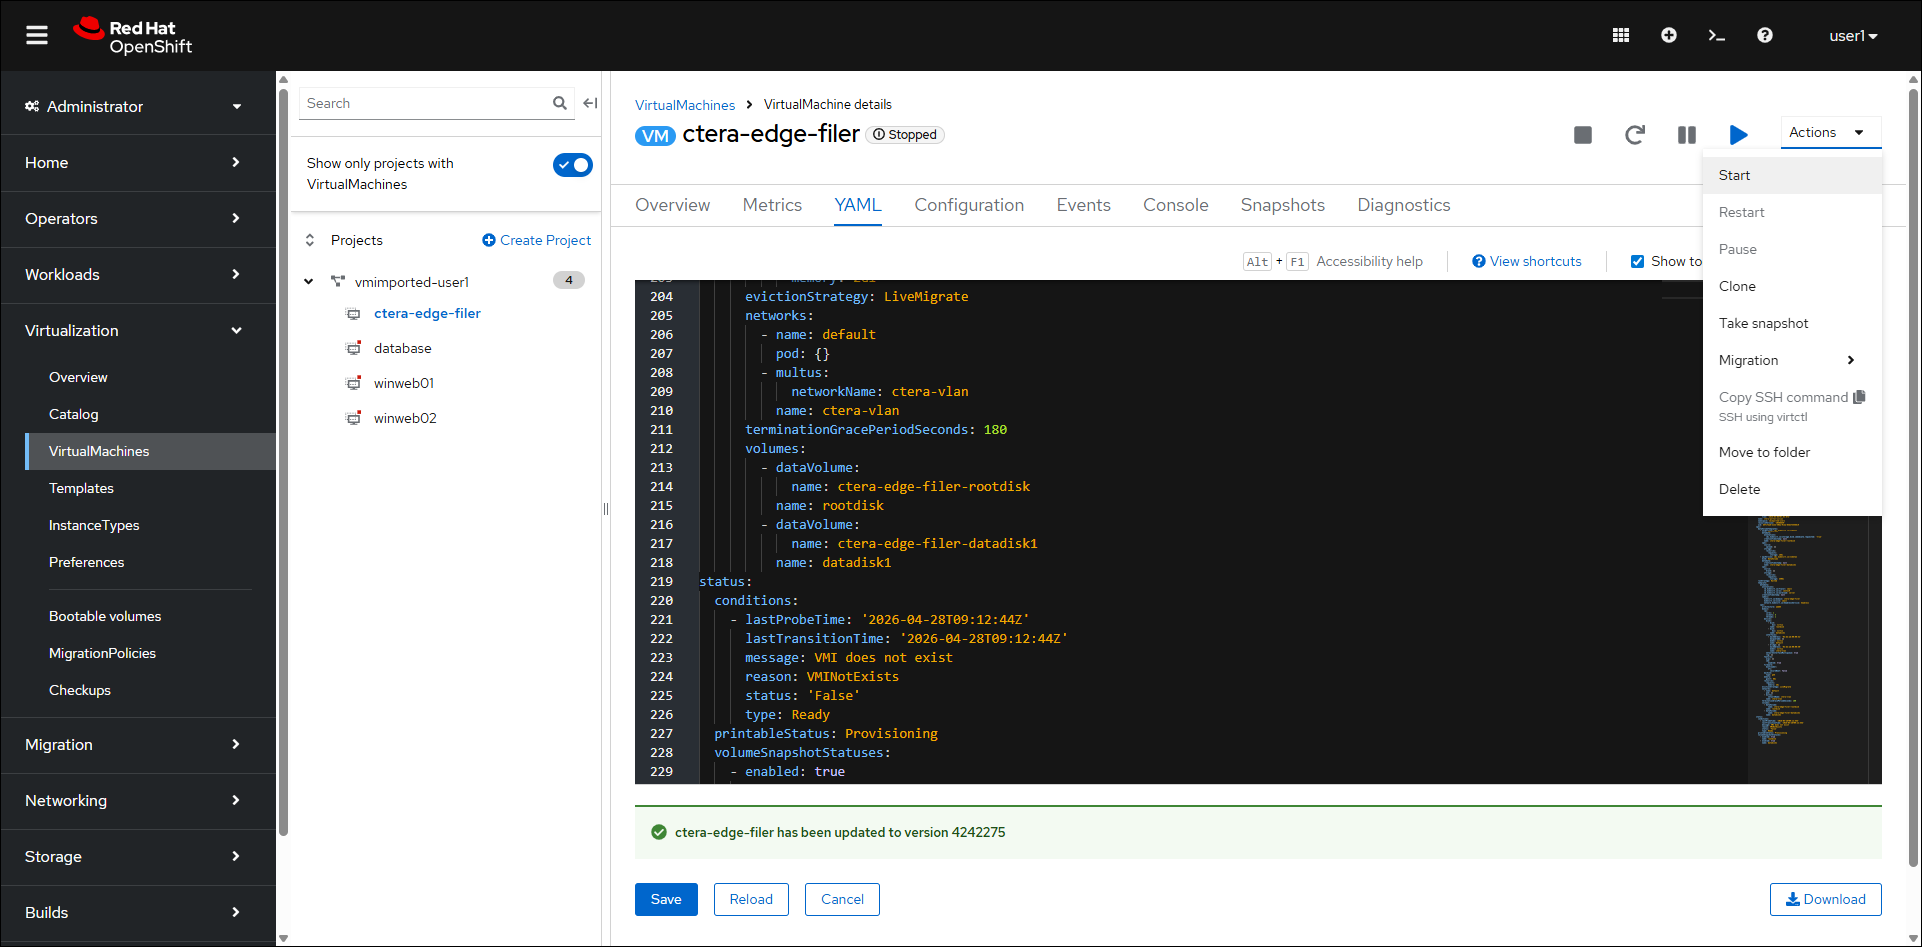
- Click Actions > Start.
 Note
NoteThe VM contains two network interfaces:
- eth0 has a fixed IP 10.0.2.2 (nat IP)
- eth1 has an IP from the network, for example 192.168.x.x. This IP is bridged to a physical interface and routable.
- Click the Console tab or click the Overview tab and then Open web console.
Note
When opening the web console from the Overview tab, the console is displayed in a new brower tab.
- If necessary, click Connect.
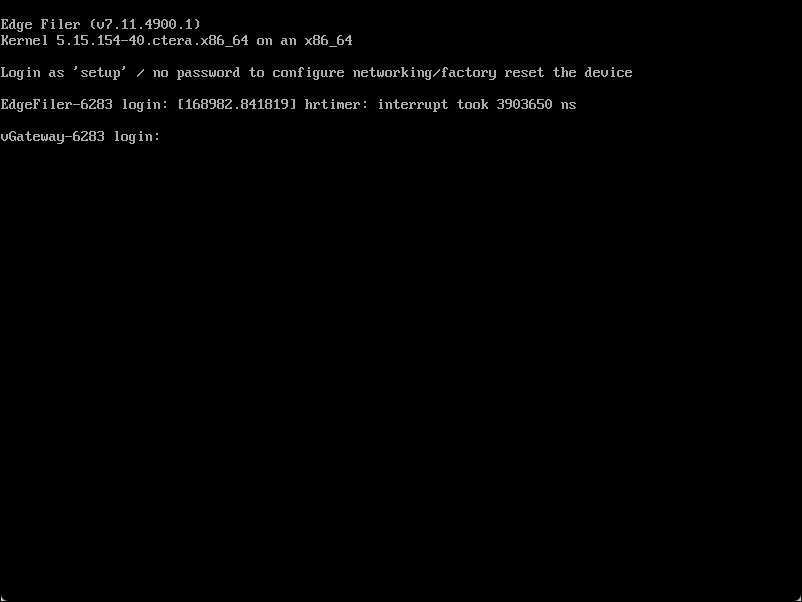
- Login in with the username
setupand no password, as instructed.
Using DHCP, after a few seconds, the IP address to access the CTERA Edge Filer is displayed in the top right of the console. You can set a static IP address, as described in Setting a Static IP Address. - Continue with First Time Setup.
Setting a Static IP Address
To set the virtual machine static IP address:
- Access the virtual machine.
The following login screen is displayed:
- Login in with the username
setupand no password, as instructed.
Using DHCP, after a few seconds, the IP address to access the CTERA Edge Filer is displayed in the top right of the console.
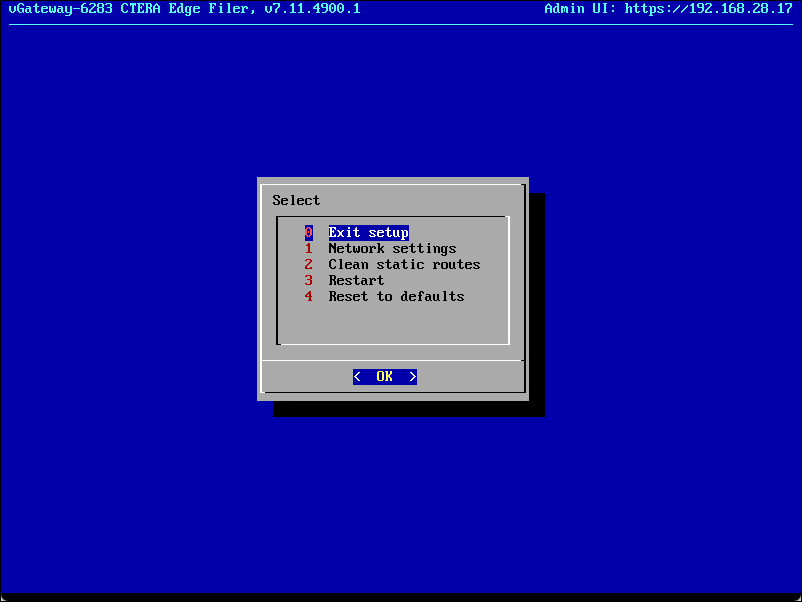
- Click in the console to transfer the keyboard control to the console and, if necessary, use the arrow keys to scroll to Network settings.
- Press Enter.
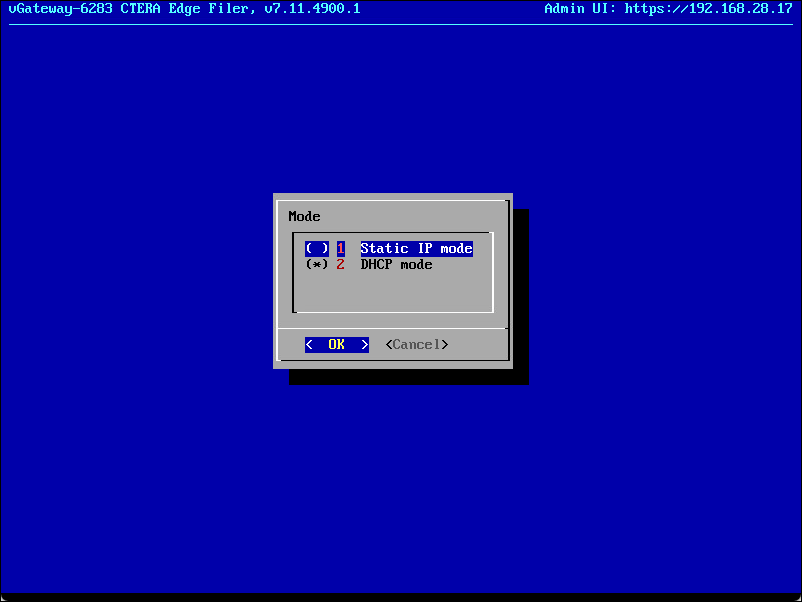
- Select Static IP mode and press OK.
- Complete the configuration for static mode by entering the static IP, netmask, default CTERA Edge Filer IP and the primary and secondary DNS server IPs.
- Press OKst Time Setup](/v1/docs/first-time-setup-4-1-1-1).