After adding the antivirus license, you add an antivirus server to the portal and then include antivirus scanning in a plan at the global level. Any portal assigned to this plan includes antivirus scanning.
For details about adding a license key, received from CTERA, that includes antivirus, refer to Adding and Removing Licenses.
To add or edit an antivirus server:
-
In the global administration view, select Services > Antivirus in the navigation pane.
The ANTIVIRUS page is displayed.
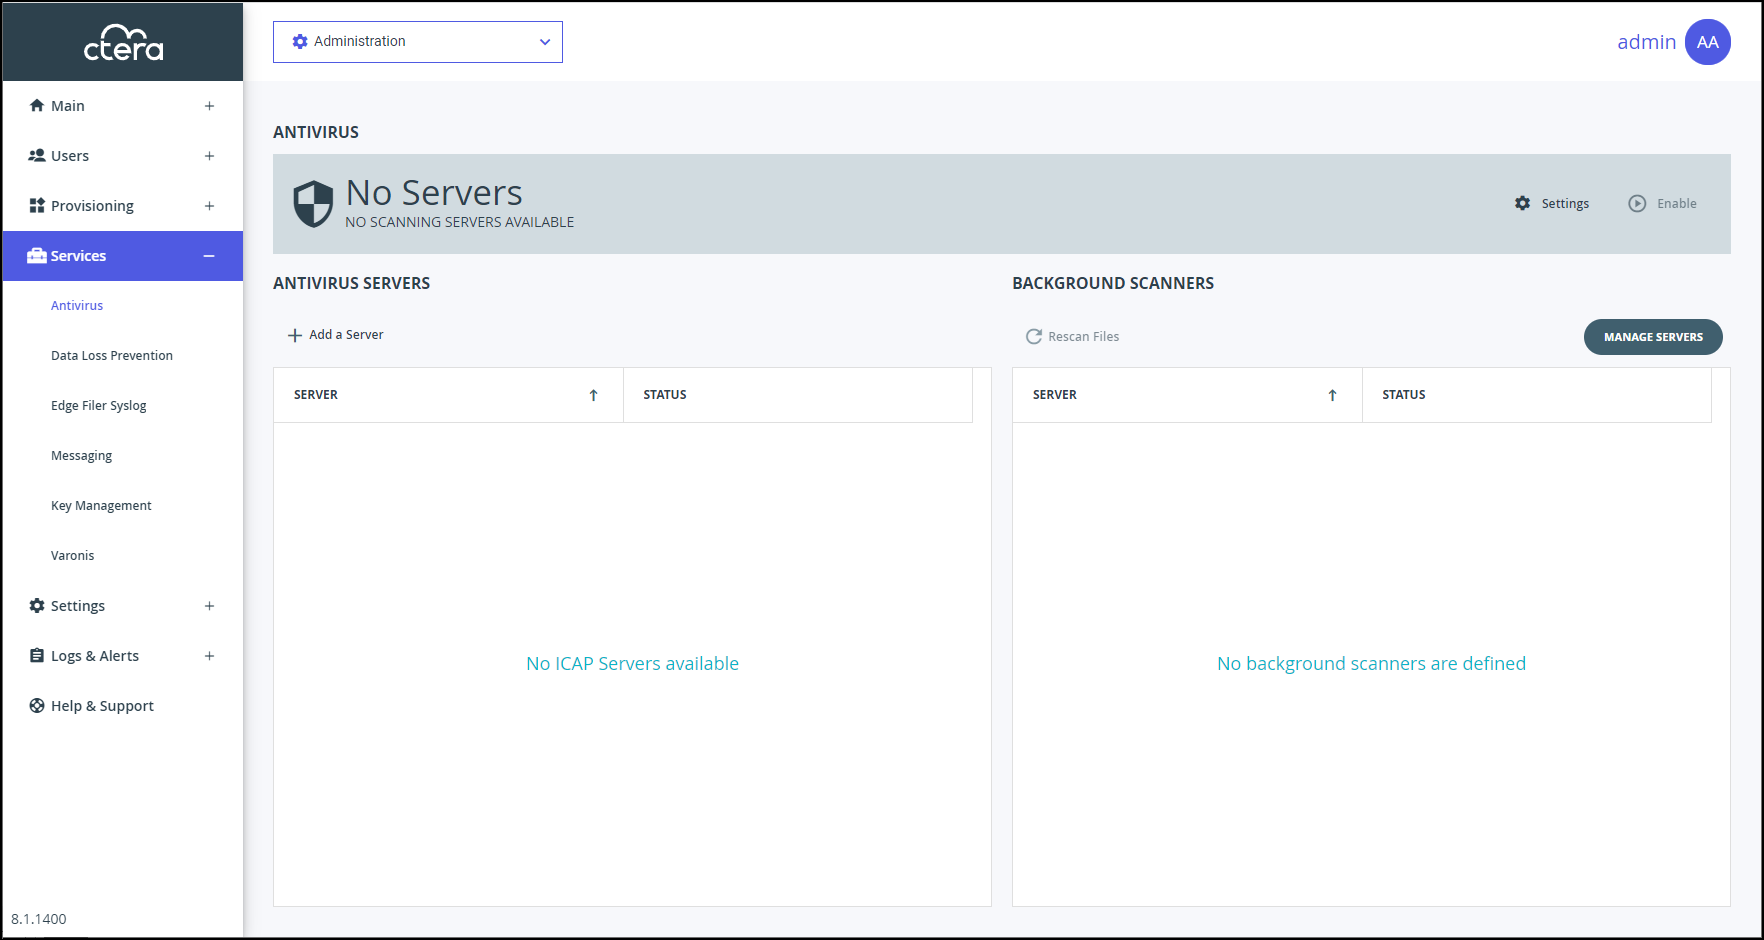
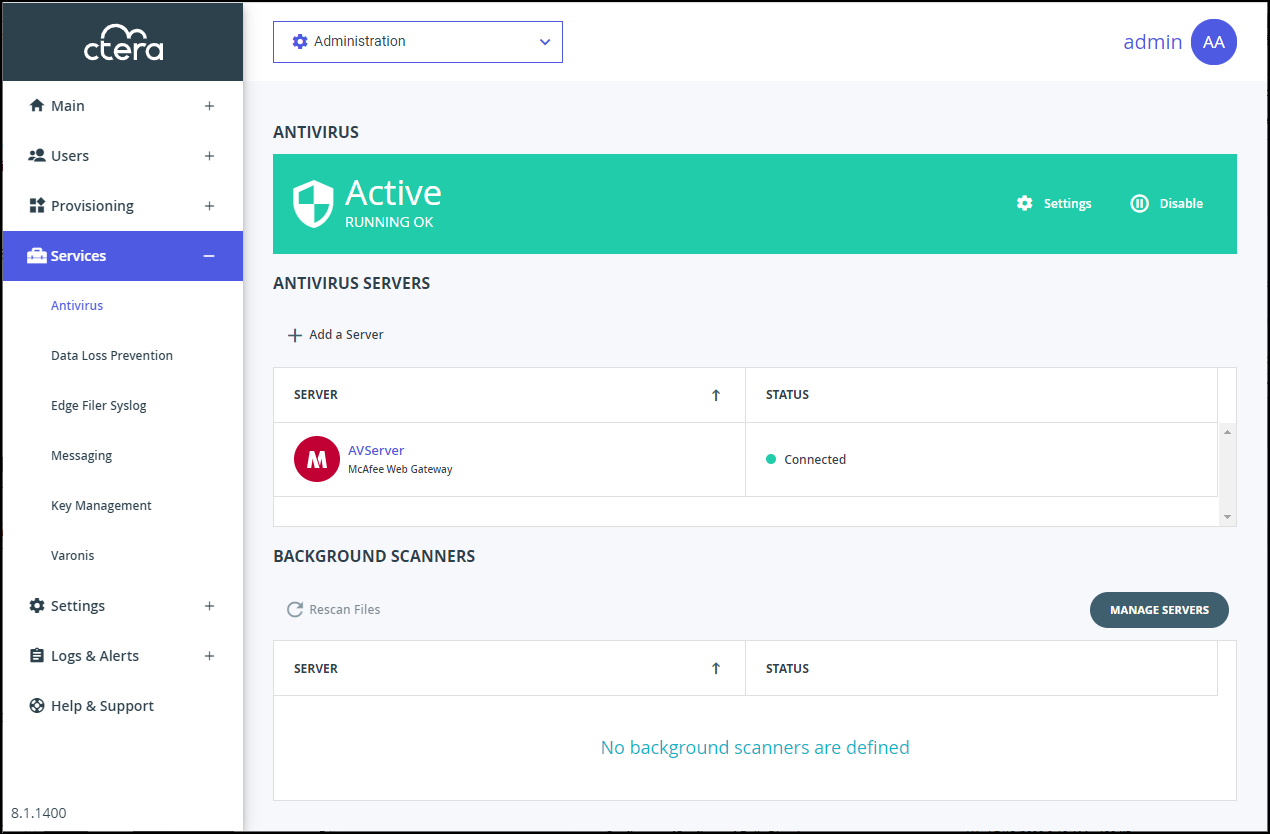
The Antivirus Status bar at the top of the page shows the current status:
Active/RUNNING OK – Antivirus is running on at least one server.
No Servers/NO SCANNING SERVERS ABVAILABLE – There are no antivirus servers defined.
Failed/NO SCANNING SERVERS ABVAILABLE – The antivirus server is not running.
Disabled/NOT RUNNING – Antivirus scanning has been suspended.
Warning/NOT LICENSED – The antivirus service is not licensed. -
To add a new server, click Add a Server.
The New Antivirus Server window is displayed.

Or,
To edit an existing antivirus server, click the server’s name.
The antivirus server window is displayed with the server as the window title. -
Specify the details:
Name – A name for the server.
Scanning server type – Select a supported antivirus server:- McAfee Web Gateway
- Symantec Protection Engine
- ESET Gateway Security
- Sophos AV
- McAfee VirusScan Enterprise for Storage
- Trend Micro InterScan – Choose this option for either Trend Micro InterScan or Trend Micro Web Security
Server URL – The URL of the server, including the ICAP port and the name of the service. The default ICAP port is 1344. The antivirus service name is configurable in the antivirus server software. Assuming the default ICAP port and default antivirus service name:
For all the scanning server types except for ESET, the URL ishttp://IP:1344/avscan
For ESET the URL ishttp://IP:1344/av_scan
Server connection timeout – The server's connection timeout, in seconds. -
Click SAVE.
The server is added.

-
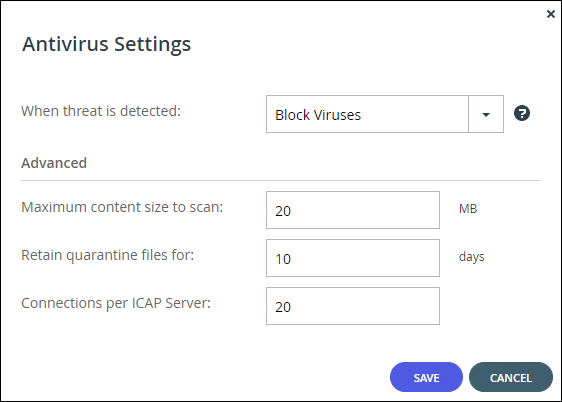
Click Settings in the Antivirus status bar to configure the antivirus settings.
-
Specify the settings:
When threat is detected – Either block files that contain a threat from being downloaded and move them to quarantine or copy the files to quarantine and email about a possible threat.
Maximum content size to scan – The maximum size of files that will be scanned. Make sure that this value is less than the maximum specified by the vendor. For example, for McAfee VirusScan Enterprise for Storage, the maximum file size is 128MB.
Retain quarantine file for – The amount of time that quarantined files are saved in quarantine before being deleted.
Connections per ICAP Server – The number of connections to the ICAP server. Make sure that this value is less than the maximum specified by the vendor. For example, for McAfee VirusScan Enterprise for Storage, the default is 100. -
Click SAVE.
-
Click Enable to start the service.
The ANTIVIRUS page is redisplayed showing that the service is Active.
To set up antivirus scanning in a plan:
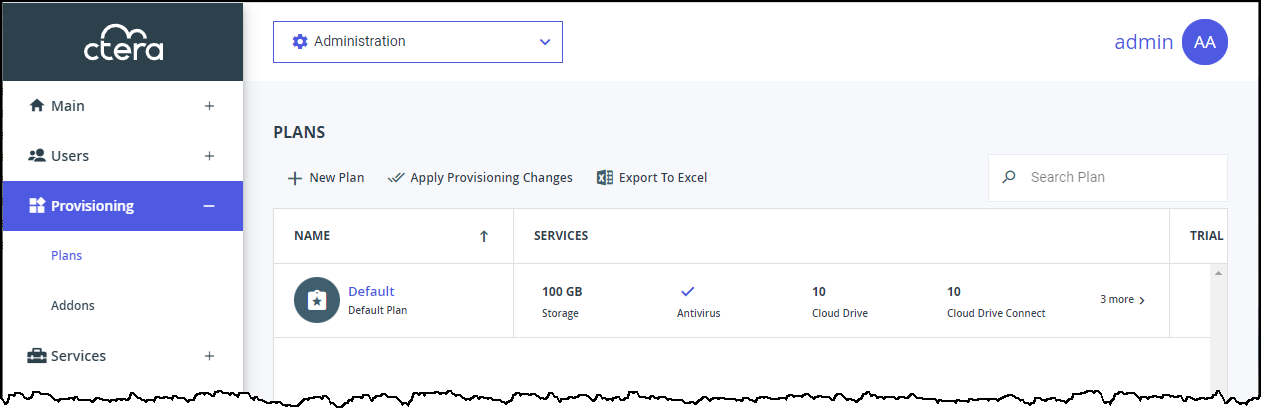
- In the global administration view, select Provisioning > Plans in the navigation pane.
The PLANS page is displayed.
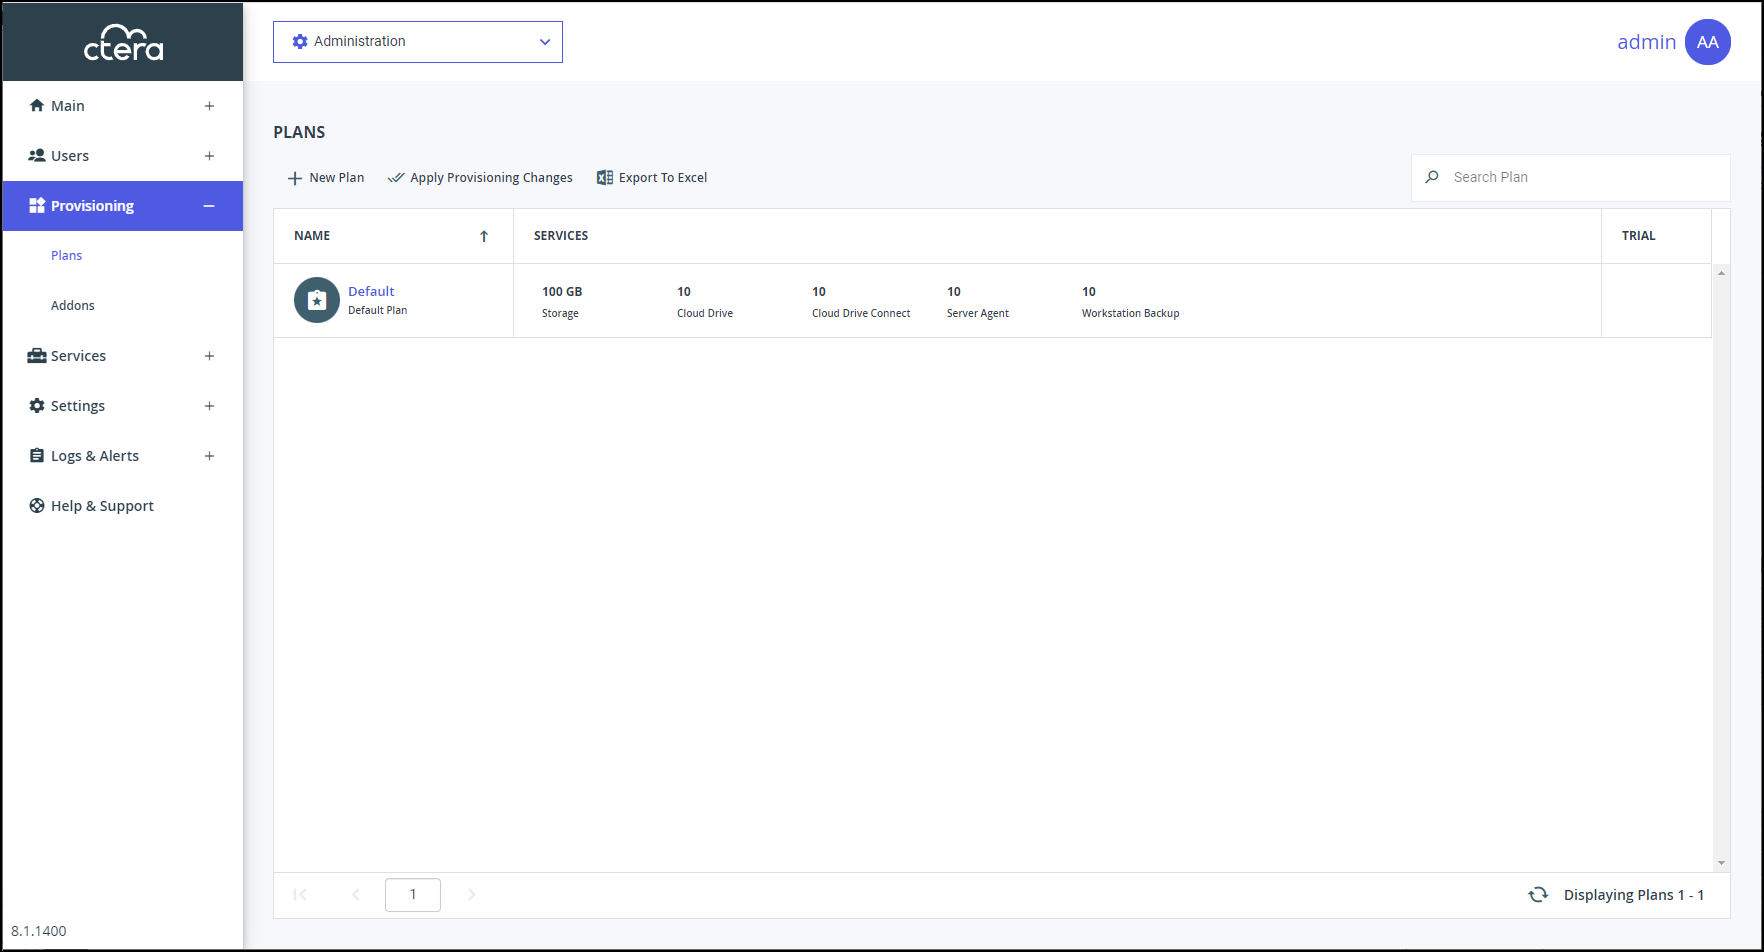
- Click the plan to activate antivirus scanning or click New Plan to add a plan.
The plan wizard opens, displaying the Services window.
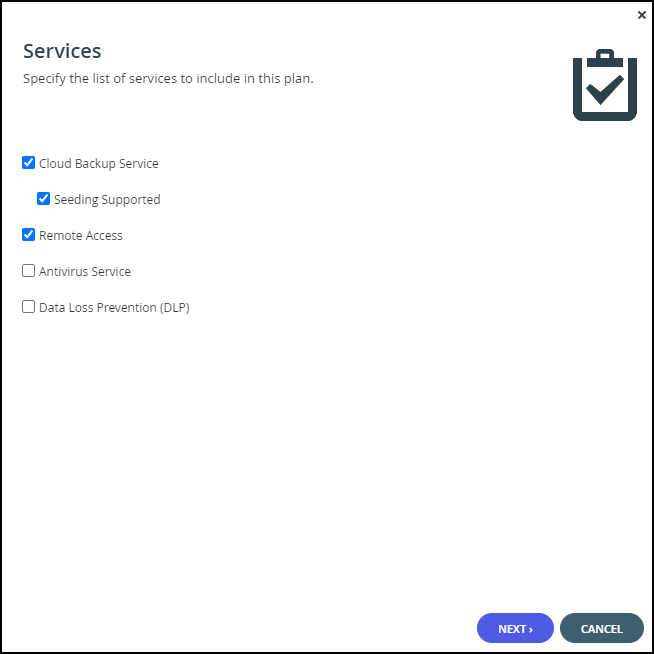
- Check Antivirus Service to activate the antivirus feature and continue with the wizard to completion.
When antivirus is activated, files are scanned for malware automatically and transparently, before they are downloaded for the first time.