Installation Prerequisites
- A new application added to the Microsoft Entra application gallery. For details, see Setting Up Content Services SSO.
Note
The access control set up for CTERA Content Services in Azure Entra ID should also be used for the CTERA Portal, so that the identities are aligned.
When Content Services is installed in an ESXi Environment:
- The latest ESXi CTERA Portal OVA file from CTERA Support.
When Content Services is not installed on ESXi:
- The CTERA Content Services deployment zip file, ctera-ai-deploy.zip, from CTERA Support.
- The latest release package, ctera-ai-release-
.zip, from CTERA Support, for example, ctera-ai-release-1.18.0.zip.
The CTERA Content Services components can be deployed on a single VM. The Ingestor can also be installed on a separate VM and the Collector and Embedder can then be installed on another VM, resulting in two VMs.
When two VMs are deployed, repeat the installation procedure on each VM.
Installation in an ESXi Environment
CTERA Content Services can be installed in a VMware vSphere environment, with the following:
- VMware ESXi 7.x or later.
- Access to the CTERA Content Services ova image file from the vSphere Host Client or Client console.
- CTERA Content Services can be managed in VMware vCenter and in VMware vCloud Director.
The latest CTERA Content Services ova file is available from CTERA support.
CTERA Content Services installation must be done using the ova file and not by cloning an existing CTERA Content Services installation.
The following procedure uses the vSphere Client.
To install the CTERA Content Services using the vSphere Client:
- In the vSphere Client console click File > Deploy OVF Template.
- The Deploy OVF Template wizard is displayed.
- Browse to the CTERA Content Services OVA file and choose it.
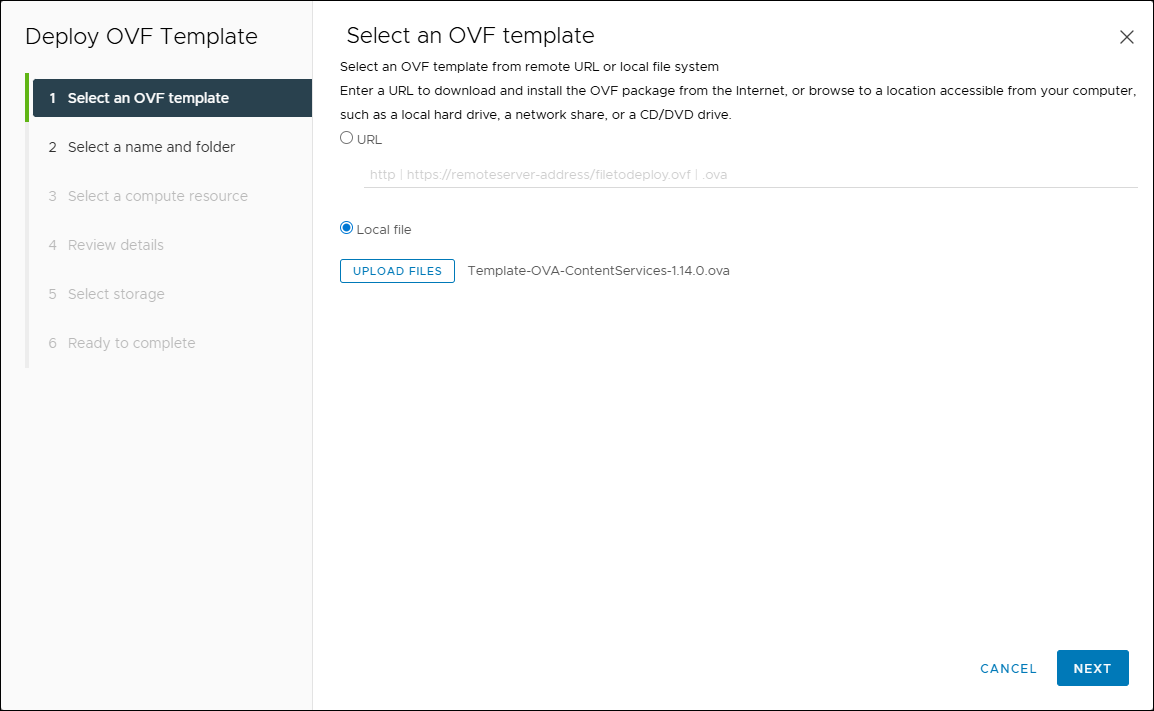
- Click NEXT.
- Continue through the wizard specifying the following information, as required for your configuration:
- A Virtual machine name to identify CTERA Content Services in vCenter.
- The location for CTERA Content Services: either a datacenter or a folder in a datacenter.
- The compute resource host or cluster to run CTERA Content Services.
- The virtual disk format for the CTERA Content Services software and the storage to use for this software. Refer to VMware documentation for a full explanation of the disk provisioning formats. Select either Thick Provision Lazy Zeroed or Thick Provision Eager Zeroed according to your preference.
Thick Provision Lazy Zeroed – Creates a virtual disk in a default thick format. Space required for the virtual disk is allocated when the virtual disk is created. Data remaining on the device is not erased during creation but is zeroed out on demand at a later time on first write from the virtual machine. Using the default flat virtual disk format does not zero out or eliminate the possibility of recovering deleted files or restoring old data that might be present on this allocated space.
Thick Provision Eager Zeroed – Creates a virtual disk that supports clustering features such as Fault Tolerance. Space required for the virtual disk is allocated at creation time. In contrast to the flat format, the data remaining on the device is zeroed out when the virtual disk is created. It might take much longer to create disks in this format than to create lazy zeroed disks. - The destination network that CTERA Content Services will use.
- Review the configuration details and click FINISH.
- Log in to the VM as
ctera, using SSH or through the console.
The default password isctera321 - Go to the ctera-ai-deploy-main directory using the command
cd /data/ctera-ai-deploy-main - Edit the env.service_name file using a text editor like vi or nano.
- Edit the following line:
DOMAIN_NAME=<base_URL>
- Edit the following line:
- Change the directory to the
/utilsdirectory using the commandcd /data/ctera-ai-deploy-main/utils - Run the script
sudo ./setup-deployment.sh --domain <base_URL>NoteRunning this script takes several minutes.
- Navigate to the
data/ctera-ai-deploy-main/secretsdirectory and open the .secrets.openid file. - Add the following secrets to the file and save the file:
OPENID_ISSUER OPENID_CLIENT_ID OPENID_CLIENT_SECRET OPENID_ADMIN_ROLE_ID OPENID_USER_ROLE_ID - Navigate to the project root:
cd /data/ctera-ai-deploy-main/ctera-ai-nnwhere nn is the CTERA Content Services version, for example ctera-ai-1.14.0. - Run the following command:
docker compose up -dand check that all the dockers are running. - Check that Dozzle, the web-based interface to monitor docker logs, is running and that all the services in the left column are marked green.
- Use the following URL to check:
http://<ip>:8080
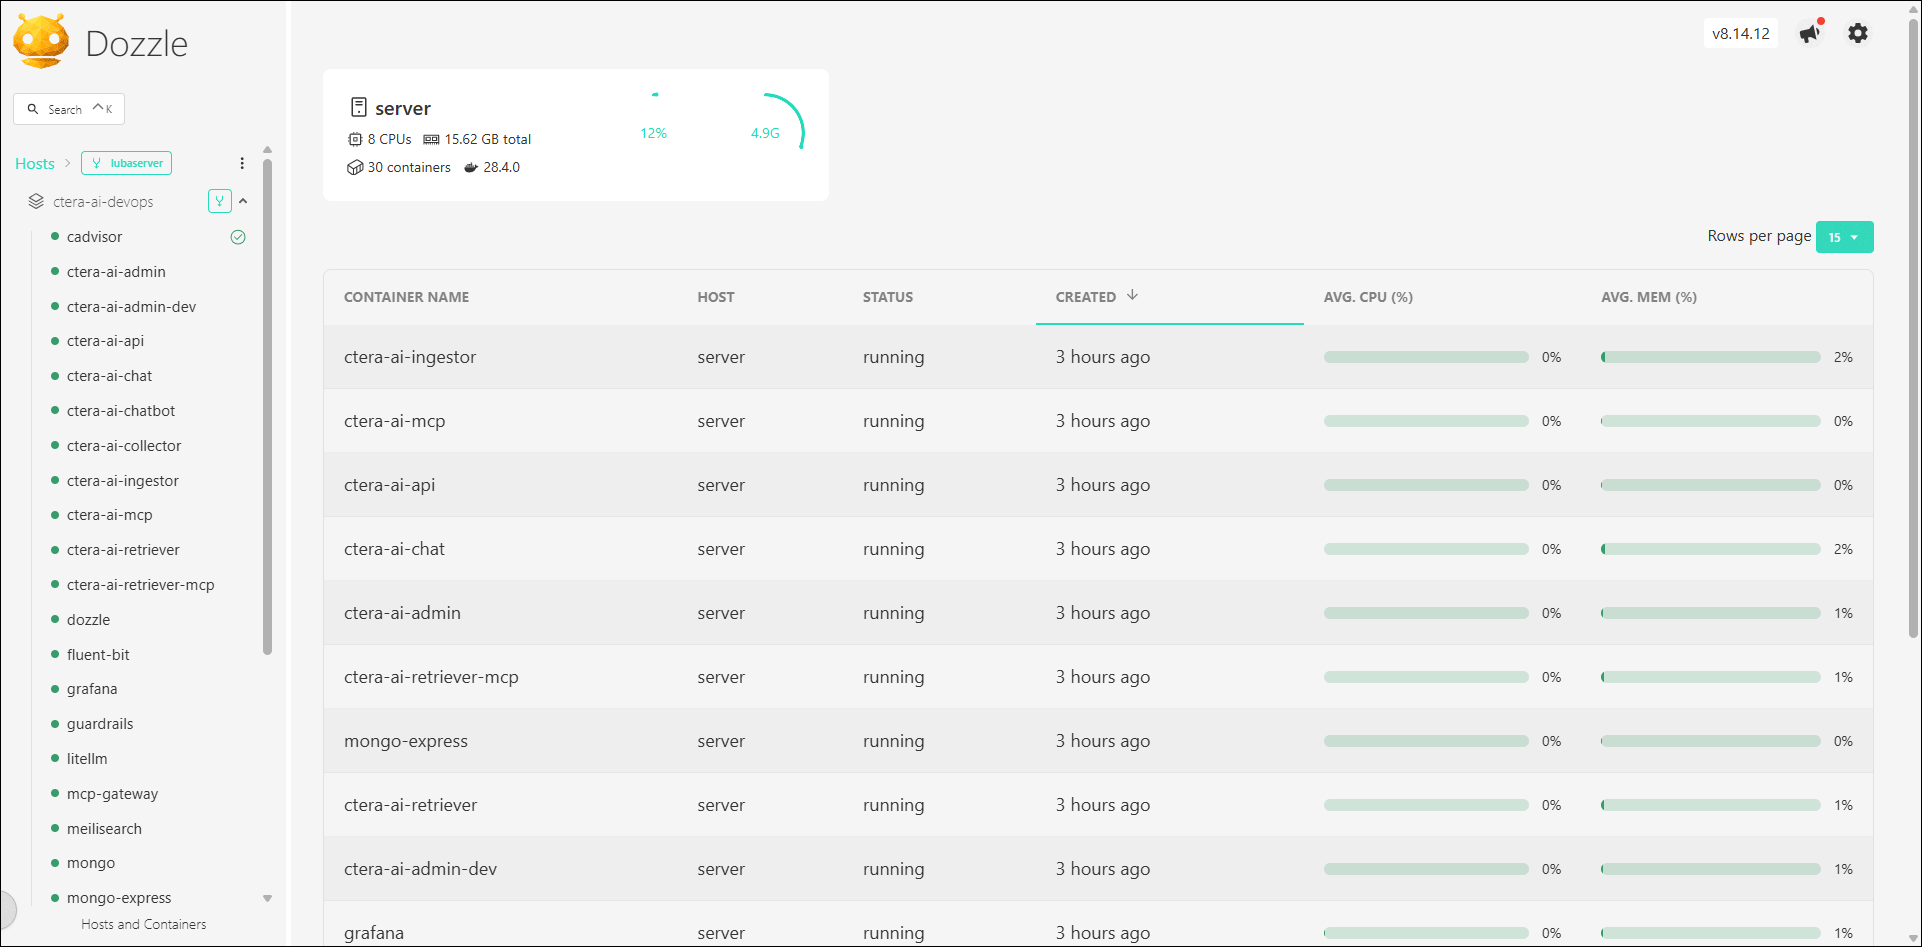
If any of the containers are not green, contact CTERA Support.
- Use the following URL to check:
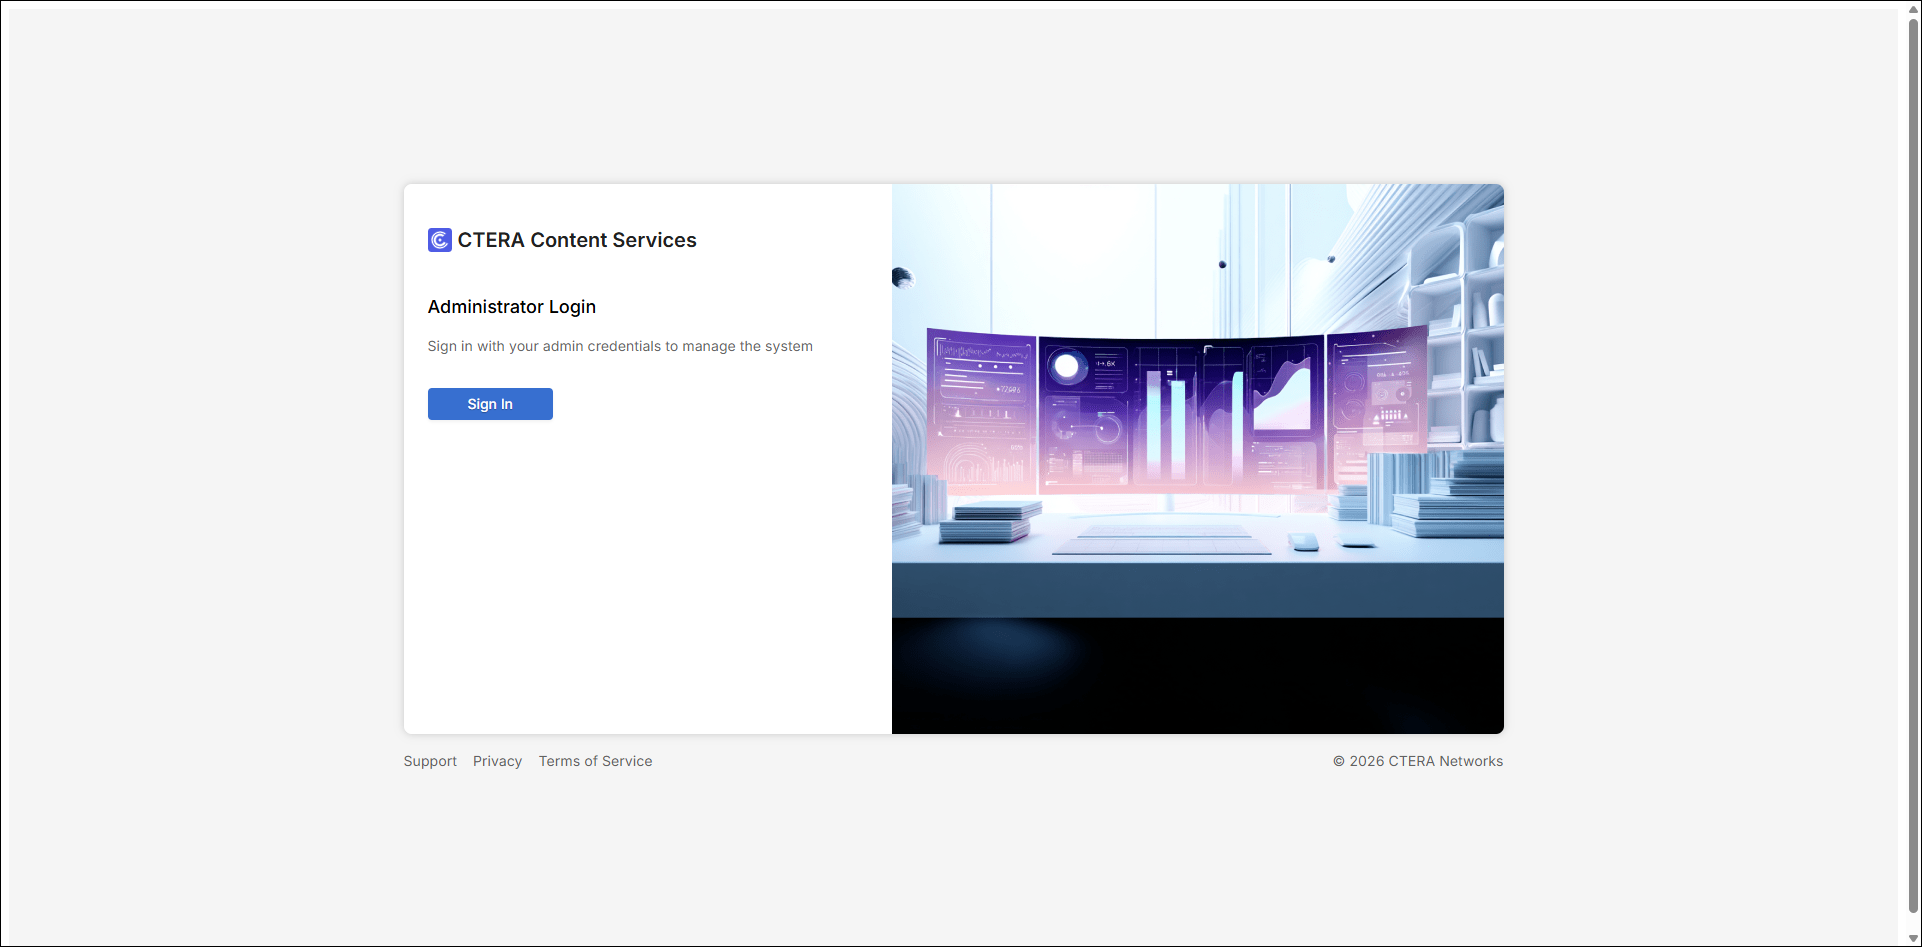
- Sign in as an administrator, using the following address
https://<ip>/admin/login

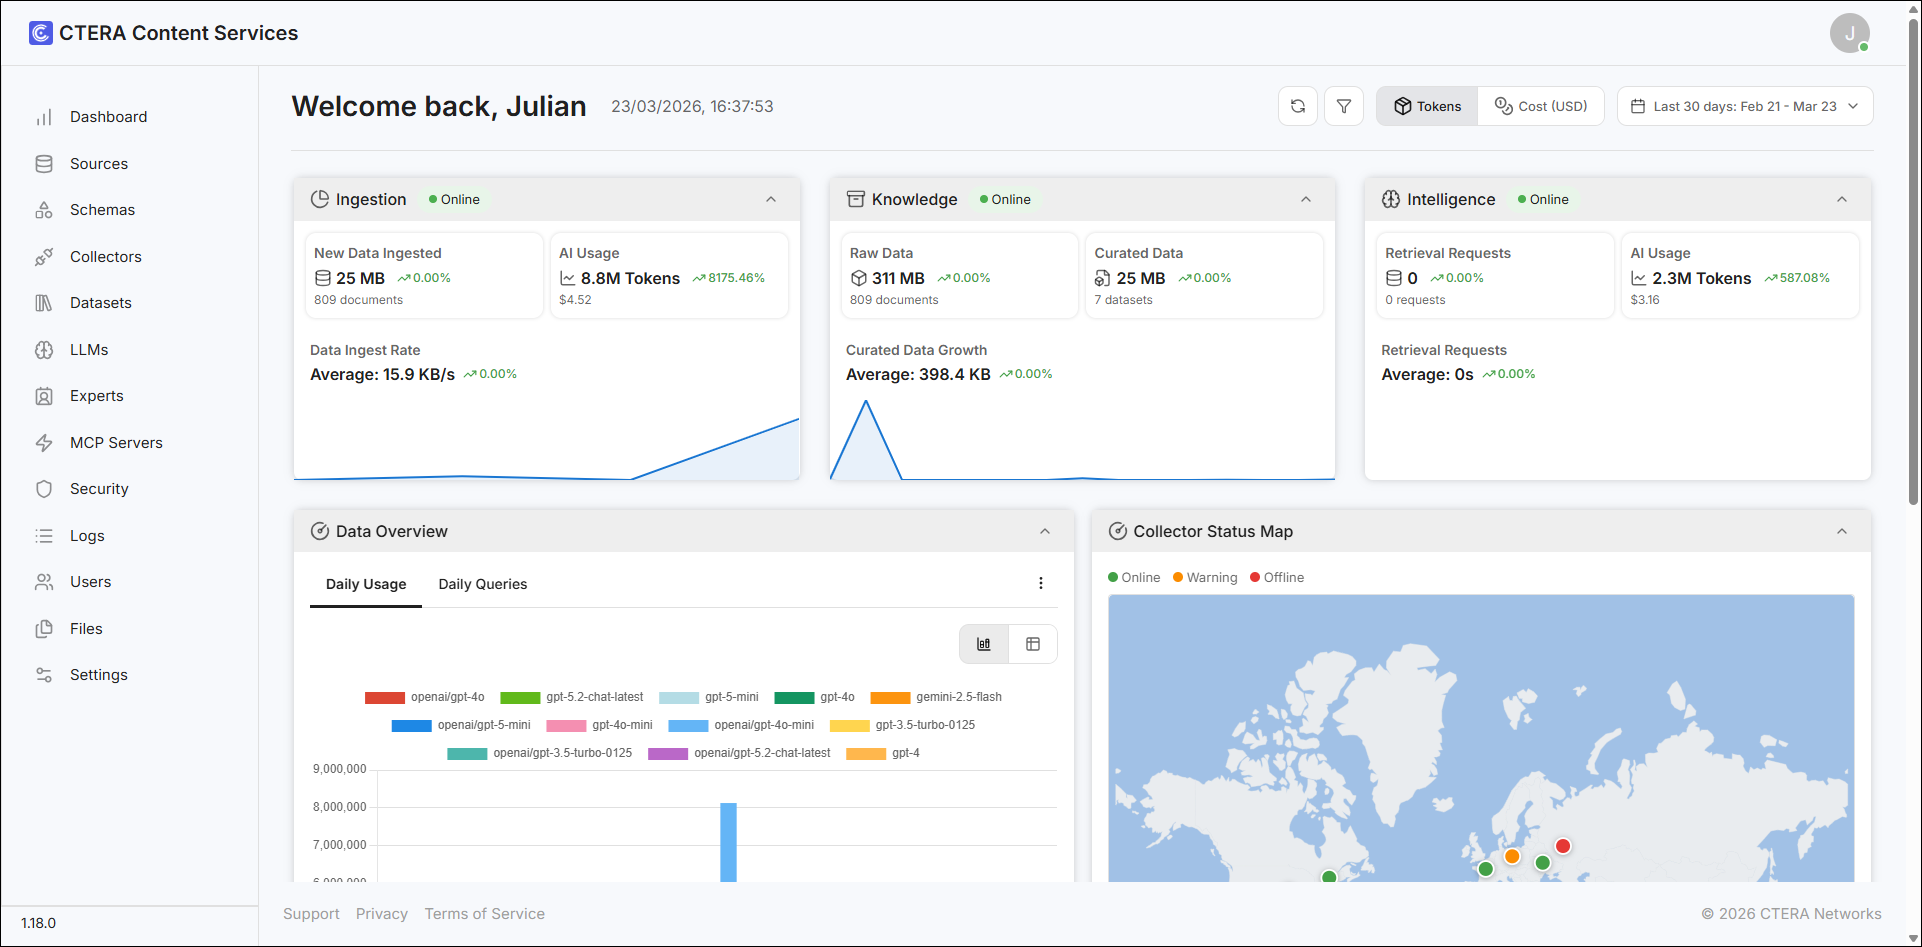
The administration dashboard is displayed. - Sign in to CTERA Content Services and then perform the initial setup.
Installation in Another (non-ESXi) Environment
To install CTERA Content Servers in a non-ESXi environment:
- Use SSH to access the Content Services VM and run the following command:
sudo apt update && sudo apt upgrade -y - Install the dockers by running the following commands:
Where user is the username of the user logged on to the Content Services VM.curl -fsSL https://get.docker.com -o get-docker.sh sudo sh get-docker.sh sudo usermod -aG docker $USER newgrp docker sudo apt install docker-compose-plugin -y - Install OpenSSL by running the following command:
sudo apt install openssl -y - Login to the CTERA-managed Azure Container Registry:
docker login -u <username>-readonly -p <password> cteraacrai.azurecr.io - Save the deployment zip file, ctera-ai-deploy.zip, to the Content Services VM in
/home/usr/ - Unzip the zip file using the command
unzip ctera-ai-deploy.zip - Go to the ctera-ai-deploy-main directory using the command
cd /data/ctera-ai-deploy-main - Copy the .env.service_name.example from the unzipped files to .env.service_name using the command
cp .env.service_name.example .env.service_name - Run the command
nano .env.service_name - Edit the env.service_name file using a text editor like vi or nano.
- Edit the following line:
DOMAIN_NAME=<base_URL>
- Edit the following line:
- Change the directory to the
/utilsdirectory using the commandcd /data/ctera-ai-deploy-main/utils - Run the script
sudo ./setup-deployment.sh --domain <base_URL>NoteRunning this script takes several minutes.
- Change the directory to the
/secretsdirectory using the commandcd /data/ctera-aideploy- main/secretsand open the .secrets.openid file. - Add the following secrets to the file and save the file:
OPENID_ISSUER OPENID_CLIENT_ID OPENID_CLIENT_SECRET OPENID_ADMIN_ROLE_ID OPENID_USER_ROLE_ID - Copy the release zip file to the
ctera-ai-deploydirectory and unzip it:unzip ctera-ai-release-<version>.zip - Navigate to the project root:
cd ../.. - Run the following command:
docker compose up -dand check that all the dockers are running. - Check that Dozzle, the web-based interface to monitor docker logs, is running and that all the services in the left column are marked green.
- Use the following URL to check:
http://<ip>:8080
If any of the containers are not green, contact CTERA Support.
- Use the following URL to check:
- Sign in as an administrator, using the following address
https://<ip>/admin/login
The administration dashboard is displayed.
- Sign in to CTERA Content Services and then perform the initial setup.