You can share synced folders and files in your Cloud Drive folder with other people, both inside and outside your network, by sending them invitations to access the folders or files. The invitation is sent by email and includes a URL, which when clicked allows the invitee to view or edit the folder or file from anywhere over the internet. Upon clicking the URL or path, invitation recipients are granted read-only or read-write access to the shared folders and files. To sync a folder, in Windows File Explorer, right-click the folder on your computer to share or that contains files to share and select CTERA Agent > Sync this folder.
Share files in your cloud drive with other users in one of the following ways:
- To share files with team members, external users, or entire groups, use the Collaborators feature. See Collaborating on Files.
- To quickly share with broad audiences, or over public mediums such as LinkedIn or Twitter, use Public Links. You can define whether the link recipients are able to respond by uploading edited files back to the shared folder. See Making Content Public.
Collaborating on Files
You can invite co-workers, external users, or groups of users to collaborate on a folder or file with you. Collaborators receive an email notification inviting them to view or edit files in the project and can add files and folders to the project, depending on their permissions.
You cannot share a stub when the CTERA Agent is configured as a Caching Agent. If the file to share is a stub, open it first.
To share a folder or file:
-
In Windows File Explorer, right-click the folder or file to share and select CTERA Agent > Share this folder or CTERA Agent > Share this file.
Or, to share a parent folder in the cloud drive:
- Open CTERA Agent Settings window.
- Click Main > Cloud Drive in the navigation pane.
The Cloud Drive page is displayed. - Click the
 button for the parent folder of the folder you want to share and click Share With Others.
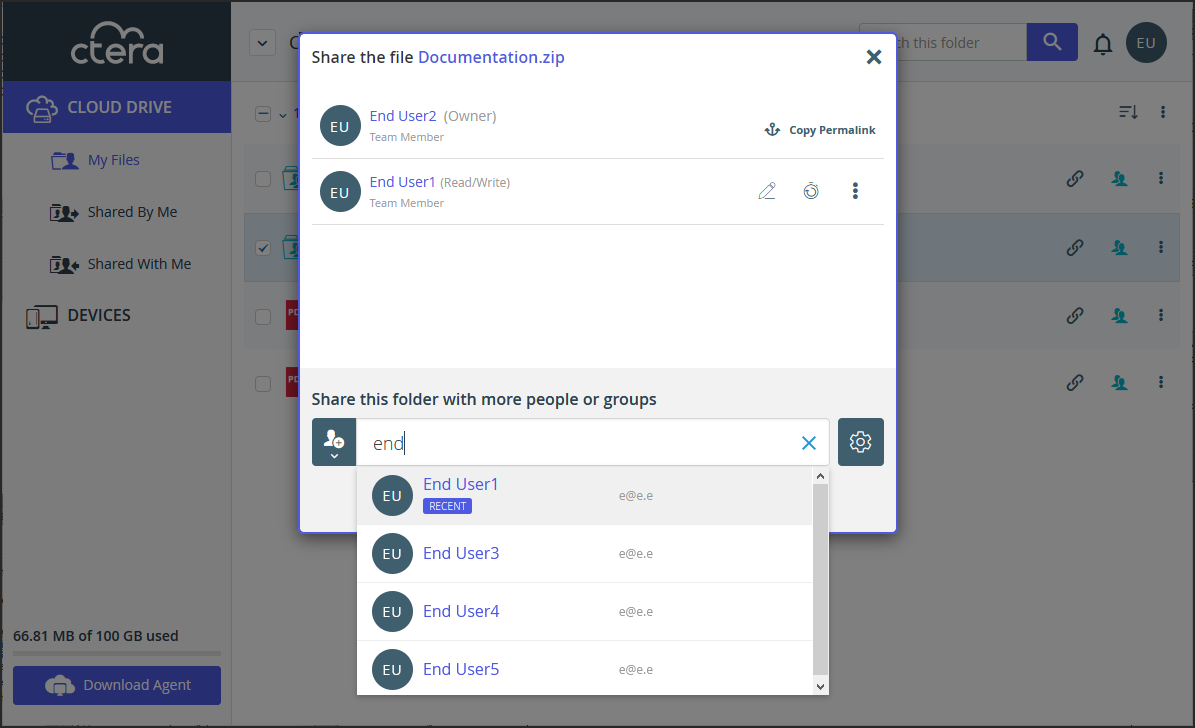
The CTERA Portal is displayed in your browser with a sharing window for the folder or file.

-
Select whether to invite a single user
 or group
  .
. -
Enter the user or group to invite: an email address, user name, or user group name. Users that you frequently share with will be auto-completed after you type only a few characters of the name or email.
-
You can manage the collaborator permissions.
-
Click
 and choose the relevant permission as No Access, Preview Only, Read Only or Read/write.Note
This icon changes depending on default permissions level. For example, the preview icon is displayed for the Preview Only permission level.
When you share a folder, all the files in the folder inherit the folder permission. If you share individual files in the folder, and change the permission to override the inherited permission, including to mark some files as No Access, the files are still accessible via the parent folder. The override permissions only apply when attempting to access the file as a separate share. Preview Only share recipients are able to view the file using the CTERA Portal’s integrated document preview server. Users with this permission are unable to download, copy, or print the file.
-
Configure an expiration date for the collaborator, by clicking
 .
. -
Remove a collaborator, by clicking
 and then Remove.
 -
For external users defined by email, define authentication settings such as email verification for increased security, by clicking
 . The user receives a verification code and must use this code within 30 minutes before it expires.
-
-
Configure project settings by clicking
 and select the options you want:
- This is a team project – The folder is a team project. The folder is displayed in co-workers Shared with Me folder without your name. The storage used for this folder is taken from your storage allocation, unless the folder is requested from an administrator to use team storage.
- Allow team members to reshare this folder/file – The folder or file can be reshared by other team members. If you do not want this folder or file reshared with additional people, clear this check box.
- Allow team members to sync this folder – The folder can be synced to the computer of other team members. This option is only available for top-level folders.
-
Click SAVE.
After sharing a file, the collaborator icon changes:  .
.
After sharing a folder, the folder icon changes:  .
.
An email is sent to the collaborators inviting them to access the file. Emails are also sent to Active Directory group members that are included in a collaboration.
- If the email recipient has a CTERA Portal account, a team member, clicking the link in the invite goes to the item in the CTERA Portal. If the user is not logged in to the CTERA Portal, a login window is displayed. Otherwise, the file or folder is displayed.
- If the email recipient does not have an CTERA Portal account, an external user, clicking the link in the invite opens displaying the file or the folder in a browser.
Selecting the shared folder or file and then clicking the share icon opens the Share window, where you can change the settings. An additional option is available to resend an invitation, by clicking  and then Resend.
Making Content Public
You can create a public link to any synced folder and file and share the link with anyone. Clicking the link provides access to the folder or file in the CTERA Portal Cloud Drive.
The file cannot be a Caching Agent stub. If the file to share is a stub, open it first.
To create a public link:
- Make sure that the folder is synced with the CTERA Portal.
- In Windows File Explorer, right-click the folder or file on your computer and select CTERA Agent > Copy public link.
The Copy Link window is displayed.
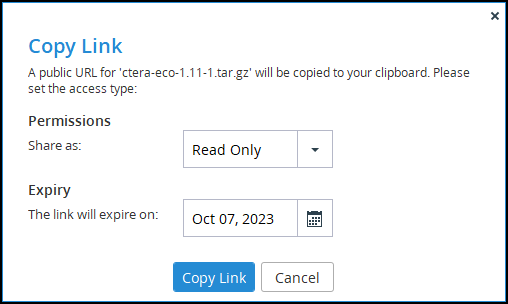
- Configure the link.
- In the Share as drop-down box, configure the file permissions as Preview Only, Read Only or Read/Write.
Preview Only share recipients are able to view the file using the CTERA Portal’s integrated document preview server. Users with this permission are unable to download, copy, or print the file. - Configure an expiration date for the link, or accept the default expiration, which is after 3 months.
- In the Share as drop-down box, configure the file permissions as Preview Only, Read Only or Read/Write.
- Click Copy Link.
The link is copied to the clipboard and you can paste it in a message. The link has the format:https://portal_address/invitations?share=7b424ee4a3c49bfa00b3